First published in the September 2011 issue of Street Machine
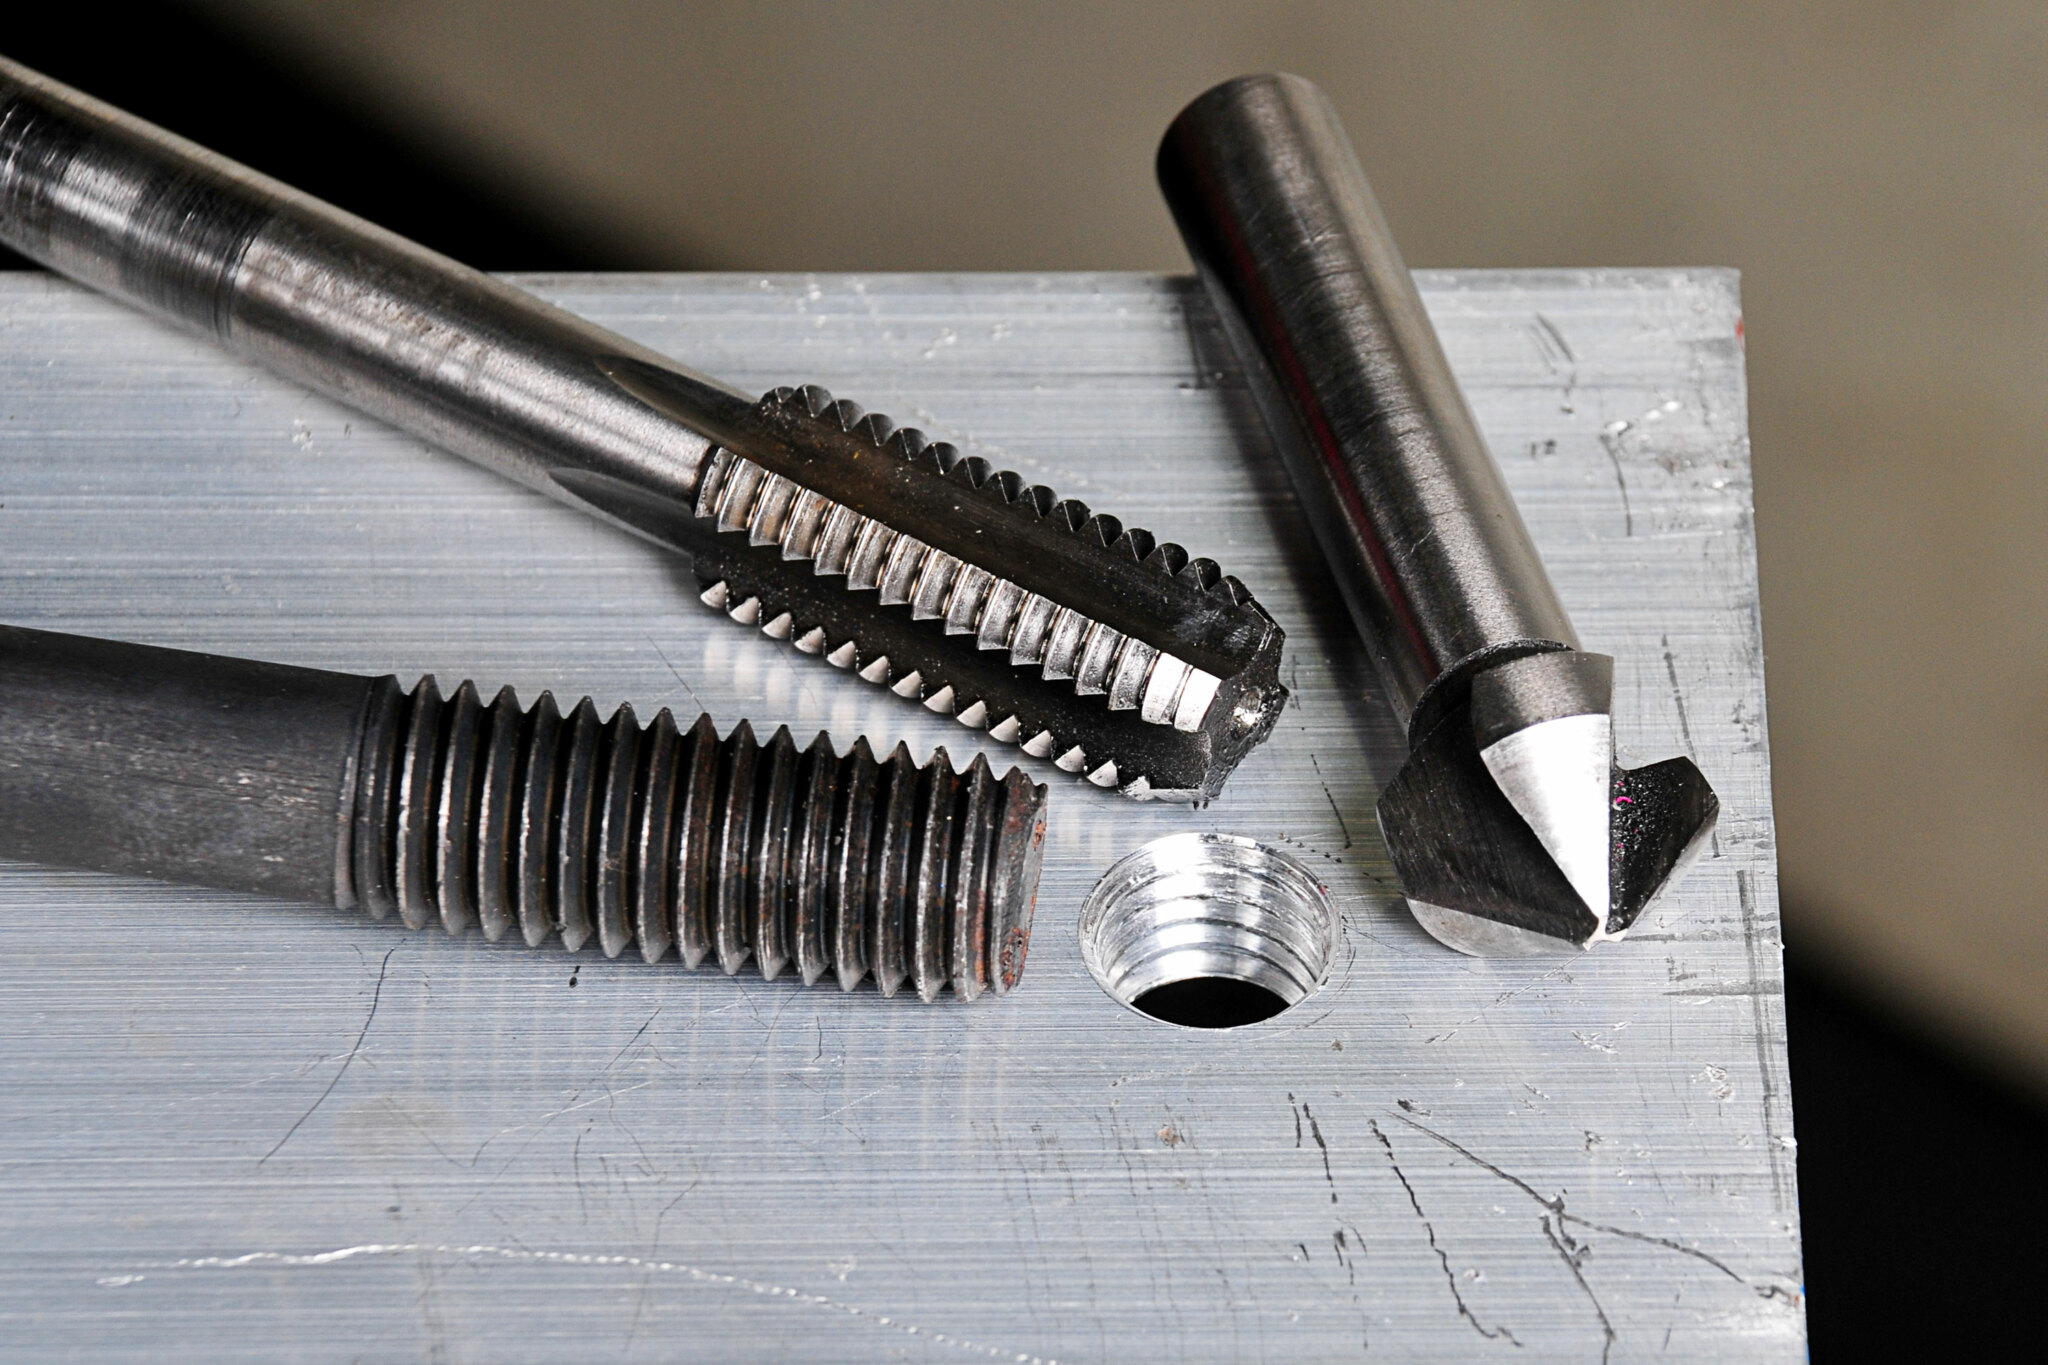
Tapping threads is part and parcel of working on any streeter, whether cutting new threads or cleaning or restoring existing ones (shown below).

To do it you’ll need two main thread cutting tools: the tap (for internal threads) and die (for external threads).
Taps can be purchased individually or in sets. Some sets (shown below) are quite useful but many of the larger commonly available sets are not good value. For starters, the taps are made from high-carbon steel, which is far less robust than high-speed steel (HSS) taps.

HSS taps are considerably more expensive but they’re well worth the investment, as breaking off a tap will be a world of misery. The big sets also contain huge numbers of odd threads that you’re unlikely to ever use. You’re much better off buying the sizes you need, each die coming in a set of three; starting, intermediate and bottoming (shown below).

Common automotive sizes are 1/4, 5/16, 3/8, 7/16 and 1/2 inch. Each is available in two thread pitches: fine (UNF/NF) or coarse (UNC/NC), the latter the most common.
In metric, 6, 8, 10 and 12mm are the most useful sizes. While there are metric coarse and fine threads, metric fine is very uncommon until you get into larger (12mm) thread diameters.

Thread files (above, right) are designed to remove corrosion, paint, chrome plating or to repair cross threading. However, using the correct tap, button die or die nut (below,) is better. Thread gauges (above, left) are used to determine what size and pitch a thread is. You simply try each pattern against the thread until a match is found.

Trying to make your own bolts is fairly pointless as it’s far easier (and better) to buy the correct bolts, screws or threaded rod (All-Thread).
It’s important to get a number of things right to achieve a properly tapped hole. Foremost, the hole has to be the correct size. Too large and the threads will be weak. Too small and turning the tap will be difficult and may cause a breakage. There are reference charts for choosing the correct tap and drill combination — check on Wikipedia under ‘drill and tap size chart’. Tap manufacturers also have charts. Individual taps often have the correct drill size written on their packaging. Starting the tap straight (below) is important.

In deeper holes it will tend to straighten itself to a degree but if you start too crookedly it’s
difficult to correct later in the process.
One way to ensure the tap starts straight is to mount it in the chuck of a drill press. Turn it by hand to start the thread then once it begins cutting true, remove it from the chuck and use the handle. We can’t stress enough that the drill press should not be turned on — the press must be used purely as a handoperated device to start the thread!
When starting a new thread, apply pressure to push the tap into the hole, or the button die along the shaft. This way you won’t strip the thread as it begins to form.

It’s important to use lubricant or cutting compound such as Rocol RTD (above) for a clean cut and to help prevent breakages. Taps are very brittle and great care is needed, even when using high-quality HSS units. Try forcing it through in one go and you’ll almost certainly break it.
As the tap is turned into the hole, resistance increases. When it does, stop and wind it backwards to clear the swarf. Half to three-quarters of turn in, two turns out is a typical action. This turn ratio varies
with the type of material — steel requires more frequent swarf clearance than softer materials like aluminium.
Note that it’s more difficult to feel what’s going on with holes smaller than 1/4in or 6mm, so even greater care is needed.
In addition, aluminium suffers from galling — if you can’t wind the tap out to clear the swarf, avoid the temptation of going further in, as the tap will eventually jam solid. Instead, progressively work it back and forth until it unscrews, then clean the tap and recommence tapping with plenty of lube.

Demonstrating these procedures is Franky from Dandenong Engine Reconditioning. He suggests countersinking the hole before starting to cut the thread because it helps get it started and produces a better finished result (above).

Comments