
We’ve all been there. You find the perfect base for your dream project and drag it home with boundless enthusiasm. But over time, that enthusiasm wanes, and as you grapple with the enormity of the task at hand, the car sits in the corner of the shed, gathering dust. Once that happens, it can be hard to set the wheels in motion again.
First published in the May 2023 issue of Street Machine
That was certainly the case for my mate Ben Lenane, who came to own this 1966 Falcon wagon in the early 2000s. The car was fairly solid except for the floors, which were cactus. For Ben and his buddy Chops, the objective was clear: lose the rusty factory floors and install a full chassis.
Work progressed slowly, but as time passed, life did its thing and got in the way. The chopped-up wagon was going nowhere fast. That was until Ben’s mate Tim Nelson offered to take it off his hands to get the ball rolling; Ben’s only rule was that the car had to stay low.
With the Falcon now residing in his workshop, Tim yanked the previously installed Barra engine and set about formulating a build plan. A new driveline was chosen, and given Ben’s brief for a low ride height, airbags were an easy choice for the suspension.
After two years in Tim’s possession, the wagon sported a tunnel-rammed Cleveland backed with a trusty C4, but there was plenty of work still to be done to get the car driving.
Having known Tim, Ben and Chops for years, and being familiar with the story of the wagon, I suggested that we get together with a couple of other mates and stage a working bee to finish the build. The plan was to bring the car to my workshop, and, over the Easter long weekend, turn it into a running, driving, tail-dragging wagon. Here’s how we did it.
THE BUILD:
1. A truckload of goodies, including a hand-picked airbag suspension system and a cut-down nine-inch, accompanied the longroof on its Thursday-afternoon journey south.
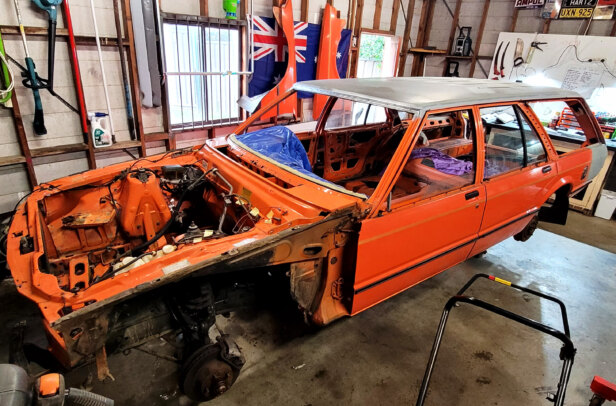
Resting on a modified HiLux chassis, the gutted shell of the 57-year-old wagon was rolled off the trailer and into the workshop.
2. After some lengthy discussion, the body and chassis found their way onto the shop’s body lift.
A list was written and a plan for Friday was set. This included stepping up the already modified rear chassis to allow diff clearance so that the wagon could lay frame.
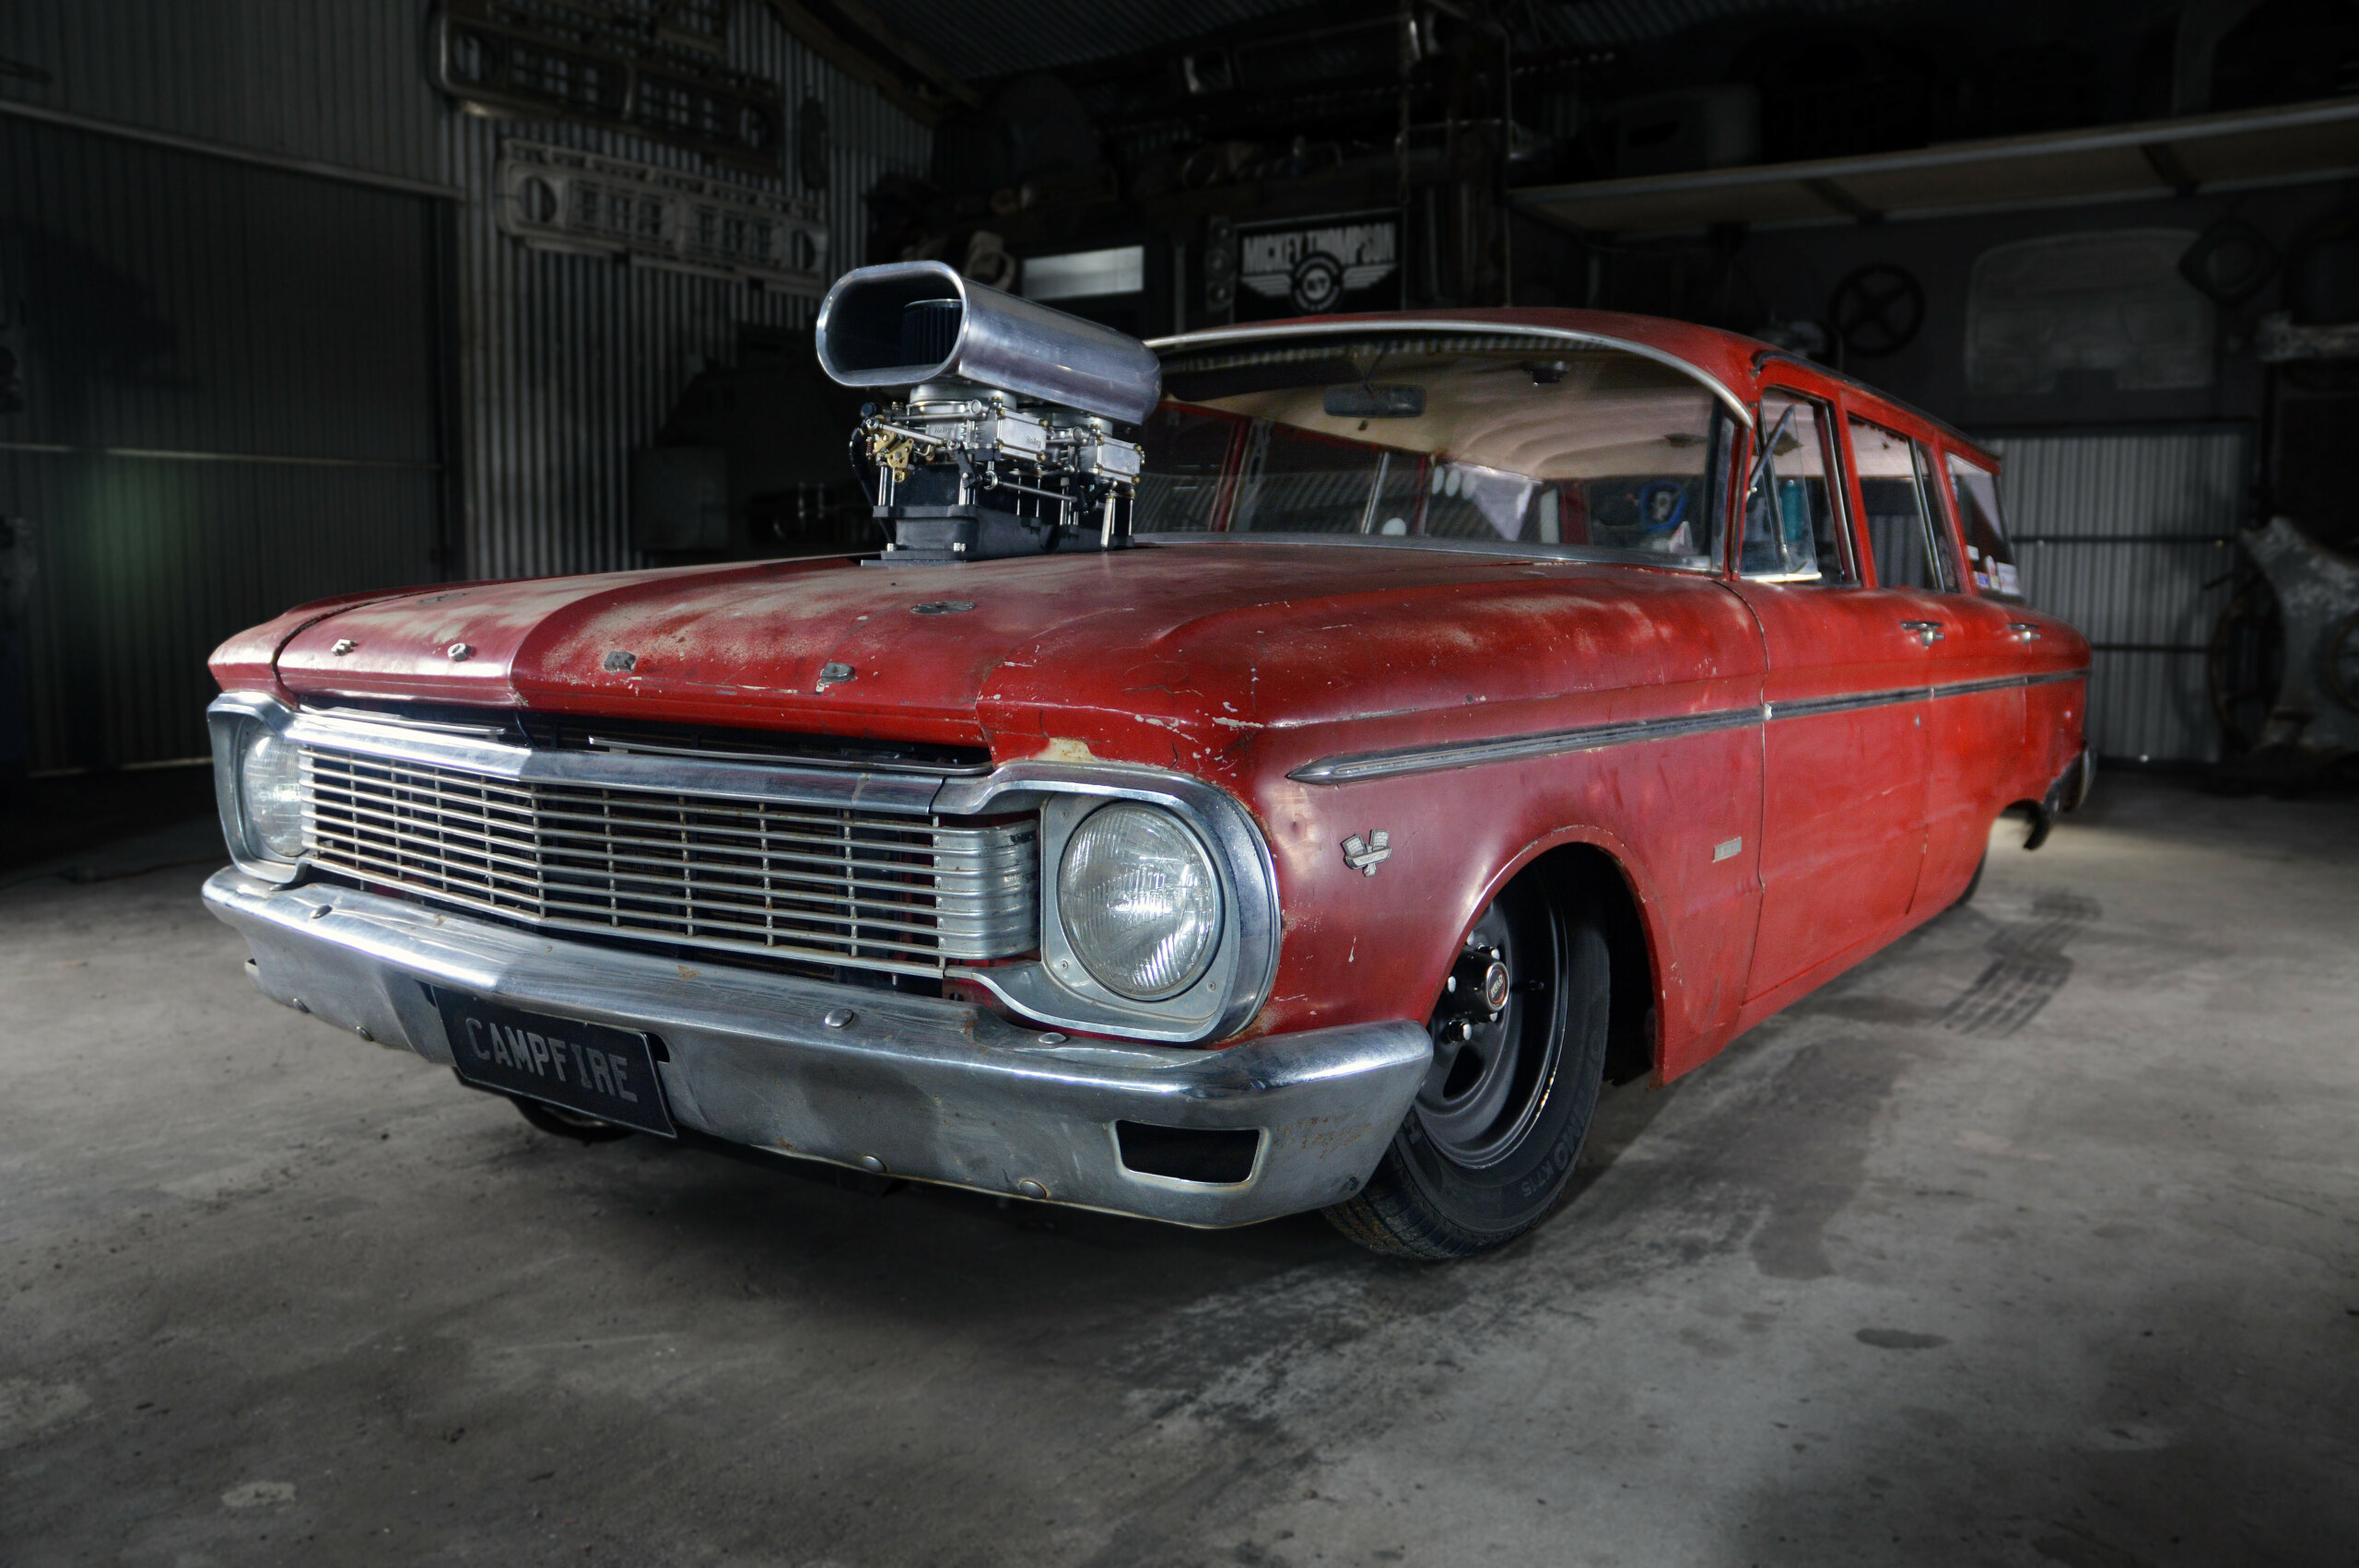
3. Although lovingly referred to as ‘the showbag’ – because it looks the part on the outside but is junk on the inside – the 351 still has the basics, including ported heads, a mild cam, fresh pistons and a tunnel ram topped off with two 600 Holleys.
4. Friday morning dawned and the job was on. Removing the previously installed fishplates and notching the rails to clear the diff were the priorities.
5. The front-end suspension was a head-scratcher. The original torsion bars had previously been removed, and with a bag-over-strut set-up being the replacement suspension choice, some extra bar work was in order.
6. Some 1.5-inch Speedway tubing was bent using a manual JD Squared tube bender. The driver’s side was first, as clearance for the Wilwood master cylinder and Toyota steering box had to be considered.
With the help of a digital level, angle finder, and the all-important measuring tape, the passenger side was then duplicated with symmetry in mind. Once the chassis was levelled and the body squared to the chassis, a laser level was used to mount the tube symmetrically.
7. The Y-shaped configuration of the front barwork not only mounts the strut tops but also eliminates any lateral movement, without the need for a cross-brace running over the engine.
With Ben’s future plans including a full rollcage, the front Y-bars tie into a horizontal bar mounted between the pillars under the dash.
8. In the rear, a parallel four-bar kit with a Panhard bar was the go. With everything mocked up at ride height, the pinion angle was determined from the engine and gearbox angle.
Everything was tacked into place, including airbag plates mounted off the rear of the diff. Full travel was tested for clearance issues.
9. Tailshaft safety loops were incorporated into the fabricated tubular crossmembers, with the rear loop being larger to allow for tailshaft clearance when the ’bags are aired out.
10. Wheel tubs fabricated from 3mm steel found their new home, ready to withstand the full force of rubber and steel belts letting go at full noise. With everything locked into position, final welding took place.
11. The original plan was just to tuck rim, but the hungry girl now happily eats up tyre, rim and hub.
12. Friday, Saturday and Sunday seemed to blur into each other, with a steady routine of cutting and welding well into the evenings. Mocking things up, checking clearances and functions, having discussions and listening to second opinions were critical.
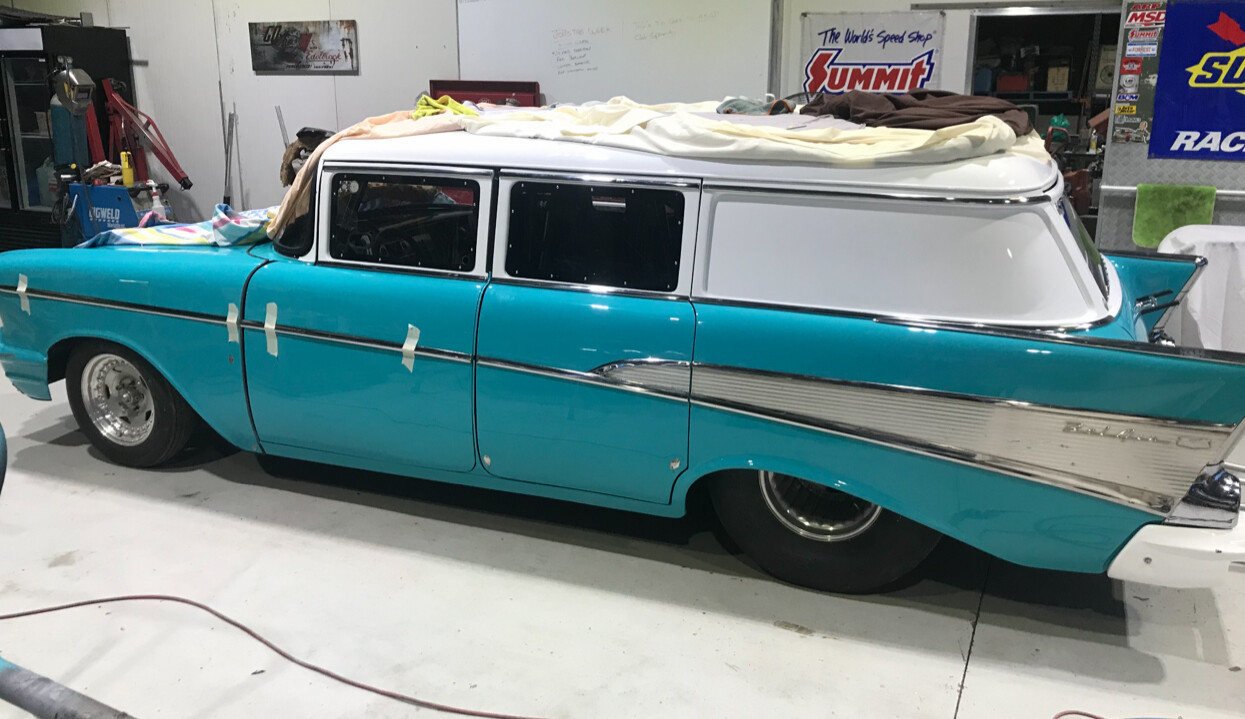
The side glass and windscreen did well to catch a lot of sparks, but being junk anyway, there is a second set to take their place.
13. Monday morning arrived too soon, and it was do or die. Thus began a mad rush to complete the remaining jobs: fabricating a sheet-metal trans tunnel; mounting the shifter and front seats; fitting the front-end sheet metal; plumbing temporary air lines; running the fuel line and battery cable; mounting a battery, fuel cell and air compressor; and buttoning up the last of everything else.
14. The tubular transmission crossmember mount was fabricated to incorporate a solid mount for the B&M shifter and eliminate the factory crossmember.
15. Interior-wise, a bench seat was on the cards, but unfortunately what we had on the weekend wasn’t going to work.
A pair of Lancer bucket seats now act as placeholders while the logistics of fitting a bench are figured out.
16. A very basic switch panel fills the pre-existing AM radio hole. Up and down switches for the front and back airbags will later be replaced with a self-levelling system.
17. Late Monday afternoon, four days deep, the now ‘complete’ XP was eagerly aired up, rolled off the body lift and fired up. Success! A swift drive to a stretch of private road followed; the old wagon had a heartbeat once more and wanted to be heard.
At full noise, with one very happy driver behind the wheel, the cobwebs were truly blown out. The old girl was reborn!
18. With the weather turning fast and daylight fading, the wagon was pointed for home, with a brief pit stop at the local drive-through to pick up refreshments.
Then it was back to the workshop for some well-earned reflection – and of course to drop rail on some empties for a bit of can-crushing goodness!
19. Those familiar with Eric Bana’s 2009 documentary Love the Beast will recall Eric likening a project car to a campfire, in that it’s the thing that brings everyone together. We figured this was a fitting name for the wagon.
20. It’s pretty gratifying when putting elbow grease into our collective passion is accompanied by mateship. With the time limitations we had, certain things had to be prioritised while others missed out on the love.
Some things such as the floorpans will be removed and refined at a later date, with some serious sheet-metal work from the firewall to the fuel cell still to be done.
The engine also has a big brother in the form of a methanol 393ci Clevo ready to take over duties up front. But projects of this nature are more often than not forever evolving, as time, coin and skills allow. Sounds to me like the perfect excuse for everyone to get together again and make it happen!
21. This is how the XP looked when Ben bought it in the early 2000s.
The paint and body remain virtually untouched, but mechanically it’s now a very different machine, with a tunnel-rammed Clevo sitting pretty up front and airbag suspension underneath.
Comments