
Making your own braided lines and fittings may seem daunting, especially as they play such an important role in keeping vital fluids where they are supposed to be, as opposed to them making a mess – or much worse – in your engine bay.
First published in Street Machine’s Yearbook 2023
However, with some study, patience and a couple of simple tools, there is no reason why you can’t tackle these jobs at home and come up with a result that is safe and neat.
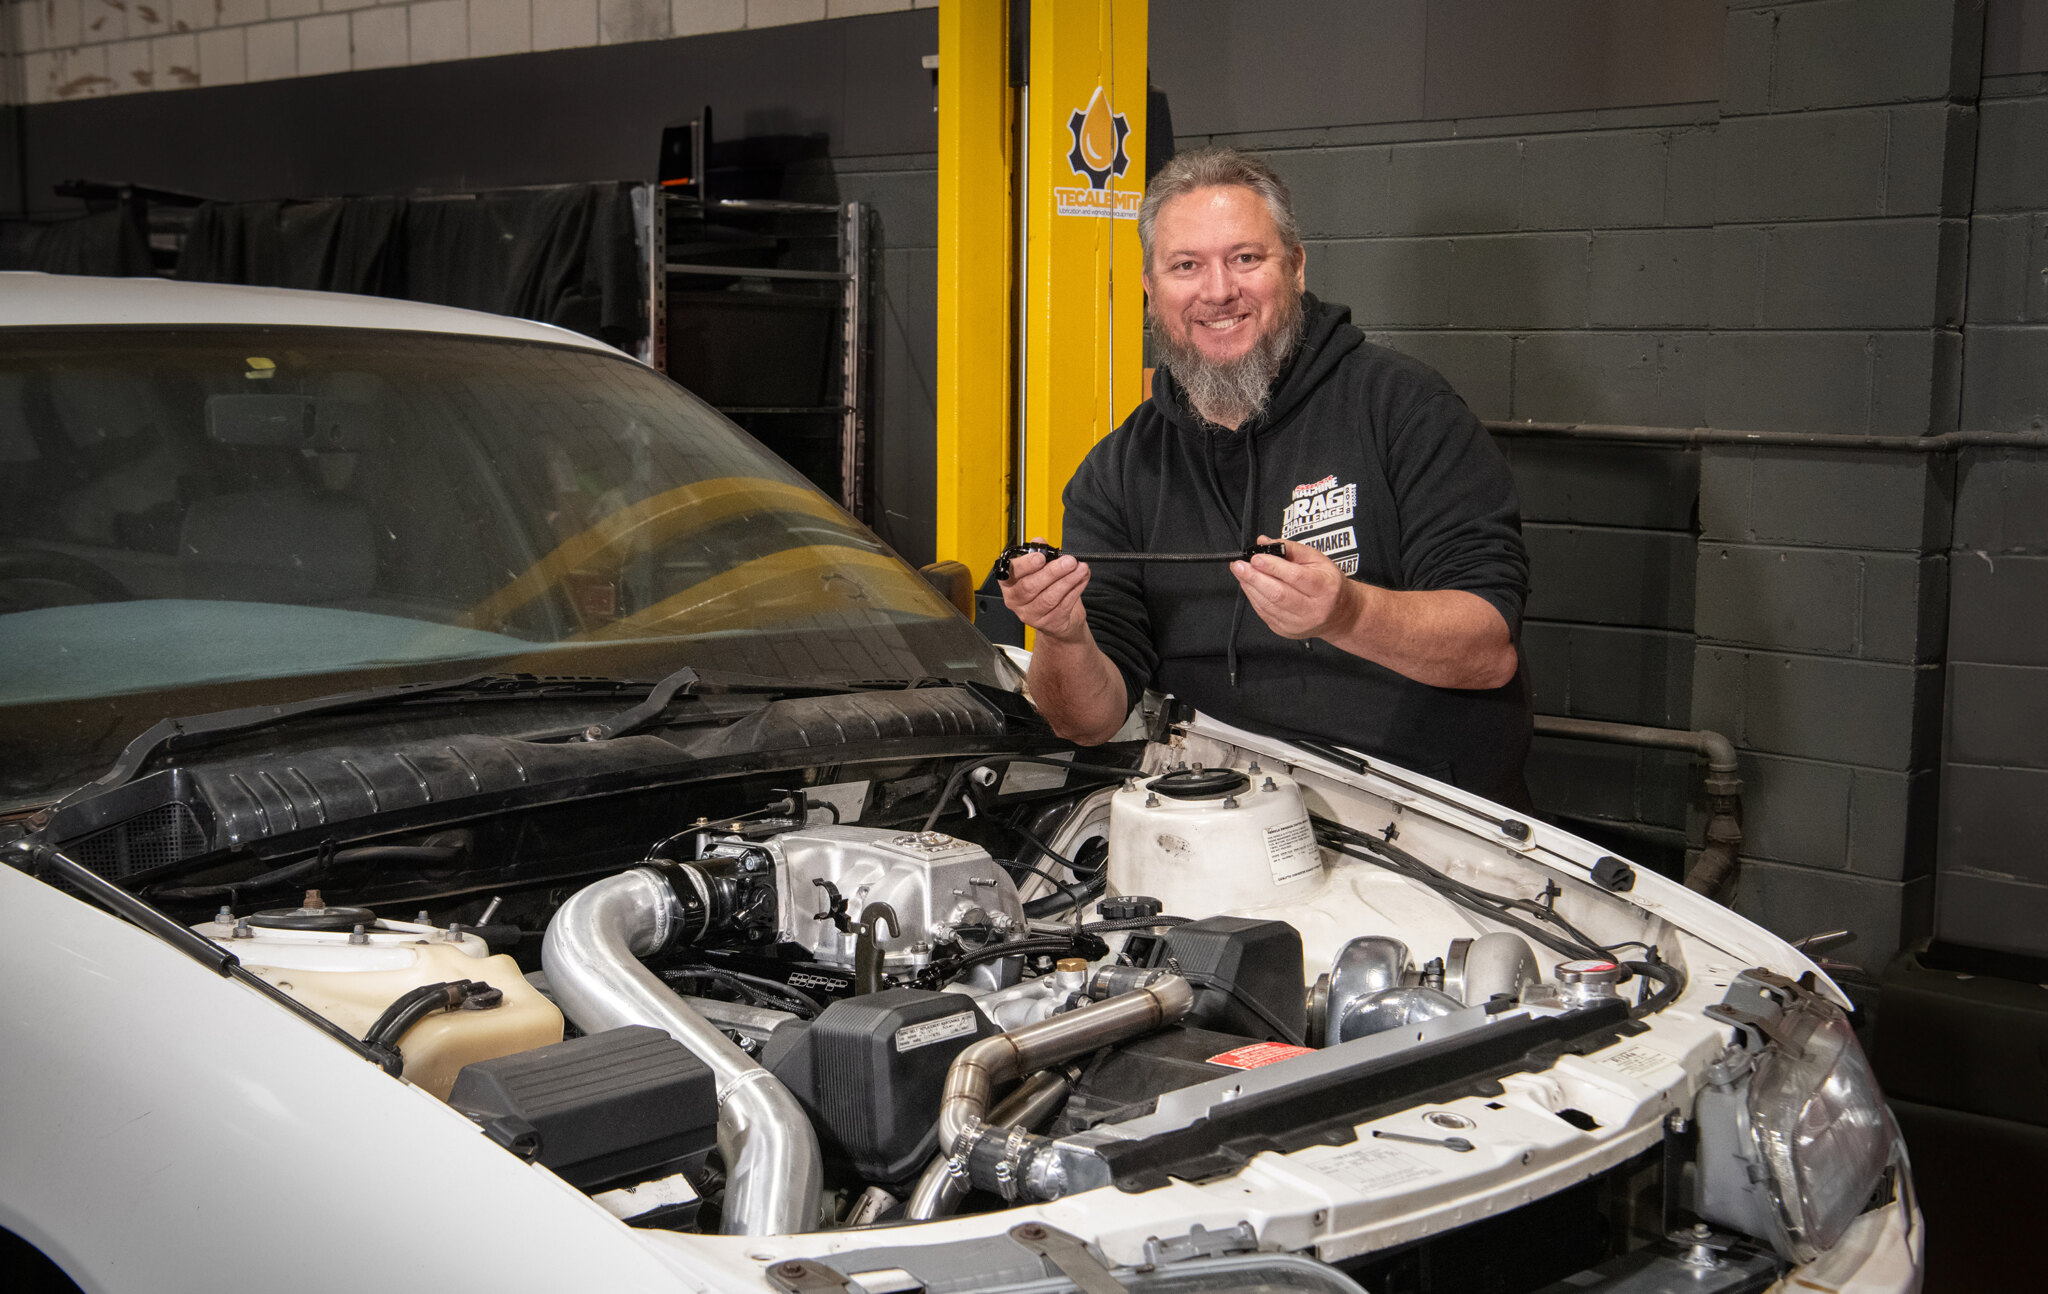
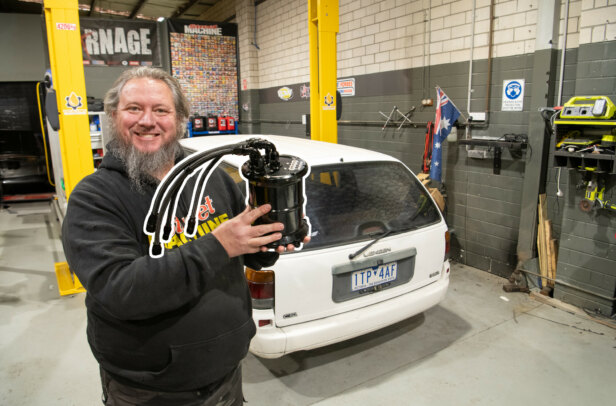
To demonstrate, we dropped into Carnage HQ to watch host Scott Taylor button up the turbo 1UZ V8 conversion in our Toyota Lexcen project for the final time, using Proflow 200-series PTFE line.

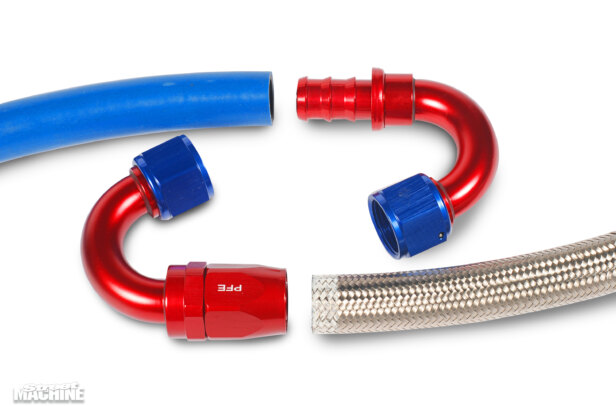
What’s PTFE? That would be our friend polytetrafluoroethylene (known to most folks by the brand name Teflon), which is used as the liner in 200-series hose. By contrast, 100-series hose uses a rubber liner. The other key difference between the two types of hose is that the 200-series uses a metal ‘olive’ to seal the fittings so they won’t leak.
“I reckon 200-series is generally better than 100-series for most applications we use,” Scott says. “The fittings are slightly more work to make, but I think it is worth it. The only real disadvantage is that the bend radius isn’t good.


“The other great thing with the PTFE lining is that the car doesn’t smell of fuel. And in the case of the Lexcen, we have the fuel surge pot in the back of the car, so that’s important.”
For Proflow’s Jake Cugnetto, the 200-series gear is a signature part of the company’s range. “That’s basically where we started with the Proflow brand nearly 15 years ago,” he says. “Proflow has over 7000 products, and at least 2000 of those would have to be 200-series lines and fittings.


“The 200-series lines have a much higher maximum operating pressure and temperature range than the 100-series,” Jake continues, “and 200-series can also be used inside fuel tanks or with brake fluid. Nitrous and fire extinguishers are other common applications.”
Keen to have a go at making your own braided lines and fittings? Read on!

- 1. For our 1UZ-FE Lexcen V8 build, we used Proflow 200-series PTFE lines and billet fittings. PTFE is more commonly known by its trademarked name of Teflon. The double-anodised Proflow black fittings are easy to work with, look amazing, and can handle a broad range of chemicals, temperatures and pressures.

2. Proflow makes a huge array of lines and fittings that are available in just about every shape and size, as well as adapters for almost every conceivable situation. They can be had in traditional red/blue or black, both of which are double anodised, or a hand-polished finish for those wanting maximum bling factor.

3. To do your own AN lines, you will need a couple of simple tools such as good hose cutters and aluminium spanners, as well as a good bench vice and some aluminium vice jaws – all of which are available in the Proflow catalogue.


4. Start by cutting the hose with the hose cutters. We don’t recommend an angle grinder for this, as it can leave foreign material in the hose. Taping the hose to be cut can help restrain the strands, but we found it largely unnecessary with these lines.

5. This particular hose is –6 AN in size, or roughly 3/8in. The cutters do tend to flatten the hose out slightly, but we find you can squeeze the hose back into shape easily enough with your fingers – or a pair of pliers if you have office hands.

6. The fitting itself consists of three parts: the hose end, the silver olive and the socket. The hose end and sockets are reusable, but the olives should be considered single-use. New olives are cheap and can be bought in packs of five from Proflow.

7. Start by sliding the socket end over your 200-series PTFE hose; it will slide on easily. PTFE hose is easy to identify by its white ‘Teflon’ liner.

8. Once the socket is on the hose, we like to use a small screwdriver to tease out the stainless strands. This will allow the olive to slide over the PTFE inner liner.

9. We found the Proflow olive installation tool to be perfect for preparing the PTFE hose and installing the silver olive. The insert in the end of the billet installation tool is double-ended and suits hose sizes from –3 AN up to –8 AN.

10. Using the correct –6 size on the fitting tool, we slide the tool into the end of the PTFE hose to make it as round as possible. The end of the hose should be clean and the cut as straight as possible.

11. After using the tool, the inner PTFE liner is nice and round, which makes it perfect for accepting the olive. Make sure you still have enough space between the stainless strands and the inner liner.

12. Slide the olive over the inner liner, taking care not to get a stainless strand caught under the olive. This is important, as the olive requires a uniform seal with the PTFE liner, and if any strands are trapped, the fitting won’t seal properly.

13. Once the olive has been slid over the inner PTFE hose and checked for any wayward strands underneath, we seat the olive using the billet olive installation tool. Push the olive in all the way firmly, taking care not to kink the hose.

14. Now that the olive is seated correctly, inspect it to ensure it’s concentric with the PTFE hose. If any of the hose pokes into the olive opening, re-use the installation tool the make sure the opening is clear.

15. It’s now time to unite the hose with the hose end. Slide the socket up to the end of the hose as pictured.


16. Lock the hose end in a vice, using soft aluminium jaws so you don’t damage it. The hexagon end should be securely tightened and the aluminium threads fully exposed.


17. We like to use silicone spray to lubricate both the hose end and the olive in the hose itself. The silicone spray dries quickly, so spray both parts and get to work.


18. Slide the olive and hose over the hose end in the vice. You will need a little finesse here; it’s a two-stage operation. Part one is getting the olive onto the hose end; it’s a tight fit, but with a slight wiggle you’ll feel it go on. Once the olive is on the hose end, push it all the way to the hilt while taking care not to kink the hose.


19. With the hose fully seated, slide the socket up and start winding it onto the aluminium threads. Take care to not cross-thread the fitting – that will destroy it instantly. Use your aluminium spanner or shifter to tighten the fitting. The hose will turn as you tighten, so make sure it doesn’t kink or twist.

20. Tighten the fitting in the vice until there is 1mm or a fingernail’s clearance between the socket and the hose end. Line up the hexagons on both parts of the fitting for a seamless finish.

21. We fitted a straight hose end to the other end of the line. The hose length is critical and must be cut precisely. This picture illustrates where you need to cut – right in the centre of the mark – for a perfect fit.

22. We love using the Proflow 200-series PTFE hose, and it works great in most situations, except where you require tight bends. The PTFE has a shallow bend radius, and once you kink the hose, it is ruined. For tight turns, we recommend either the 100-series braided hose or 400-series push-lock fittings.
400-SERIES
The 400-series push-lock hose is simple to use and great for low- to medium-pressure situations such as catch cans, or water and fuel lines. It cuts easily using the Proflow hose cutters.


Lock the fitting in the vice, spray both the fitting and hose with silicone spray and immediately push the hose onto the fitting with as much force as you can muster. The last part has to be done quickly to fully seat the hose.

Comments