Making a bubble window for your van is easier than you think
This article on bubble windows was originally published in the June 2015 issue of Street Machine
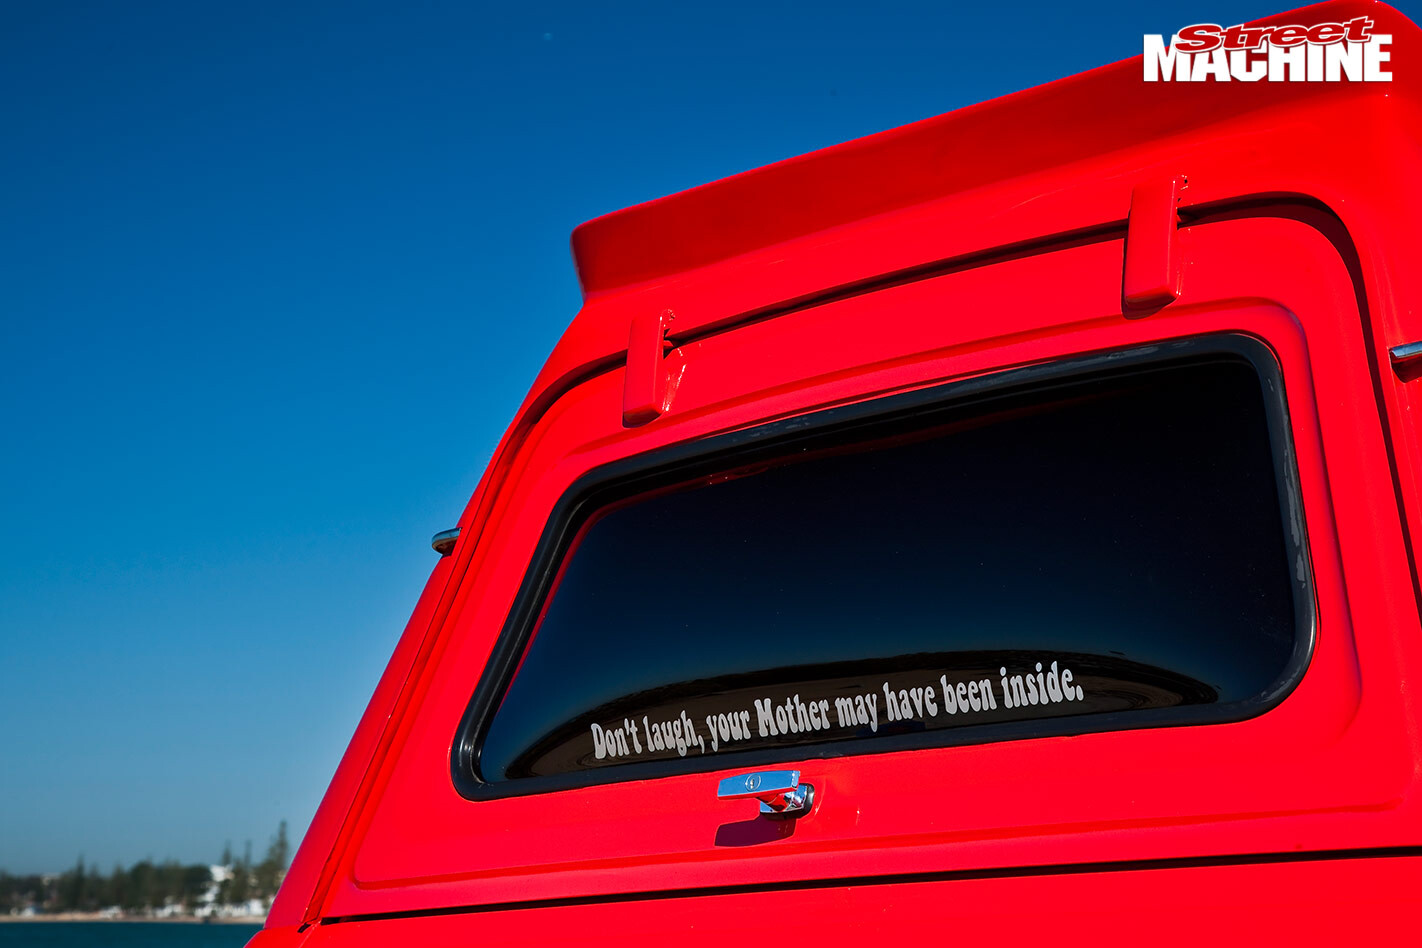
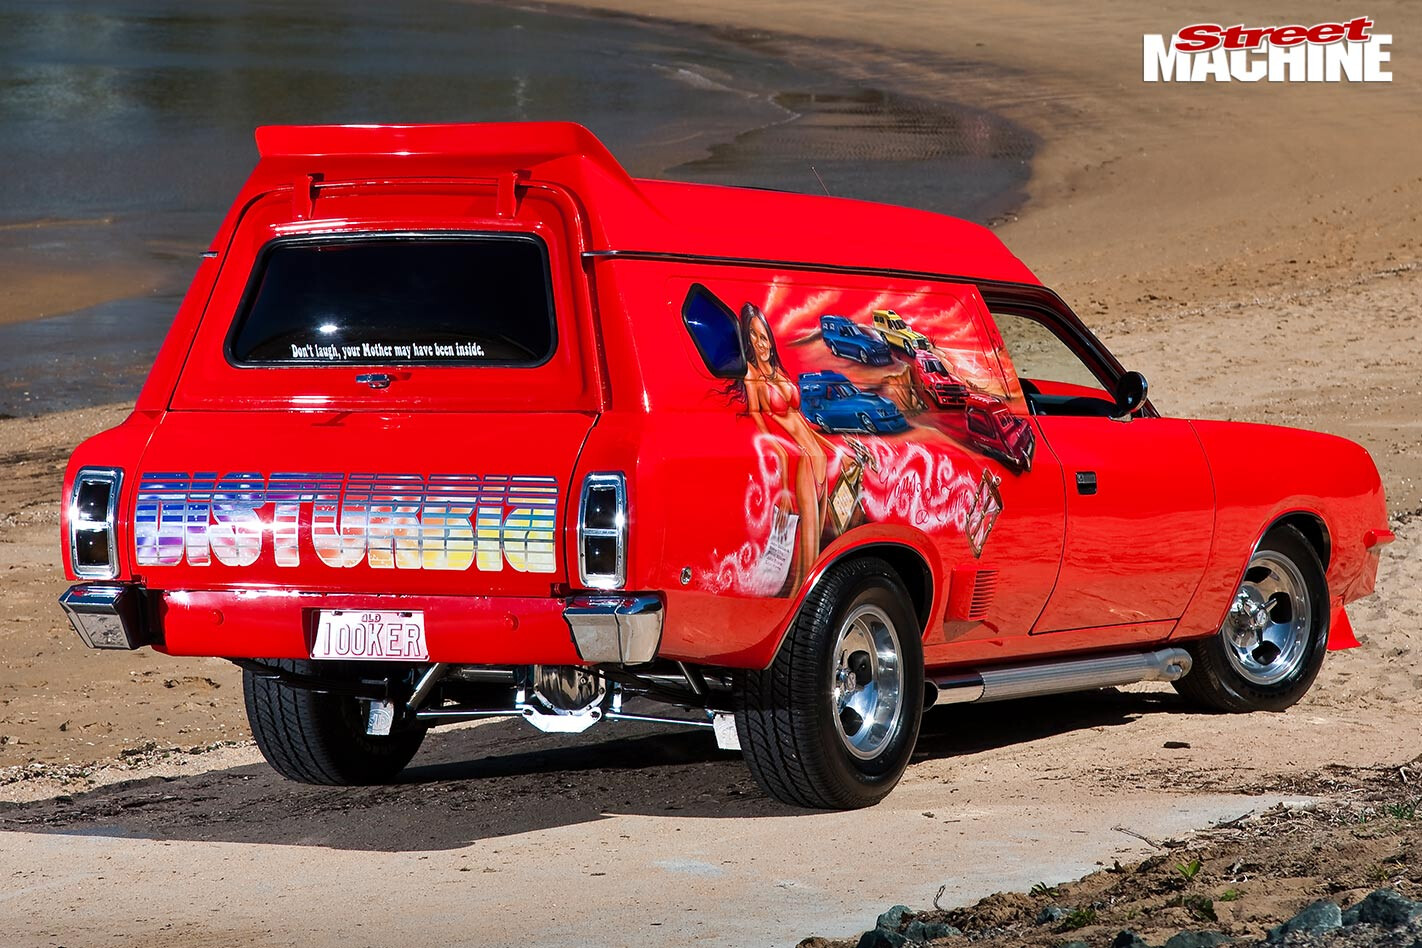
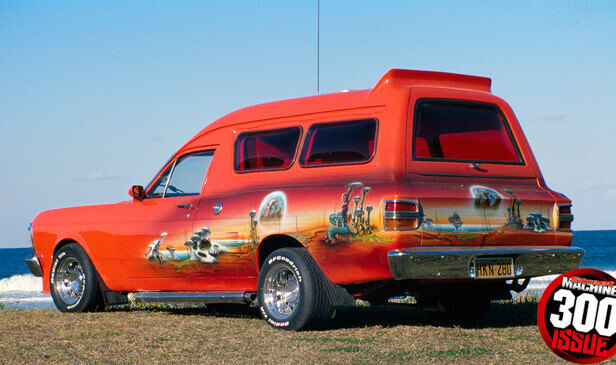
LIKE thunder and lightning, peaches and cream, fish and chips, beer and, er, some more beer, panel vans and bubble windows just go together. Forget the lame-o caravan versions, if you’re after some proper old-school bubbliness for your van, it’s actually pretty easy to make your own acrylic bubble windows.
There are a number of different methods out there, but we’re going to focus on a simple backyard option that will get your project one step closer to vanning utopia.
Now the ‘experts’ may nitpick my methods to death, but then it was the ‘experts’ that laughed me down a few years back when I enquired about buying some bubble windows for my van, Disturbia. They offered no help or solutions (bastards!), so I went down the path of self-sufficiency instead. So there.
 What I did was cast my mind back to 1987, to Mr Morgan’s Gap High School shop class, where we made acrylic bowls using compressed air and an old kitchen oven. I thought, a bubble window is just a big-arse weird-shaped bowl, right? So surely the same process would work for a window. Right? RIGHT? Turns out it would, and did, and does.
And so, dear reader, I now present to you Simon’s Secrets of the Bubble Window™. But remember, like anything involving barbecues (did I not mention you’ll need a barbecue? You’ll need a barbecue), things can get pretty damn hot, so make sure you equip yourself with some decent welding gloves or similar, to handle the hot acrylic.
Make your own acrylic bubble windows step-by-step:
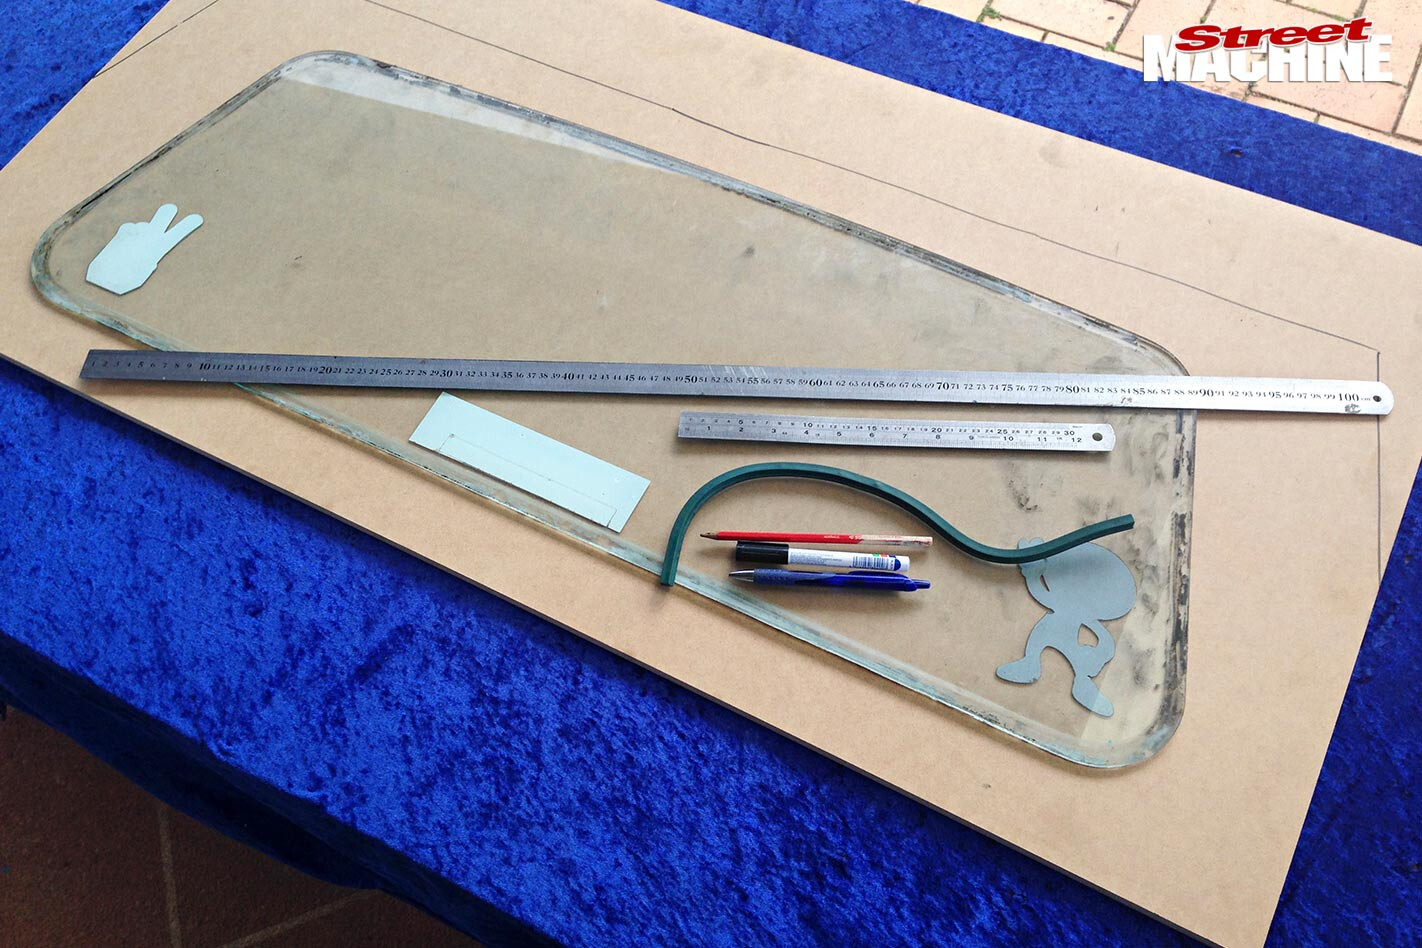 1. The materials list to kick things off is pretty straightforward. You’ll need some suitable pieces of 12-16mm-thick MDF, a couple of pens and rulers, a drill and holesaw, and of course the donor window you’re looking to replace. Here we’re using a tailgate window, but this same basic method can be applied to all types of van windows, large or small. The green snakey-looking thing is a graphics flexi-curve from the old-school days of hand-drawing stuff; it is a super-useful piece of equipment that is worth tracking down.
 2. We’ll start with the air tray. This is the base that we’ll clamp the template to and shoot the air through from underneath. If you’re going to be making a few different windows then it’s best and more cost-effective to make a generic base that caters for multiple templates. I try and allow at least 60-100mm of clamping edge around each window. Start by sawing a decent hole through the centre and trim the corners of the base to follow the general profile of the window shape. This will allow you to get the clamps closer to the template edges and reduce the chance of air leaks. Holden, Ford and Chrysler tailgate glass are all different, but the same base will work for all of them if you measure properly first.
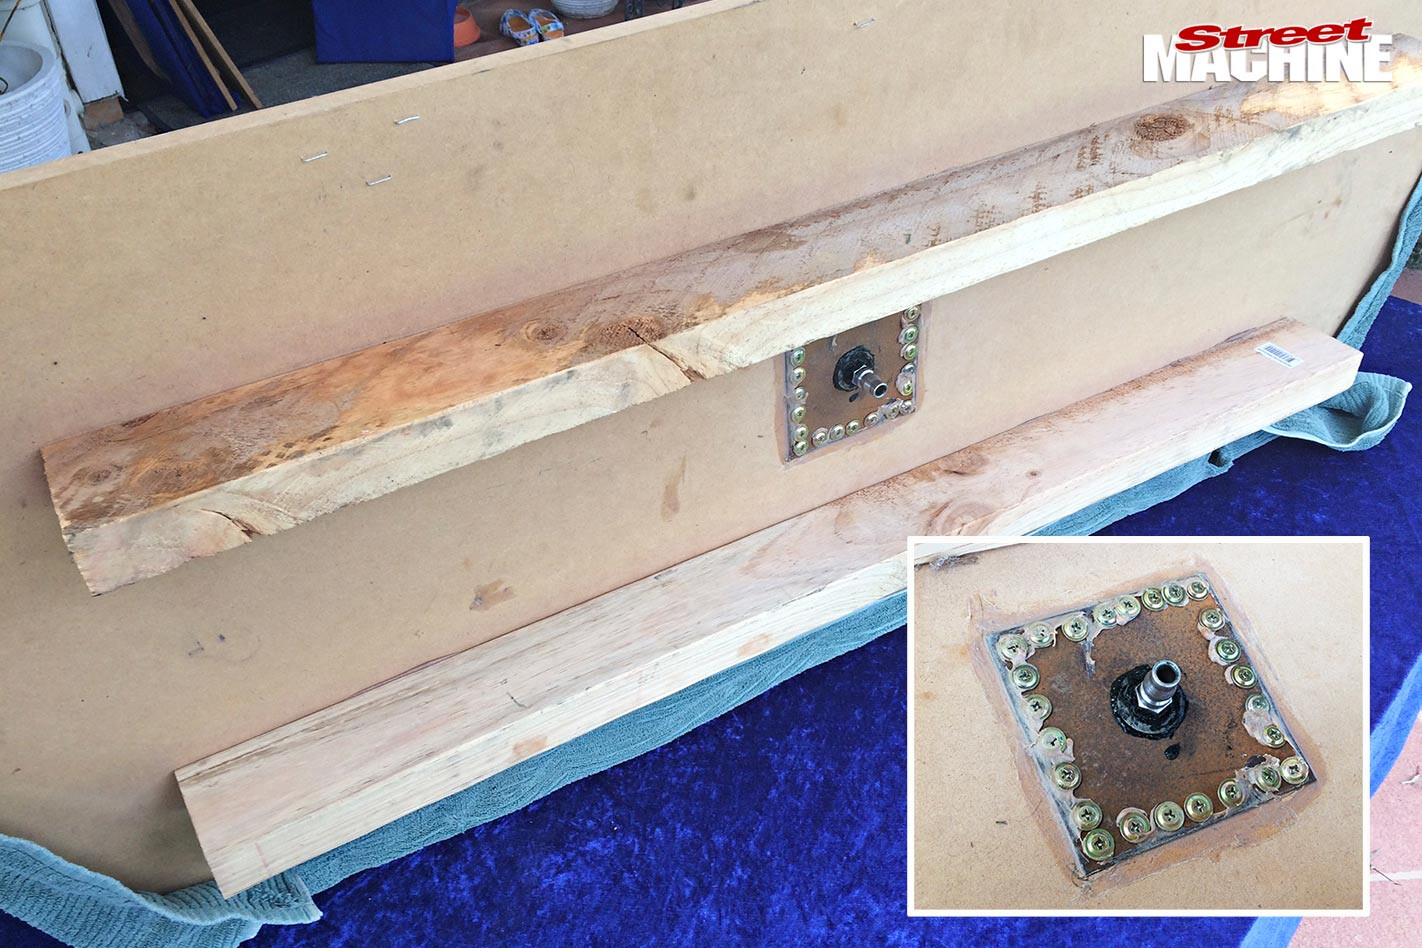 3. Next we add an air fitting to the underside of the tray, where you’ve made the hole. I just screw on a small square of sheet metal with a standard air fitting slotted through the guts. Make sure the fitting doesn’t protrude past the tray on the upper surface, and seal the fitting and plate with Silastic or the like to again reduce the chance of air leaks. Two pieces of timber along the underside will help to reinforce the tray and stop the bubble window from bowing along its length when you start adding heat and compressed air.
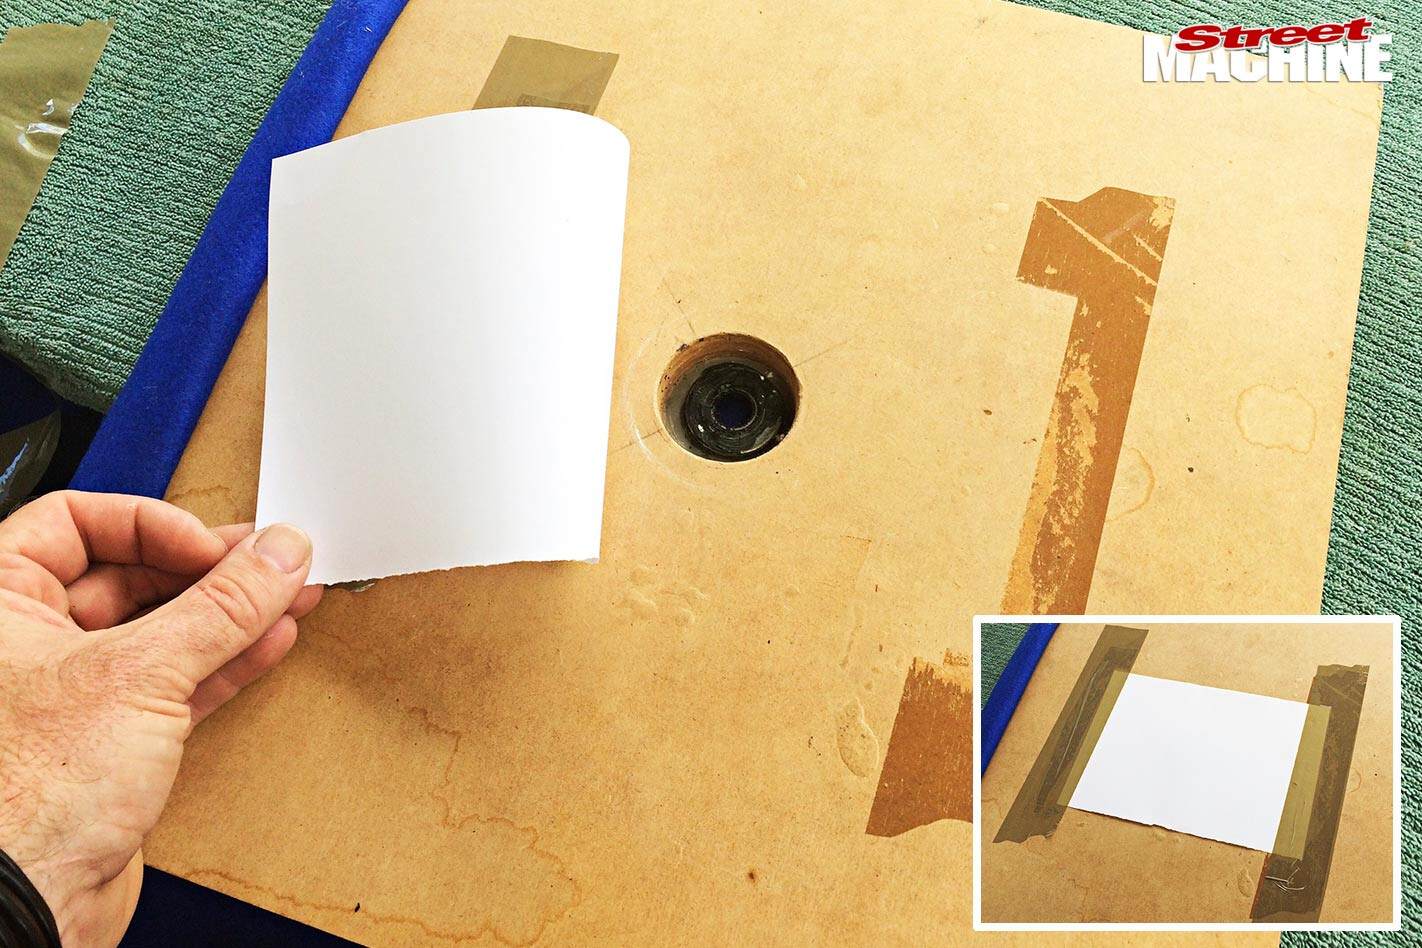 4. A small piece of paper taped along two edges to the top side of the tray is a great air diffuser – it reduces the chance of cold spots forming on the hot acrylic when cool air is blown in to create the bubble shape. It also pays to run a decent water trap and make sure your lines and compressor are moisture-free before commencing the bubble-blowing process. The smaller air tray in these pics is used for feature shapes (hearts, tail-lamp bubbles, etc) but the principle and preparation is the same. Note that the air fitting doesn’t protrude past the upper surface of the tray – this enables the acrylic sheet to lay flat.
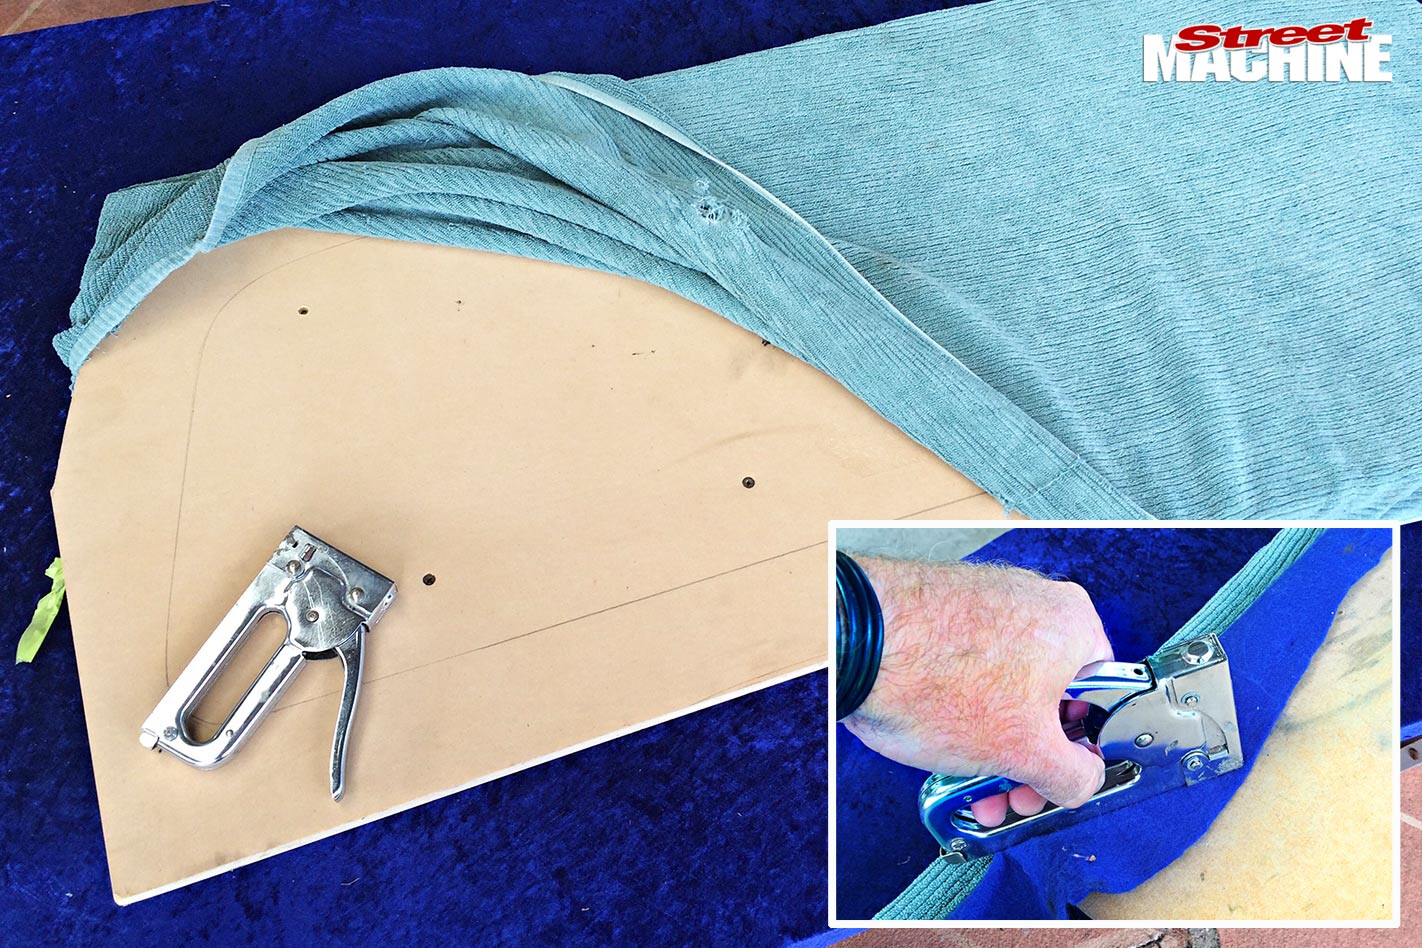 5. Once the tray is assembled and a diffuser is taped down, cover the top surface of the tray in felt or an old towel. This helps to seal in the air pressure and protect the acrylic from surface scratches or contaminants. A hand staple gun makes light work of this and allows easy removal for cleaning or to replace the paper diffuser.
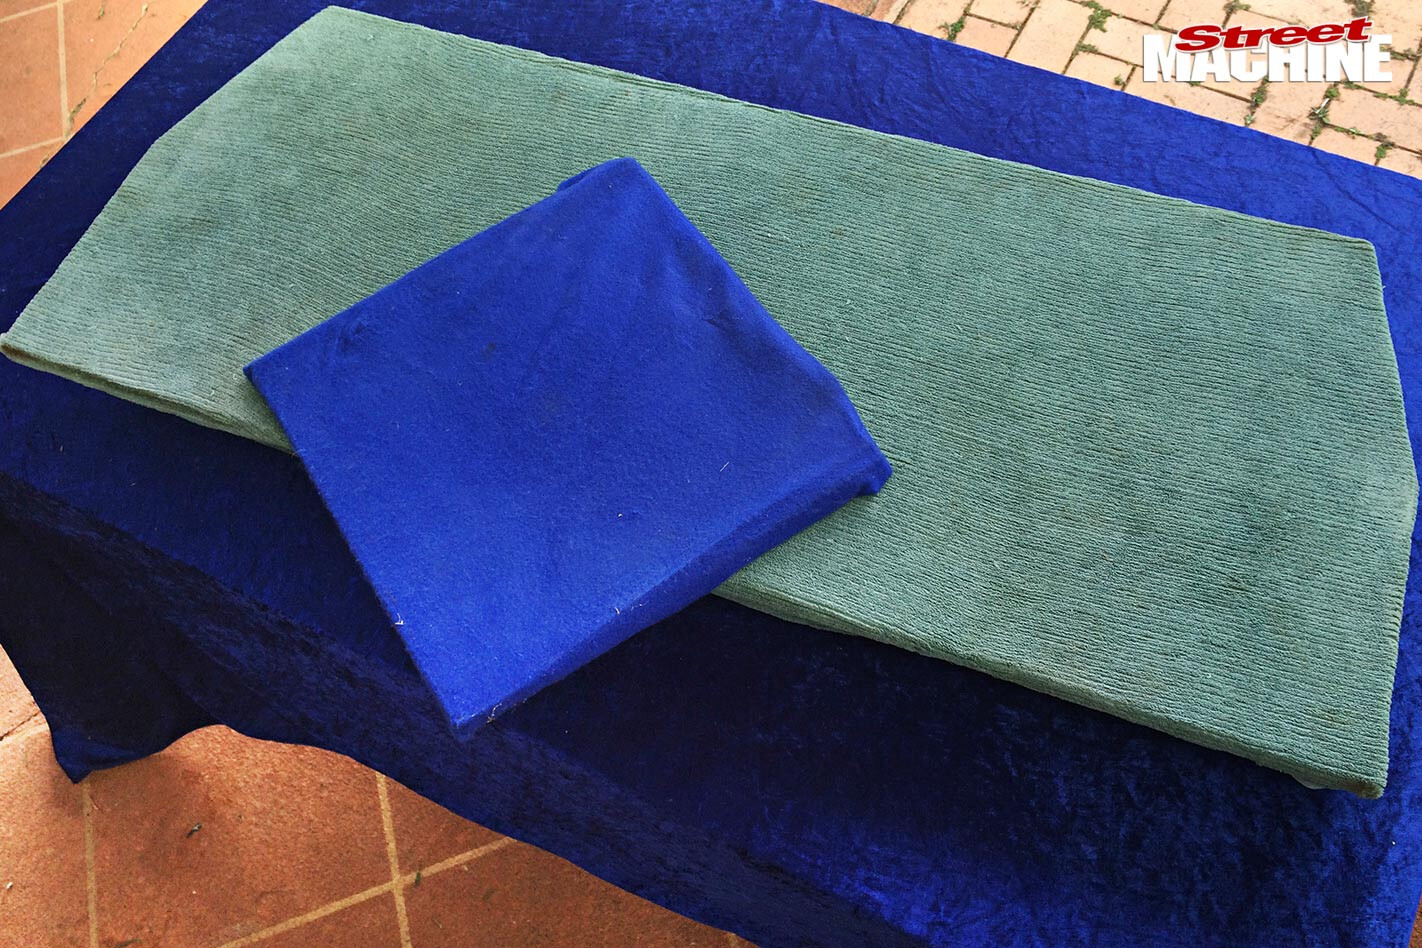 6. Here’s two finished air trays ready for use. I find that a 450x450mm square item is perfect for smaller work and the larger 1200x500mm tray is suitable for most tailgate and larger side windows
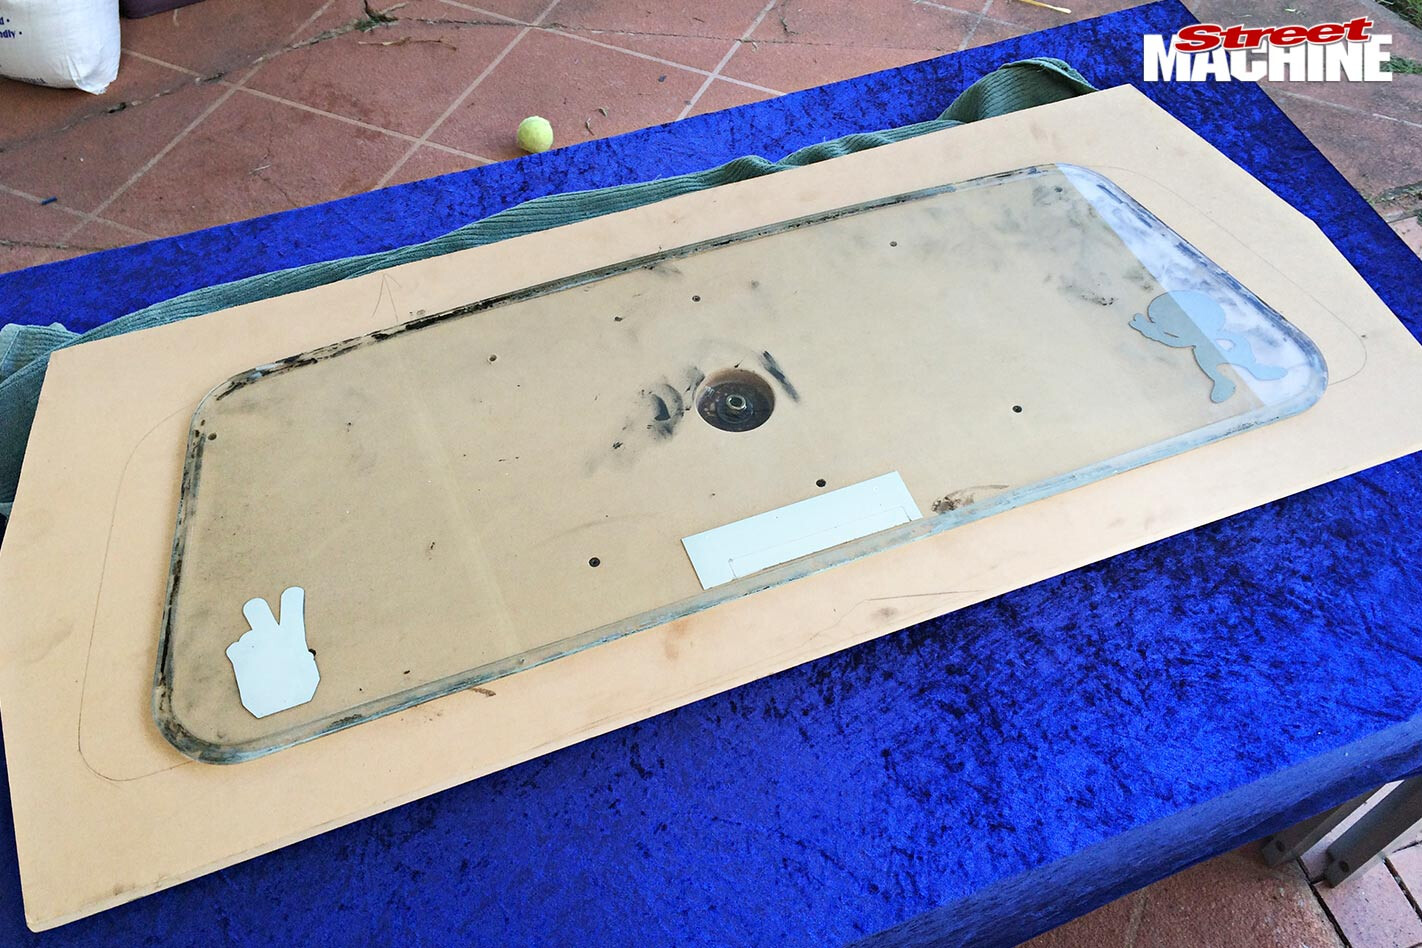
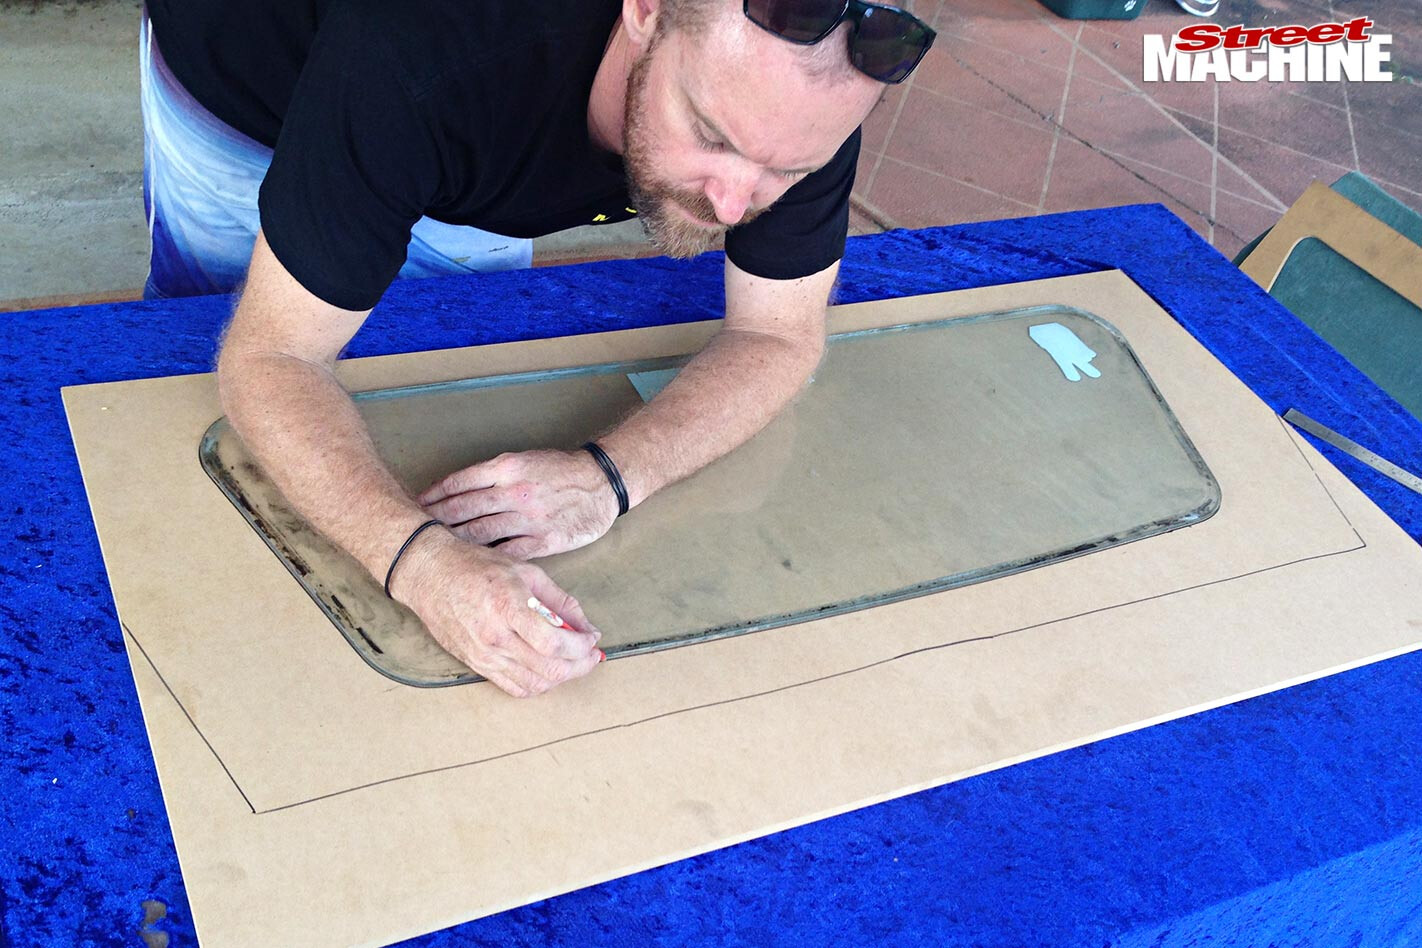 7. On to the template now, so grab a fresh piece of MDF and cut it to match the shape of the air tray. Centre and trace around the donor piece of glass, remembering that you’ll need to compensate for a flat lip that will enable the bubble window to slip into the original sealing rubber.
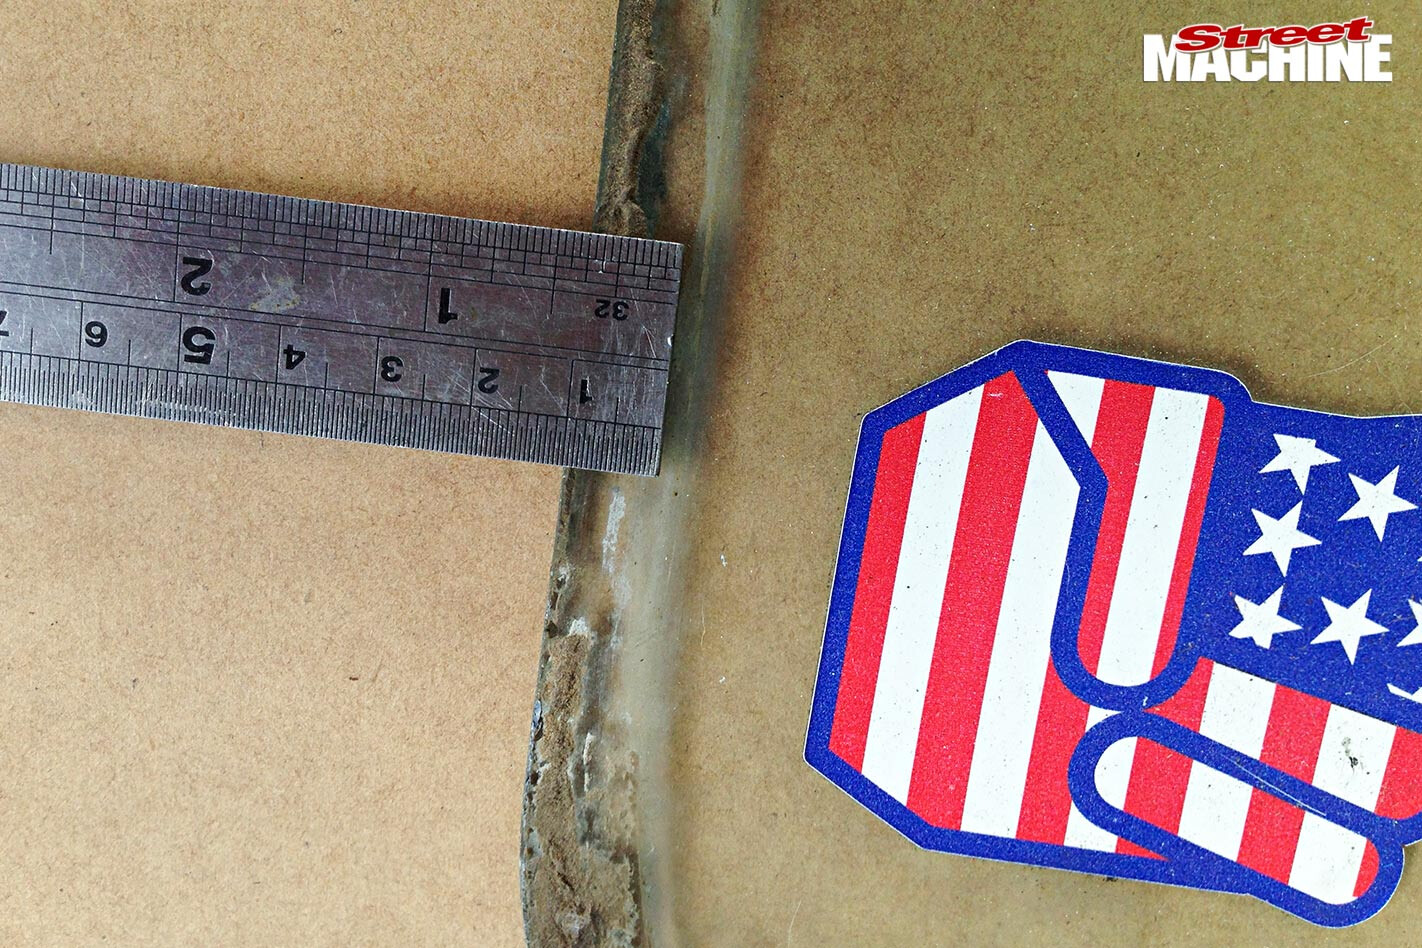 8. The simplest method to determine how much rubber lip you need is to measure the sealing stain on the factory glass; it’s a sure-fire method to determine how much recess for the edging is required. Most tailgate windows need approximately 10-12mm, while smaller side glass uses 8mm.
 9. Using a ruler and flexi-curve, mark out and draw the required thickness for the lip within the original window tracing. In this instance we’ve reduced the window shape by 10mm around its full perimeter, which will allow a sufficient flat edge around the border of the finished bubble window.
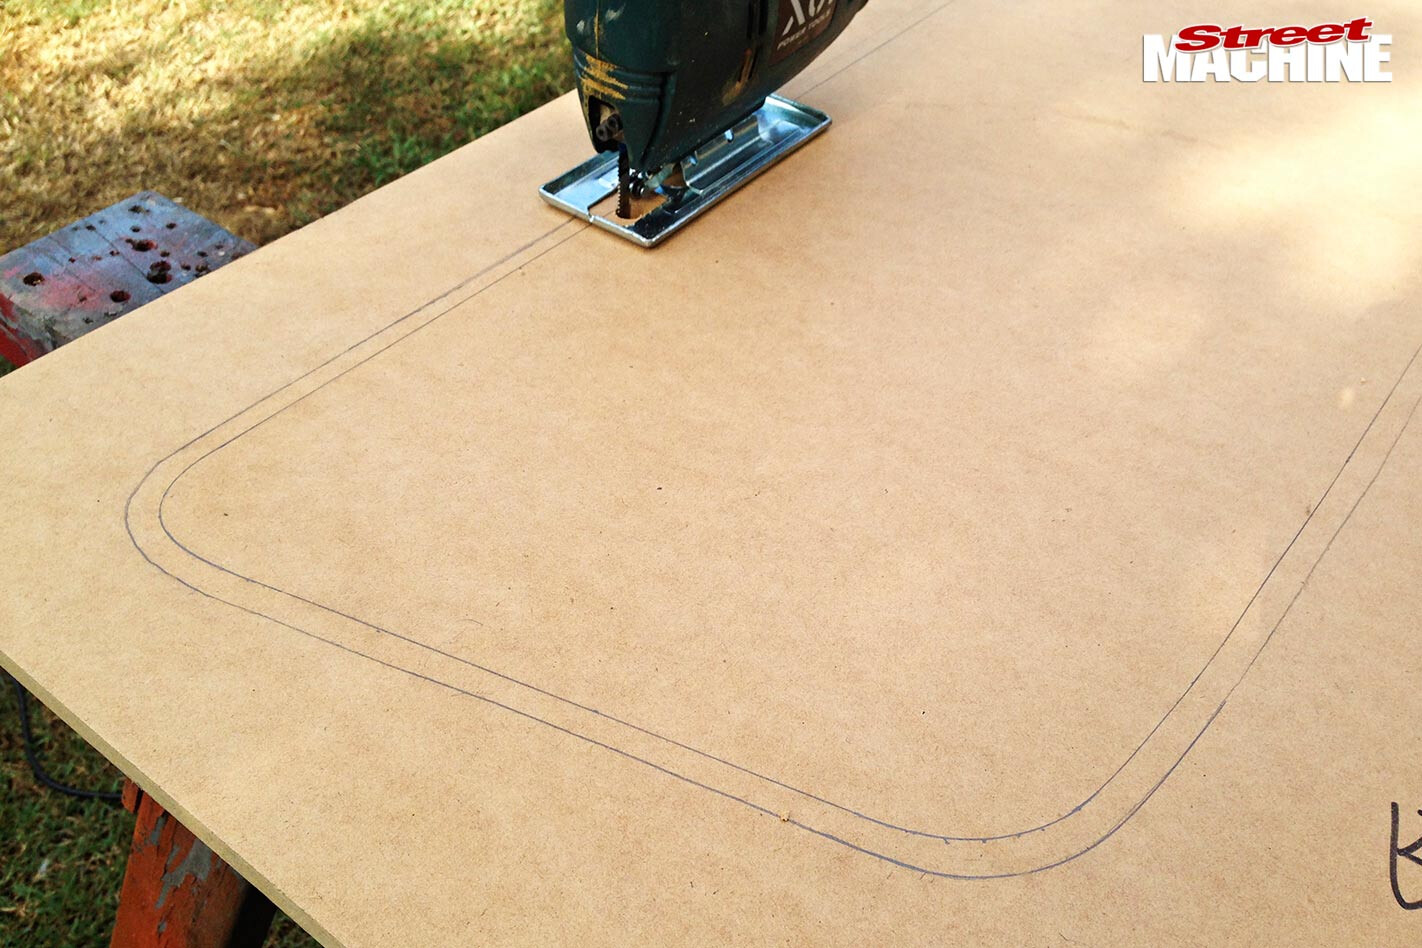 10. Drill an access hole into the scrap centre of your MDF, and using a jigsaw, cut around the inside pencil line of your window template. You want to still see the outermost pencil line on your template once you’ve finished cutting! Be sure to make this cut as clean and accurate as possible, as it will determine how neat your finished window will look. The jigsaw can splay on tight corners and alter the shape at the base of this cut, so treat the pencil-side edge as your accurate shape.
 11. Lightly sand the hard pencilled edge off of your inner template lip, to maintain the correct shape and also assist the acrylic to rise once air is applied. It’s at this stage that I flip the template over and use this neat, sanded edge as the bottom surface through which the acrylic will form its shape. If you’re a bit steady like me, mark the new top as ‘top’ now, as you won’t have time to stuff around working out the right way up when your acrylic is cooling off like a bastard.
 12. Grab your acrylic sheet in the desired colour and/or tint, and trace around the template to give you the appropriate size and keep waste to a minimum, then trim to suit. The only suitable coloured acrylic for van windows is a 3mm thickness, which is more than adequate, whereas the standard grey tint can be purchased in 3mm or 4.5mm thicknesses. The 4.5mm thickness is preferred for larger windows, but the 3mm will still do the trick.
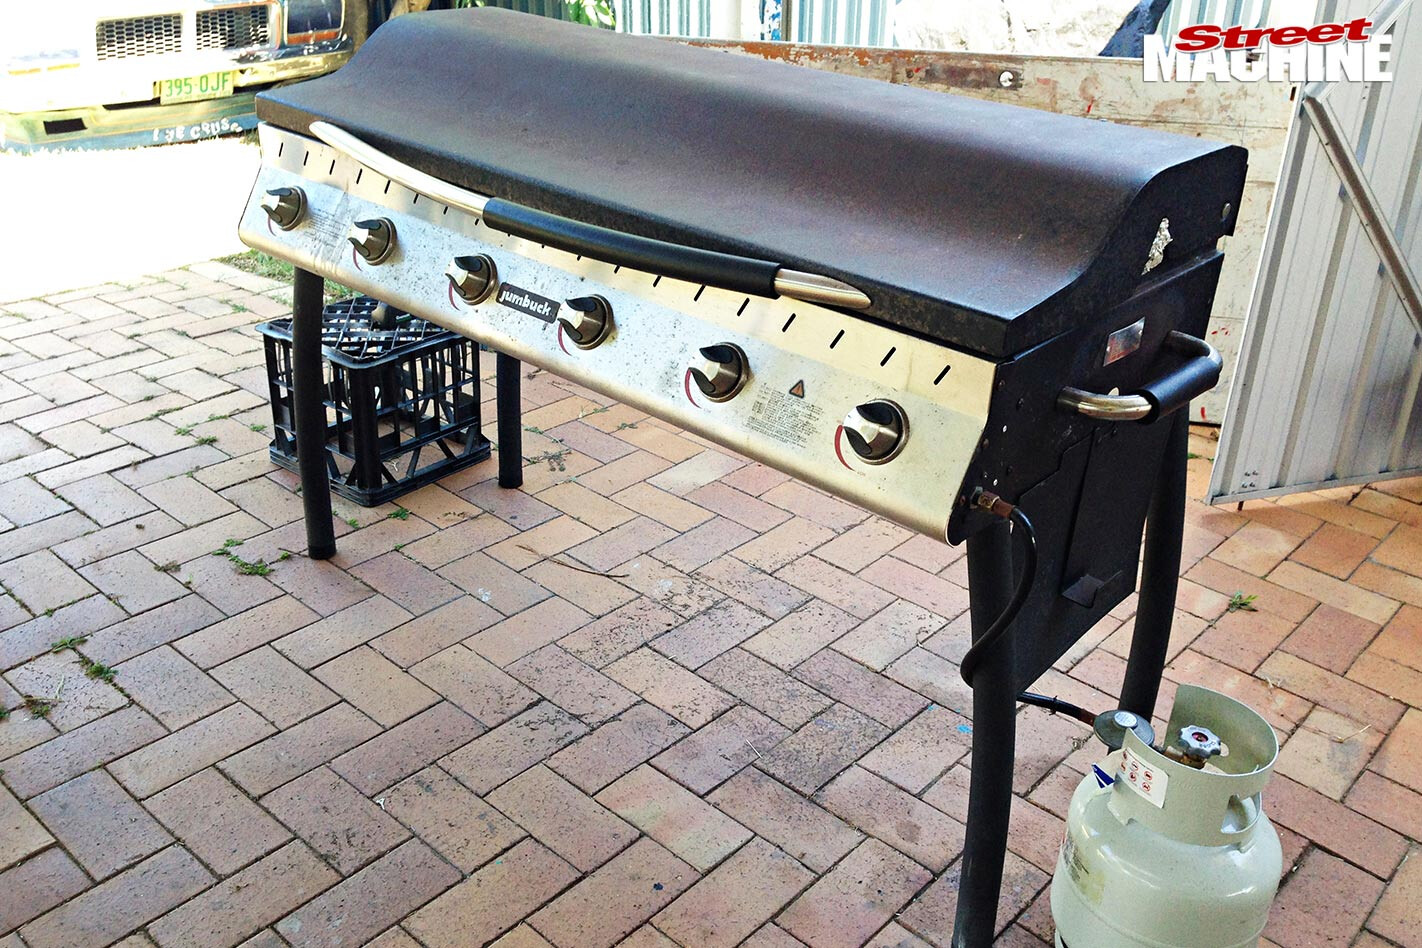 13. For heating the larger acrylic I use a decent-sized sausage sizzle-style barbecue; just make sure you clean off any cooking oil or petrified bits of onion first. A pizza oven or ultra-violet heat lamps will also work – you just need something that can maintain 180-200˚C for 6-10 minutes. A remote barbecue thermometer works a treat to keep an eye on the temps. It pays to turn the acrylic over after a few minutes to ensure the material heats evenly. For heating the smaller 450mm-based pieces, a normal kitchen oven works a treat – just make sure the missus isn’t home when you’re ready to bake, especially if you’re already on probation for cleaning hubcaps in the dishwasher.
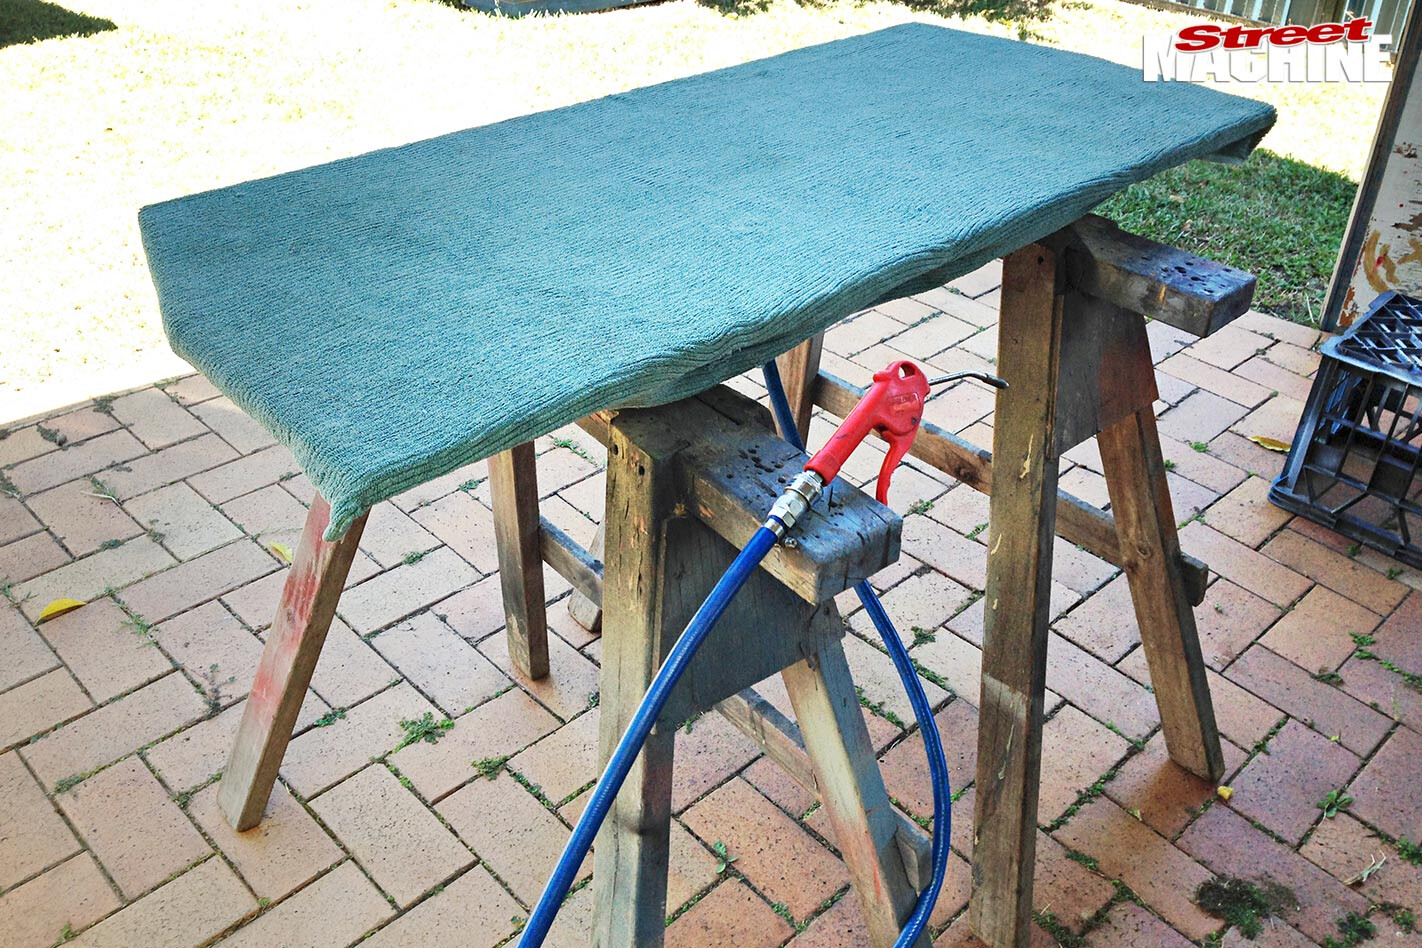 14. With the acrylic warming up, double-check your air tray set-up – saw horses allow plenty of access underneath and around your workspace. You’ll need a reasonable air compressor – 2.5hp is more than adequate – and I run two lines from a Y-piece; one to supply air to raise the bubble via a tap and a second with an air gun to help cool the finished window. Beg, steal, buy or borrow as many clamps as you can – you can never have too many, especially for the larger windows. Squeeze clamps are far quicker and easier than screw clamps, but if you have to mix them up make sure you fit the squeeze clamps first.
 15. Once the acrylic has been heated to 180˚C for approximately 6-10 minutes, it should feel quite floppy and fall easily under its own weight. Be careful not to overcook and boil the acrylic though, or you’ve just created a throwaway item. Deformed acrylic can be re-set by reheating, but boiling it will create irreversible bubbles in the clear surface. Lay the hot acrylic sheet onto the air tray using the matching shape to easily align the edges.
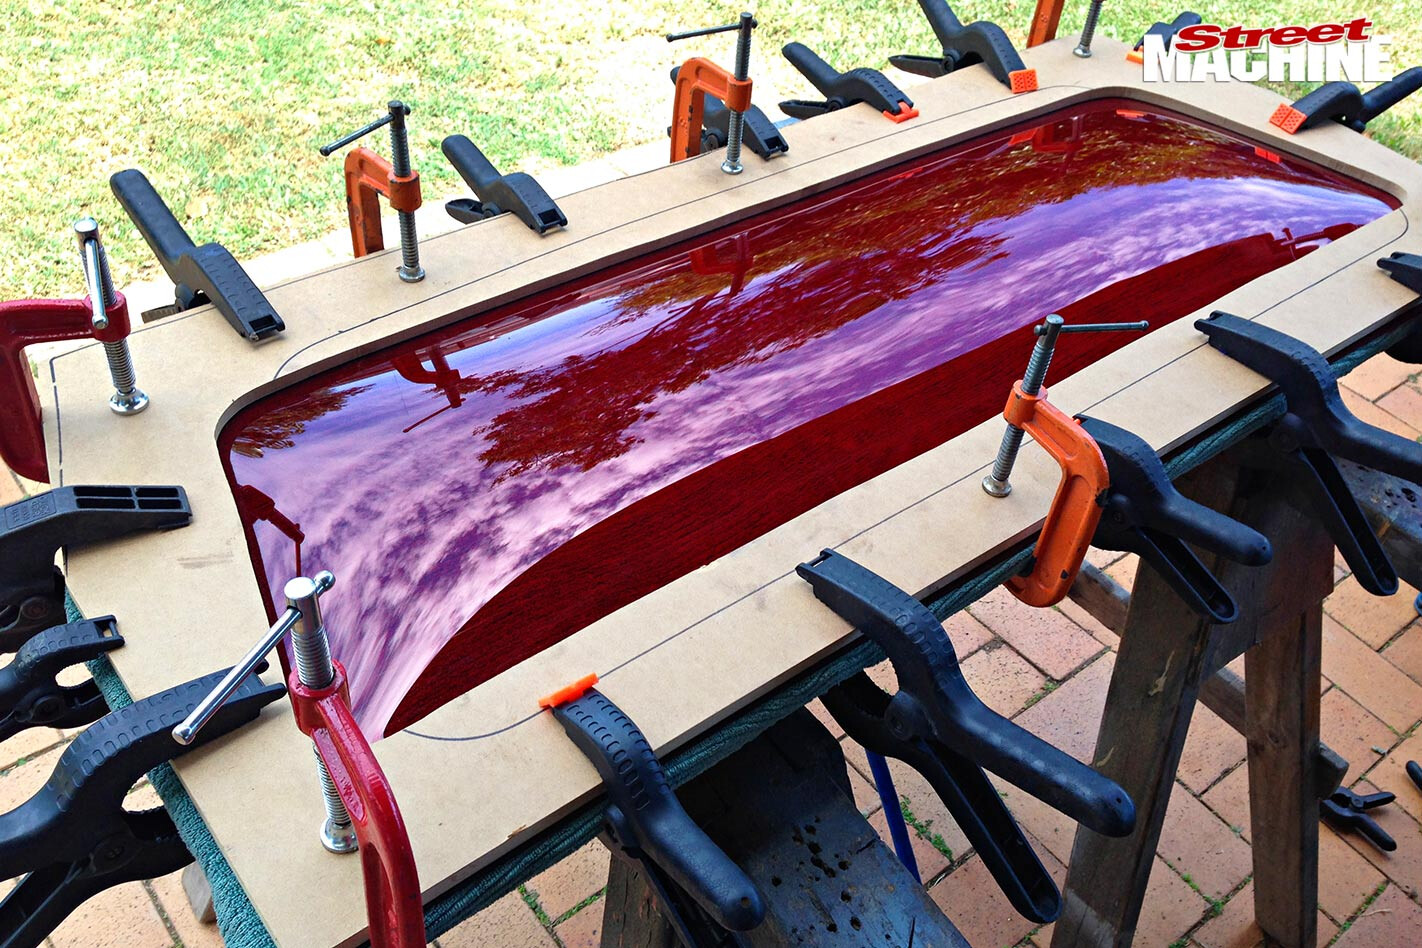 16. Position the template over the hot sheet and start clamping like a maniac. Unless you’re an octopus, it helps to have a few extra pairs of hands to speed up the process – hot acrylic waits for no man. Gently turn your air tap on and start blowing your bubble window. I usually then give it a decent hit with air to positively mark the template edge onto the acrylic surface. Add or reduce air pressure until you achieve the desired shape. If you ruin the shape or it doesn’t blow evenly, pop it back on the barbie to reheat and have another go.
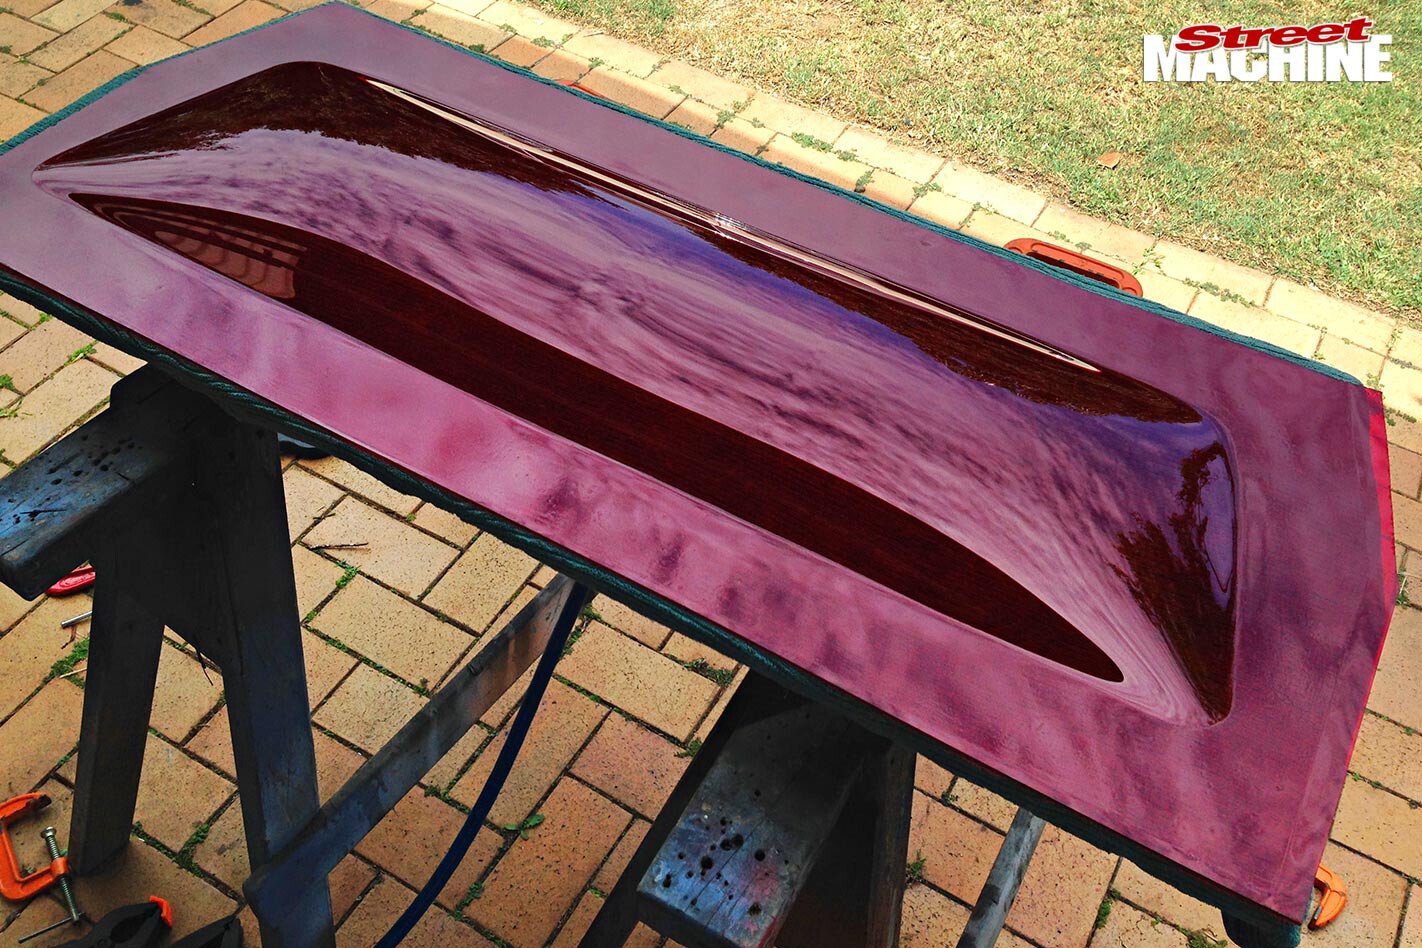 17. Maintain sufficient air pressure to keep the desired shape, then gently cool the top of the bubble using your air gun. Once the window has had a few minutes to cool, release the clamps and allow the tapped air to continue to cool both the window and template from underneath. I like them with a nice, rounded booty shape [you don’t say – Ed.], but if you prefer a bubble with a flatter top, you can make a felt-lined stopper that attaches to the template. This will restrict the height of the window and flatten the top as it presses against the stopper.
 18. With the window nice and cool, mask around the bubble edge on the flat border of the acrylic. It’s then time to re-add the width you initially removed from the template, to create a mounting lip that slips into the window rubber. In this instance we’ve added 10mm around the bubble perimeter, again marking it out in pencil using the trusty flexi-curve and a ruler. Completely mask the acrylic surface to avoid unwanted scratches, and you’re ready to trim.
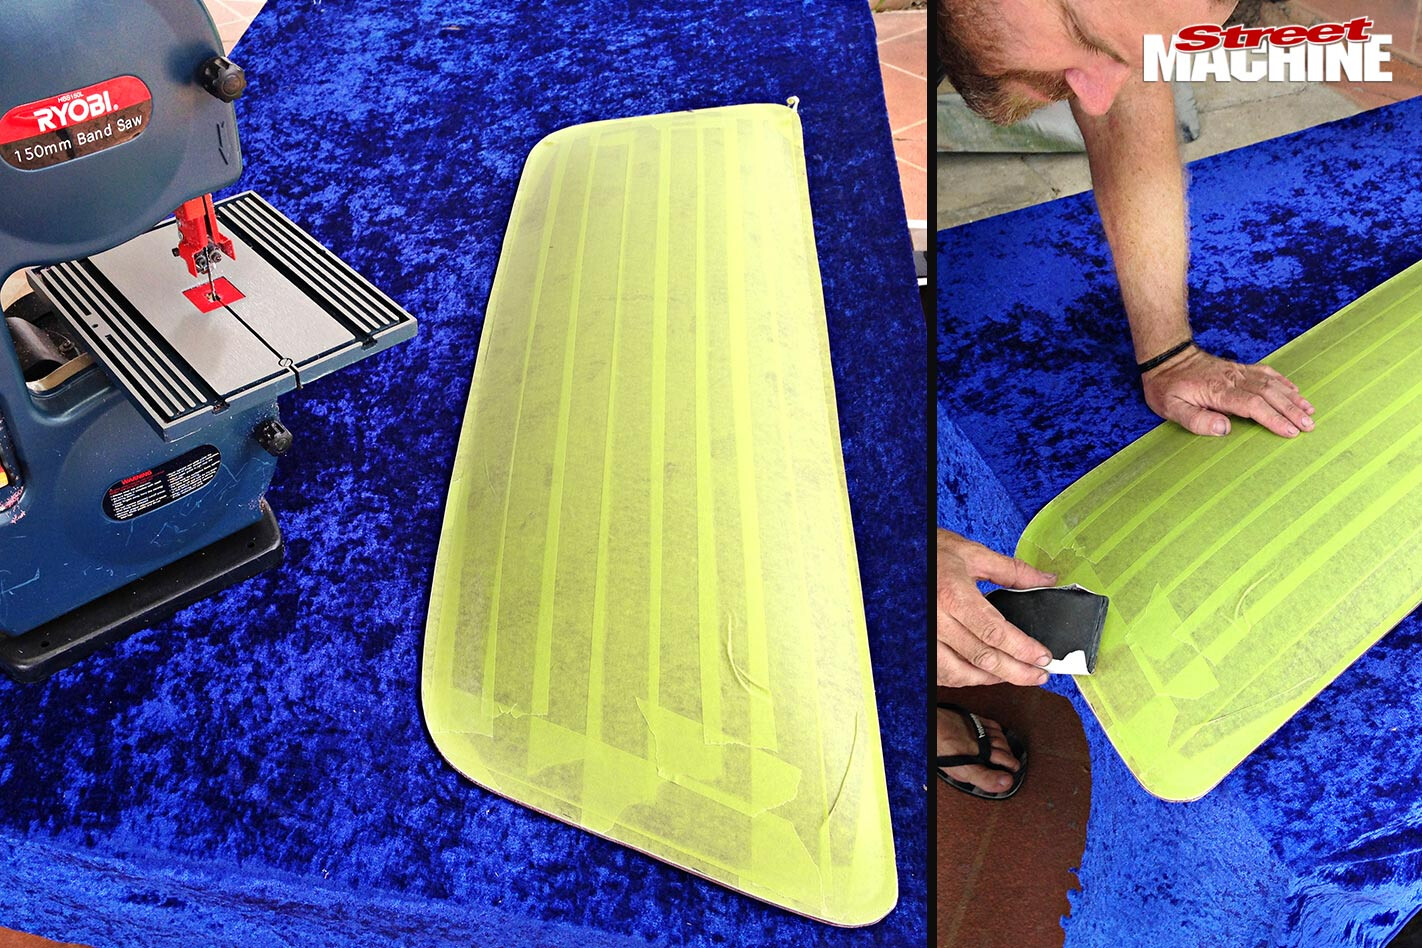 19. A mini-bandsaw makes easy work of trimming away the scrap, and it pays to gently sand the sharp edges of the bubble acrylic to help it slip into the window rubber.
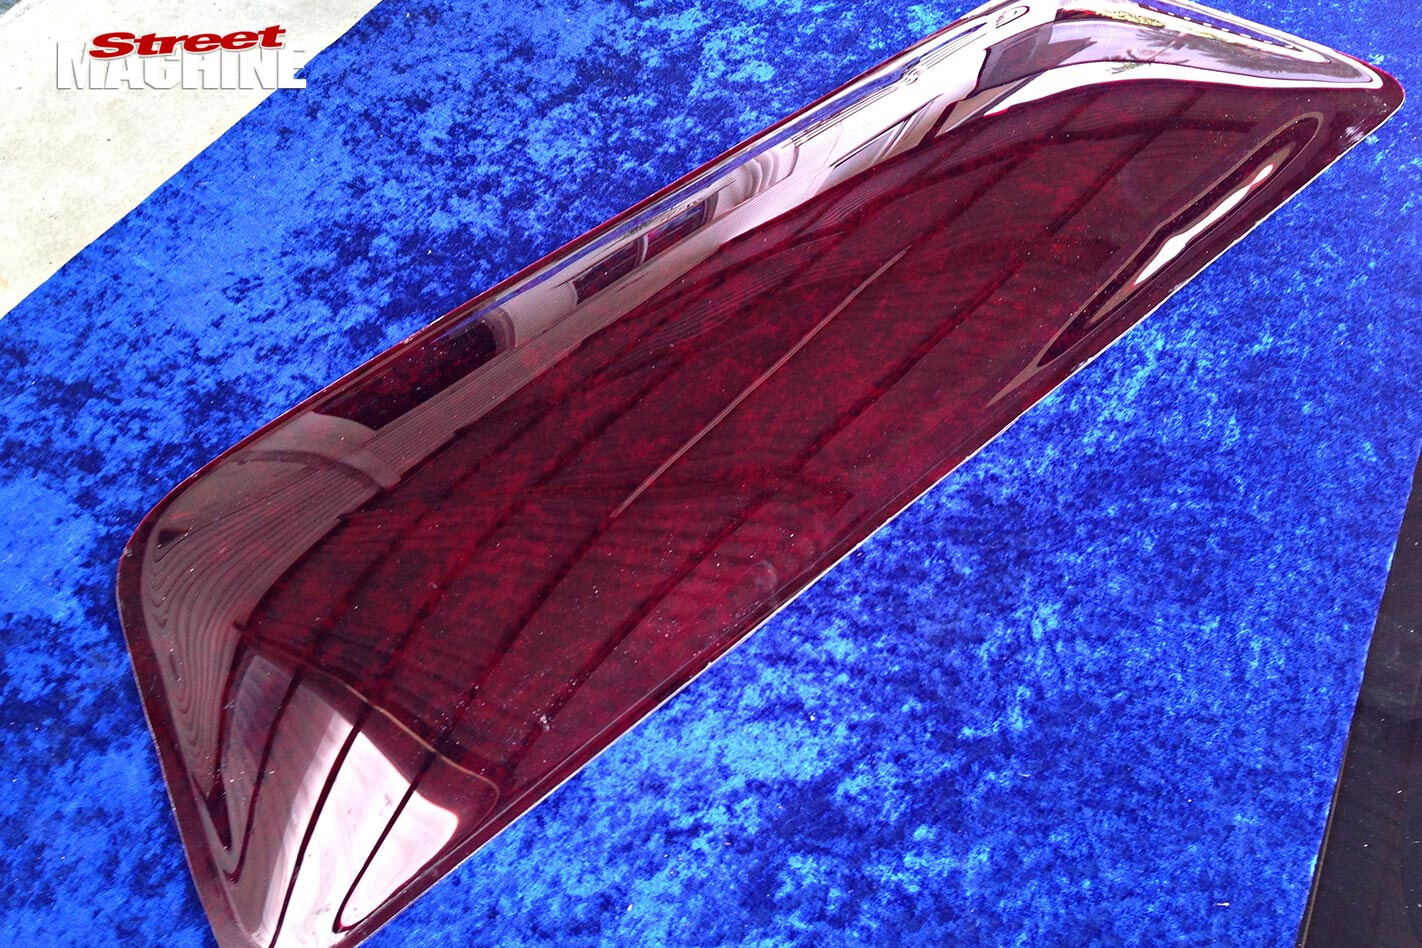 20. Peel away the masking tape and you’re done! When cleaning your bubble windows, it’s best to avoid standard window cleaners; stick with soapy water or car polish. Buffing the acrylic, just like you would your normal paintwork, will keep it looking shiny for years.
Multi-purpose:
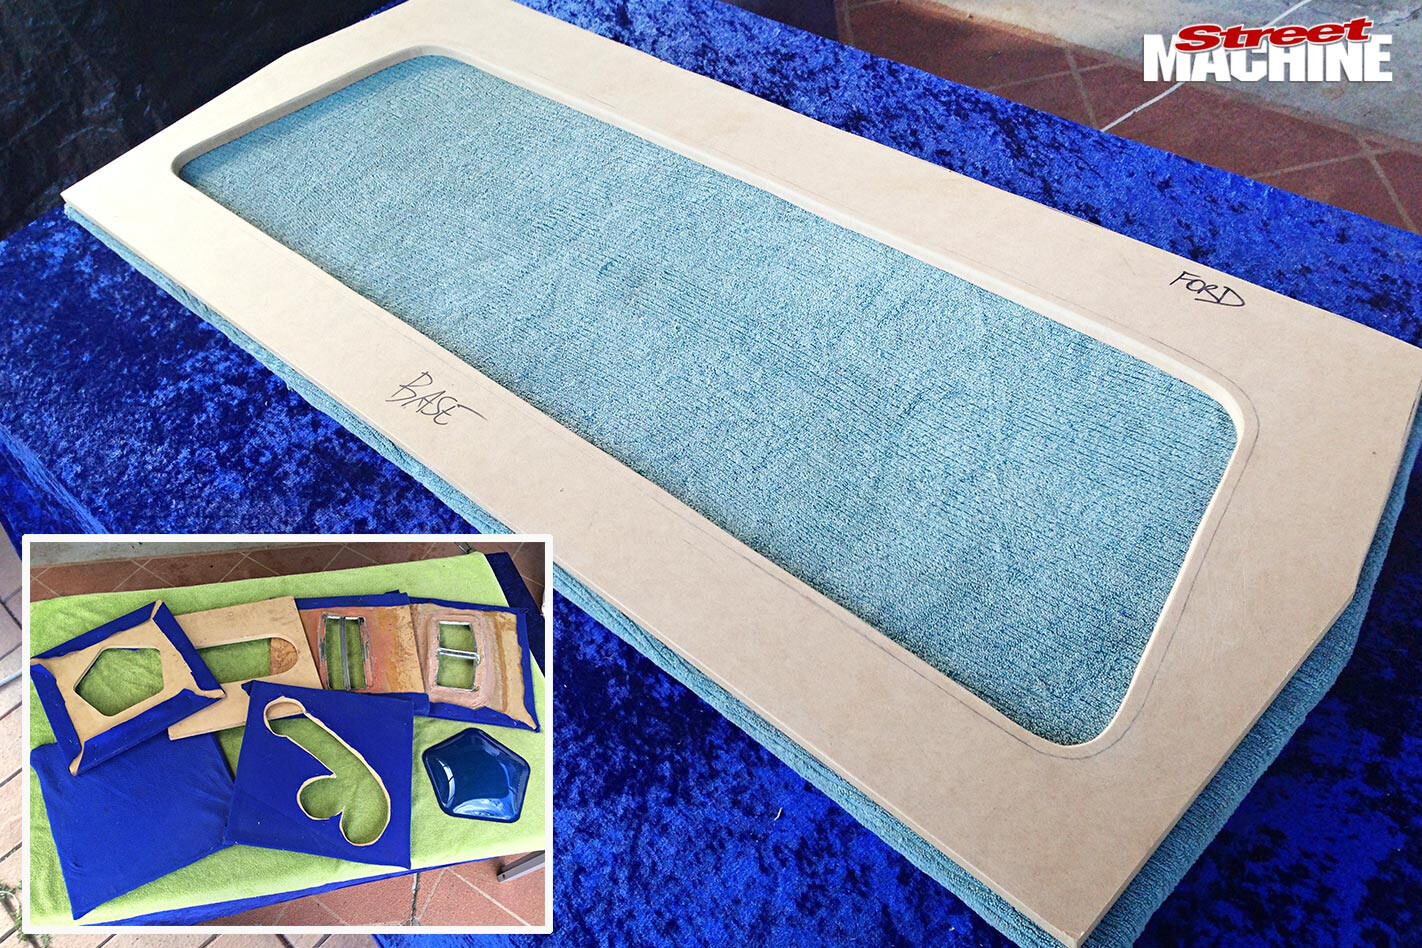
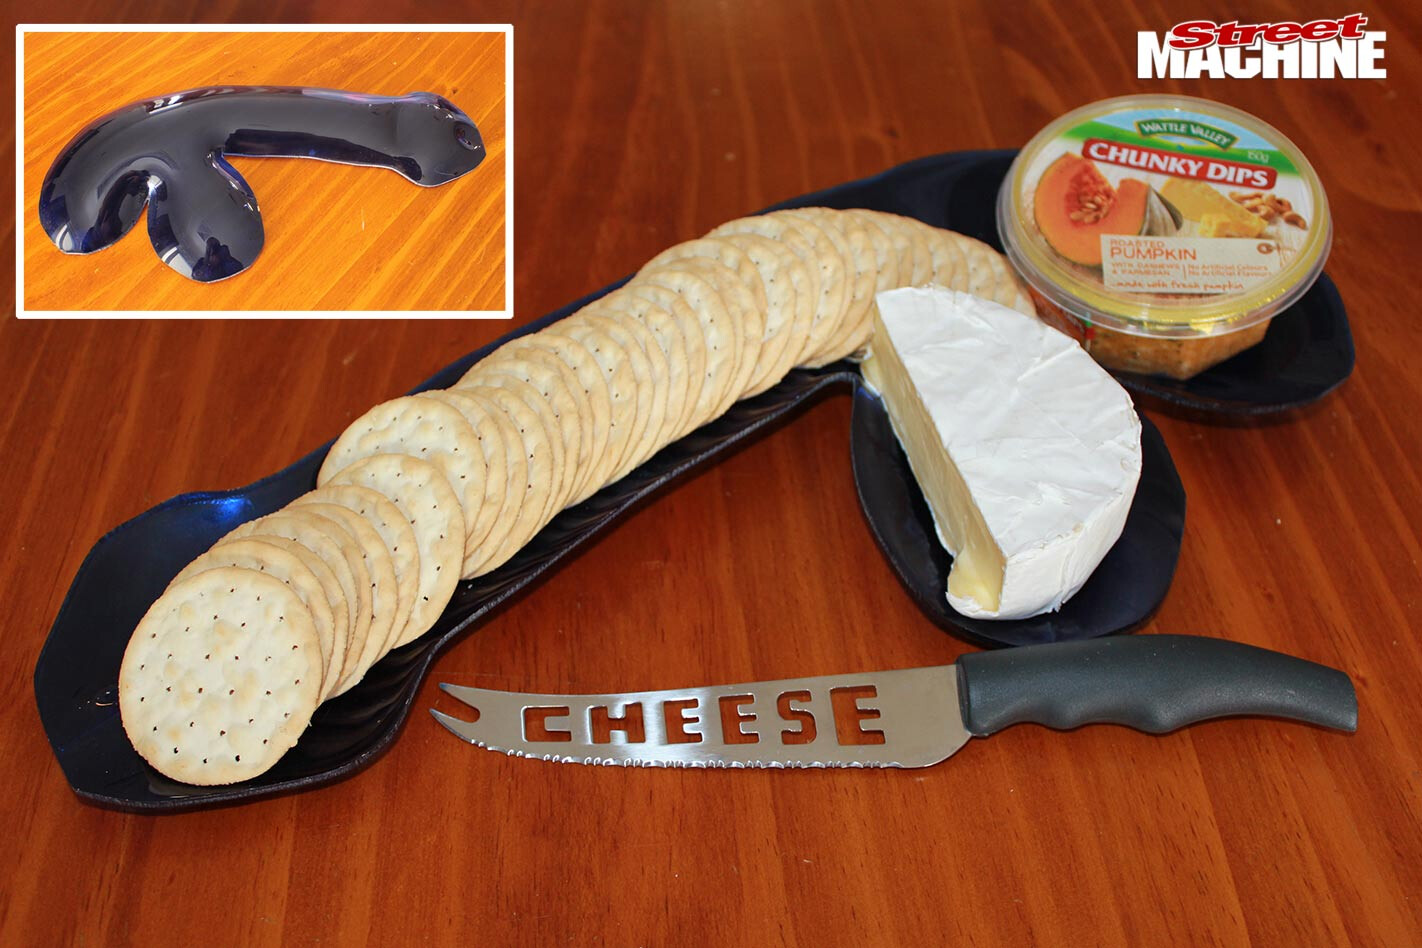
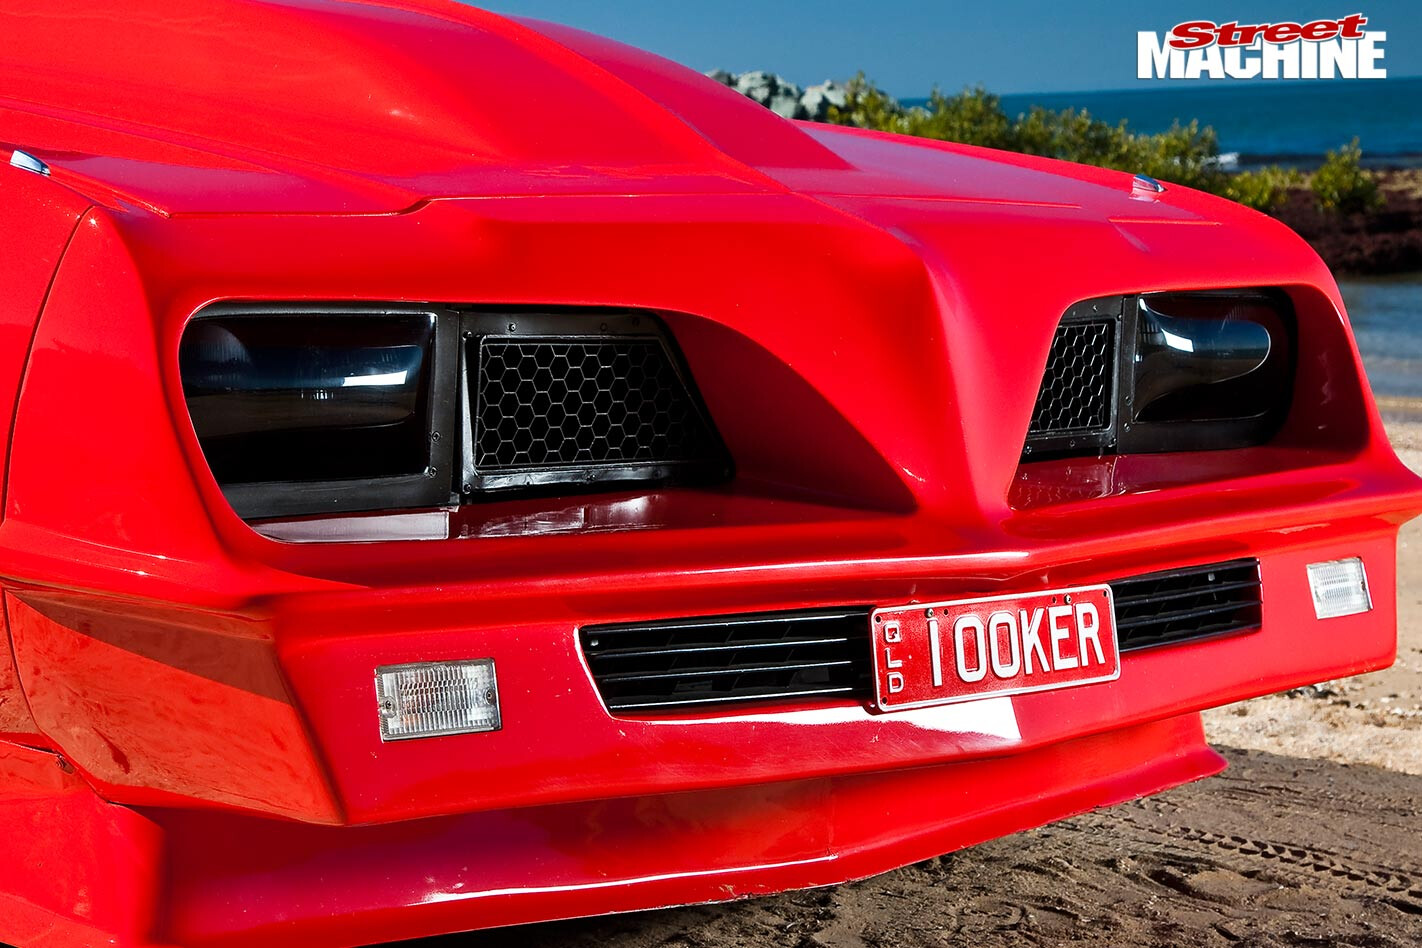 Once you’ve set up the generic air trays and equipment, the sky’s the limit as to what you can create. That single 450mm air tray has been used to create all sorts of different shapes, simply by making new templates. Things like Pentastar side windows, headlamp covers, bubble tail-lamp lens covers, and this enormous, er, chip ’n’ dip bowl (below).
 Stuff like this will help your van look period-correct (the bubble windows, that is, not the chip ’n’ dip bowl. Although come to think of it…).


Comments