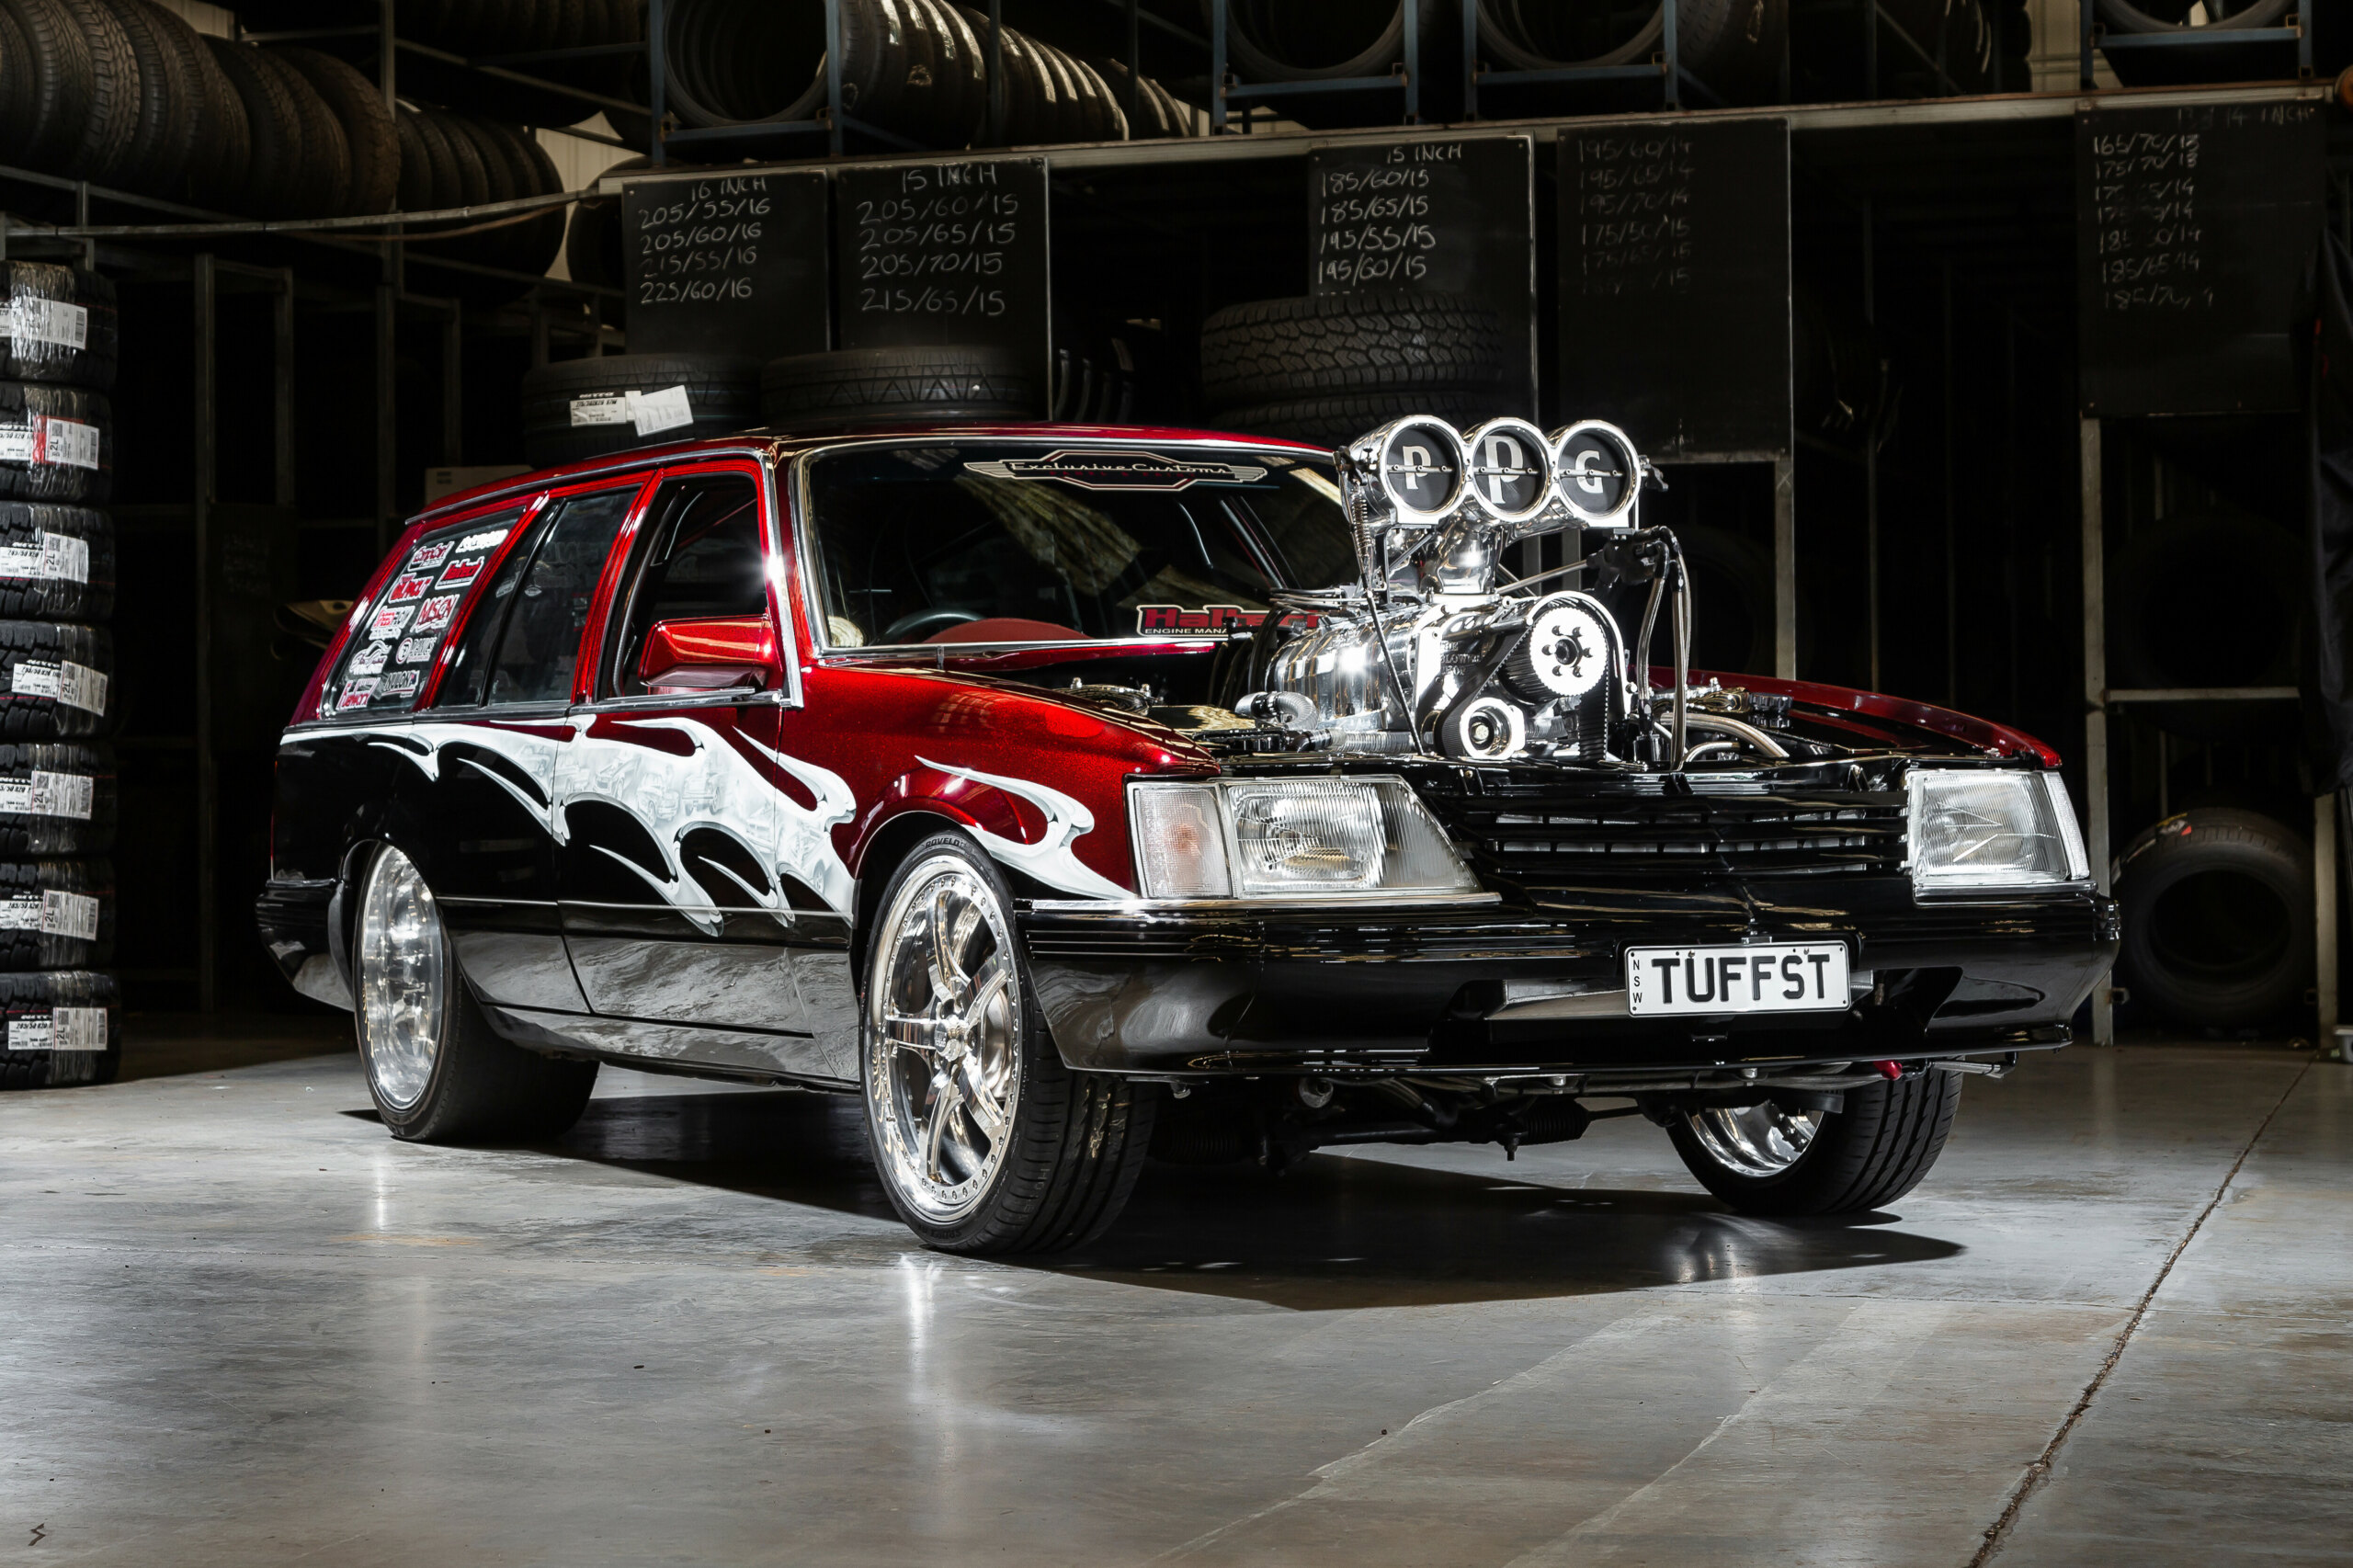
THE calibre of burnout cars being built in Australia seems to know no bounds, and in the past decade we’ve seen the sport escalate to dizzying heights. Big-dollar engines and drivelines were always par for the course, but nowadays we’re seeing many top skid cars detailed to a level that’d earn them a spot in the Elite Hall of any major national car show.
Phil Kerjean is a competitor who’s seen this evolution first-hand. Two decades ago, in a modest VN-headed, 304-cube Holden V8-powered VC wagon, he had his first flirtation with a sport that’s now consumed him for over half his adult life. “My first ever burnout was on the Summernats pad – I even managed to get both tyres off!” he laughs.
At the time, the VC was an understated silver wagon wearing Brock Aero wheels. The car has been in a constant state of advancement ever since, with its most recent makeover sporting a two-toned black and red paintjob paying homage to the winners of Summernats Tuff Street (Phil himself won Tuff Street Champion in 2009 and 2011). But Phil was planning something special for the two-decade anniversary he and the wagon were about to share.
Enter Jake Myers. Jake, like Phil, is a lauded Summernats Burnout Master himself. Son of burnout legend Gary Myers, Jake funds his skid addiction as a signwriter specialising in vehicle wraps, and has recently launched his own business, Myers Vinyl Wraps.
The duo let Street Machine tag along as they took Phil’s car back in time for its 20th anniversary, returning it to its iconic silver livery with modern Brock Aero wheels, before the new-look VC debuted at Summernats 34.
STEP-BY-STEP
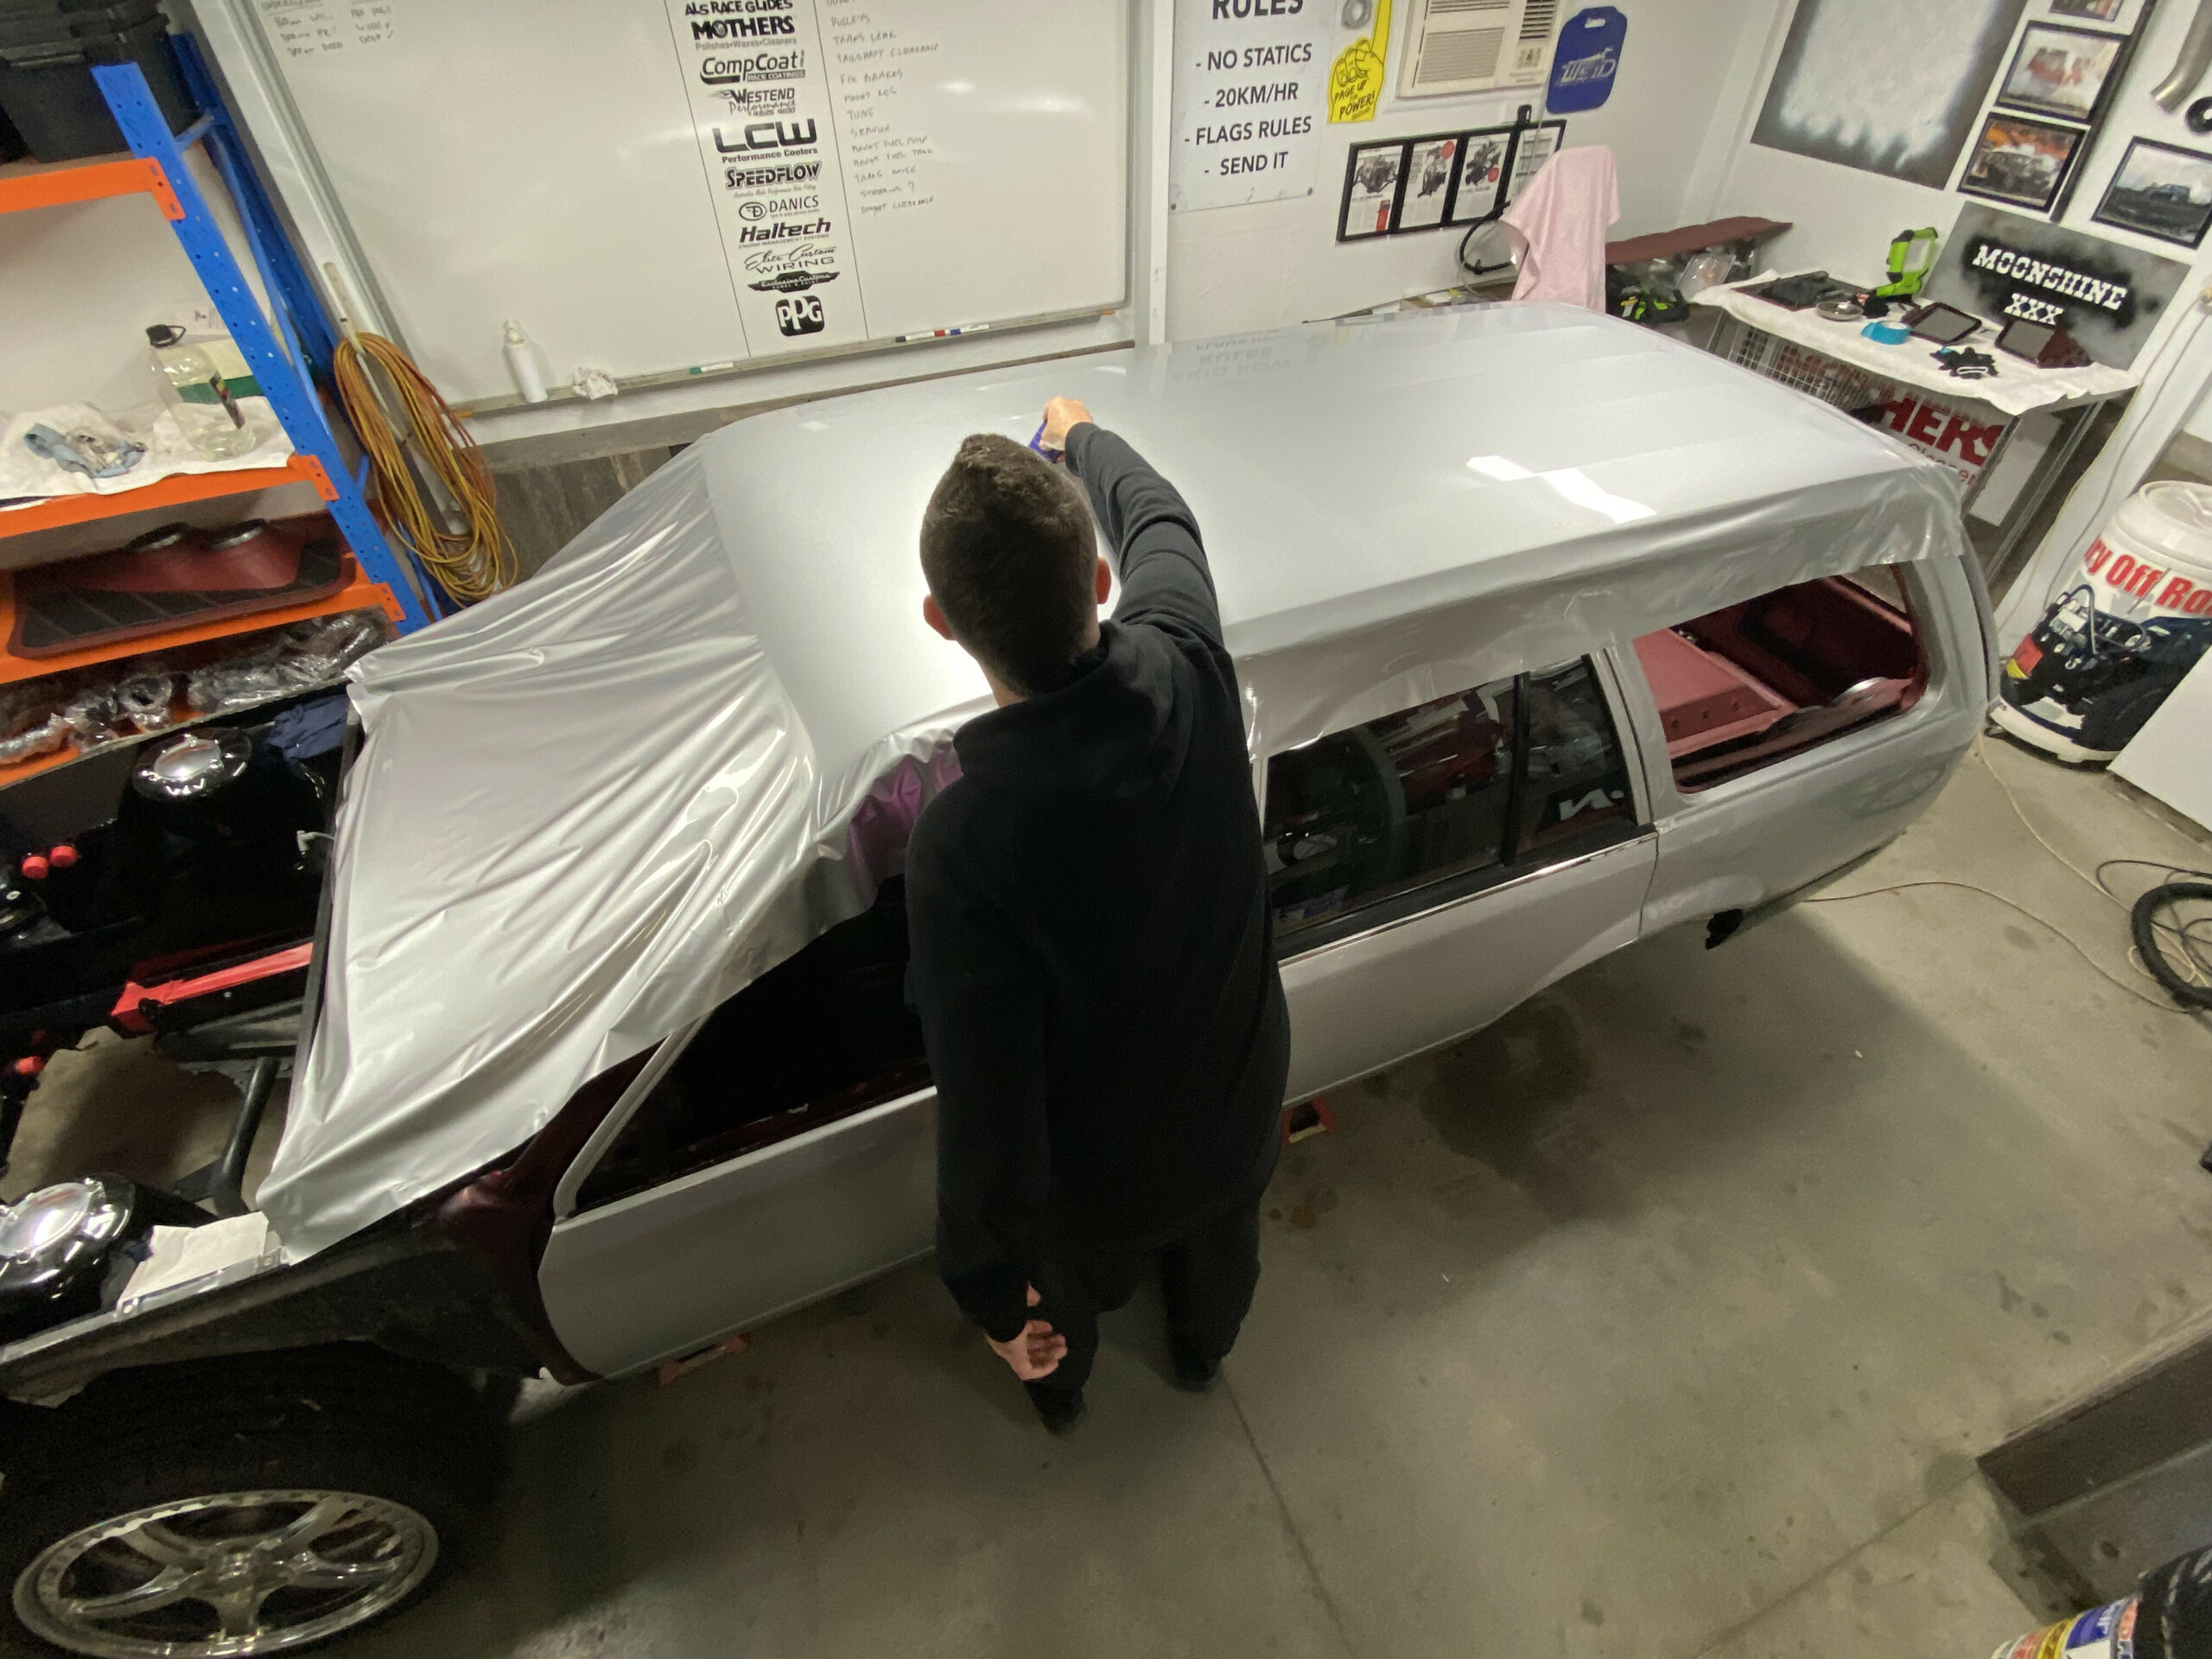
1. Preparation starts with a clean car, which means washing it to remove contaminants and then using a clay bar to remove deeply ingrained grime. “Phil’s car looked clean and glossy, but there were tiny specs of rubber all over it that would have affected the quality of the outcome, so clay barring is a must,” Jake explains.
2. Next, the car must be completely stripped. Phil’s wagon had the front and rear windows, side mirrors, weather strips and bumpers removed. Take a mental note of where these parts join the body and where you’ll be able to tuck and hide seams and joins. The body is then thoroughly cleaned again, including inside panel gaps that are now accessible, to minimise trapped dirt that would spoil the glassy finish of the vinyl wrap. Even something as small as an eyelash will show up under the vinyl, so the quality of the job will come down to how well you minimise contaminants. Jake sprays the panels with a methylated spirits mix that’s then removed with a microfibre cloth to aid in vinyl-to-paint adhesion.
3. Here’s an overview of what you’ll need to complete the wrap. Over the years Jake has amassed a collection of applicators in various shapes and sizes, including flat applicators for large panels and smaller ones for detail work. A heat gun is handy for making the vinyl malleable, while a selection of blades and cutting tapes will help trim the vinyl to shape and size.
4. Jake explains that the requirements of each job dictate where you’ll start. “I like to tackle the more technical jobs like bars, mirrors and door handles first, then it’s a home run on the easier panels like the doors, roof and bonnet,” he says.
For technical areas like the louvres in the front and rear bars, Jake relies on his bare hands or a pair of wrapping gloves rather than a plastic applicator, massaging the vinyl by hand into the intricacies of the front bar.
“The bars on Phil’s car took almost 12 hours because of all the grooves and nooks, but the finished product is so much better than trying to paint the bars to match the vinyl,” Jake says.
5. Wrapping panels like the guards and bonnet while they’re off the car gives Jake the flexibility to move freely around them, and allows him to dictate where he hides his joins and seams.
“On the back side of any panel like doors and bonnets, I like to take the vinyl all the way back to where the inner and outer skins are joined from the factory, and make a neat line there. The goal is to make it look like it’s painted, and attention to detail here helps with that.”
6. For larger panels like the doors, bonnet and roof, Jake brings his experience to bear when it comes to knowing where to start. “On the Commodore wagons, the ridges that run the length of the roof are the logical place to start, and you stretch the vinyl out from there,” he explains. “We had four people helping us stretch the vinyl over the roof, and while it’s possible to do it on your own, extra hands are helpful.” Jake works slowly, applying the vinyl an applicator’s width at a time to ‘glass it down’ – industry jargon for the art of applying the vinyl smoothly with no air bubbles or ‘spines’ (where the vinyl wrinkles and sticks together in long creases).
“You have to take your time on the larger panels, because if you miss a bit, it can be a lot of work to undo,” Jake says. “You’ve got to be patient!”
7. If you do get air bubbles, it’s not the end of the world. “You can use your wrapping glove to lightly tap them out,” Jake says. “Otherwise, a little heat will do the trick – not too much heat though; that’s a trap a lot of people fall into.”
A good-quality vinyl maker like 3M or Avery Dennison will offer ‘air release’ vinyl for wrapping vehicles, manufactured with tiny channels in the adhesive layer that are squeezed flat during the application process. The channels allow bubbles and other imperfections to be rectified without having to remove and re-adhere the wrap. “The air release vinyl is more expensive, but I couldn’t imagine trying to wrap a car without it,” says Jake.
FINISH LINE
THE finished product is so satisfying to look at – a modern reimagination of a look that Phil’s VC wore so well for so long. With glass, weather strips, door handles and bumpers reinstalled, there’s no telling where Jake has cleverly hidden the vinyl joins.
The beauty of vinyl wrap is that it protects the painted finish underneath. If and when Phil decides to remove it, the beautiful custom paint from Exclusive Customs will be good as new underneath.
And as for maintenance? “We liked to clean the paint with a quick detailer-style spray product, and we clean the vinyl the same way – the rubber seems to come off the vinyl easier, too!” Phil says.
A WORD WITH JAKE
How’d you get started vinyl-wrapping cars?
I was just about to finish Year 11 and I was looking for a trade. I did a few weeks as a sparky, but I wasn’t enjoying it. Dad had just built the 2INSANE Mustang GT, and it needed the GT stripes added. Owen Webb put us in touch with Matt Czerny from Vinyl Wraps & Graphics. We stayed in touch, and two years later he helped us wrap GM176. I spent a week helping him apply the wrap to that car, and at the end of the week he offered me an apprenticeship.
How long did it take to learn the trade?
The apprenticeship took four years, and I ended up staying with Matt for eight years in total. With all the craziness of the past few years though, the opportunity came to move out of Melbourne, be closer to family and launch my own business, so I jumped at that.
What’s the wildest thing you’ve ever wrapped?
I’ve wrapped plenty of exotics like Rolls-Royces, Porsches, Lamborghinis – even a 40-foot yacht! I remember working with Honda Australia to celebrate its 50th anniversary; I was wrapping Honda generators and even a Honda outboard boat motor all in gold chrome!
What makes vinyl wrapping so suitable for burnout cars?
A couple of things. Obviously, it’s quick and easy to totally change the look of a car, but from a maintenance perspective, it can help protect the paint finish underneath, and if the car gets damaged you only have to panel-beat it straight and re-wrap certain sections instead of having to colour-match and blend paint.
Could the average car guy or girl try vinyl wrapping with tools they already own?
A good applicator and your knife are the most important tools, but to get a good-quality finish, you’ll want a heat gun as well.
Any other cool projects coming up?
We debuted my brother’s XC ute, SKITZO, at the ’Nats, and there’s another pro-level burnout car that I’ve just finished and sent home to the owner that’ll be getting unveiled soon.
JAKE’S TOP FIVE WRAPPING TIPS
1. DON’T JUST BUY ON PRICE
Whether you’re looking to buy vinyl to try wrapping yourself or paying an installer to do the job for you, Jake’s advice is simple: the poor man pays twice. “Cheap vinyl often isn’t UV-stable, so while it’ll look okay to begin with, it’ll discolour or degrade really quickly. Similarly, anyone who tells you they can do it cheaply is cutting corners – over 90 per cent of the cost of the job is the labour involved in the prep work. The time spent here directly impacts the quality of the job.”
2. COLOUR CHOICE
“Be honest about how you’re going to use and maintain the car,” insists Jake. “Some special-effects vinyls can be really impacted by the elements. For example, I’ve seen stainless steel-textured wraps that trap dirt in the grain, and it looks like the wrap is rusting! If you want a finish that’s clean like paint, stick to solid colours and metallics.”
3. SURFACE PREPARATION
Aside from being impeccably clean, the vehicle itself has to be in reasonably good condition. “Scratches, dents, rust repairs, even flaking clearcoat – you won’t just see all these imperfections through the wrap, in some cases it’ll highlight them,” Jake says. “Think of the car as your canvas – it has to be a clean slate to work on.”
4. DON’T OVERCOOK IT
A heat gun is used to help the vinyl conform to the shape of a vehicle’s panels, but it should be used sparingly, according to Jake. “Too much heat will discolour and over-stretch the vinyl, as well as lead to shrinkage, as the vinyl will try and return to its original shape. Get plenty of practice with the heat gun on test panels of various shapes and sizes before tackling a car.”
5. GO THE EXTRA MILE
One of the easiest ways to turn a good job into a great one is by committing a little extra time towards disassembly and reassembly. “Removing items like mirrors and door handles will help make the job seamless and ultimately help the wrap last longer,” Jake explains. “But if you can go one step further and remove your front guards, bonnet or bumpers, that’ll all help with the quality of the job, and tucking your joins behind panels really makes it appear painted rather than wrapped.”
Comments