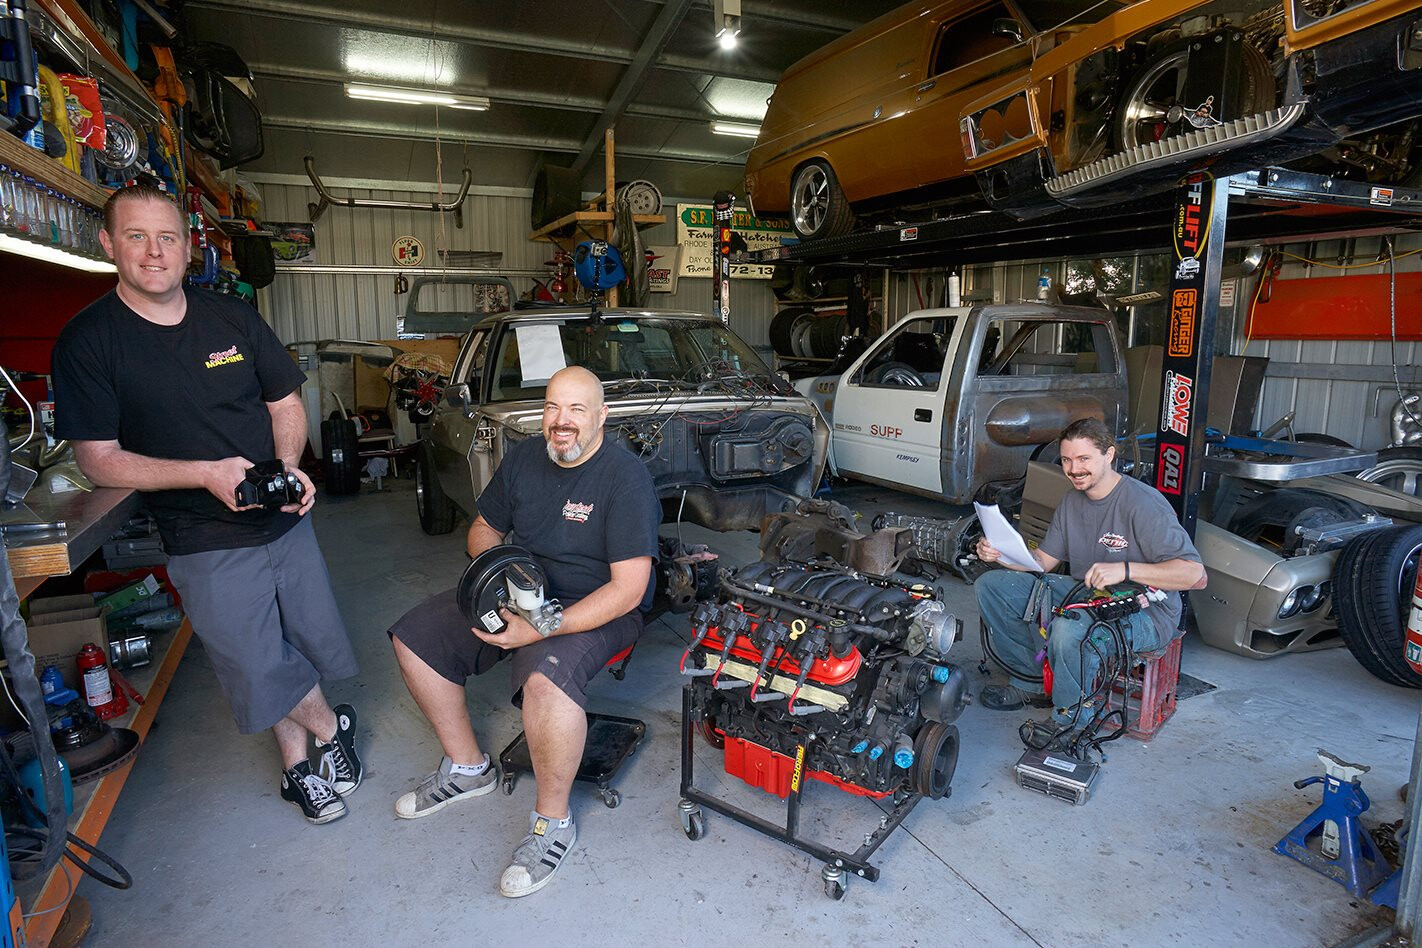
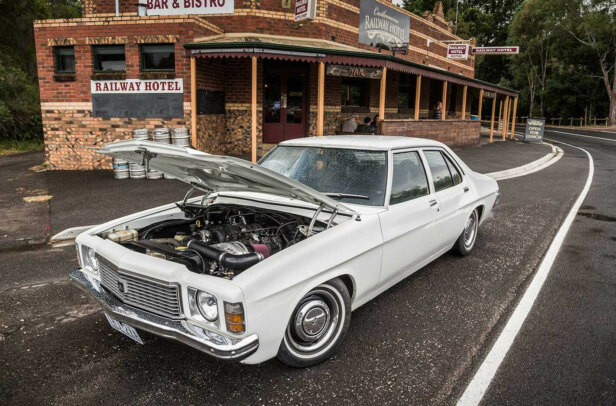
It seems the internet is awash with people asking the best way to put an LS V8 into an old Holden – mainly HQ-WB – but it’s hard to get a definitive answer from the chorus of opinions coming back. So we decided to give it a go ourselves, aiming to get an LS V8 and transmission mounted, wired and plumbed to run in a day.
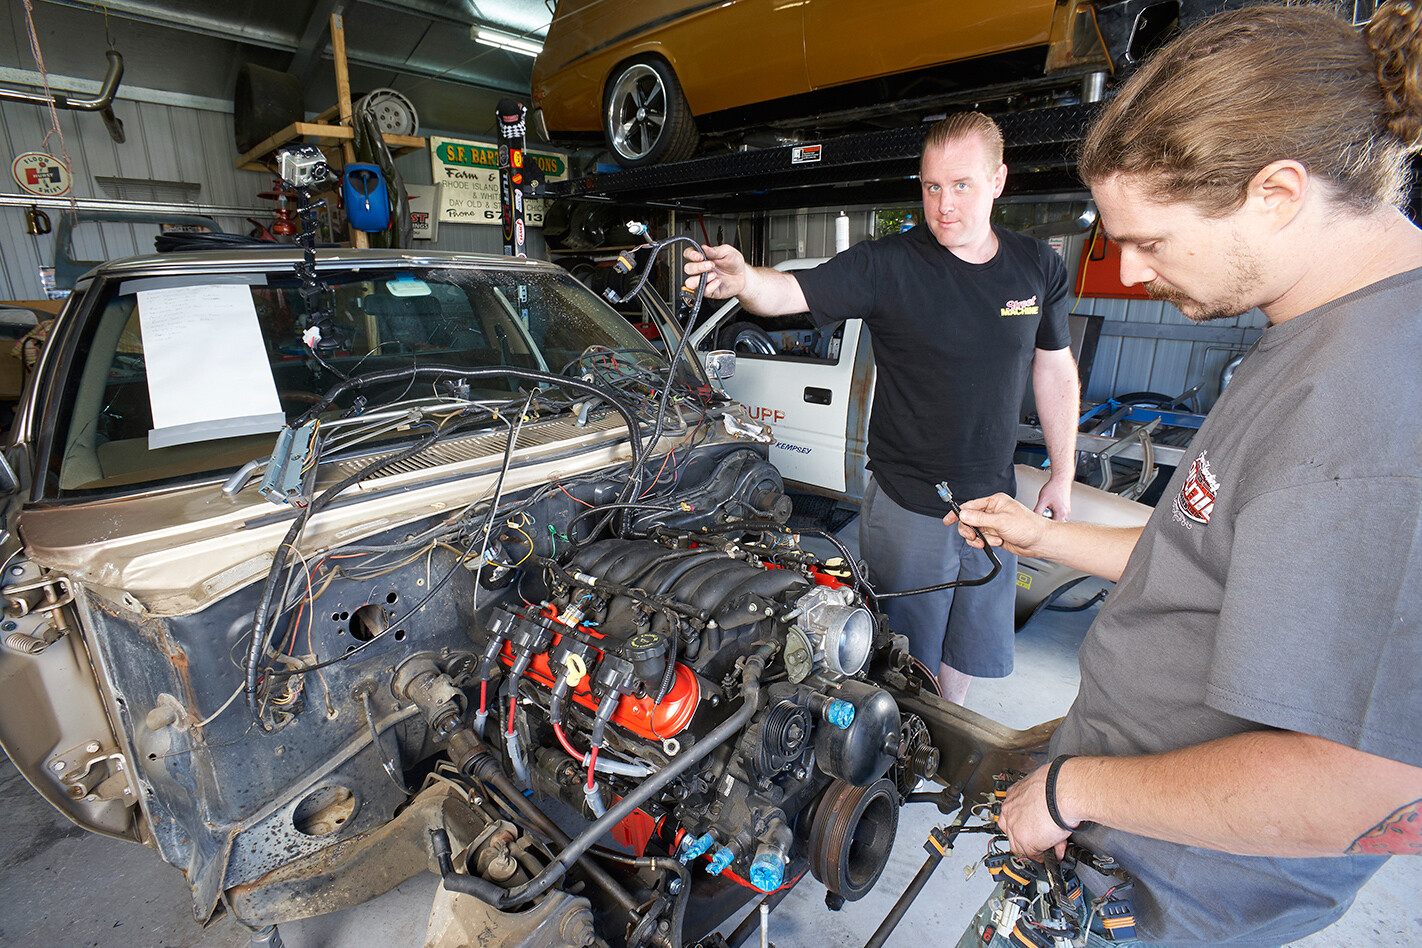
My mate Scotty Barter had planned on sticking a cammed 5.7 LS1 and Tremec T56 six-speed manual into his HJ Sandman van, but couldn’t resist a cheap supercharged LSA crate motor when it popped up. This was where his dad Richard’s HJ one-tonner came into the picture. Scotty wanted to give his dad’s commercial a big birthday; Richard has owned his HJ since new but, aside from a retrim eight years ago and a couple of hand-me-down Holden V8s from Scotty’s Sandman, the venerable old workhorse hadn’t copped many upgrades since ’74. So the LS1 and T56 were earmarked for the tonner.
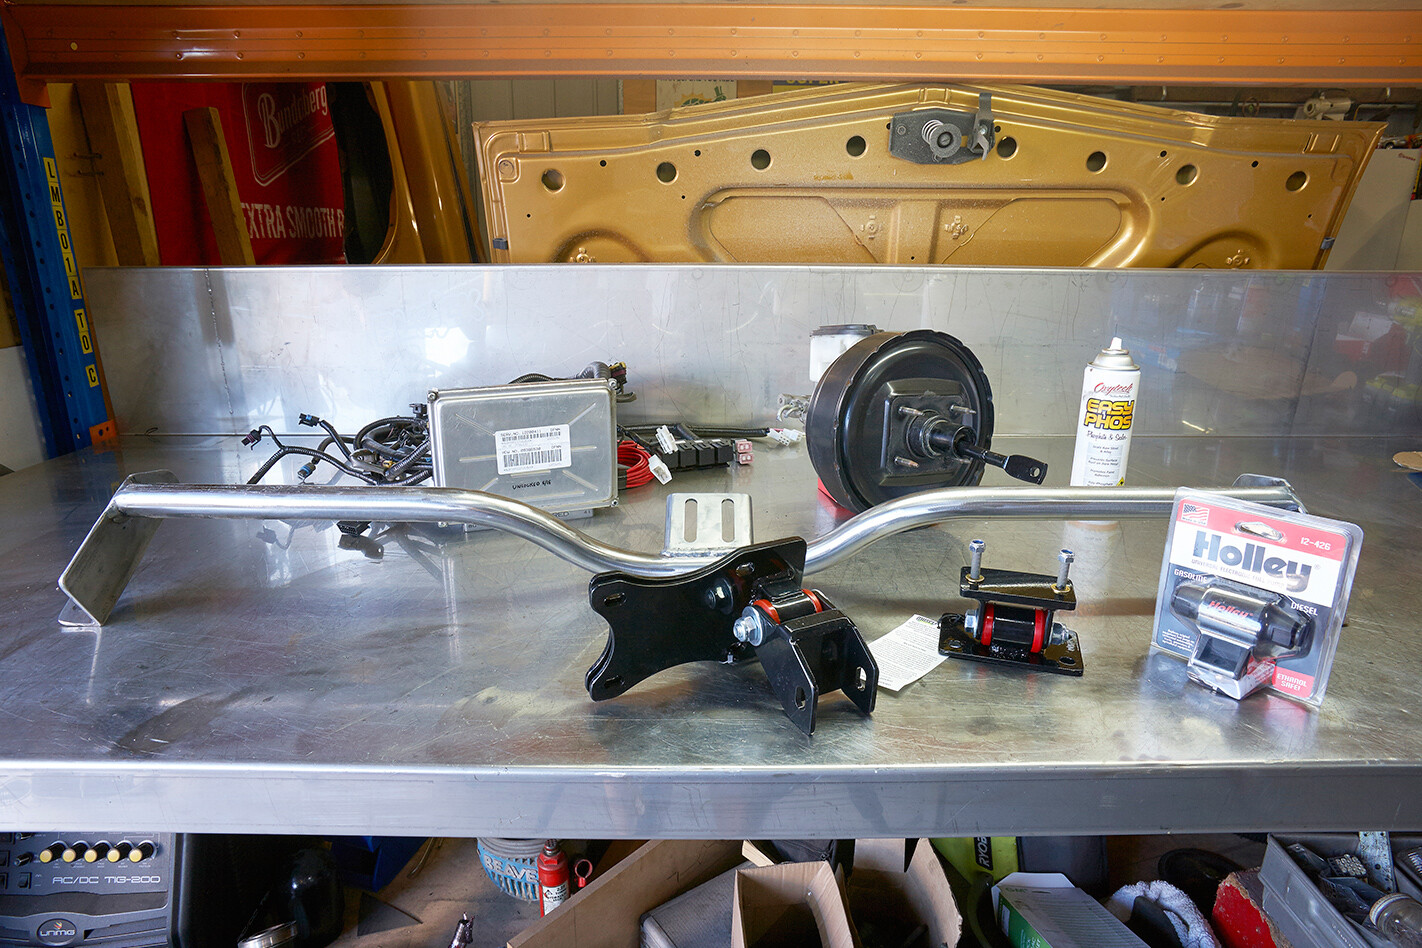
Preparation was key to getting the job done in one day, so Scott started by writing out a list of parts he knew we needed to make the swap happen. For our goal of getting the engine in and fired, the required parts list was fairly simple: engine and transmission mounts, customised engine wiring harness, unlocked ECU, an EFI-ready fuel system (see breakout, page 136), aftermarket extractors and a sump.
While he could have made custom mounts, sliced and diced a stock sump and modified the loom himself and saved a few bucks, Scott chose to save bulk time and effort by buying off-the-shelf parts for the swap. And this is where most punters come a cropper.
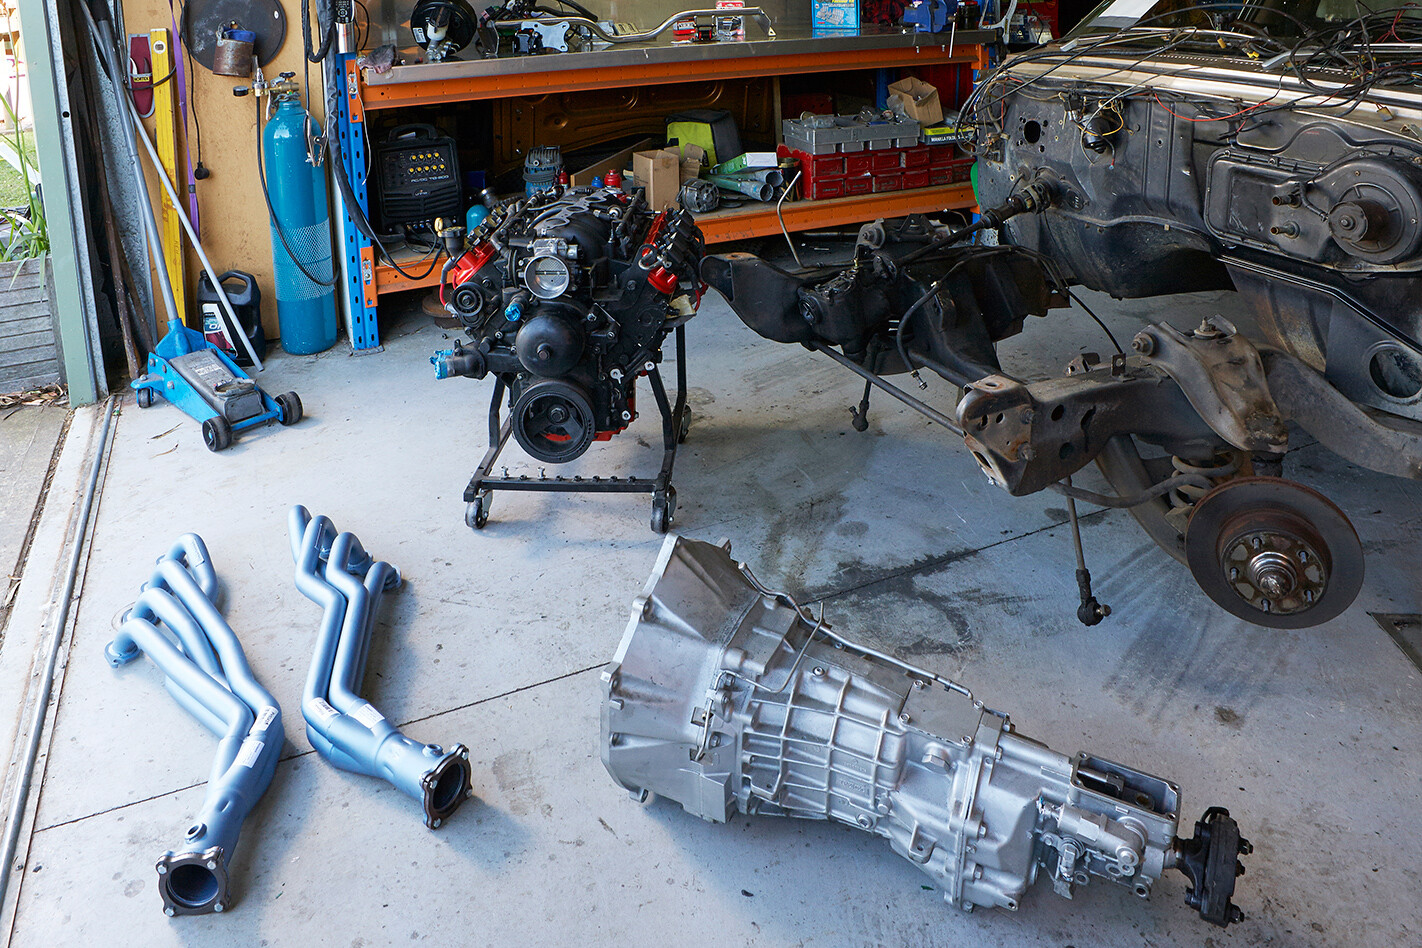
Mixing and matching components is part of street machining, but when it comes to engine conversions, it is safer to go with proven combinations. Scott knew from previous experience on his pano that using engine and transmission mounts supplied by Tuff Mounts, extractors by Pacemaker and a Mast Motorsports sump meant everything would drop in and clear with no hassles. The combination of the Mast sump and Tuff Mounts would also allow the engine to sit low, so you’d get a much better pinion angle (4.5°) and less tunnel modification would be needed.
 Scott dropped a stock wiring loom to suit the LS1/T56 combo off to Justin Stark at Ultimate Conversion Wiring, who cut the wiring down to only what was needed to run the late-model motor in a 1970s chassis. Many modern cars have body control modules through their wiring looms, which tell the ECU everything is working correctly and to run as per normal. If you don’t remove the vehicle anti-theft system (VATS) from the loom, the car will simply not run as it is being told something is drastically wrong. Looms set up for an automatic car will also require work, as the stock four-speed auto is electronically controlled and needs an externally mounted control box to select gears and show temperature outputs.
While the wiring was being prepared, Scotty took a stock VX SS Commodore ECU around to Russo Performance to have a base tune installed so the car would fire. If you don’t do this, the ECU won’t turn the car on until it sees a signal from the factory key turning in the factory barrel. Along with the modified wiring harness, Scotty was pretty much all done on the electrical side of the project for almost $1500.
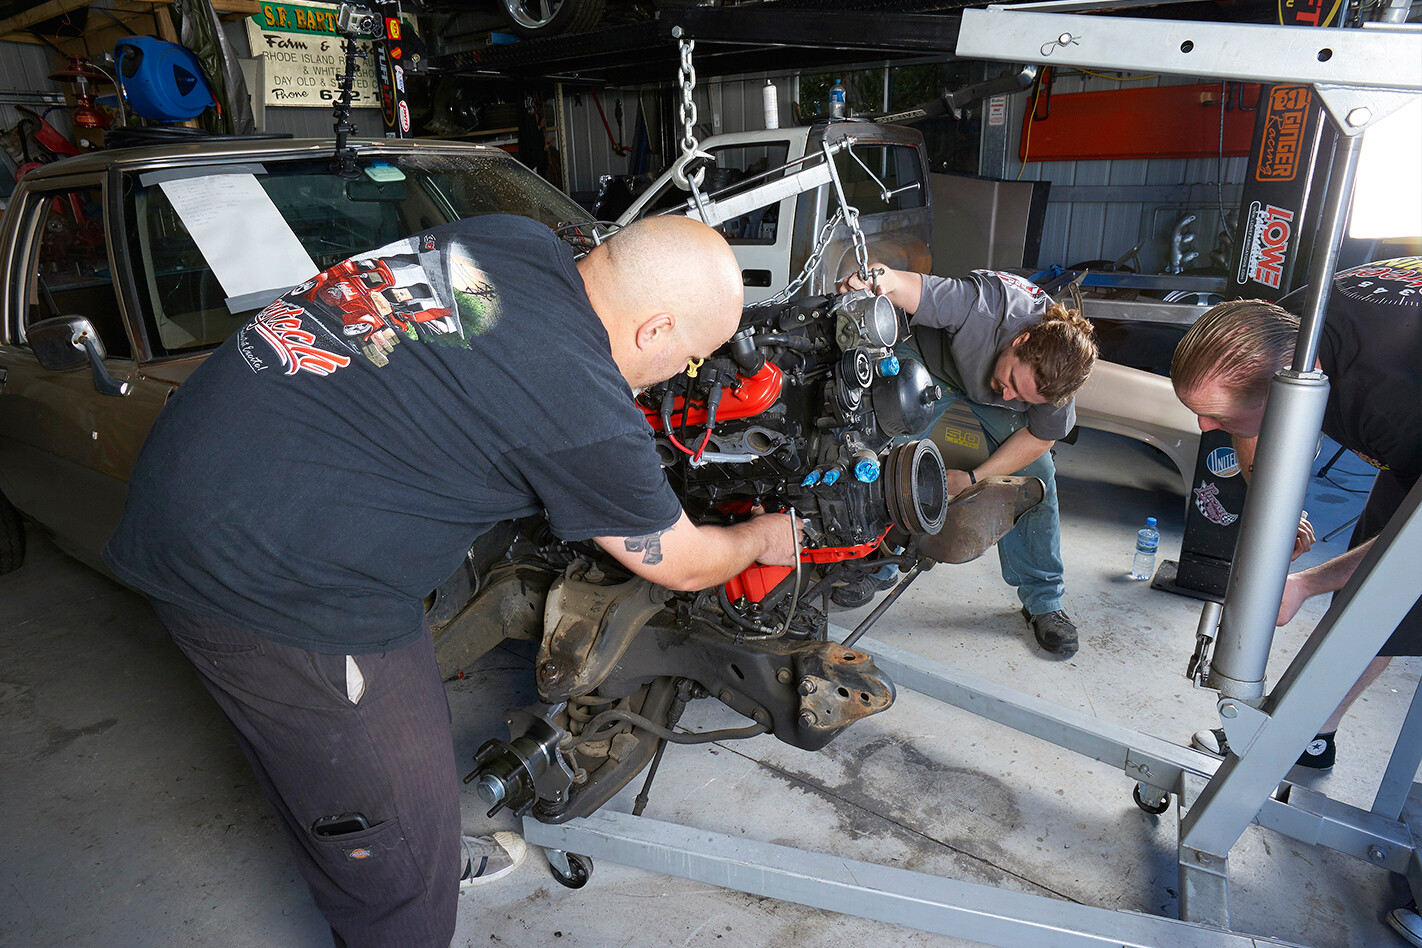
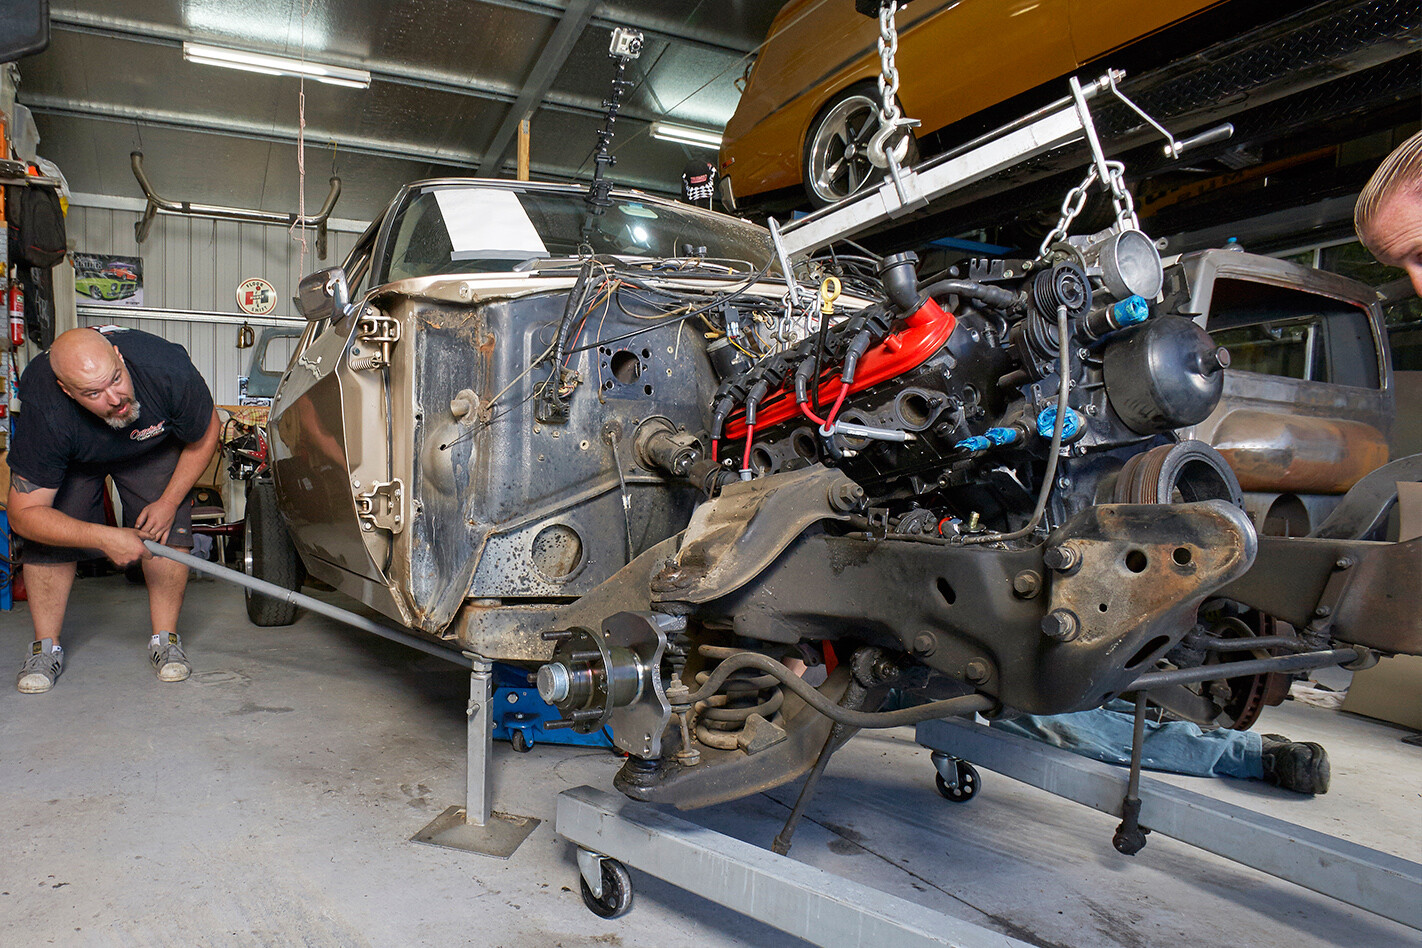
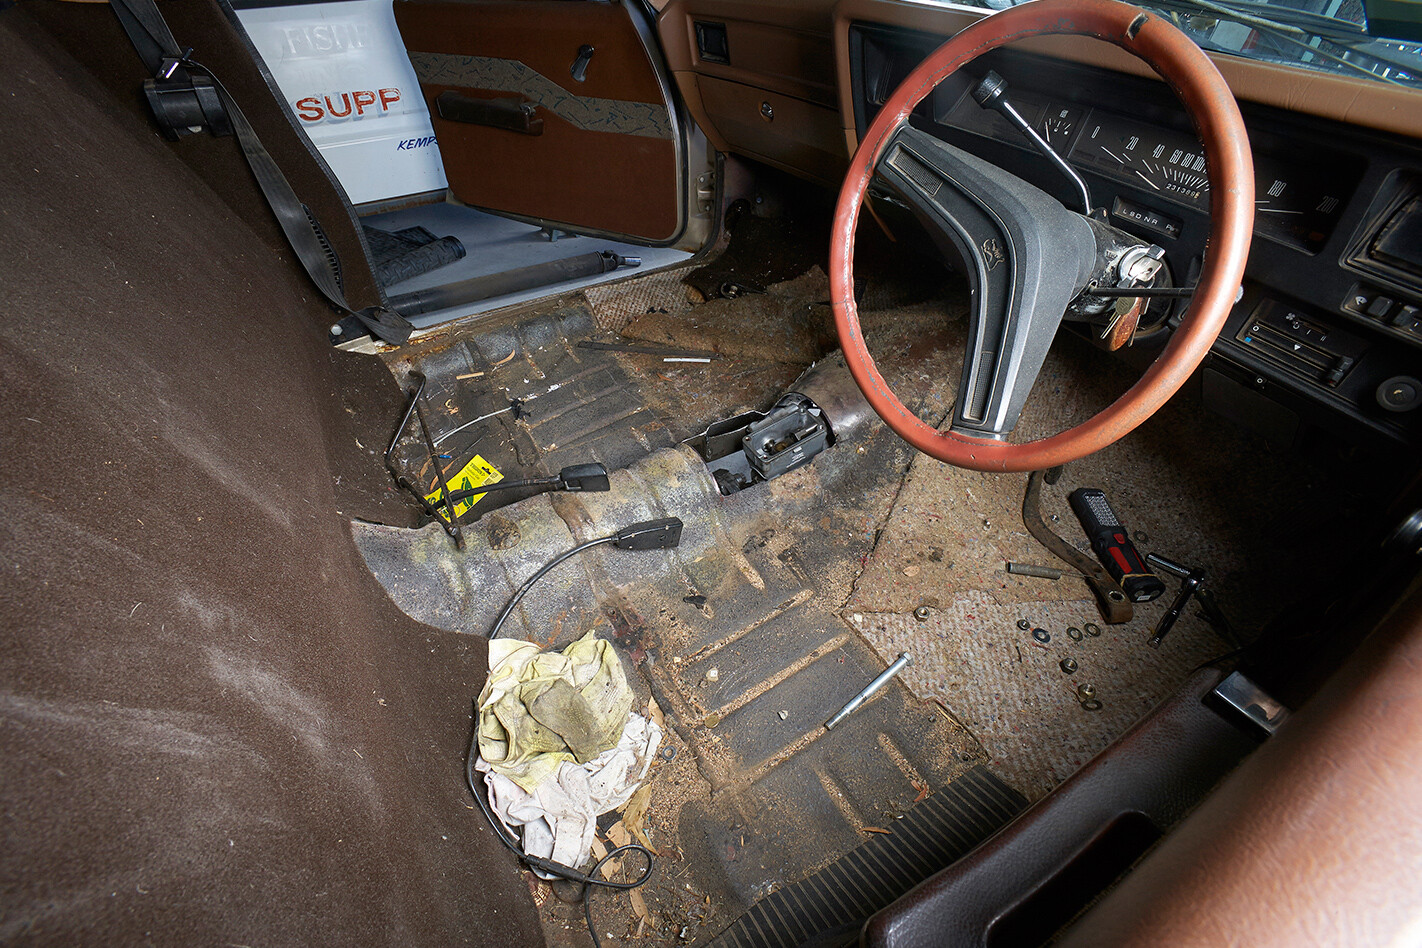
Scotty also stripped the HJ’s front end and interior, and removed the old drivetrain one afternoon after work. The stock pedal box, brake booster and master cylinder and wiring loom were being replaced, so those items all came out before Scott, our mate Adam ‘Fret’ Moretti and I tackled the conversion that Saturday.
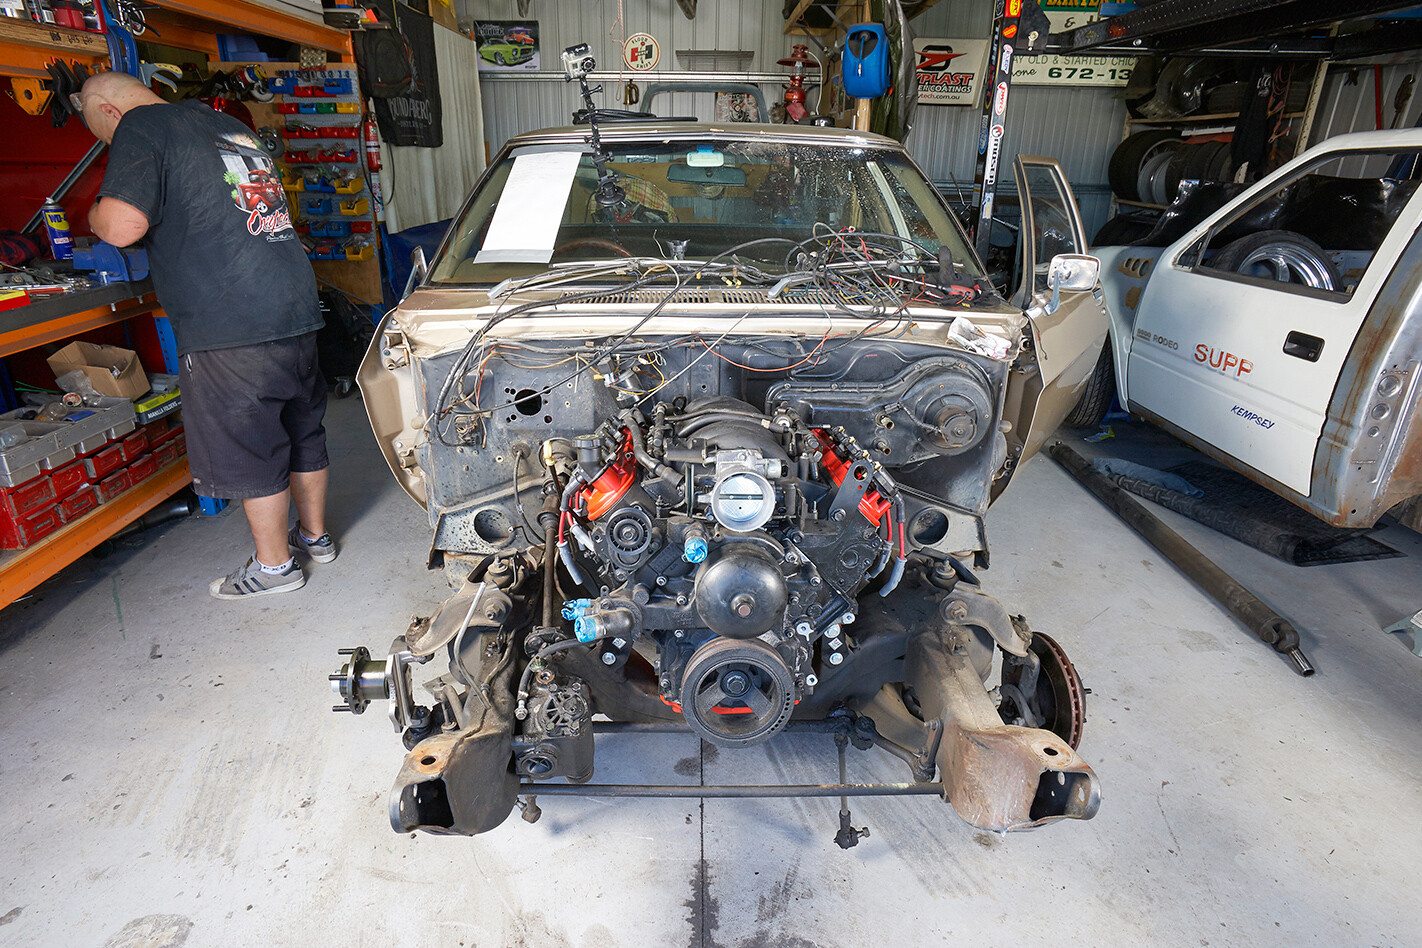
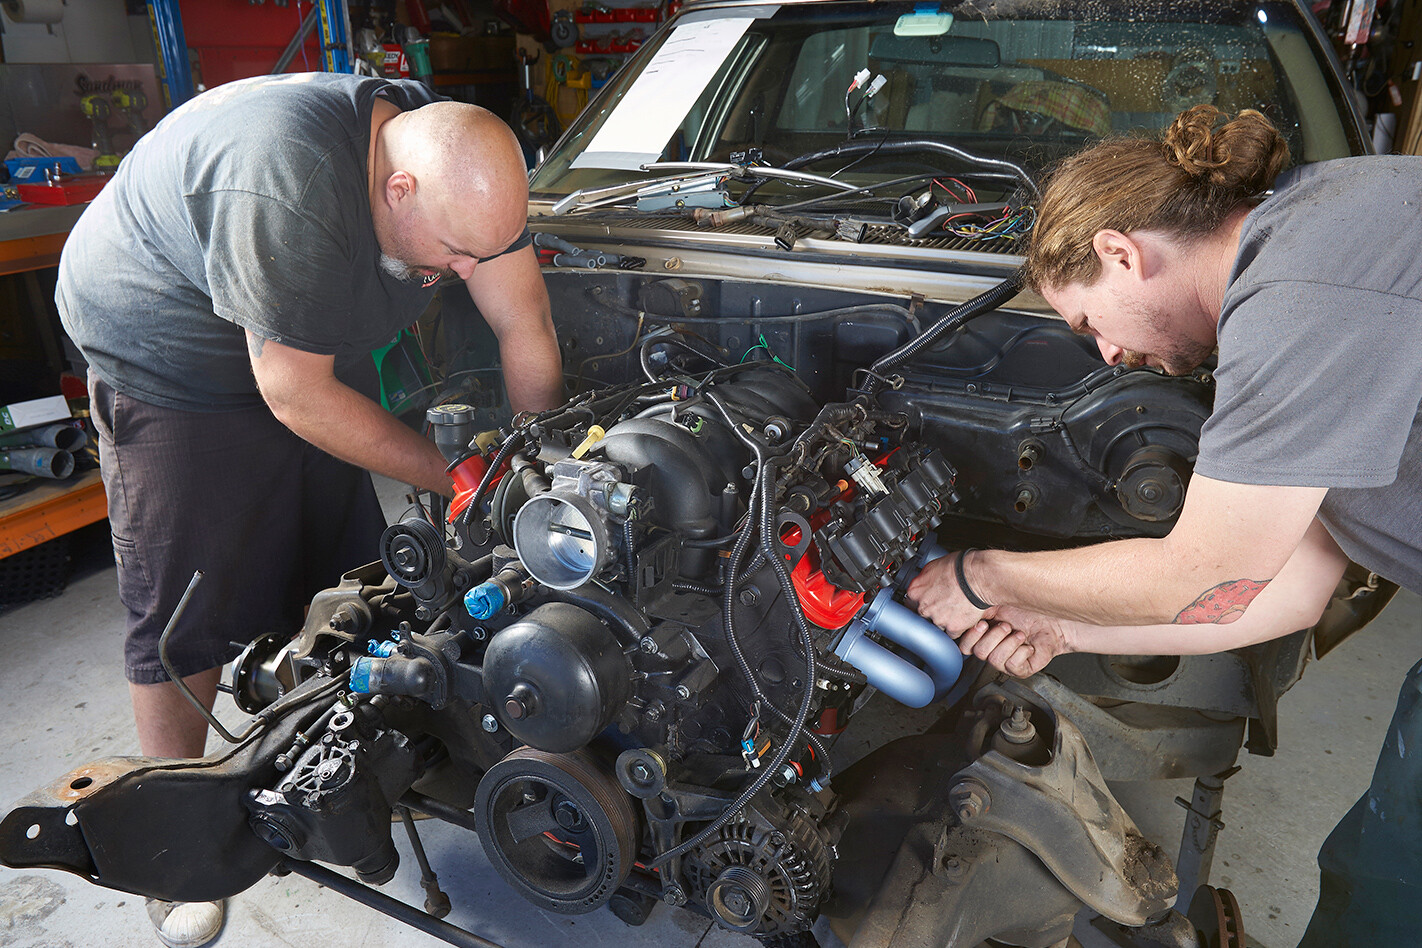
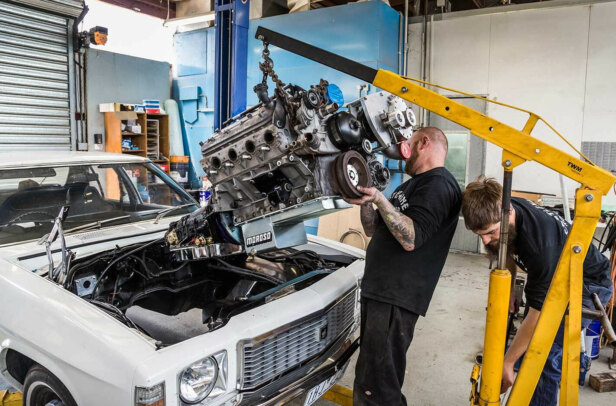
After photography duties were done, the actual swap started a bit after 10am, with the engine and transmission being bolted together. We fitted the engine mounts but left them slightly loose, as the Tuff Mounts have some adjustability in them, allowing us to fine-tune the perfect engine and transmission position.
 Tremec’s T56 is a huge bugger of a ’box, so the stock transmission tunnel needed a bit of cutting at the front and passenger side of the shifter hole to fit properly. Even with that work, however, bolting the engine and gearbox into the tonner took around 30 minutes, with the supplied Tuff Mounts transmission crossmember and mount meaning we didn’t have to do any stringlines or bust out the MIG welder.
There are several sump options that will suit the HQ-WB chassis, but Tuff Mounts recommends the Mast Motorsports unit, and it fits like an OEM part. Interestingly, we hit a snag with the oil filter, as Scotty had a spare one for his LSA and was going to fit that, but it turns out the mount is different between LS1 and LSA, so that delayed us 20 minutes as we ran down to Repco to grab an oil filter for a stock early LS1.
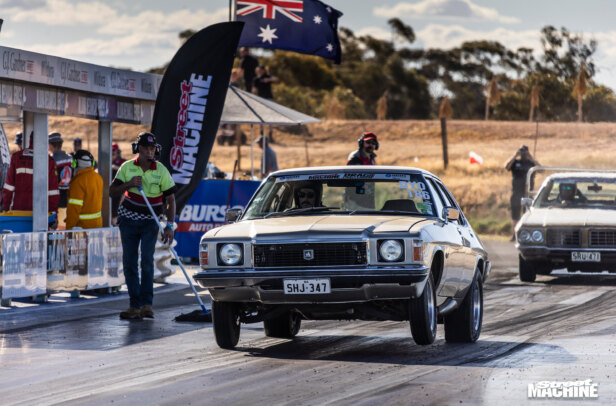
We managed to get the car ready to start with about three hours’ work, but ultimately weren’t able to get it idling due to not receiving our fuel pumps and surge tank in the post in time. Scotty, Fret and I maintain that if you had a full list of all parts, a team of competent street machiners could perform the LS1 swap and drive their Kingswood out of the shed within three days.
STEP-BY-STEP
 1 The basic bones of the swap are pretty simple, with a 5.7-litre LS1 and T56 Tremec six-speed manual out of a smashed VX SS Commodore that Scott had Russo Performance chuck a cam in, as well as Pacemaker extractors to suit this swap and a Mast Motorsports conversion sump
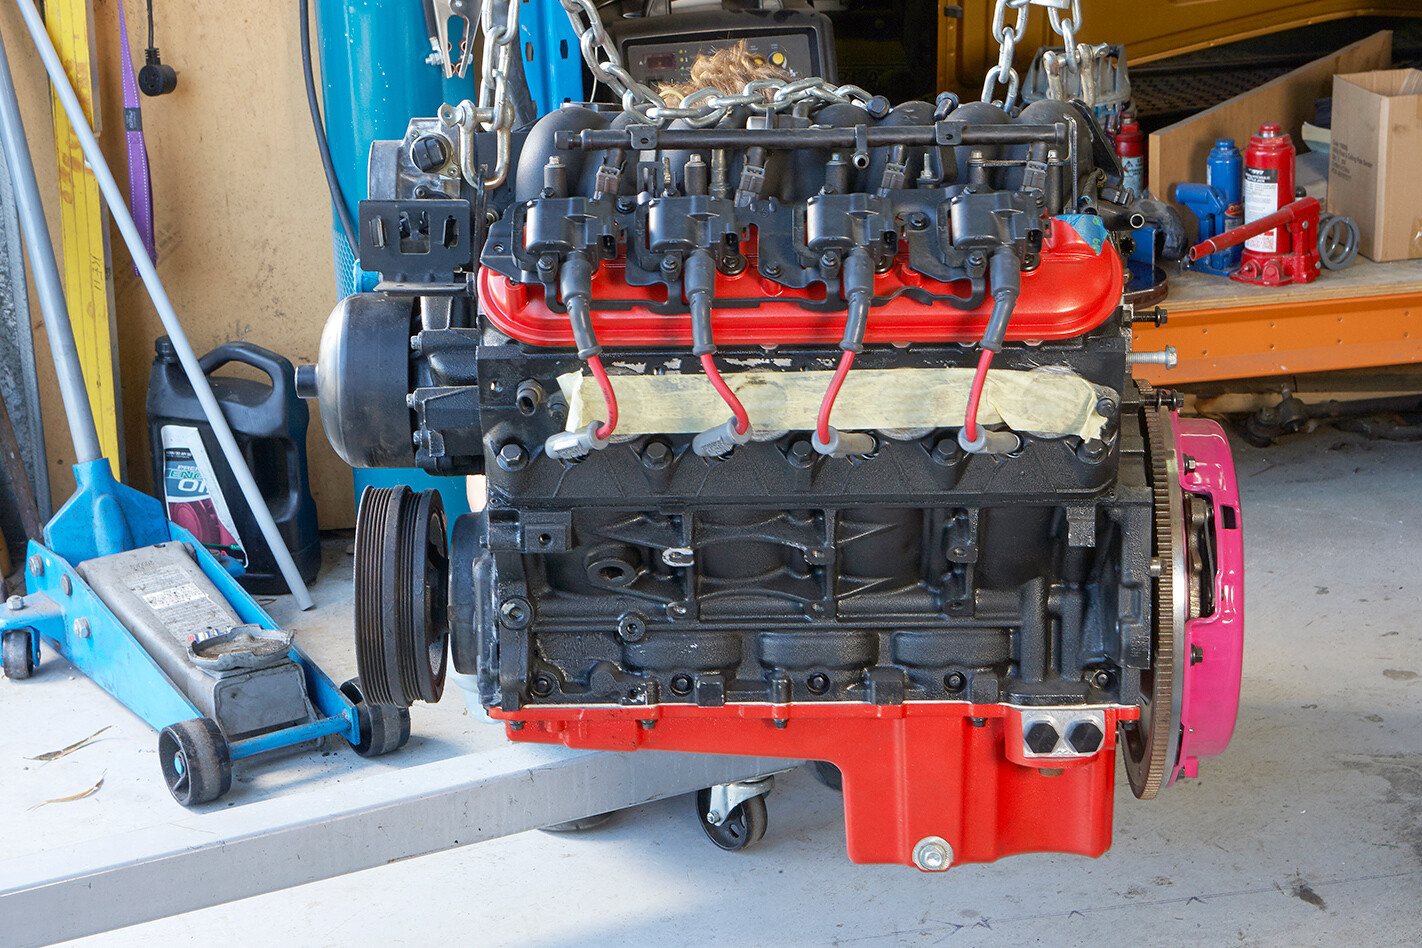 2 Other oil pan options for LS swaps into HQ-WB include using a stock F-body Camaro or H3 Hummer pan and dipstick, while aftermarket options are available from Moroso, Holley and GM Performance. The big issue many punters find when doing their swap is that their sump doesn’t work with the engine mounts and headers they’ve chosen, and they get clearance problems
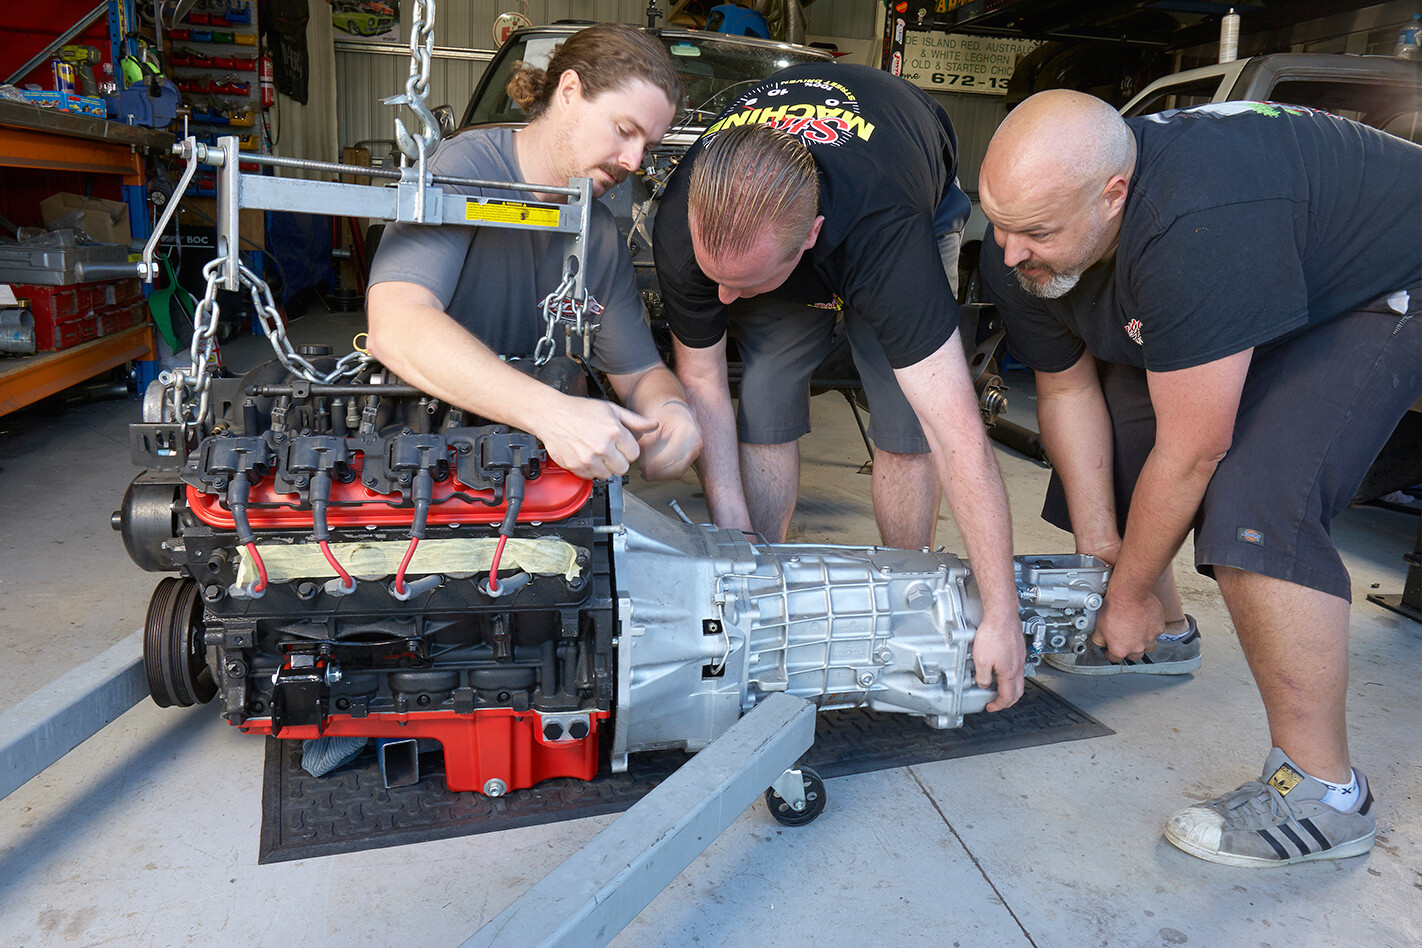 3 The T56 is a big bugger of a gearbox, but it was still easy for two of us to line it up and wiggle it into the back of the LS1’s flywheel and clutch assembly. While you could install the engine and transmission separately, we found it much easier to pull the HJ’s front end apart and slide it in all in one go
 4 We put the starter on before installing the motor and ’box in the car, but then found we needed to remove it to make fitting the extractors and wiring loom easier
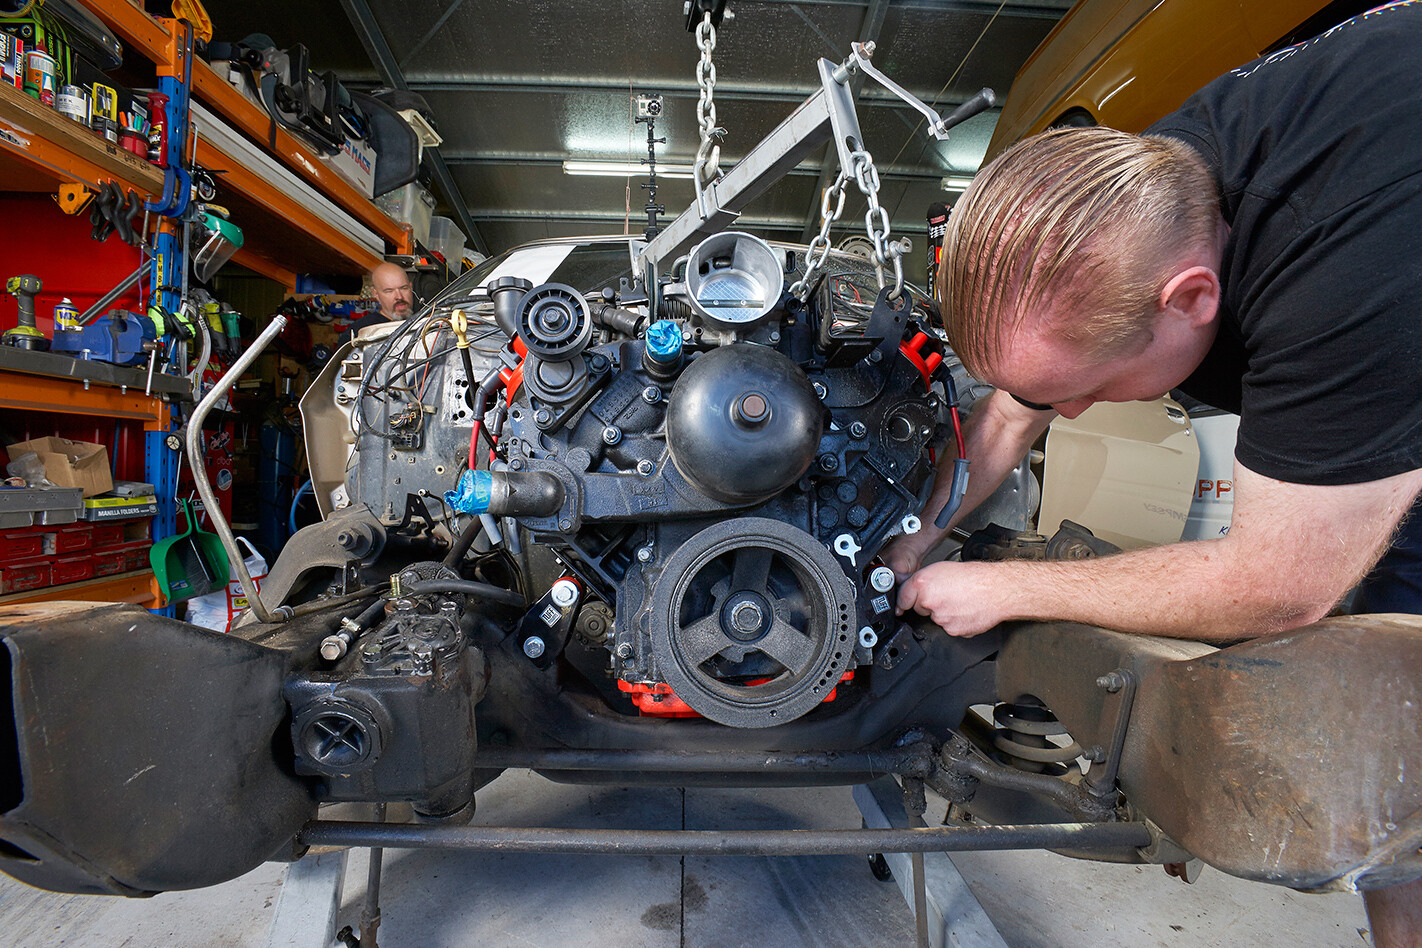
 We also threw the alternator on while we were getting the engine mounts lined up just to check everything cleared, before removing the alternator again to fully tighten the passenger engine mount
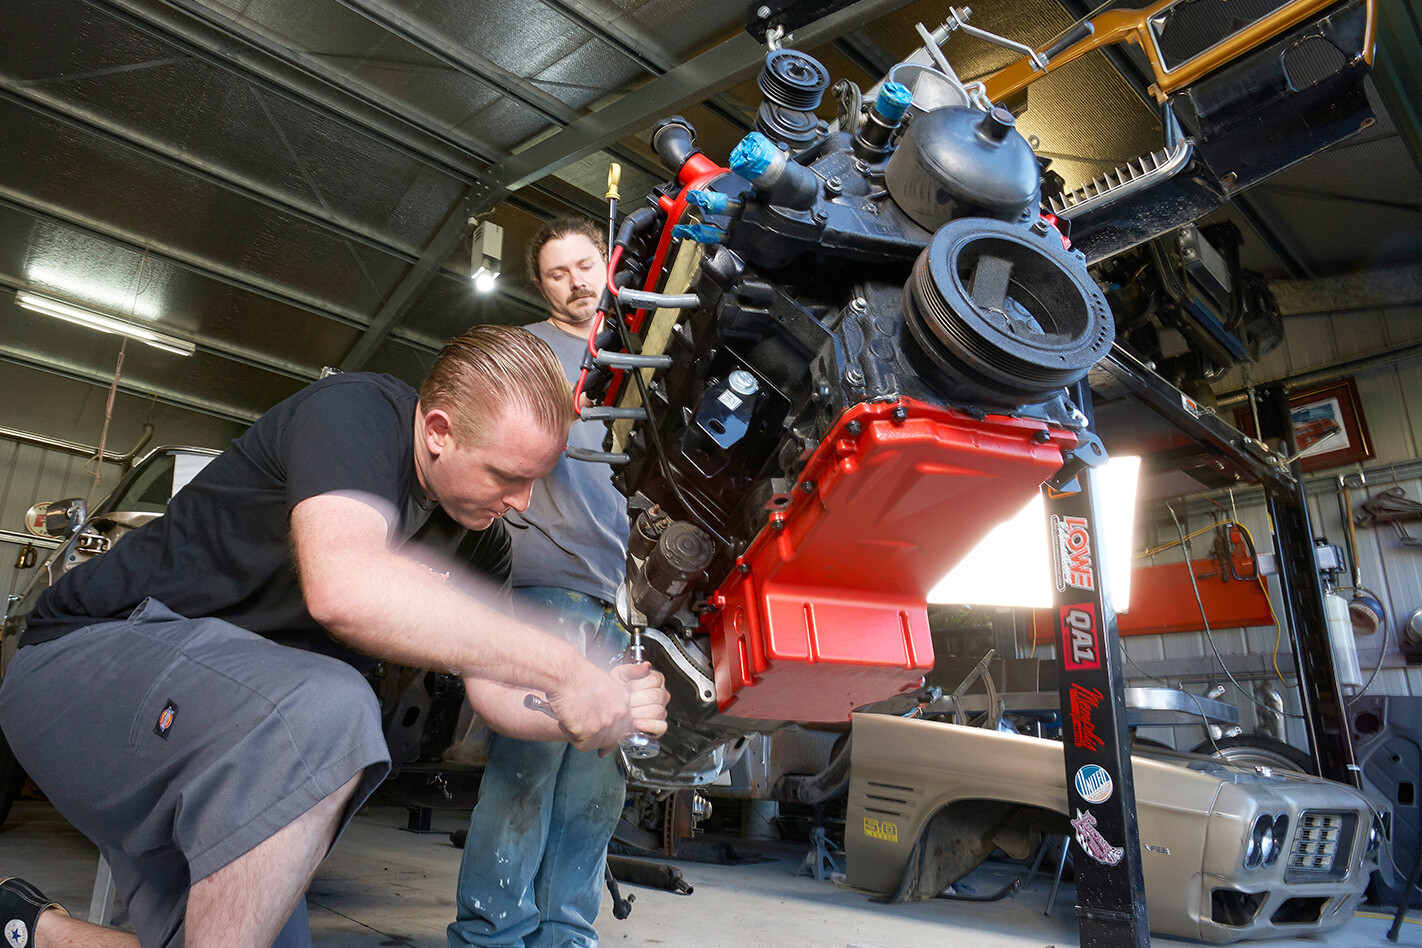
 5 We had a load-leveller on our crane, but were able to manhandle the back of the T56 between the crossmember and transmission tunnel without tipping the combo too far upright. It would still be a good idea to have a load-leveller on hand to make it possible to install the engine and gearbox on your own
 6 Scotty chucked his trolley jack under the T56’s output flange to bring the gearbox and engine level, allowing us to position both in their perfect spots without swinging around. It also made dropping and raising the T56 much easier as Scotty opened up the shifter aperture with a grinder
 7 You have to leave the extractors off the LS1 when slinging it into the engine bay, as it is pretty much impossible to get to the engine mounts unless you have sockets and extension bars for fingers. The Pacemaker long-runner four-into-ones still slotted in easily past the steering column, though we did whip the starter motor back out to maximise space
 8 Adjusting the Tuff Mounts so the engine sits as far back as possible might not seem like a huge deal, but remember you’ll need clearance for the fan and radiator at the front, and because the stock LS1 water pump pulley is huge, this can sometimes present clearance issues with overly thick radiators
 9 You can see here the back of the T56 is just too big for the stock HJ transmission tunnel. This meant we’d be getting the grinder out to liberate space, then getting a basic box bent up to cover the hole, which we’ll MIG-weld in before we put the interior back together
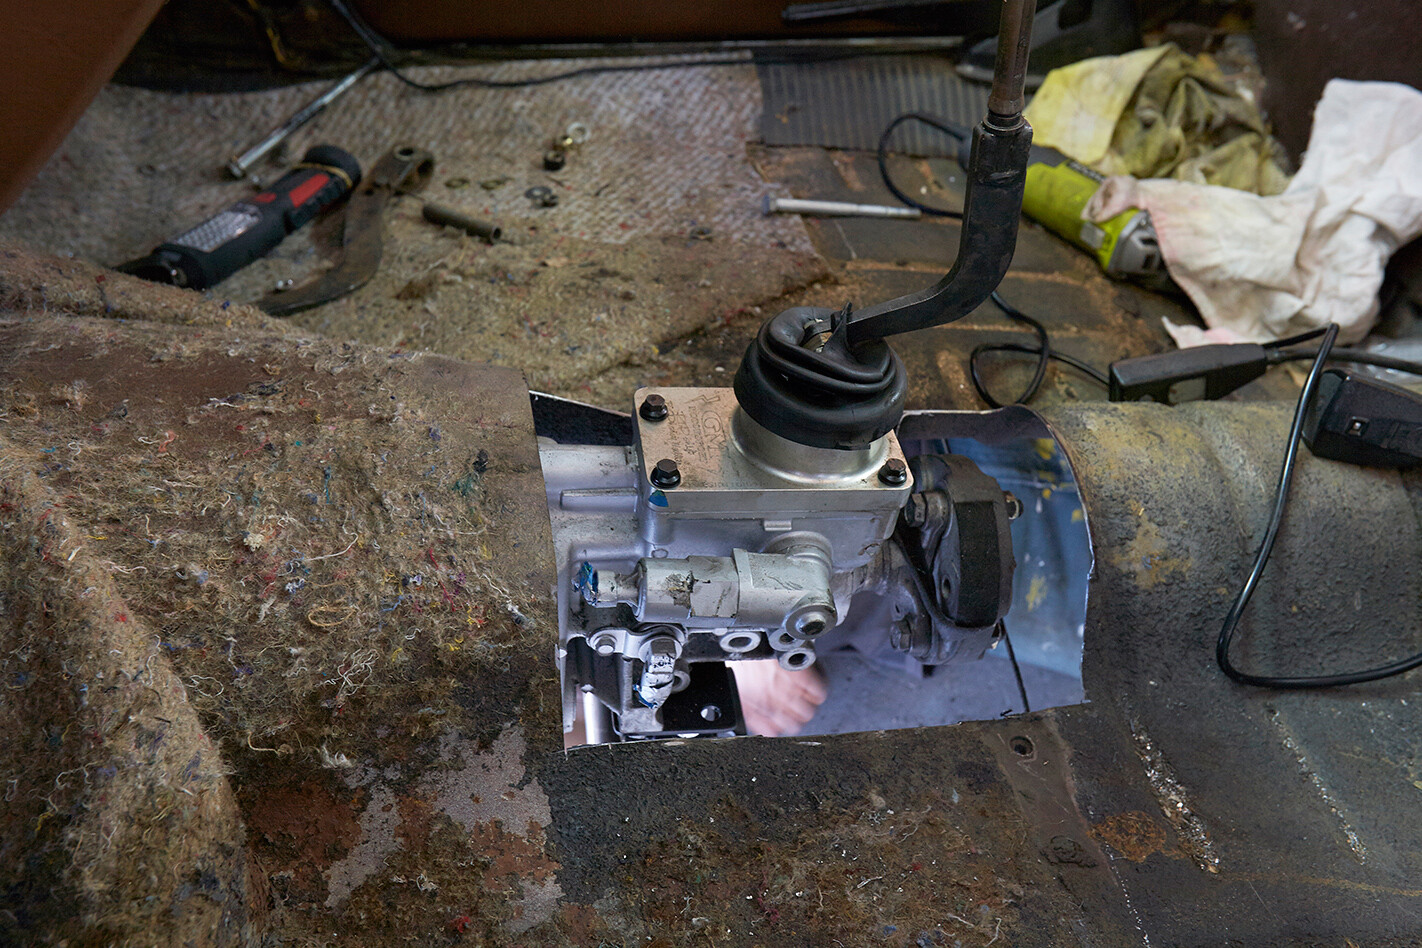 The shifter is a GM Motorsport Rip Shifter that Scotty had kicking around in the shed, but is far nicer to use than the stock one
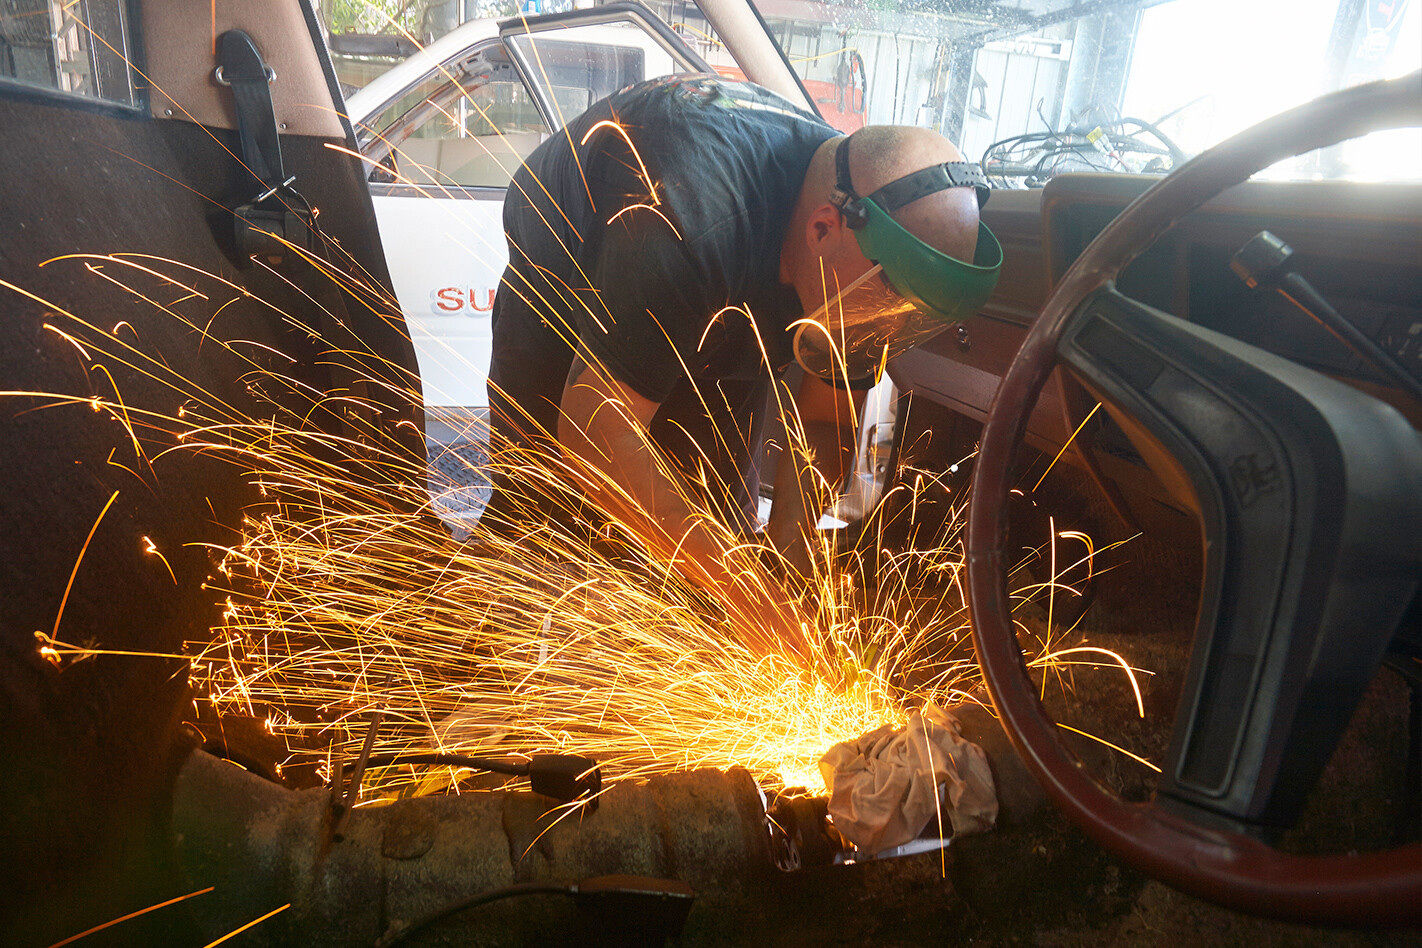 10 Scotty liberates space for the back of the T56 by removing a section of the transmission tunnel that slopes downwards towards the shifter hole, as well as a slice out of the passenger side of the tunnel. After each sliver was cut out, we jacked the transmission back into place and threw some bolts into the crossmember to check clearance
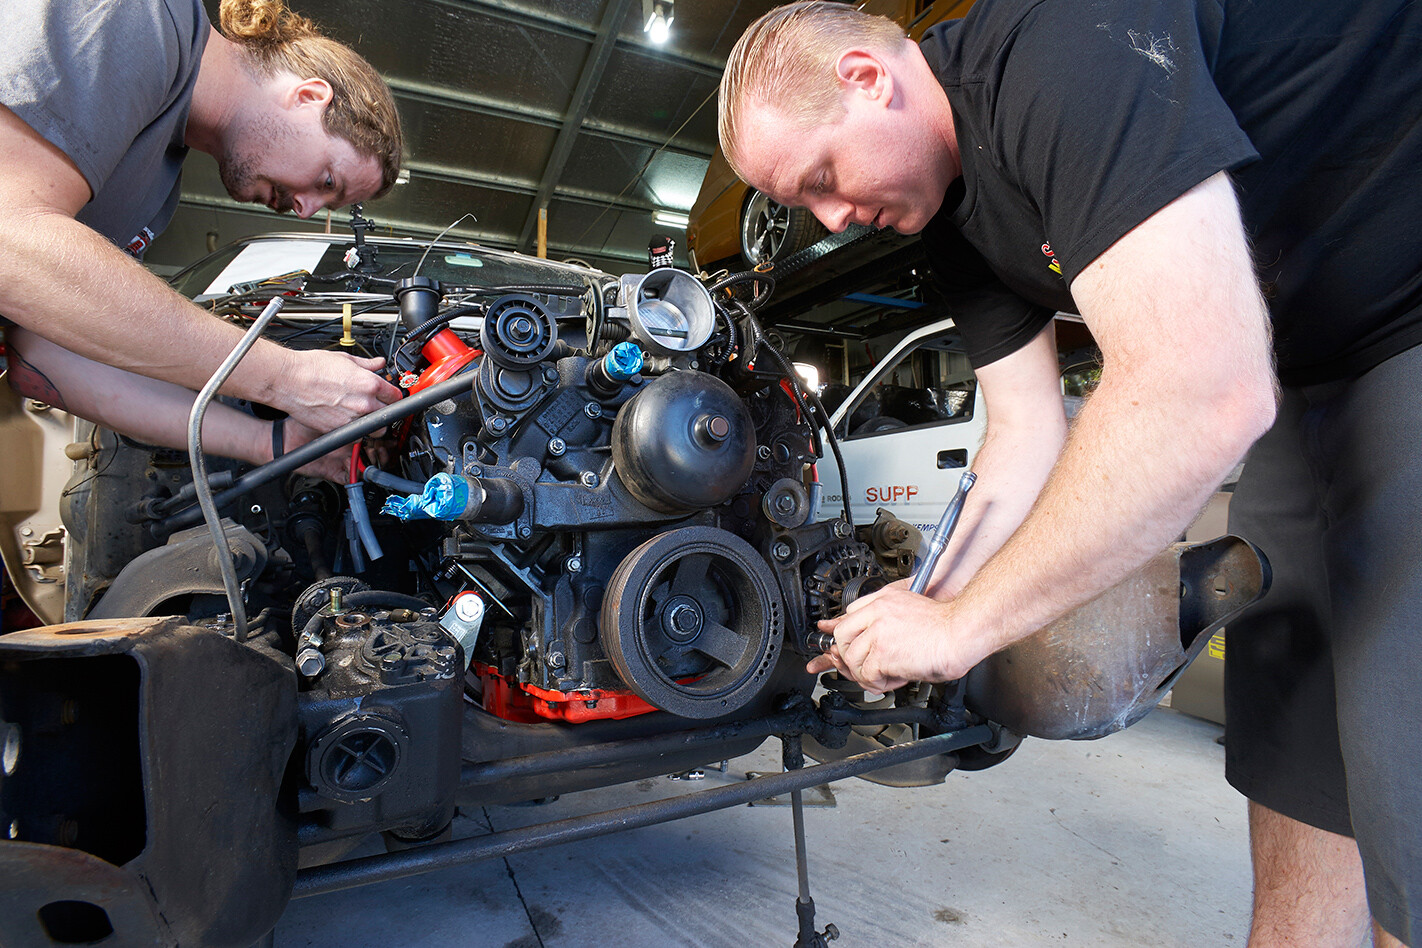
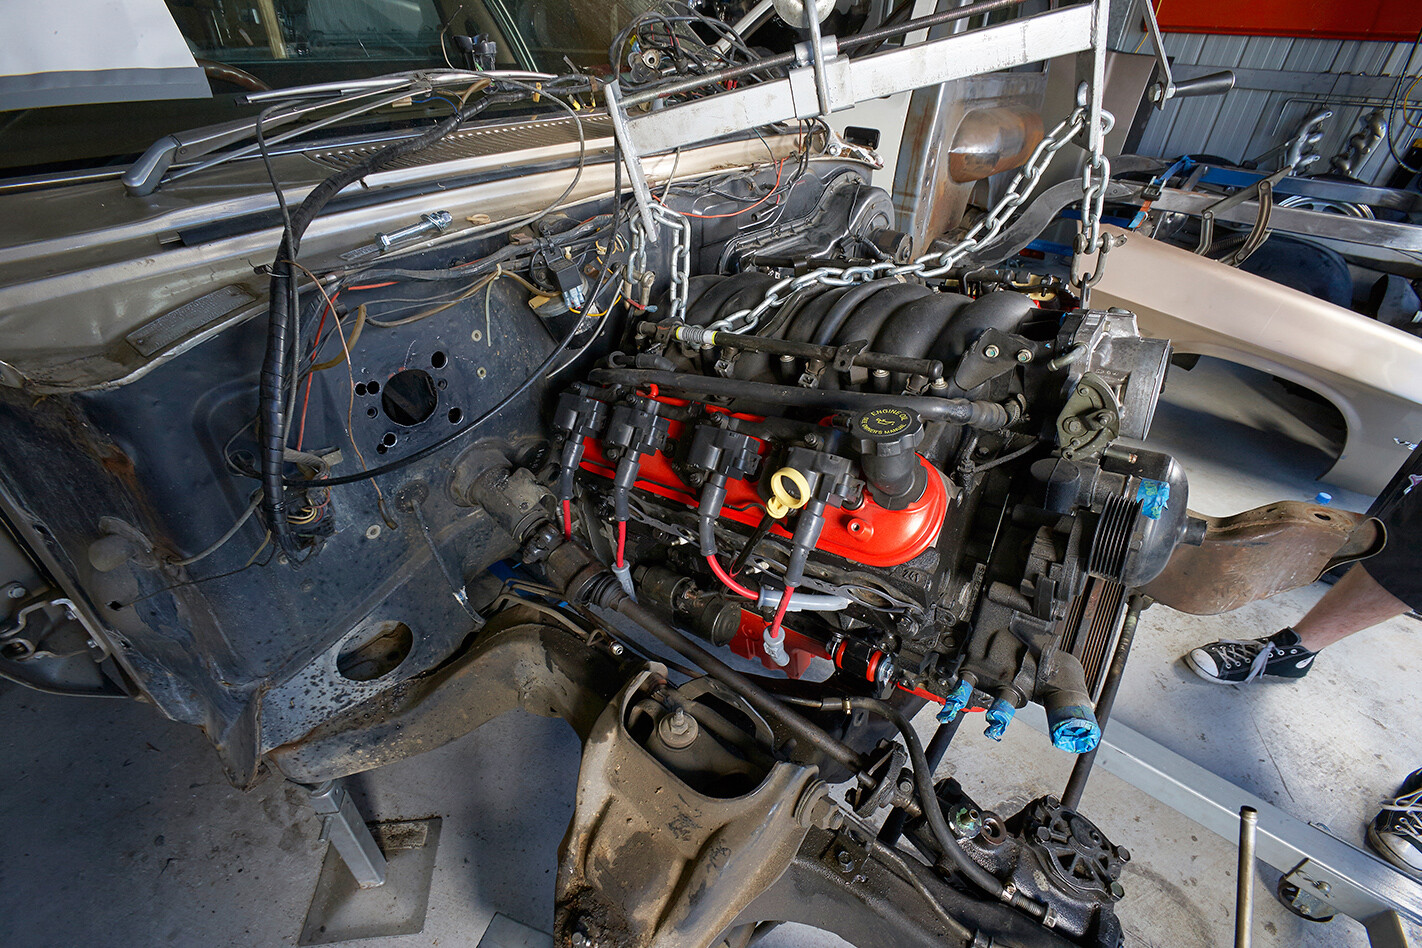
 11 With the engine and transmission bolted in place we started running the pre-made wiring loom and getting the ECU ready to plug in. Heater hoses will have to be custom jobbies as they have to cross from the driver’s side to the heater box on the passenger side of the engine bay
 12 Fret (right) and I get busy connecting the wiring loom, starting with the coilpacks and working down from the top of the motor. Because of the fuel system issues, we didn’t bother fully installing the ECU inside the cabin, and jerry-rigged the battery on a stool next to the starter motor just to get the LS1 kicking over. Once the fuel system turned up it was an hour’s work to install the battery and mount the ECU on a custom bracket on the transmission tunnel
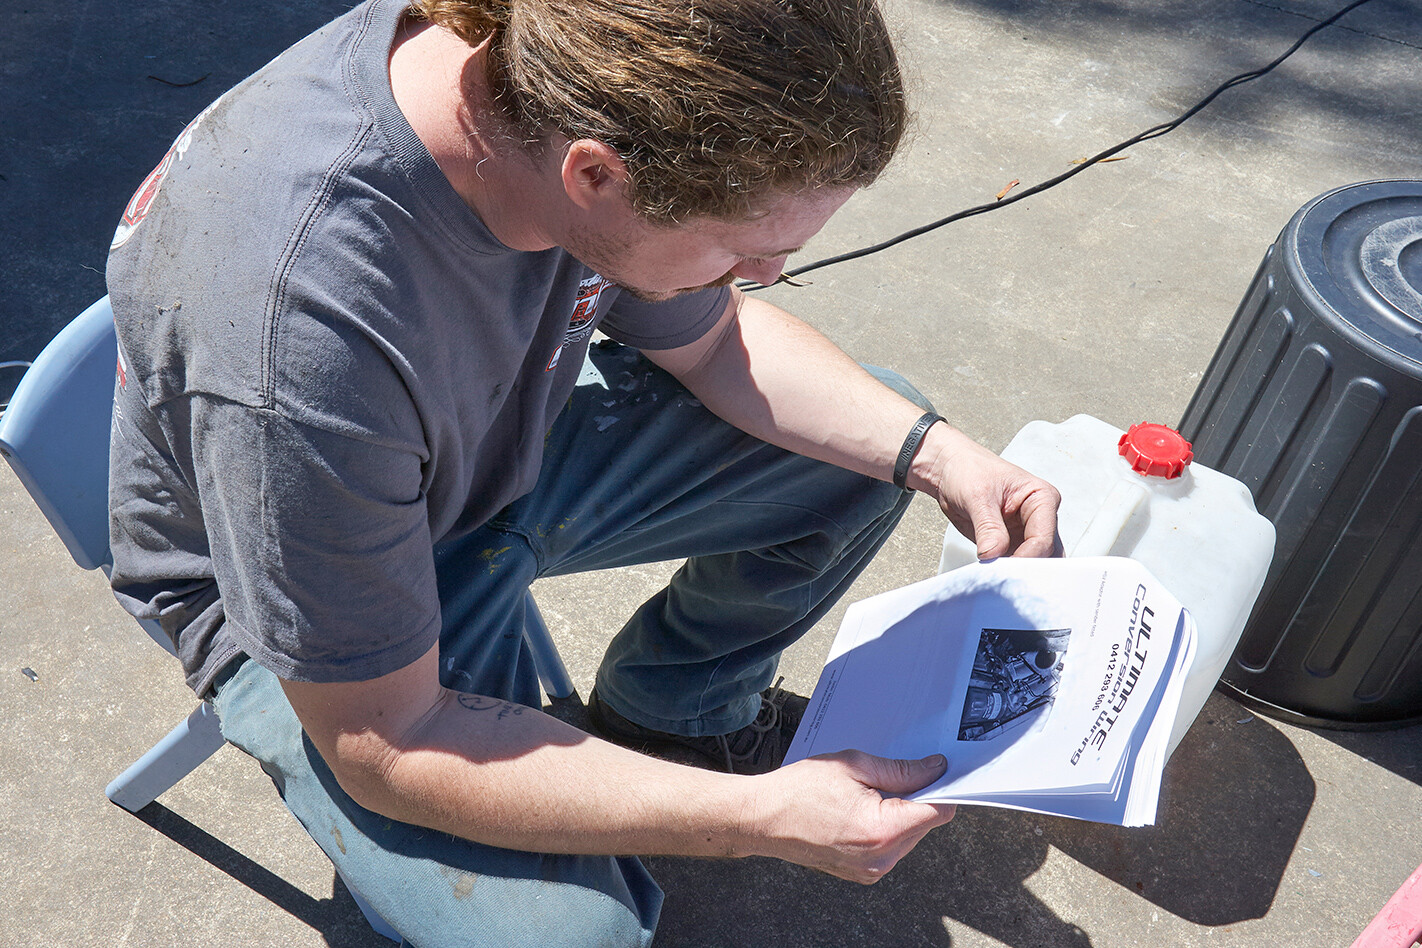 13 Ultimate Conversion Wiring included instructions with its loom to make it easy to work out what goes where; the length of the different plugs to different-shaped sensors made it a simple task
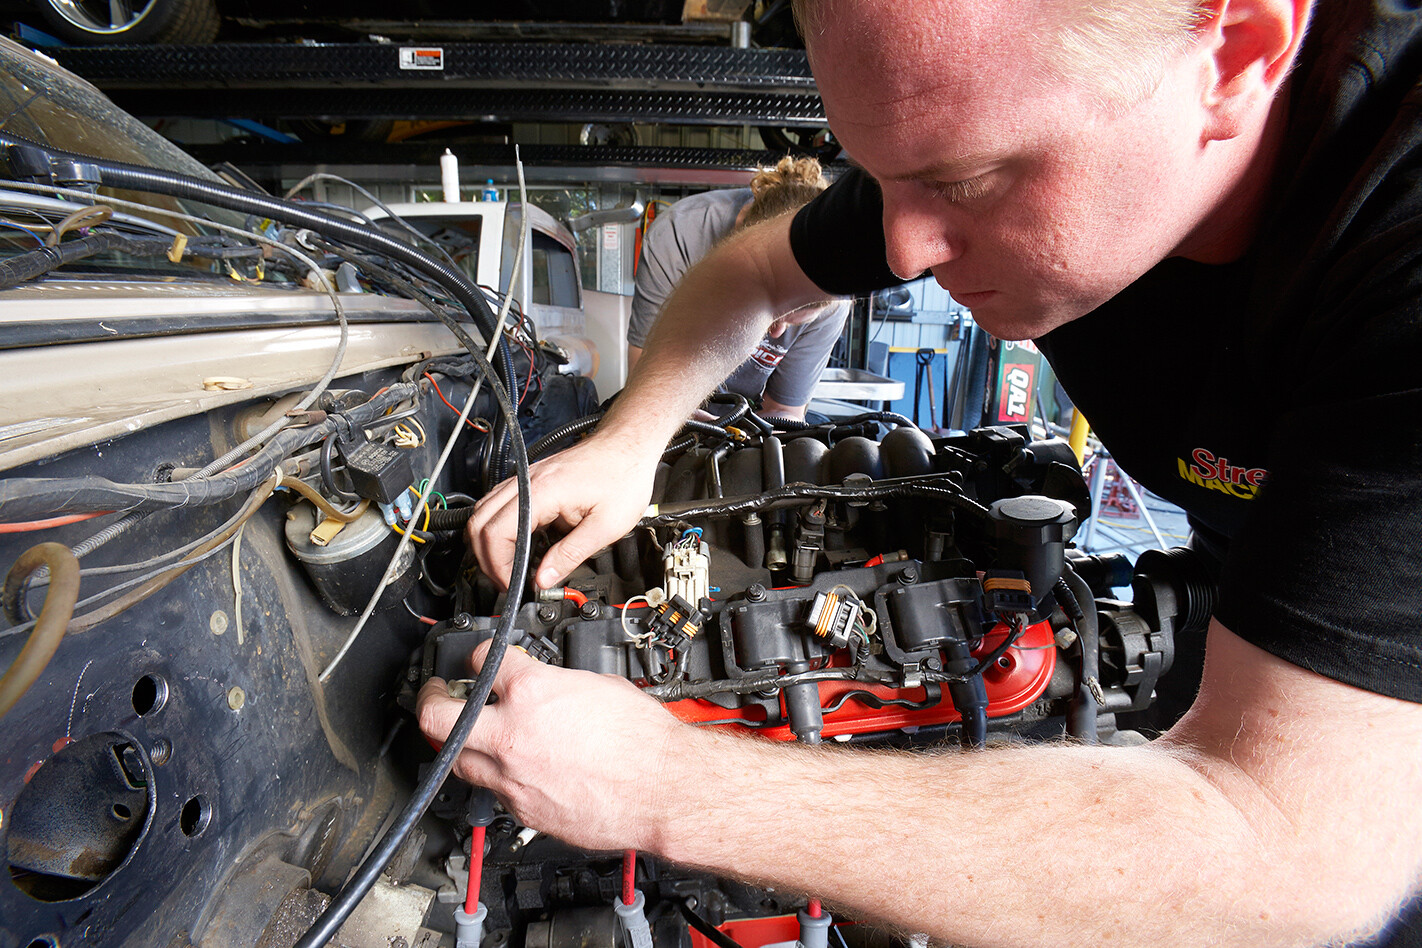 14 The best way to install the coilpack wiring is to pull the coils off the rocker covers, plug them in and get all the wiring neat before bolting them back down onto the rockers
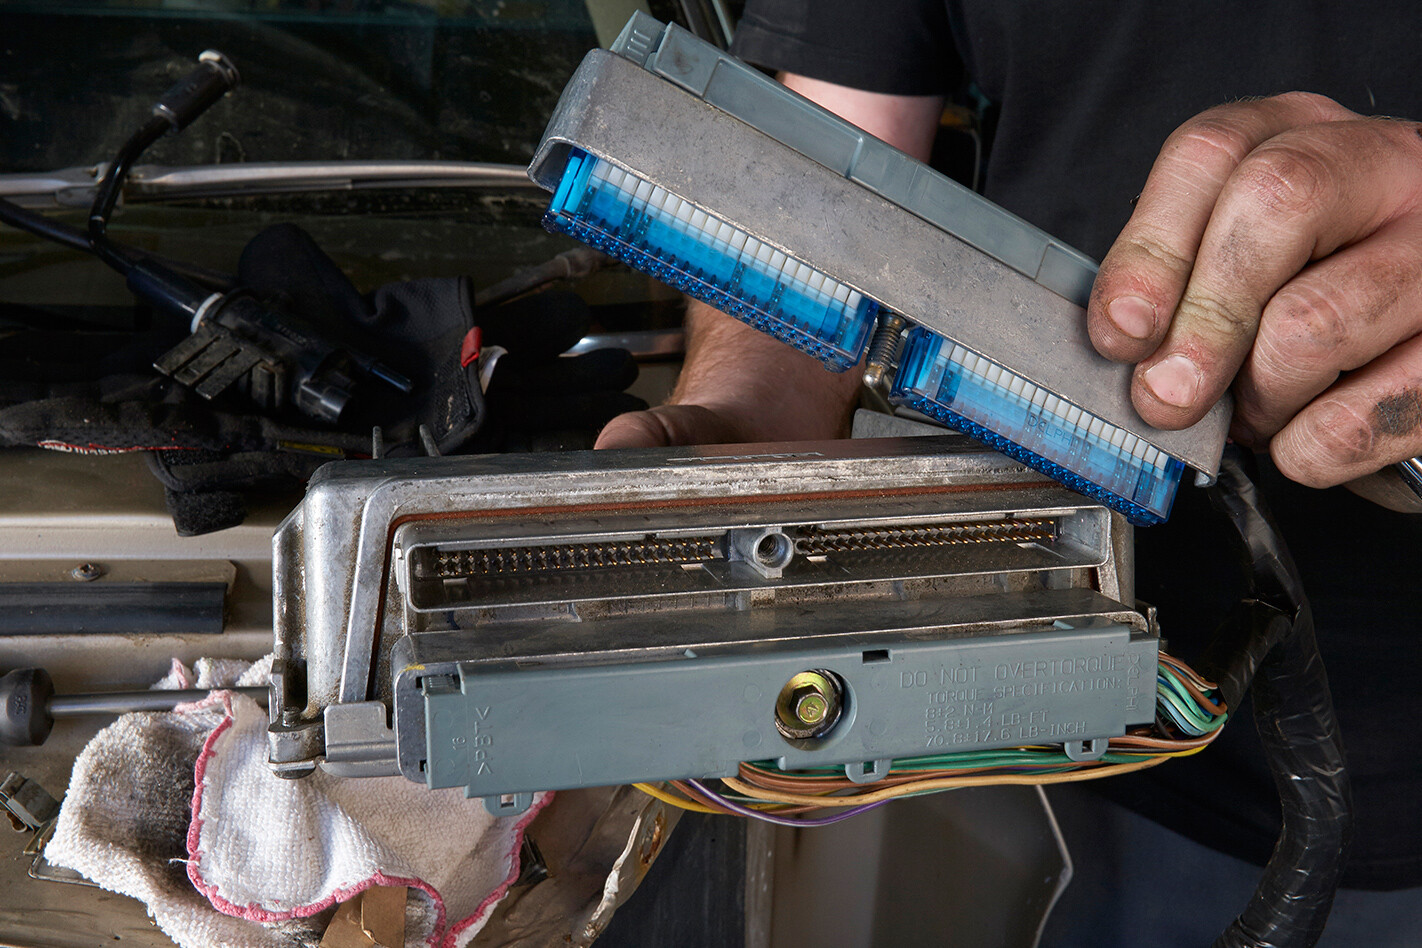 15 A stock VT-VZ ECU plugs in like it is in a factory Commodore, but this one has been modified by Ultimate Conversion Wiring to have the in-built coded security systems (VATS) removed. This means the stock key barrel can be used and there are no issues with body control modules. Scotty will be getting the tonner flash-tuned once it is driving, to take into account the mystery cam the Russo boys installed in the LS1 before Scotty picked the engine up
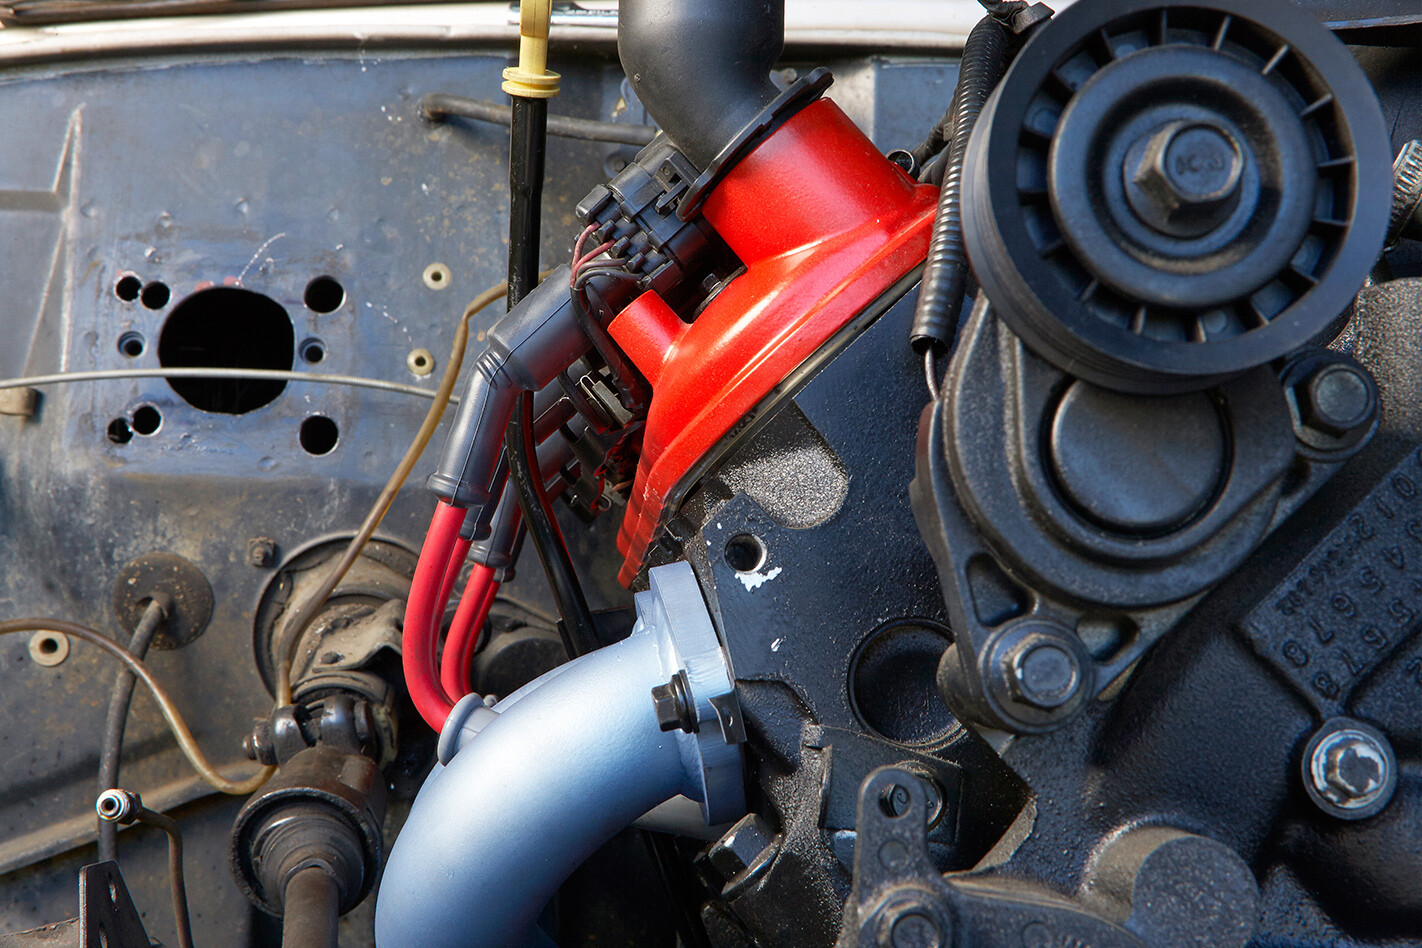
 16 The Pacemaker #PH5342 swap headers went in like a charm and have a handy feature – you wind the outer bolts into the heads loosely to hang the headers, then just thread the remaining bolts in. We needed to extend the wiring for the oxygen sensors to suit the new headers, as the aftermarket items have bungs further down the pipes than the stock manifolds
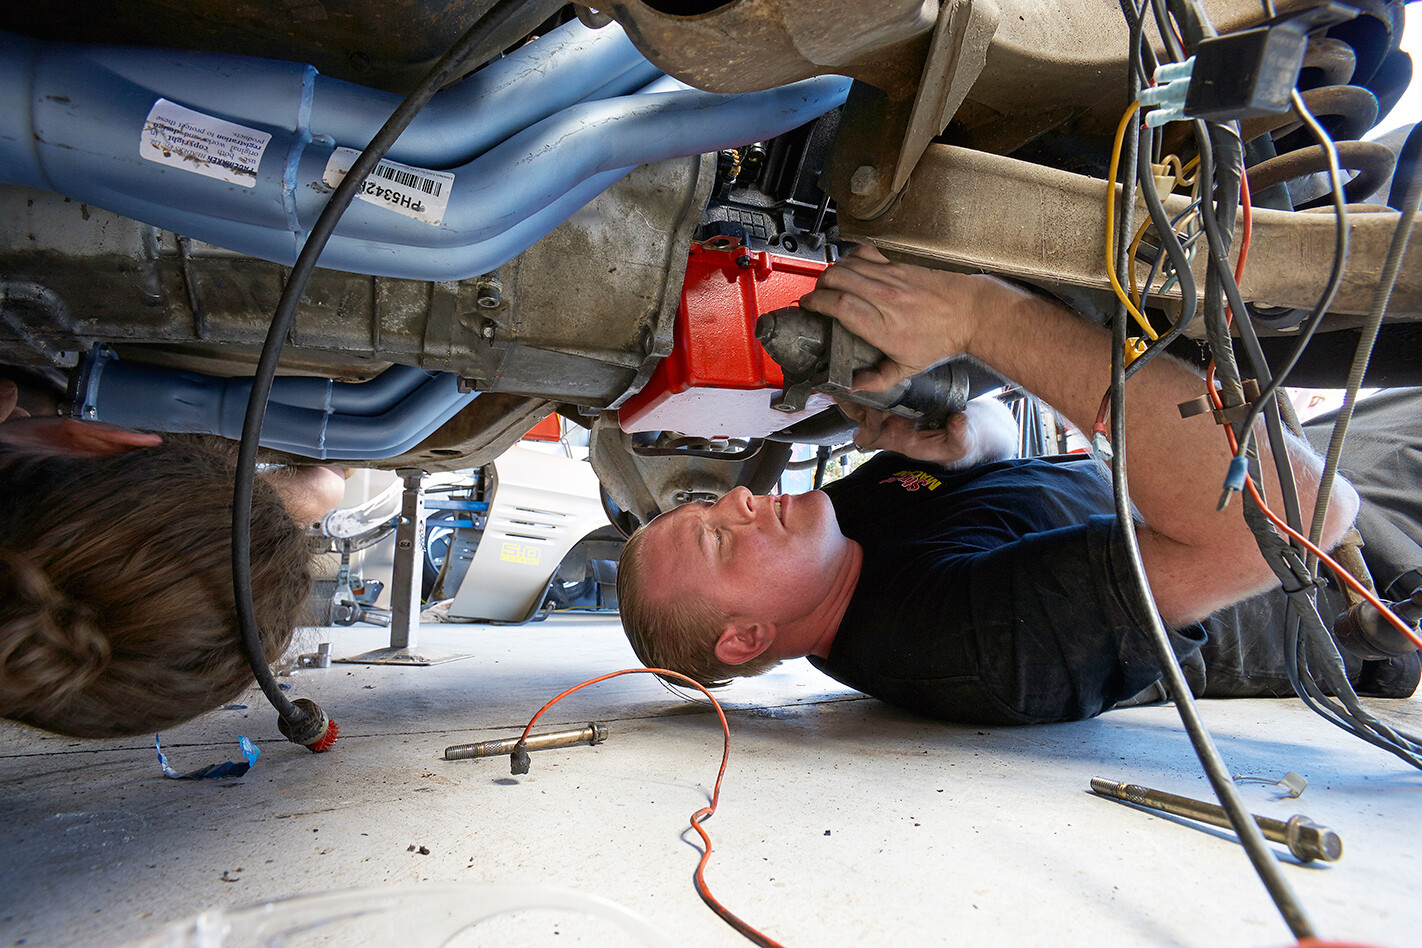 17 “Didn’t you guys already install the starter motor?” Yes, but we removed it to put the extractors in, as it gave us precious room between the block, steering and chassis rail to squeeze the collector through
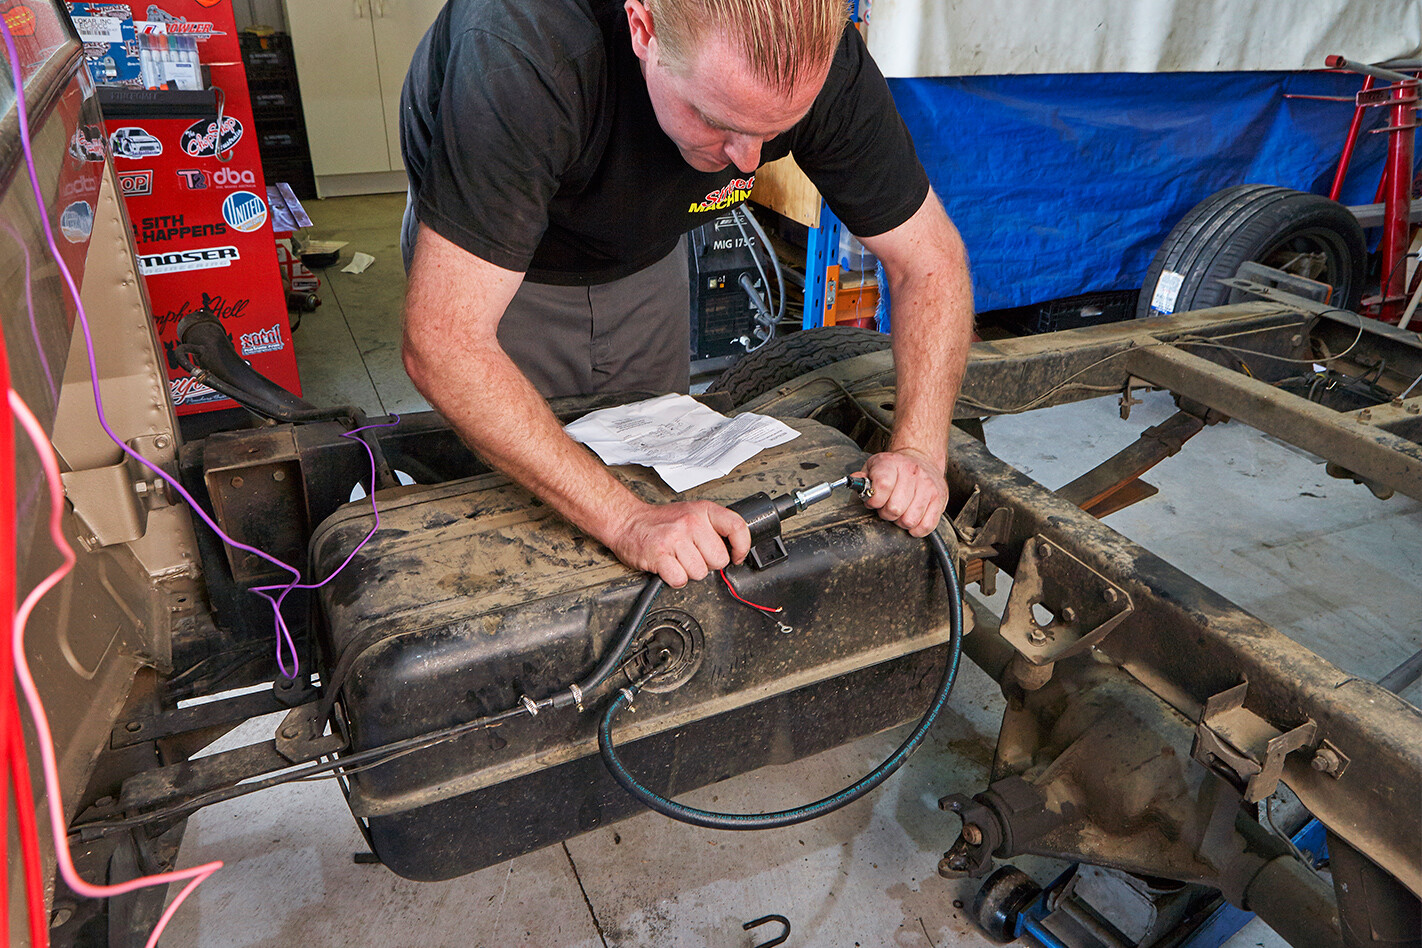 18 Our plan was to set the fuel system up with an externally mounted surge tank and cradle for two electric fuel pumps, but a SNAFU with postage meant it didn’t turn up in time for our assigned swap day. In desperation to hear the LS1 fire we dug out an old ‘clicker’-style universal electric fuel pump and plumbed it in to see if it could start the 5.7L. The issue with that was it only supplied 9psi fuel pressure, a long way short of the 58psi the LS1 needs (see breakout, page 136), and as such we could only get a few coughs and splutters rather than a mighty roar from the Gen III
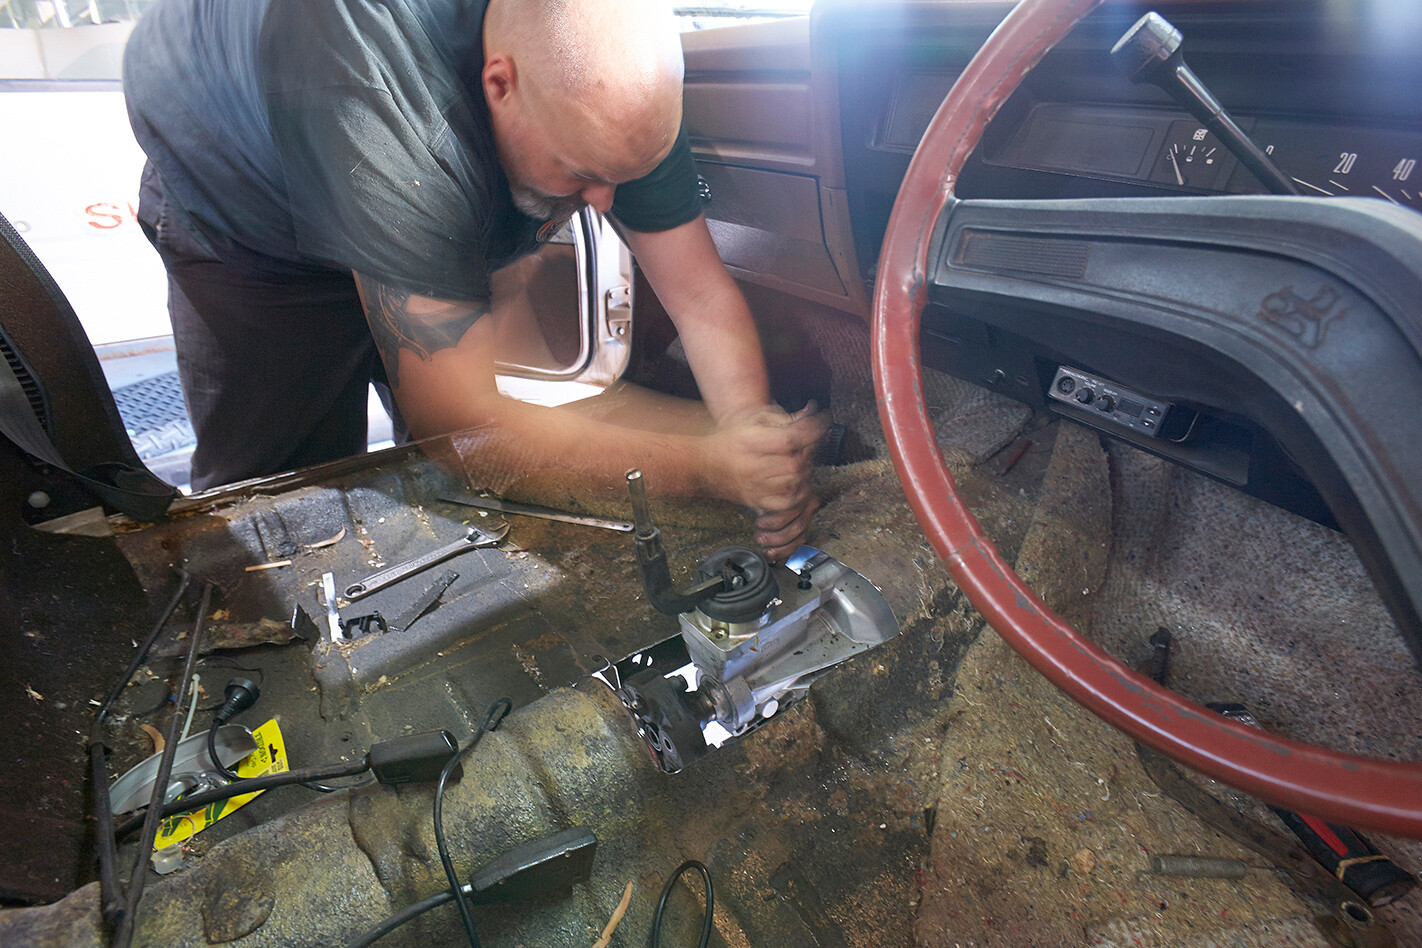
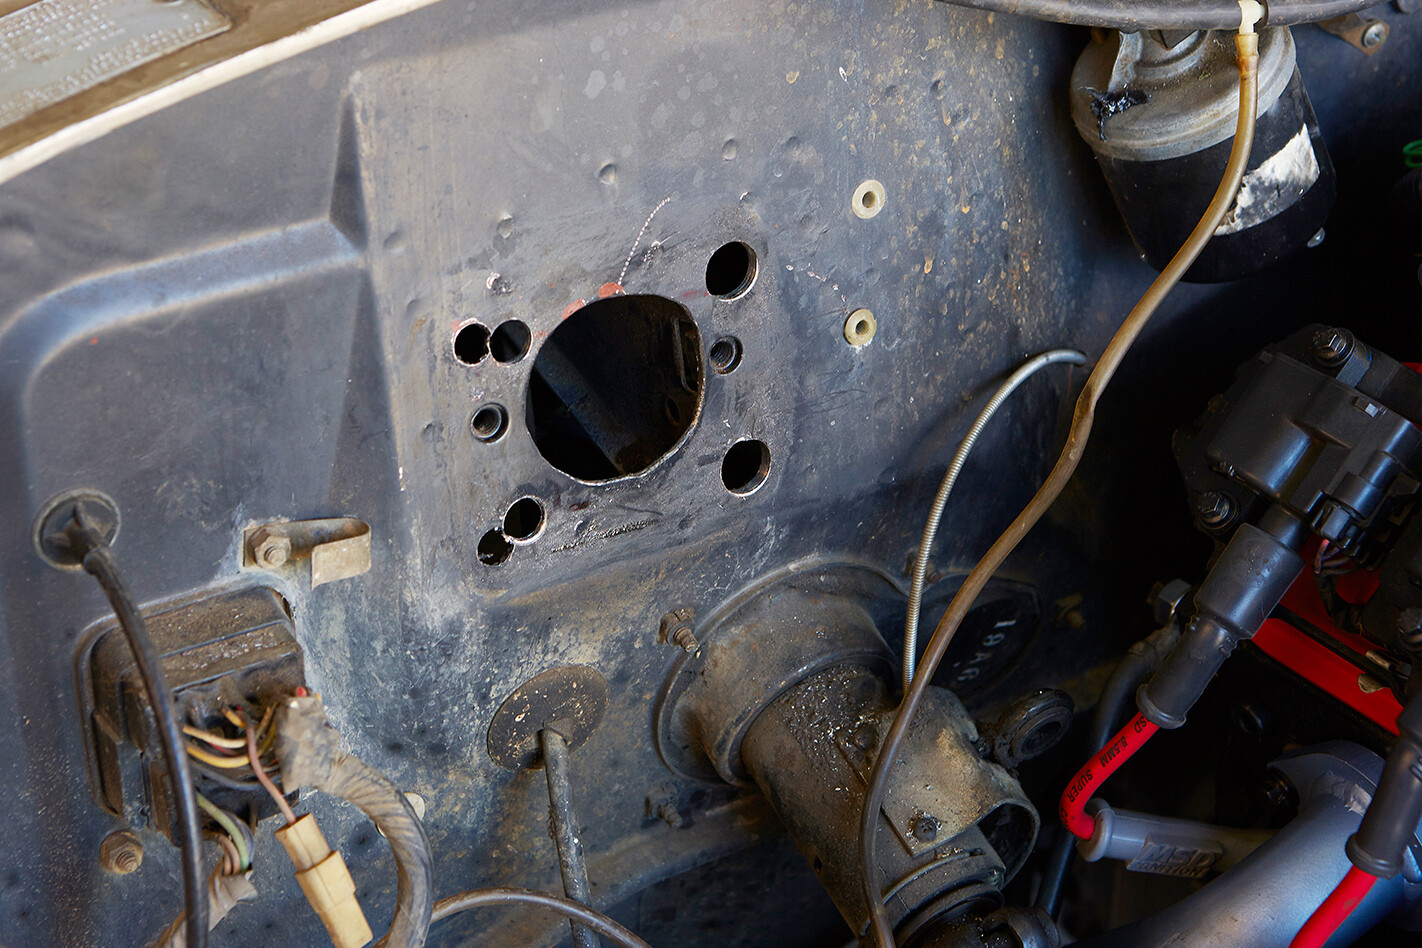 19 For brakes Scott upgraded the front to stock VT-VZ SS Commodore-spec twin-pot calipers and ventilated discs, and redrilled the firewall to suit a VX SS booster and master cylinder combo. The actuator rod had to be shortened to fit the HQ-WB brake pedal, while the firewall had new mounting holes drilled for the new booster placement. Scotty was going to go back and zap the old holes closed with his MIG once we were done mounting the engine and transmission
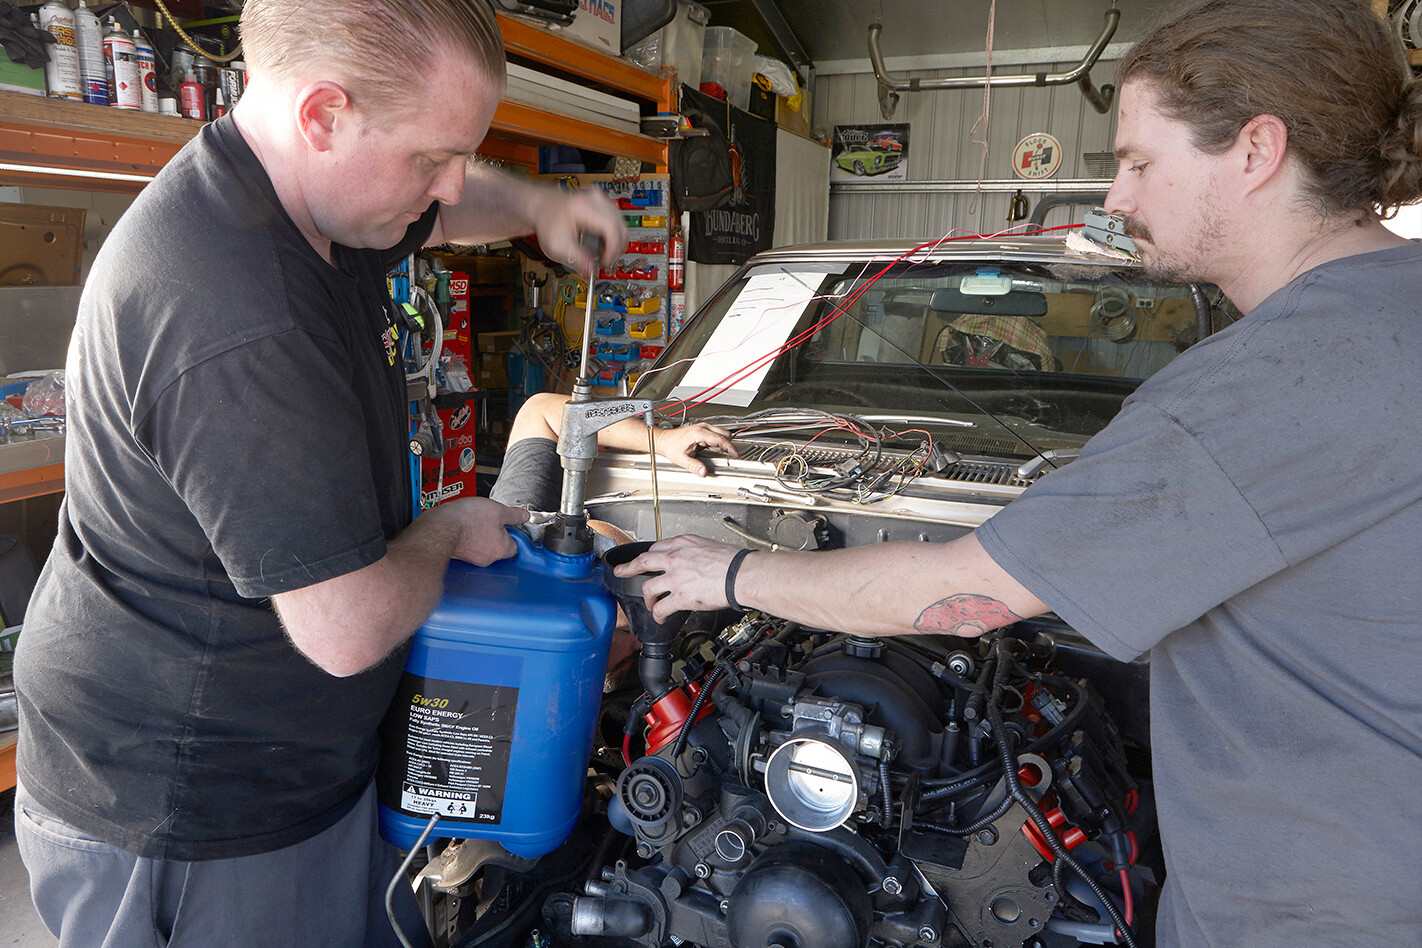 20 Smashing a few litres of fresh engine oil in was the last thing we had to do before we engaged the starter motor. LS1s aren’t super-fussy about the oil you use, but it is a good idea to change it every 5000km or six months at minimum – more if you like to rev yours hard
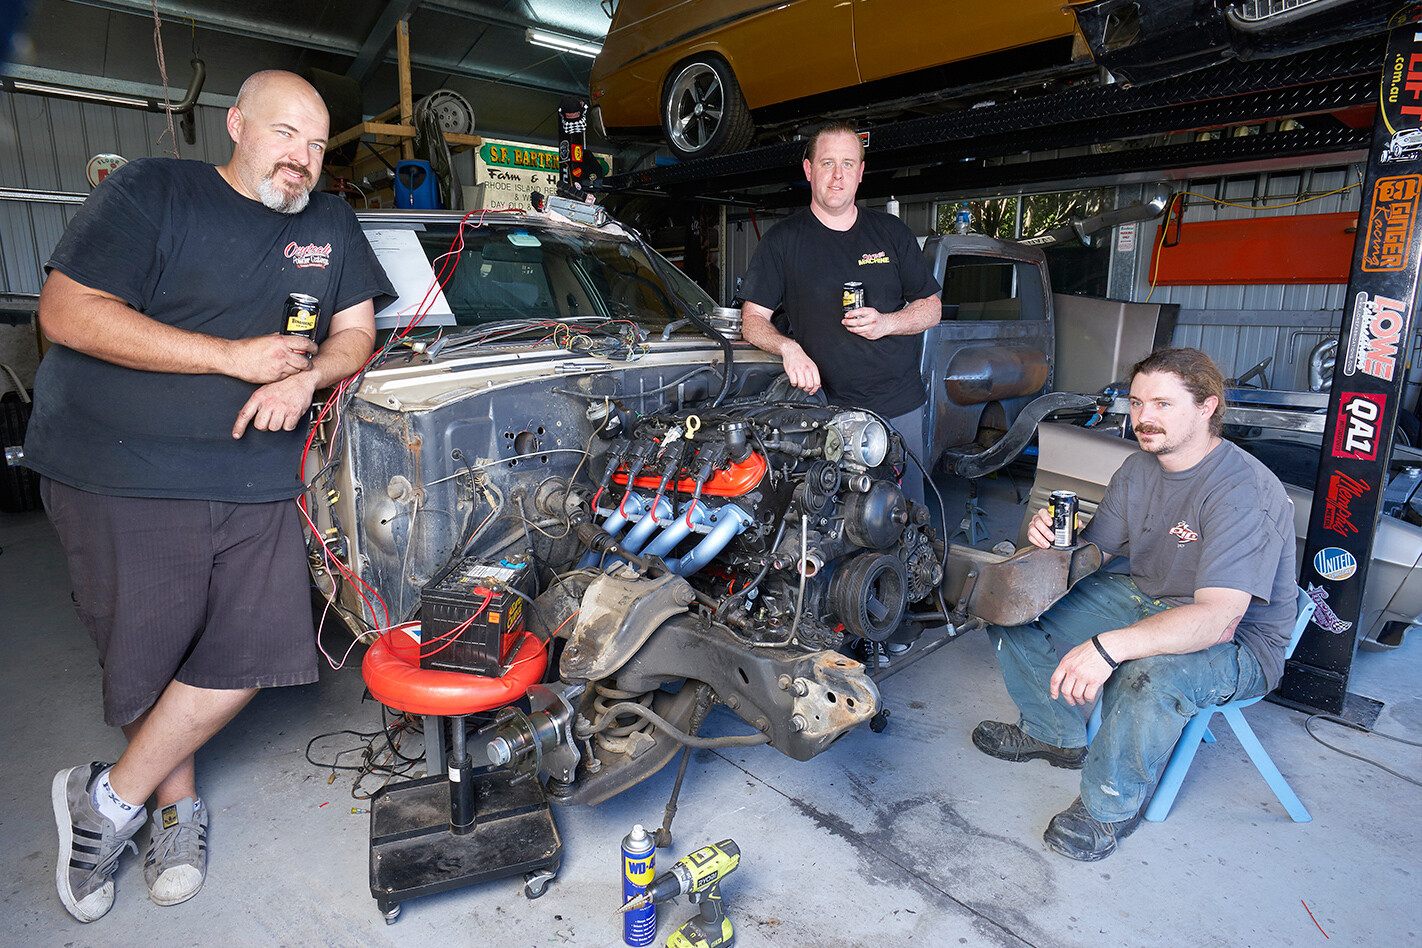 21 Success and failure, all in one. Thanks to an incomplete fuel system, we didn’t get more than a few coughs out of the LS1, but that was rectified a few nights later when the surge tank was plumbed in. All up it only took us about three hours of work to get to this point, so you could easily have a car driving in a three-day weekend if you had all the parts you need delivered on time
GET IT DRIVING
THERE’s a decent amount of work to do to get the car driving from this point, but if we’d had all the parts and another two days, there is no reason we couldn’t have driven the HJ out of the shed.
Firstly, a custom-made tailshaft is required, which will run you around $1000 to have made; it needs to be measured at ride height. In our case, Scotty just got Ricky’s Driveshafts to cut down the original tonner tailshaft (about $500) to suit the flash new disc-brake nine-inch from Geelong Differential Services.
You’ll also need a new exhaust that is fitted with catalytic converters, which need to be positioned a predetermined distance from the headers to they can heat up and operate correctly. Depending on the material, types of bends and brand of mufflers used, and the labour rate of the shop you go to, this can run you anywhere from $1000 to $3000.
 If you stick with a Gen III engine you’ll need to sort a new accelerator cable, while Gen IV motors use an electronic throttle assembly, including pedal. You can convert them back to cable, though.
On top of that, it’s a good idea to sort out some suspension and braking upgrades, as well as engineering approval to your state’s requirements.
FUEL PRESSURE
AN LS1 needs 58psi of fuel pressure to kick over, far more than a carburettor car that is supplied by a mechanical pump on the motor, or a small universal ‘clicker’ pump can supply.
In a late-model LS Holden there is an electric lift pump located in the tank that provides go-juice to a pressure regulator, which sends fuel on to the rails and eight top-feed high-impedance injectors on the motor.
Apart from 1997-98 C5 Corvettes, all LS V8s have what is referred to as a ‘returnless’ fuel system, where the fuel pressure regulator (which sets the required 58psi fuel pressure) is mounted near the fuel tank, removing the need for a return line to run from the engine back to the tank. Some factory LS fuel systems even have the regulator mounted inside the tank as part of the fuel pump and filter assembly!
Converting a car from a carburettor-fed engine to one with EFI is fairly straightforward these days, with two main options: Have your tank modified to accept an internally mounted lift pump, or mount a surge tank and external fuel pumps near the stock tank. For simplicity, we chose the latter on Richard’s tonner, though it didn’t quite go to plan, with a postage delay meaning we didn’t get the pumps in time for the swap day.
If you’re installing an LS V8 as part of an engine conversion and don’t know how to make the stock returnless fuel system work, don’t fret. If your car has a return line to the tank to remove excess fuel, you can mount an aftermarket adjustable fuel pressure regulator on the motor or bulkhead and use the vehicle’s stock return line back to the tank. With a pair of aftermakret fuel rails (or 1997-98 Corvette items) you’re in business
Comments