It’s vital that your brakes work reliably and predictably every time you hit the pedal. For this reason, brake system modifications are tightly regulated and should only be carried out by licensed operators. There is, however, quite a bit of work you can complete yourself. If you’re rebuilding an older car, chances are that the lines, fittings and many components will need replacement or rebuilding.
First published in the February 2007 issue of Street Machine
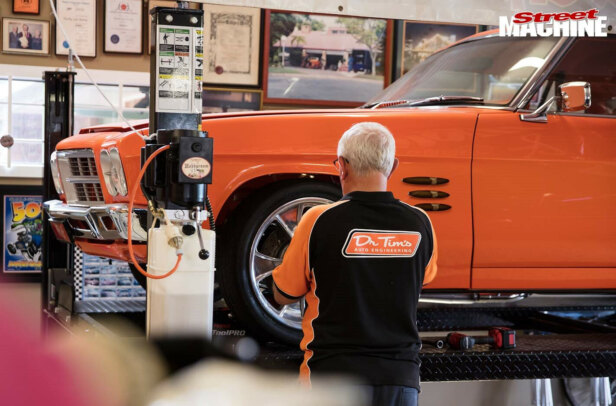
If you’re adding modern dual-circuit brakes to an older car originally fitted with a mono-circuit system, you’ll basically need to re-plumb the entire set-up. We spoke to brake specialist Hoppers Stoppers to find out what can and can’t be done, along with what you need to watch out for when tackling the hands-on aspects of a brake system installation, or upgrade.
As we’ve shown previously, fitting caliper kits and other bolt-on components like boosters which already have engineering compliance is acceptable. In terms of custom work, simple jobs like running fluid lines and attaching basic fittings are relatively straightforward tasks that a competent home mechanic can tackle.
Even so, Hoppers staff tell us that they’ve seen some bizarre mistakes made by people attempting to work on their own brakes. One guy whose hard lines were unsecured and flopping all over the place near the front wheels was advised that the lines should be fixed to something solid; he attached them to the control arms! In another home-built system, the owner couldn’t figure out why the car pulled heavily to one side when he hit the brakes. After much investigation it was discovered the left front and both rear brakes were running off the front brake outlet and the front right was running off the rear brake outlet!
The guys told us a heap of horror stories but they also told us the correct way of doing things, so here it is.
LINE SWAGING


Rubber perishes with age, so it’s a good idea to replace your braking system’s old flexible rubber hoses as part of your maintenance program, especially if they exhibit any sign of cracking, crazing, softening or swelling. Depending on the vehicle, replacements may be available through regular parts outlets but more often than not, you’ll need to have them custom made.
There are many different types of fittings available, both for rubber and braided line, including reproduction OEM. All must be swaged to stop them coming loose, and pressure tested to 200bar (3000psi). Only approved hose and fittings can be used, while the swaging process itself requires specialised equipment and can only be performed by a registered installer. All such fittings must be stamped with a number that identifies the installer. If there’s no DOTARS number, the part shouldn’t be used.
Fitting brake lines, step-by-step:

1. Brake lines are made of a specific type of seamless mild steel tube called bundy tube. Tube is measured externally, as opposed to pipe, which is measured internally.
Virtually all brake line (bundy tube) is imperial, with 3/16in the most common size. Quarter-inch and metric stuff exists but it’s rare. The only acceptable way to cut bundy tube is with a tube cutter.

2. Tube cutters work by tightening onto the tube, rotating it around, then tightening some more and rotating again. This process is repeated until the tube is severed (left).
The unacceptable version in the middle was cut with an angle grinder; a hacksaw produces a similar result. At right is the useless effect obtained with diagonal side-cutters.

3. Bundy tube is available in 6m lengths or large coils (longer). If you buy coiled bundy, you’ll have to straighten it somehow. This can be achieved by pulling it through a hole drilled in a long block of wood, as shown here.
As the tube emerges from the far side, pulling it in the opposite direction to the curvature controls the final degree of straightening.

4. Production cars use compression sealing at every connection via metal-on-metal contact, with flat copper washers under fittings or flare seats.
There are only two types of OEM flares: the double flare (left) suits fittings having a raised conical seat in the base of the hole. The ball-type mushroom flare (right) mates with the ‘drill point’ seat.

5. This relatively inexpensive flaring kit is available from auto parts suppliers like Bursons. It creates correct mushroom and double flares (single flares made with plumbing tools will fail in service).
Tapered threads should not be used, as they require the application of sealing compounds or Teflon tape and are leak-prone.

6. There are all sorts of bending tools available. On the right is one specifically designed for tight bends in 3/16 line. Although it’s possible to produce tight bends by hand, it should be avoided. If you kink the pipe, throw it away and start again.
Never attempt to straighten kinked or tightly bent bundy tube; it will fracture or failure later on.


7. Larger diameter bends, like the one around this diff housing, can be hand-formed for a smooth result. Always use a grommet on any line that passes through a panel; specific through-frame fittings are also available.
If the lines need to be flushed out, do so with methylated spirits. Never use any petroleum-based cleaners or solvents (see wrap up, below).

8. If this line had run straight across the top of the axle tube, the bump stop would crush it at maximum suspension compression. Care and forethought are needed when laying out lines.
Another common fault is lines that rub against exhaust systems. Pretty much anything that’s in contact with any line will eventually wear through it.

9. If you have an extremely small distance to bridge, say between a master cylinder and a nearby proportioning valve, getting enough flex into the tube to attach it can be difficult. A couple of loops can help here.
This example was formed around a length of pipe clamped in a vice. You can even use sockets measuring down to 19mm to form extra-tight bends.

10. Suspension systems move relative to the body/chassis, requiring flexible connections between them. Maximum possible movement determines the length of the connection.
Hoppers has seen lines installed that were so short, the connections were pulled apart at full suspension droop. This happens quite often in jacked-up 4WDs.

11. Zinc-plated carbon steel or brass junction blocks are used where lines diverge or where flexible lines join steel lines (the rubber hose has yet to be fitted).
The stud welded to the axle housing ensures a high-strength fixture. All flexible hoses swell under pressure, and replacing hard line with hose gives a spongy pedal, so keep hose length minimal.


12. Support all brake lines with saddle clamps. Rubber cushioned versions are ideal for general use but billet aluminium and stainless saddles are available for show cars.
Do not use mountable cable ties as they will let go if road debris fouls the line. Place saddles roughly every 300mm — or wherever needed to keep the lines out of harm’s way.


13. All moving components affecting the brake lines should be tested to ensure there’s no interference. Here the stub-axle is turned from lock to lock and from maximum droop to maximum bump.
When a car is on a hoist you can get a false impression of clearances. Long hoses (as on a McPherson strut suspension systems) may require an intermediate support.

14. Ideally, old cars should be upgraded to dual-circuit master cylinders (ie, separate front and rear circuits) so if one fails, the other remains operational.
This universal-fit assembly from Hoppers is extremely compact. Be wary when compiling a new braking system, as car companies sometimes use different threads on different components.
WRAP UP
It’s easier to make your bends and generally lay out all of the brake lines outside the car and then fit the formed tube. Hoppers says that templates made from coat-hanger wire can be a good method of checking the fit before bending and cutting any tube.
Any system contaminated with hydrocarbons (such as oil, fuel and ATF) will need every rubber seal replaced and thorough flushing of the whole system. The master cylinder cap rubber swelling to double its usual size is a telltale sign of contamination.

Although the tube may be imperial, most late-model cars use metrically threaded fittings and some cars use a mix of metric and imperial fittings, so be wary! In general, longer fittings suit ball flares and shorter ones are for double flares. Although both types have been used by OEM manufacturers, double flares are preferable. However, which type to use will depend on the equipment (master cylinder, calipers, distribution blocks) you’re plumbing.
Never use copper tube as it work-hardens with vibration and will eventually crack. Suitable stainless tube (double-annealed flaring grade) can be purchased from specialist brake companies like Hoppers Stoppers, which can be reached on (03) 9748 6950 or www.hoppers.com.au.


Comments