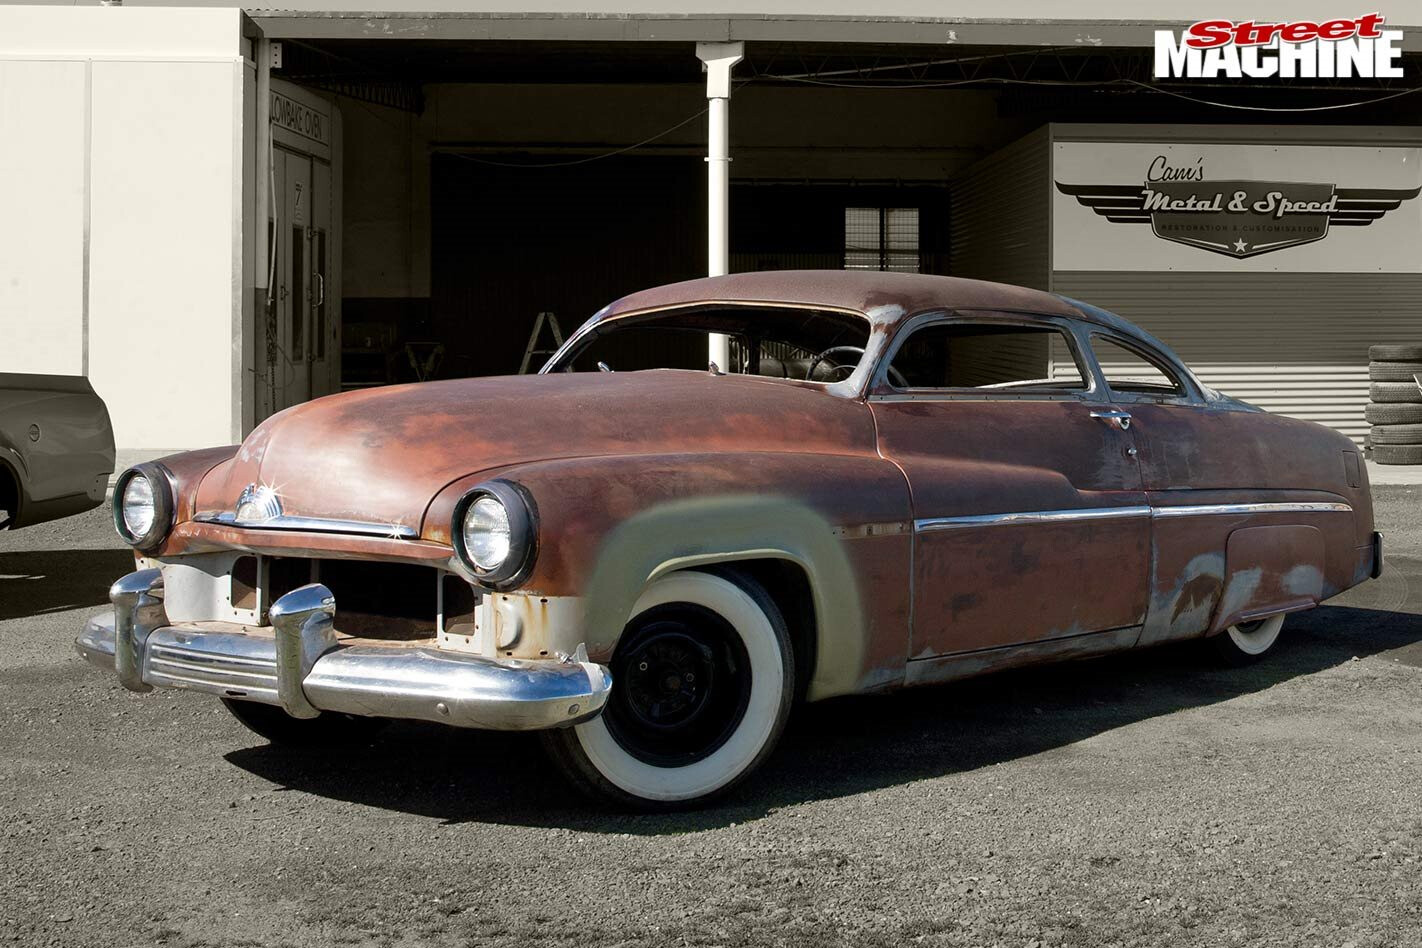
RICHARD Dabbs is no stranger to cool cars, having owned a bunch over the years, including a flamed and scalloped ’63 T-Bird and a scalloped ’61 Caddy that we featured in SM, Apr ’05. There have been a couple others in the mix, but none have received the attention that this ’51 Mercury has copped. Whereas the others have provided impact with killer paint schemes and a slammed ride, Richard is returning to the roots of customising and heavily inspired by the Sam Barris Mercury, is building a tasteful and stylish custom using nothing newer than 1955.
This article was first published in Street Machine’s Hot Rod magazine #13, 2014
Purchased as an unmolested original from Matt Townsend from Townsend Customs in Riverside, California, it soon became apparent that there would be no one better to perform the roof chop than Matt himself. Richard isn’t some bloke with a bottomless bank account, he’s a working Joe like the rest of us, but he ran the idea by Matt and they worked out a deal to get him and the wife to Australia for a few weeks. Matt ended up spending a week or so at Cam’s Metal and Speed in Geelong chopping the Merc and then he headed over to Steve Costa’s workshop to chop a Lincoln Zephyr. Don’t worry, it wasn’t all work and Matt spent a few weeks seeing the sights after the work was done.
Check out the pics to find out how a true master slices and dices a roof to create a flowing and elegant profile as nice as any chop you’ll see anywhere. No doubt this isn’t the only way to chop a Merc, but it sure turned out nice.
HOW THEY DID IT:
1. The first task in any chop is to completely strip the interior. This means you can get to everything as well as reduce the risk of setting the whole thing on fire. The bracing keeps the body and door openings in place once the roof comes off.
2. The rear window opening must also be heavily braced so that it keeps its shape once it has been removed. Richard opted to go with the more difficult option of keeping the ’51 rear window, which is more work but more in keeping with the period styling.
3. The A-pillars are marked along the straightest section, this makes lining everything else up later a lot easier. Matt cut on the outside of the tape line and while no exact measurements were taken, Richard says about four inches were taken.
4. Before Matt started chopping too much of the car up, he spent a lot of time getting all the gaps right, otherwise it wouldn’t look too good when it all went back together. Mercs don’t have adjustable hinges, so a fair bit of tweaking with blocks of wood and brute force sorted it out.
5. The entire rear window was removed, leaving about one inch of material around the top section. The panel between the boot and window was also removed as this section would have to be remade to suit the new angle of the window once it.
6. The door frames were removed in one piece, once again cutting along the straightest part of the frame. The plan was to slant the pillars, so a lot of this piece — around 50 to 60 per cent — would be reshaped to suit the new opening.
7. The rear pillar is cut horizontally, losing about five inches in height. In some cases, this is how people finish it off, but Richard and Matt spent a lot of time re-fabricating all of the corners to look like it left the factory that way.
8.Matt slices in some relief cuts in the top corners of the roof. In the bottom corners pie cuts are taken as the bottom of the pillars has to come in while the top has to go out ever so slightly.
9. A ratchet strap was used to pull the pillars in while the top of the roof section — which was never fully removed from the car — is rested on top to see how much they have to be tweaked. This is another reason why the dash had to come out, to allow those bottom relief cuts to be made.
10. As Matt went around and did all the tricky stuff, Richard followed him around with the hot metal glue gun, aka the MIG welder. Like any modifications, tack it all into place first and then once you’re certain it’s all in the right place, fill in the gaps.
11. Richard and Matt lay the back window down over the lowered roofline. This allows them to eyeball the profile and to also get an idea of where the roof needs to be modified to line up and, more importantly, flow in a smooth line from the front to the back.
12. Matt marks where some extra material needs to be removed to get the window to go in. This piece wasn’t thrown in the bin, it was used as filler pieces in the roof to ensure the thickness, or gauge, of the metal was consistent when it came time to start panel beating.
13. I’ve seen roof chops where there have been several slices in this part of the roof to get the job done, but Matt does it this way. Richard says many people can’t believe how many cuts aren’t in the car! This is the most time consuming part of the job with Matt spending a full day on each side.
14. To my eye, a roof chop seems to flow a lot better when the pillars are slanted. It’s an entirely subjective thing, but Richard and Matt agree that if you don’t do it, the rear quarter window can look too small. Either way, you’ll have to modify this section anyway.
15. With the bracing still in place — crucial if you don’t want to be going down to Bunnings to buy a sheet of Perspex — the rear window is locked into place. A large section of the C-pillar was fabricated as was the entire scuttle panel behind the window, which was rolled up by Matt on the English wheel.
16. The slanted pillars, radiused corners and consistent gaps show just how good the quality of Matt Townsend’s work is. All of the radiuses in the corners were refabricated out of 1.2mm sheet that was bent 90 degrees and then shaped in the shrinker/stretcher. A lot of effort went into making sure the door jambs looked factory.
17. And here’s the finished product. It’s about as severe a chop as you can do and still keep the ’51 rear window, that’s why some people opt for the more oval-shaped ’49-’50 Merc rear windows. Problem is, you can’t just go down to the junkyard in.
18. Matt’s a happy man. In five days he and Richard did the full chop on the car, but there’s still a bit of finishing off to do with some interior panels and window moulding, but that will have to wait until Richard’s Model A Tudor is finished off, which — fingers crossed — will be making its debut at MotorEx Melbourne.
19. The new profile is stunning and looks like it came from the factory this way, which was always the intention of the top customisers. Those with a sharp eye will also notice the ’54 Mercury front fender lips, which mimic the rear skirt shape and also give more steering clearance.
Comments