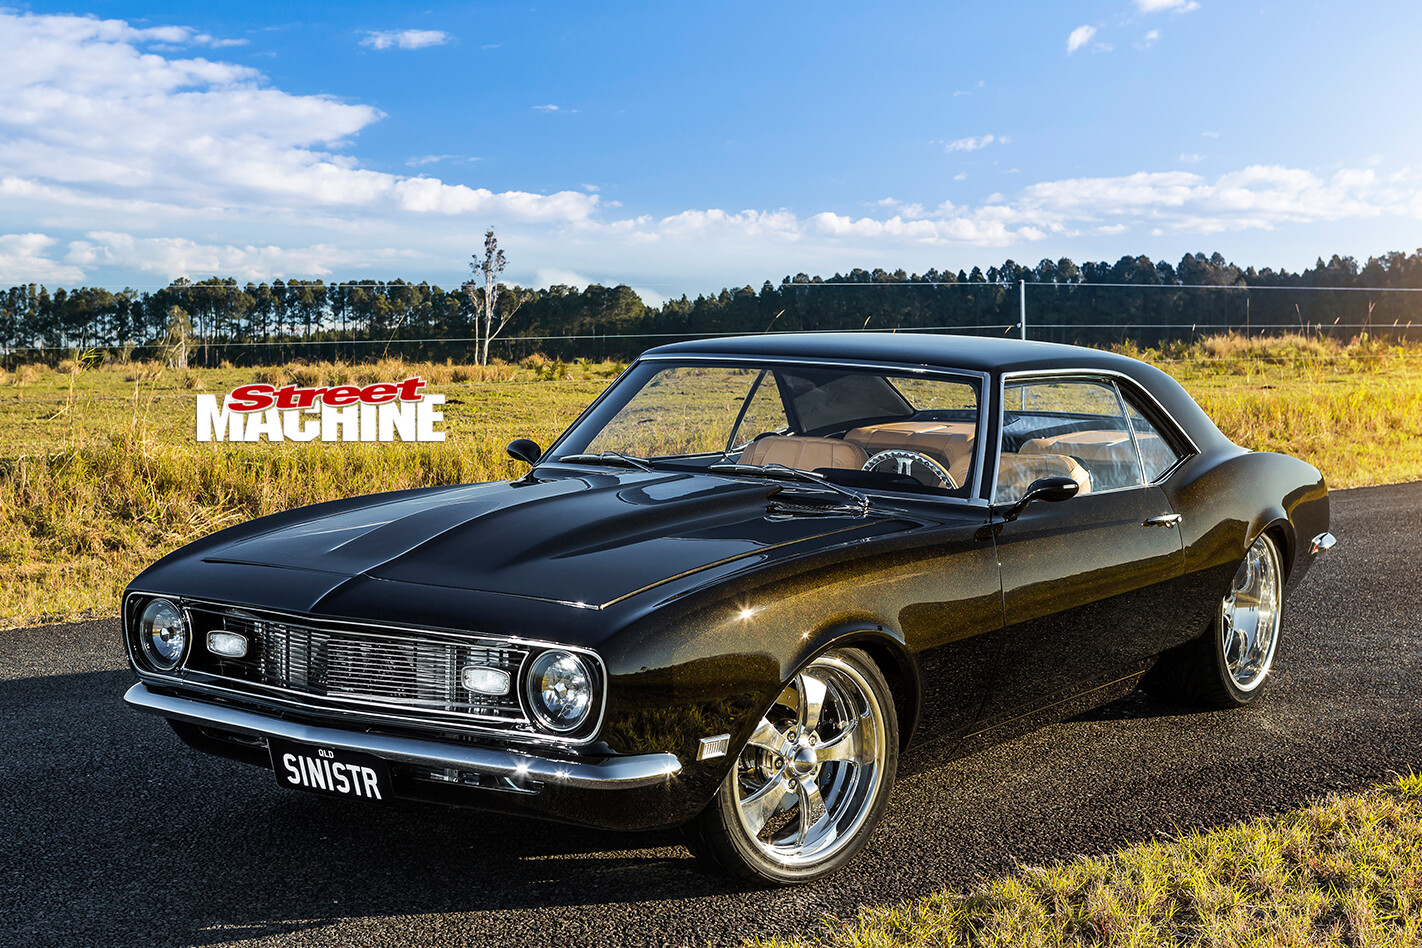
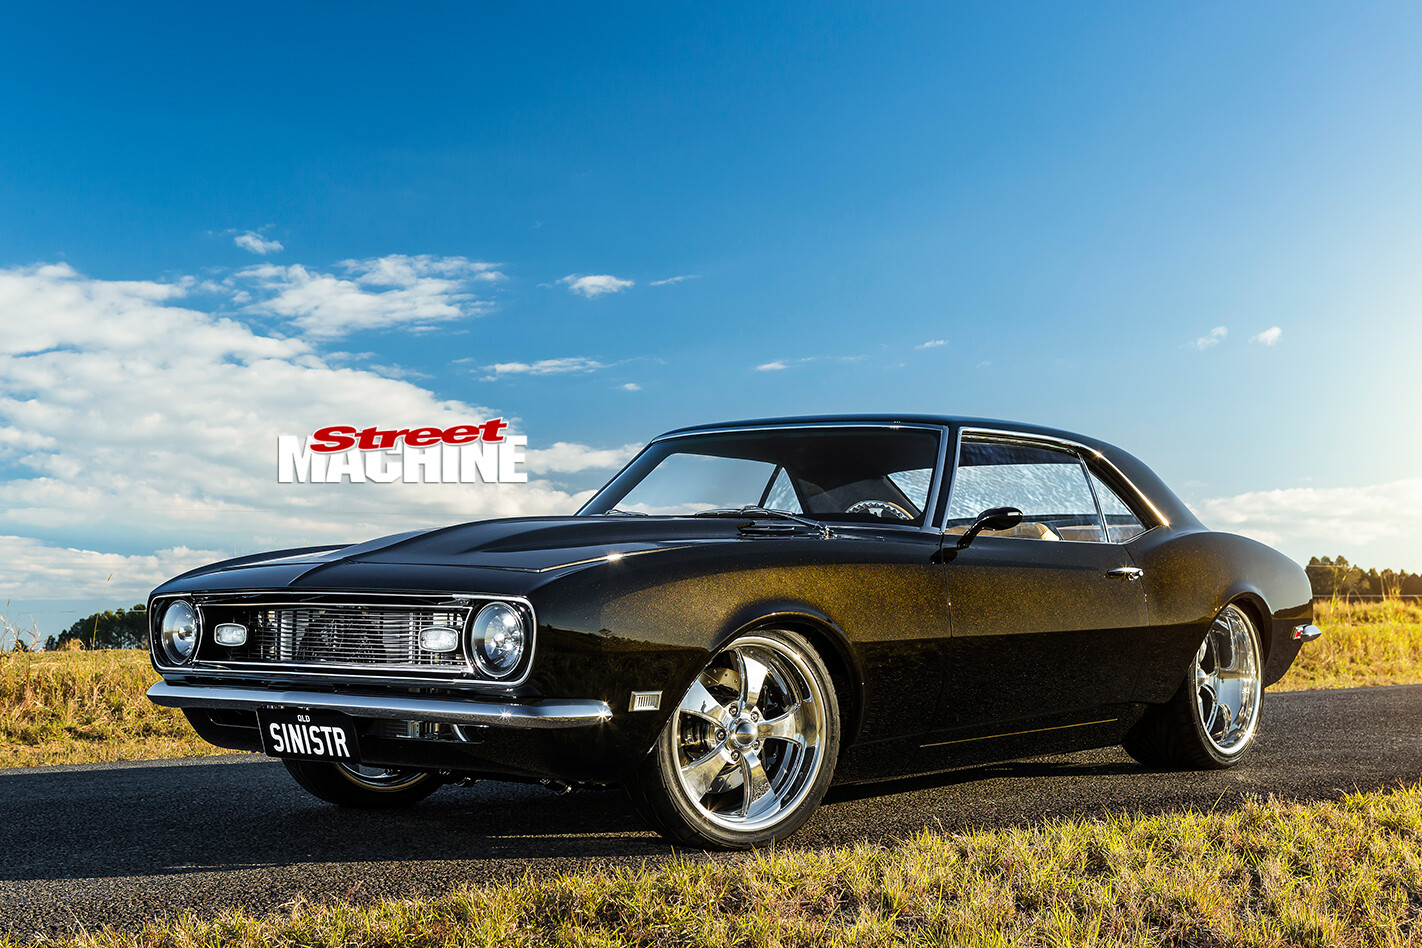
STEVE Hopes’s 1968 Camaro, dubbed SINISTR, has certainly been hoovering up the silverware on the show circuit this year, including gongs for Top Show Car at the Victorian Hot Rod Show, Top Street Machine at the Queensland Hot Rot Show, and three bronze medals at MotorEx Melbourne for Engine & Components, Interior & Rear Compartment and Impact & Display.
With its mile-deep HOK Dark Bronze paint and custom trim, SINISTR is certainly a showstopper, but it’s no trailer queen. Steve has built this Camaro as a genuine pro tourer. (See the video of Steve’s Camaro.) The car rides on an SRG-Force chassis from Street Rod Garage in Grant, Alabama, with tubular A-arm front suspension, rack-and-pinion steering and a torque-arm rear end with Watt’s link. Throw in a fearsome twin-turbo 406ci small-block Chev from Nelson Racing Engines putting out a cool 1500hp, and you’ve got a package combining the best of show and go.
Let’s take a look at how the Camaro came together.
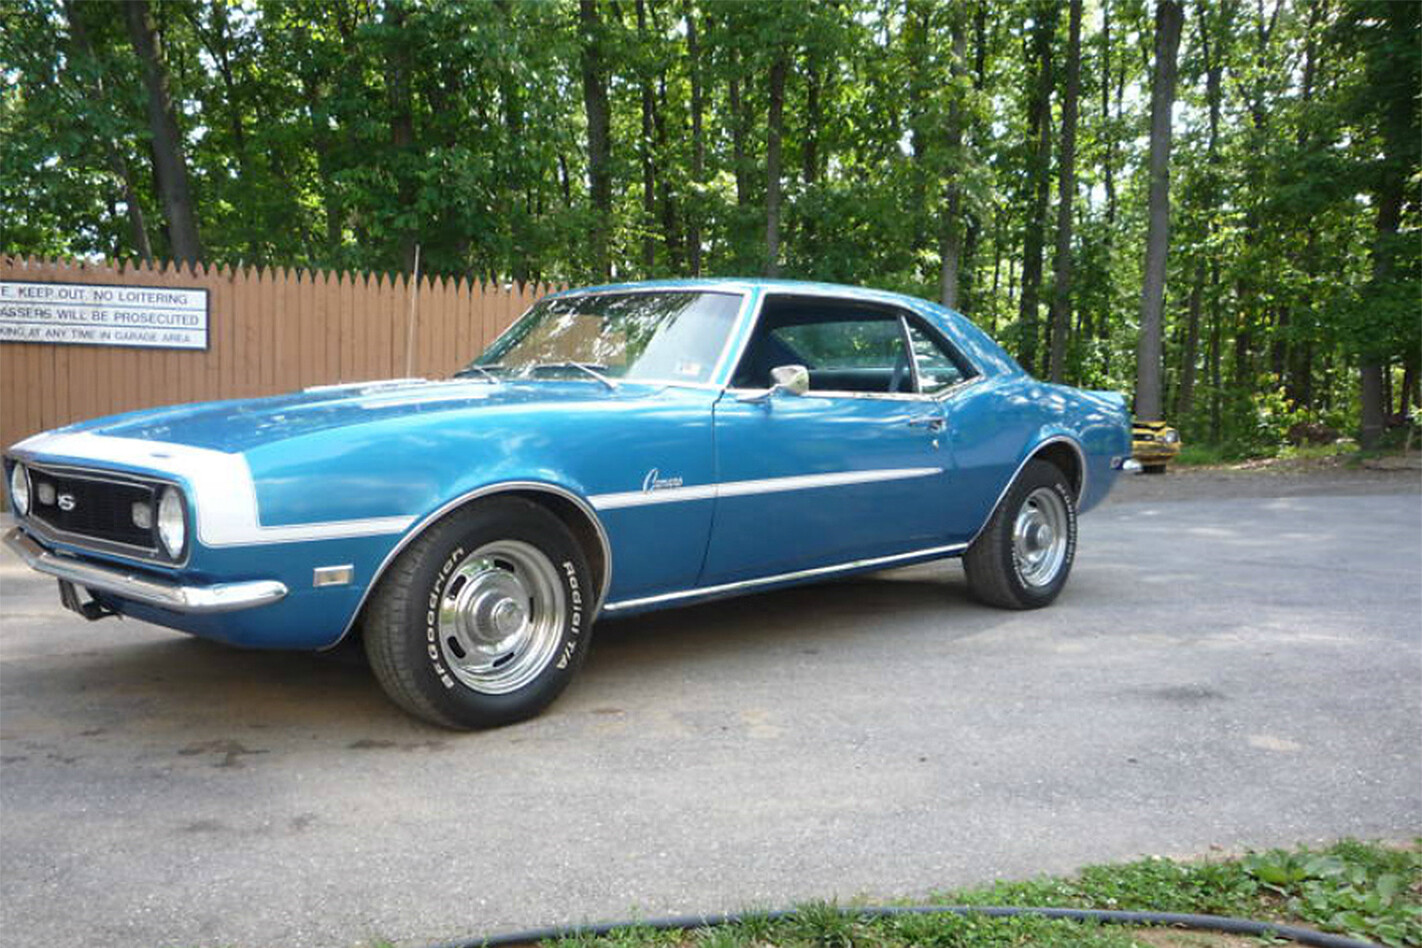 Steve sold another mint-condition, matching-numbers ’68 Camaro to buy this six-cylinder donor car for the SINISTR build. Not a bad starting point by many standards, however little else other than the doors, turret and scuttle panels were eventually used. Even then, those factory-original doors ended up being an absolute mission to fit correctly.
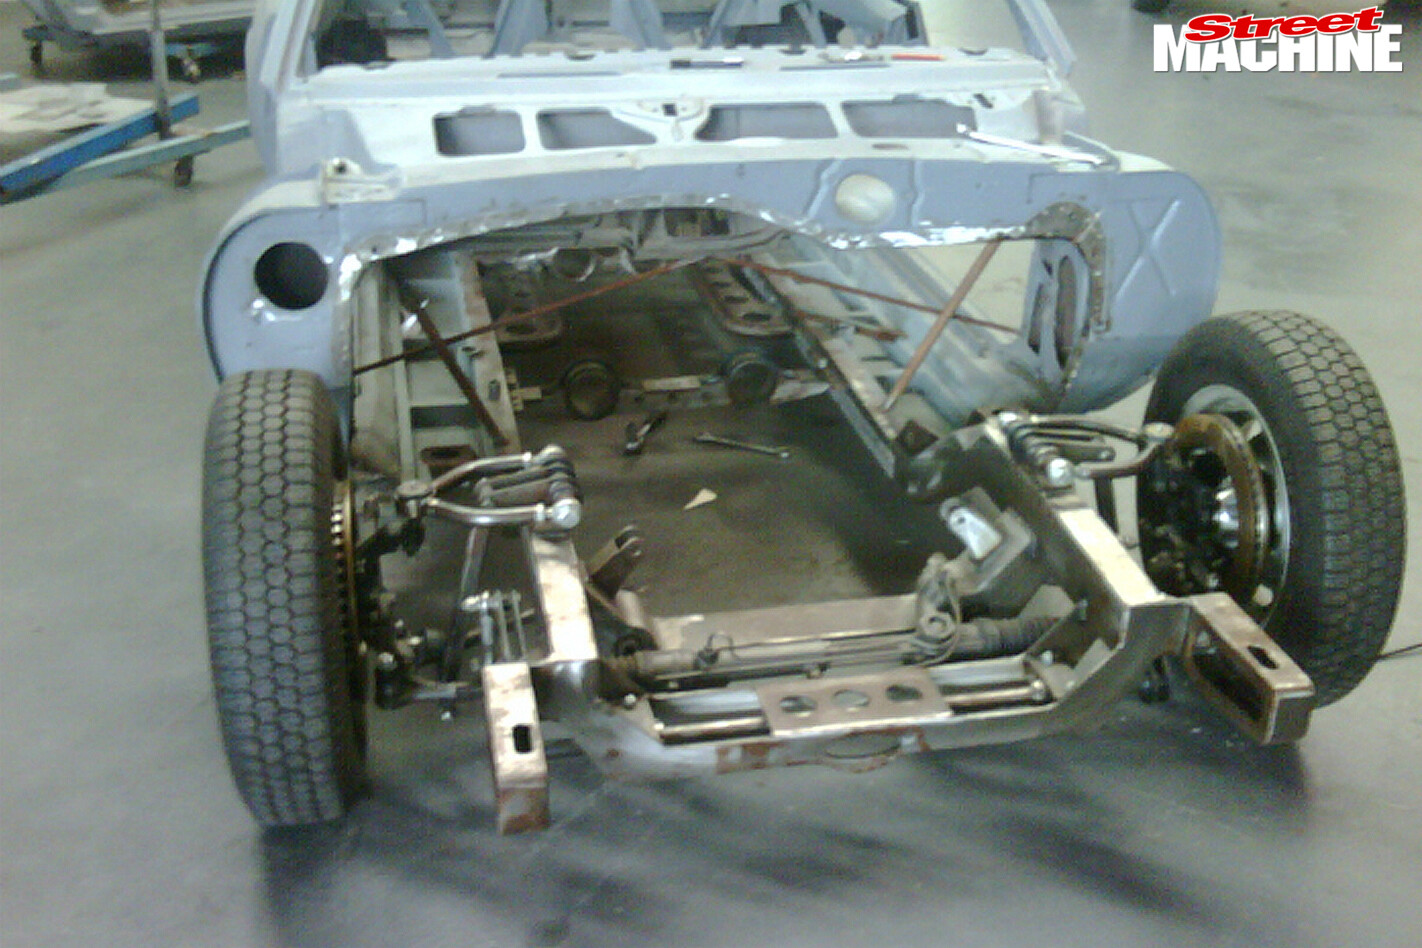 Steve didn’t want SINISTR to be too hardcore to drive, preferring it to steer, stop and handle like a modern car. With this in mind, he slotted a complete Force chassis from Street Rod Garage (SRG) under his first-gen – unfortunately it hung a bit low for Steve’s liking. His solution was to completely cut the floor and firewall out and sink it 1.5 inches further up into the car.
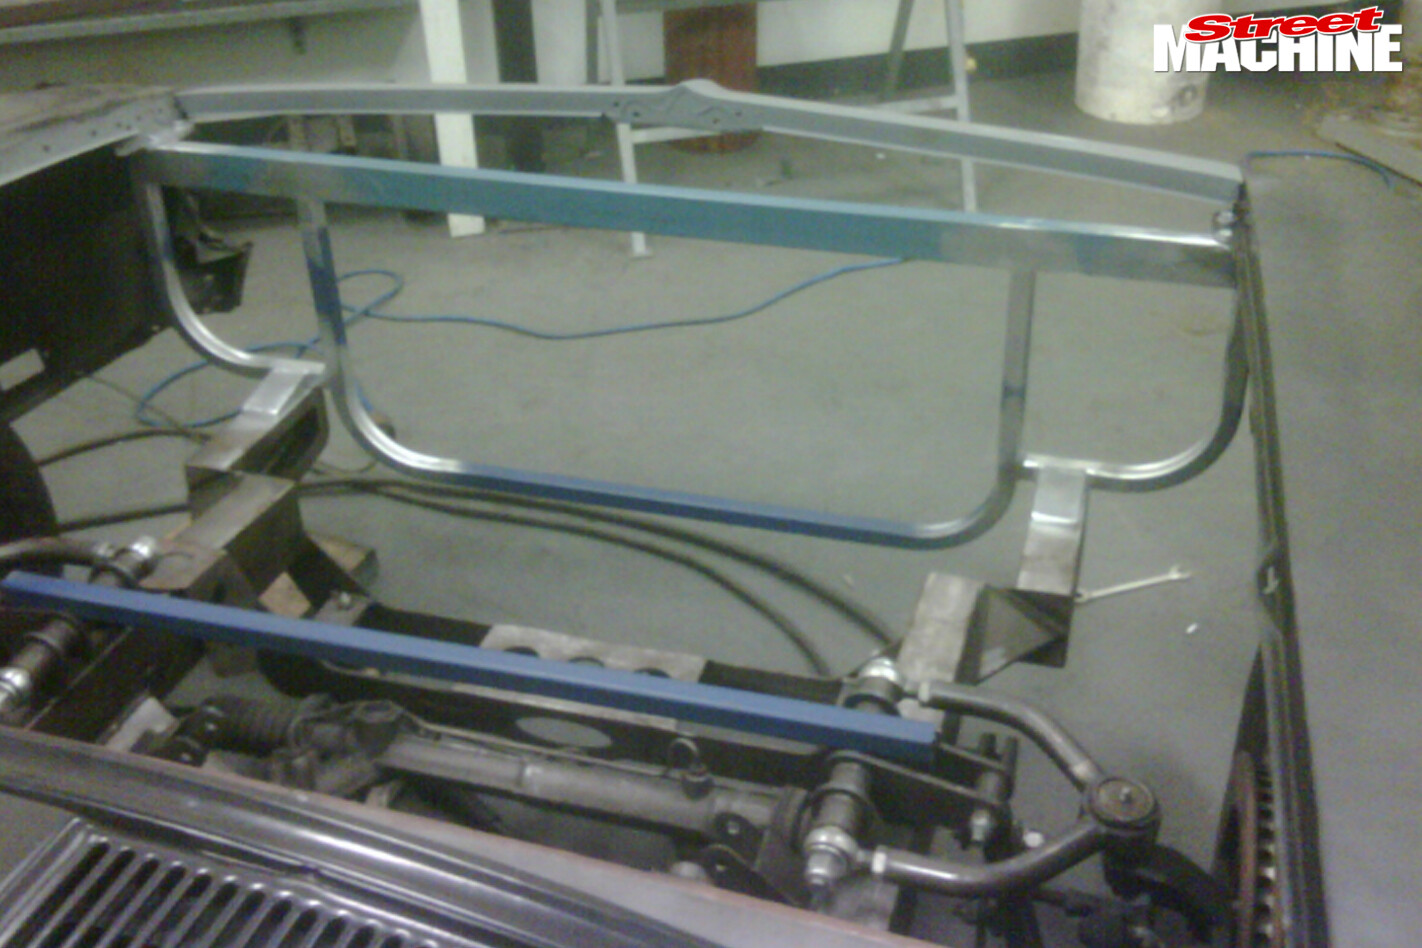 Raising the height of the chassis by 1.5 inches meant a new radiator support structure had to be fabricated. This ended up being quite an intricate piece, not only holding the front sheet metal in place, but also mounting the radiator, AC condenser and massive air-to-air intercooler.
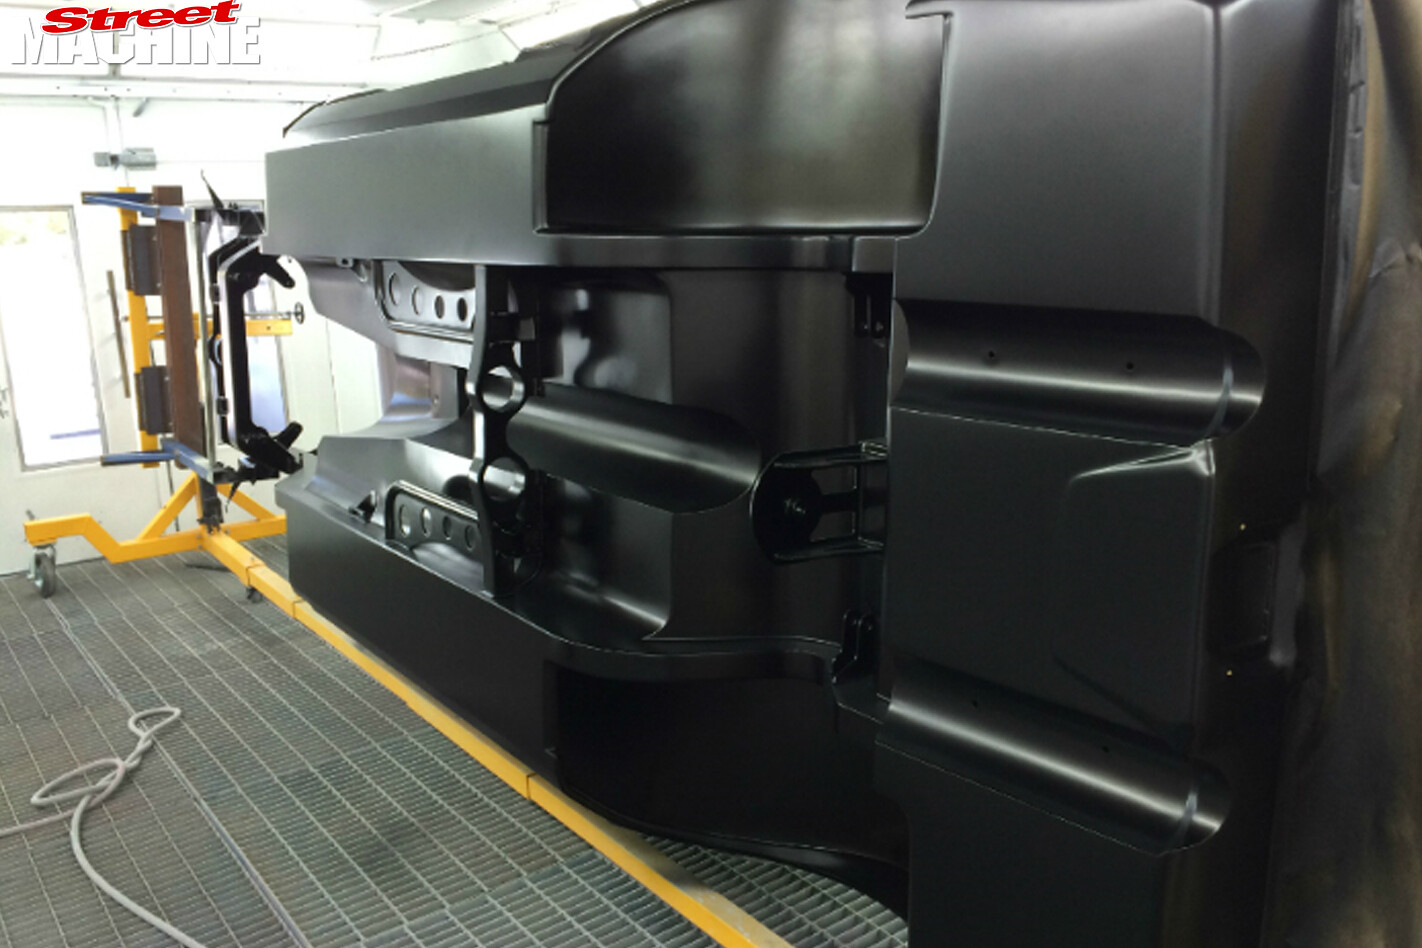
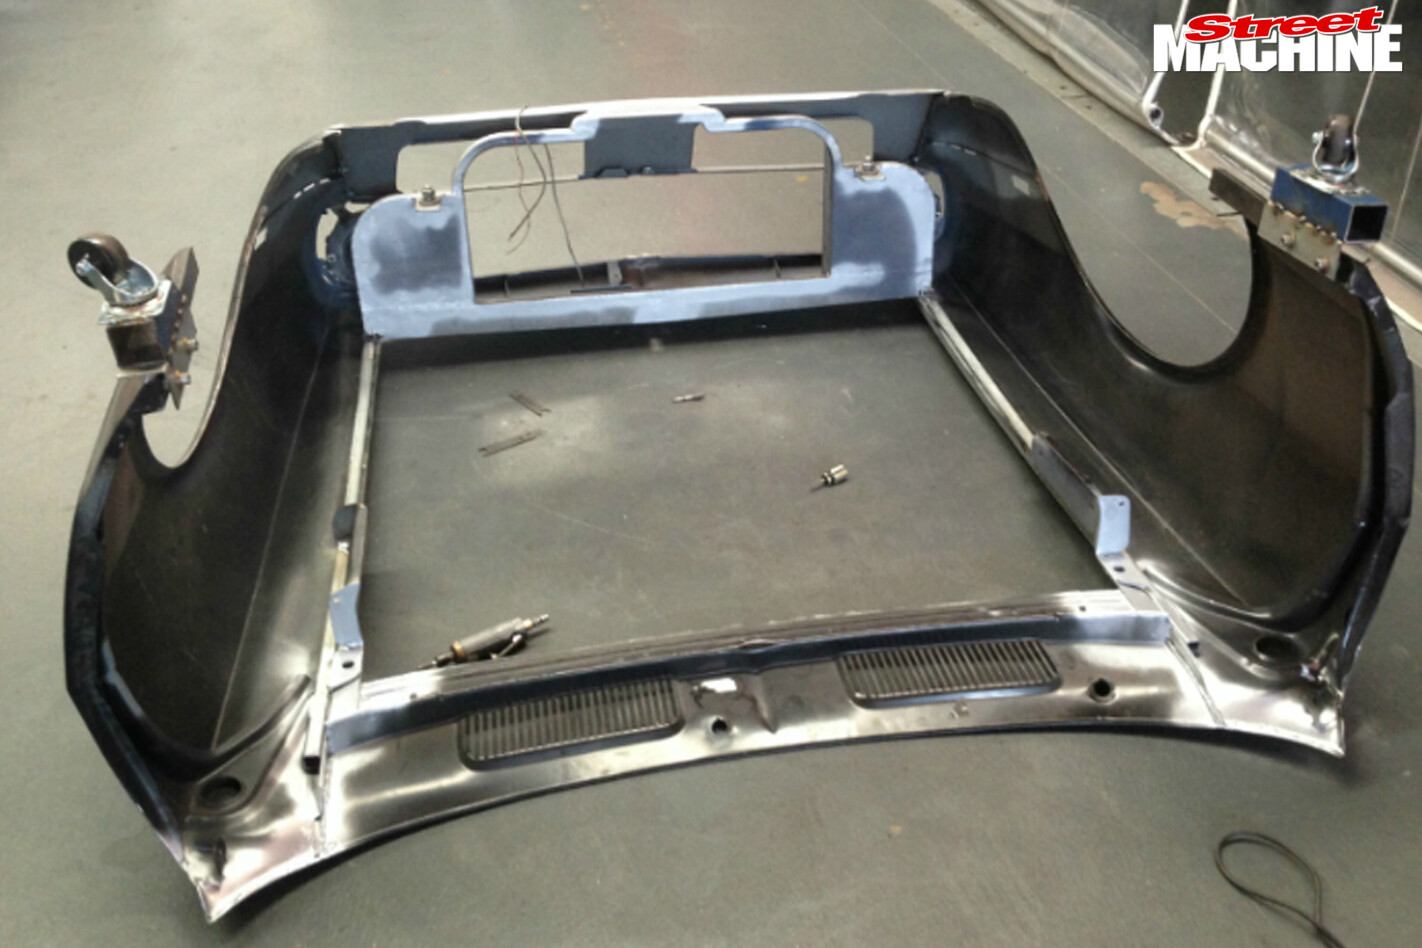 For a neater, cleaner look, all the front sheet metal was welded together into one piece. This also allowed all but two of the mounting bolts for the entire front end to be hidden from sight.
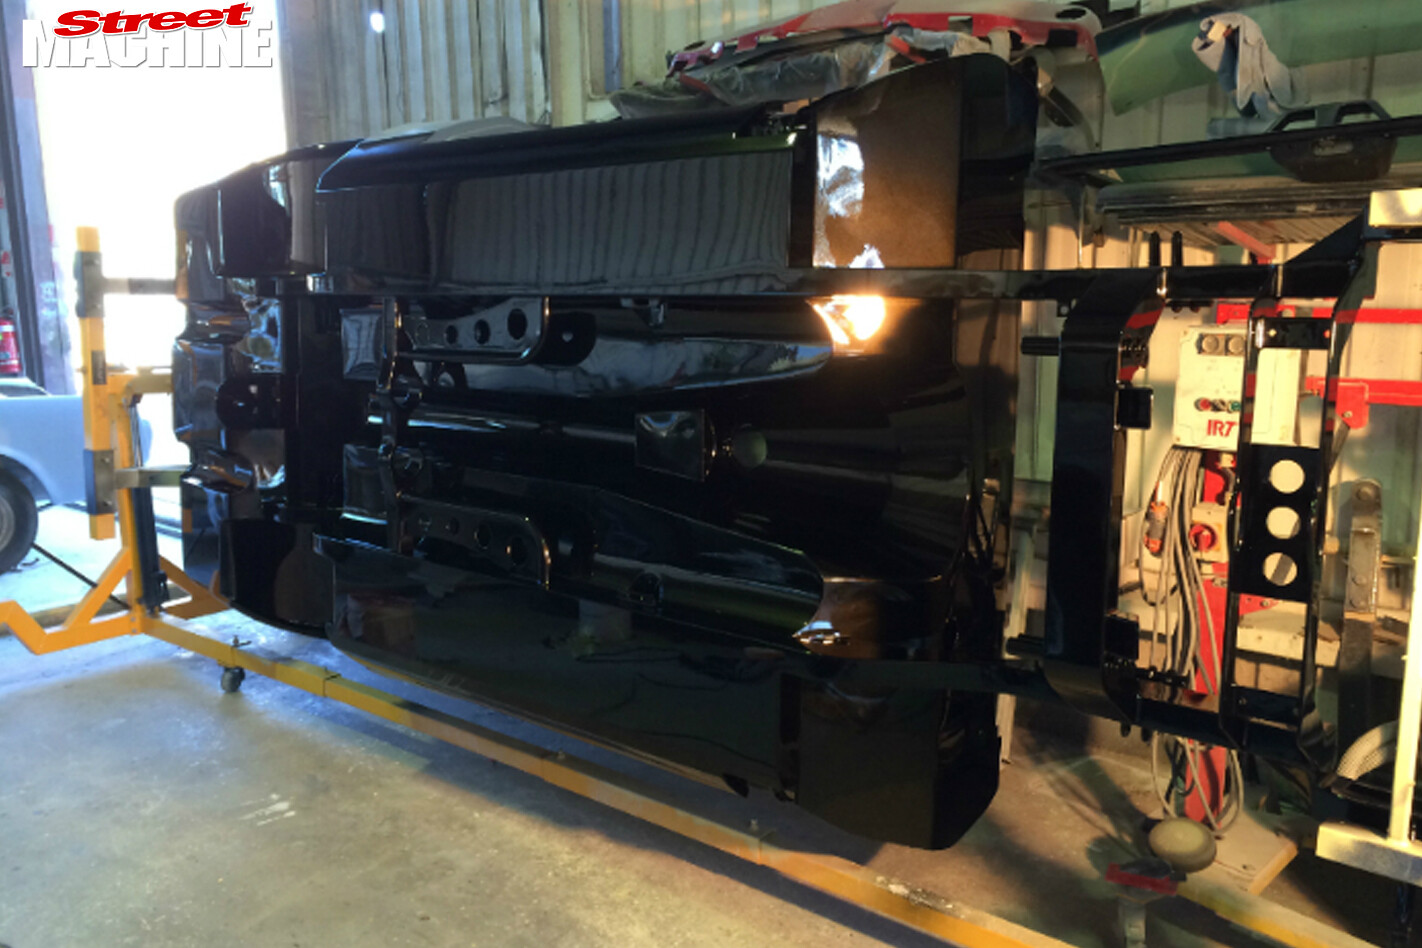
 Mr Chevrolet wouldn’t recognise a single element of SINISTR’s underside. The raised floor means nothing hangs below the sills, which have been extended 1.5 inches and wrap right under and across to the SRG chassis. The new tunnel, floor transitions and gearbox hump were rolled from flat sheet, then welded into place.
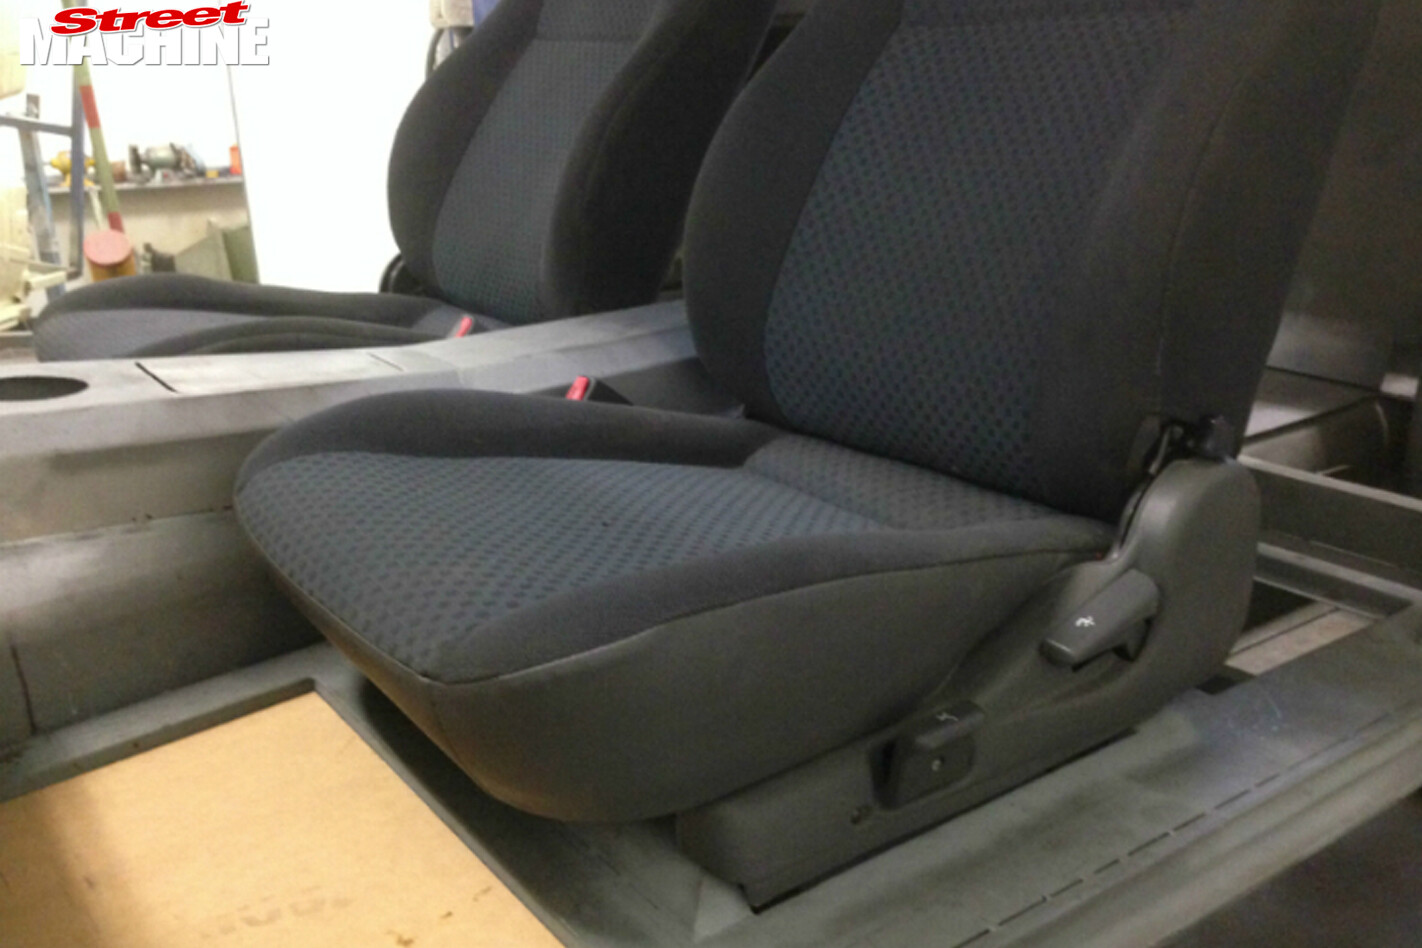 The seat bases were recessed into the floor structure for a neater finish. With the lap-sash belts integrated into the seats, this area had to be significantly beefed up to withstand the same loads as seatbelt mounts. To create all the folded tin work, Steve bought himself a folder, while one of his building contractors rolled up the curved sections using templates he supplied.
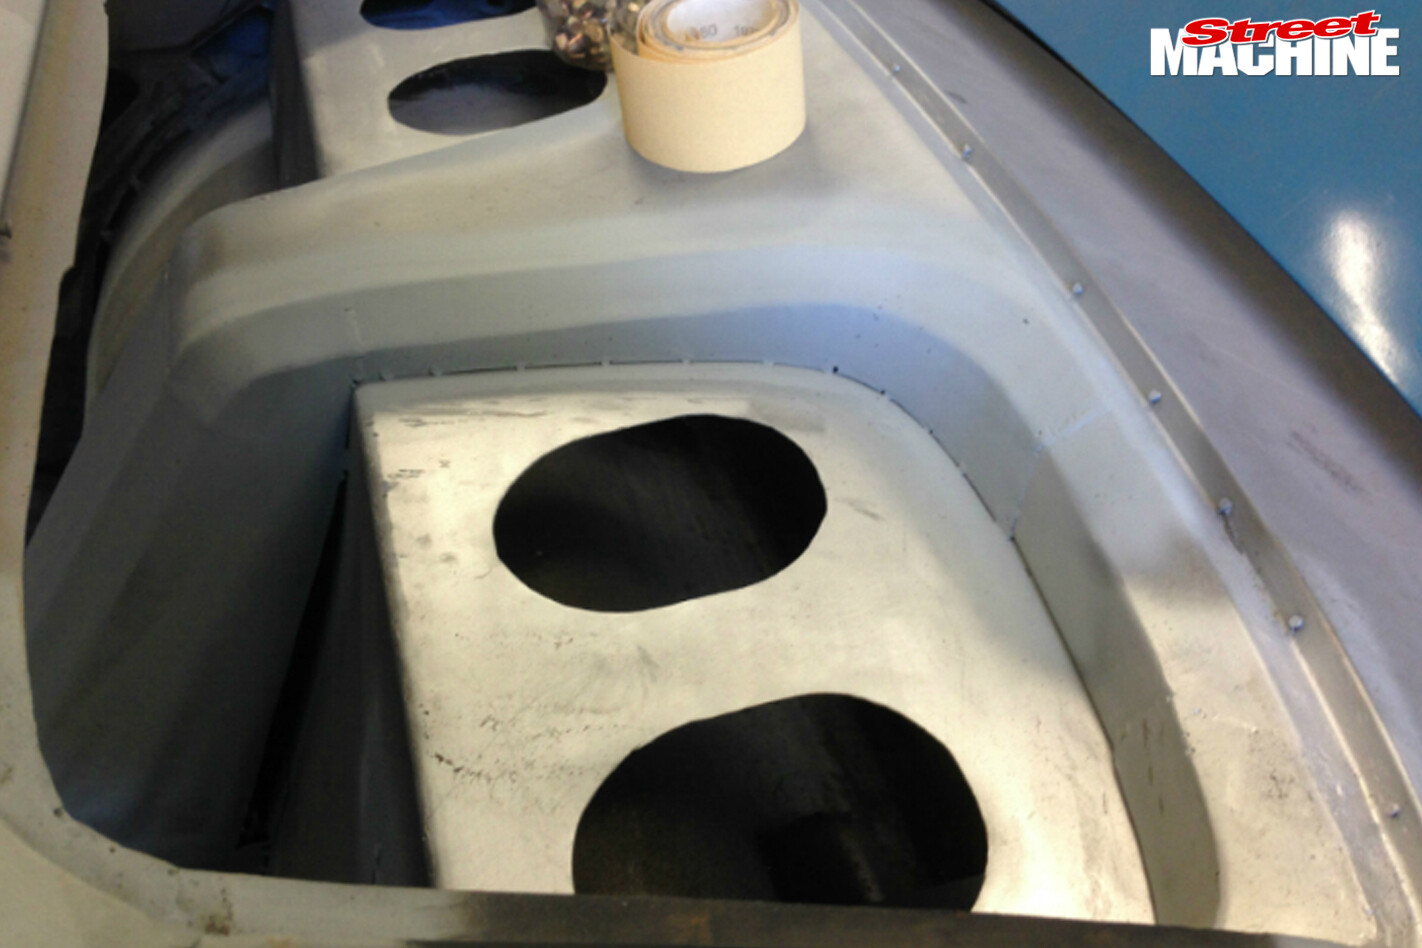 The boot lid does not have a lock or catch mechanism. Instead, it’s raised and lowered (to a water-tight seal) via a modified Commodore electric seat mechanism. These openings in the parcel tray provide access into the boot should those mechanisms ever give trouble.
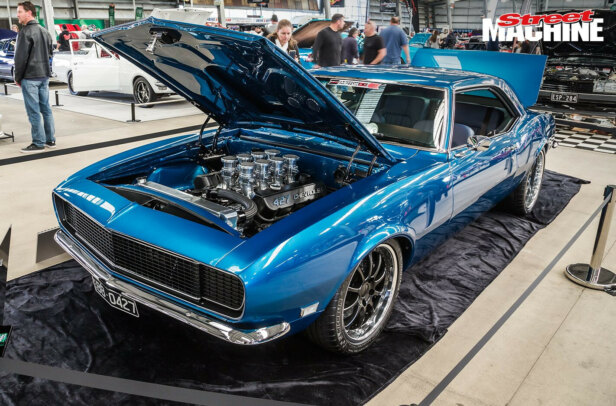
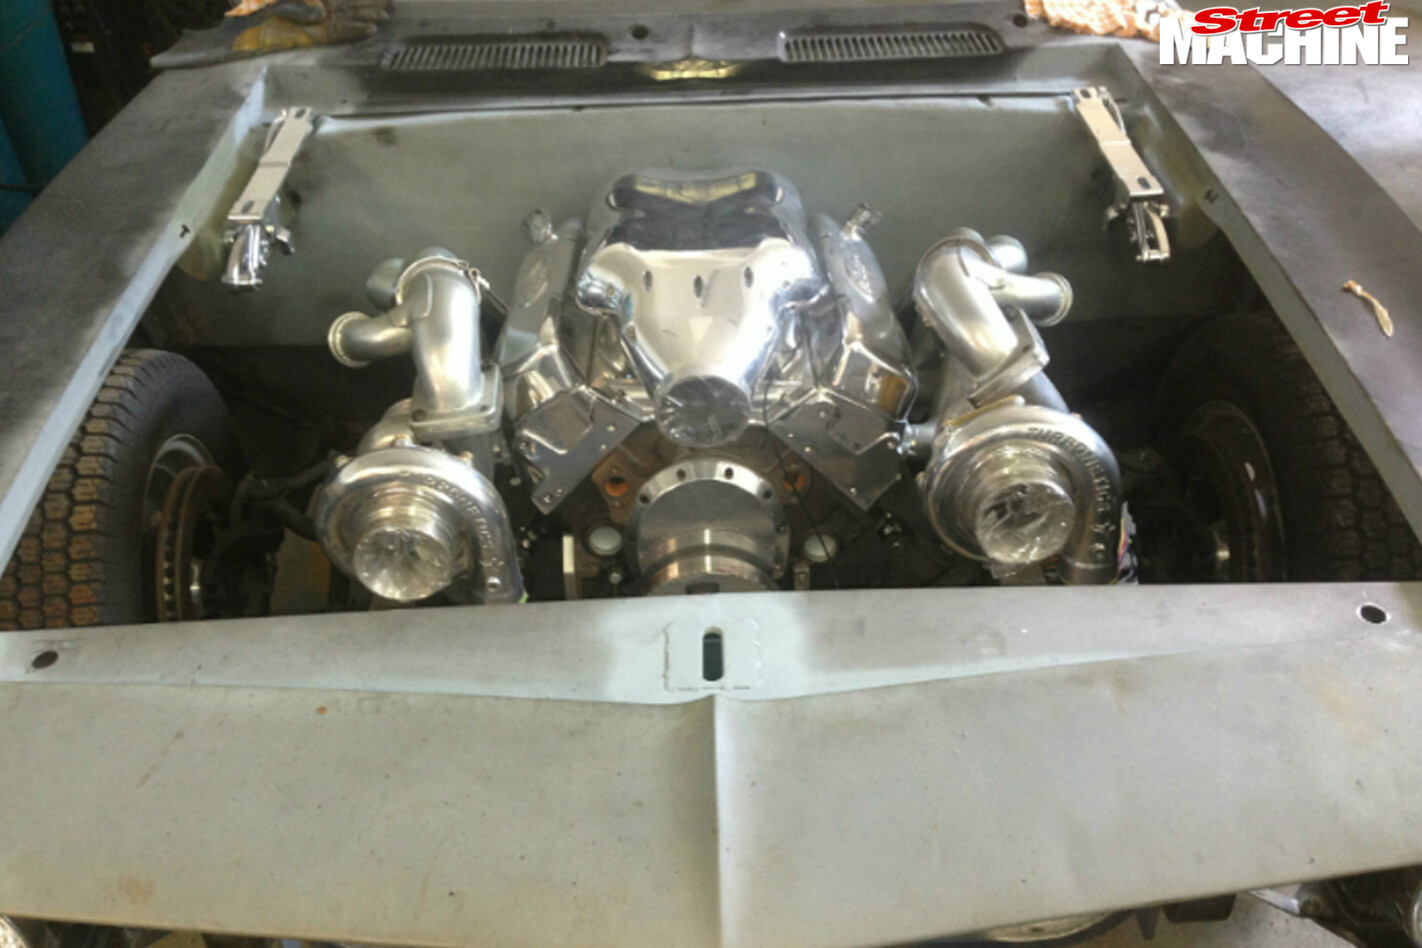 SINISTR’s twin-turbo 406ci small-block Chev is by Nelson Racing Engines, and makes a dyno-proven 1451hp and 1337lb-ft at 5600rpm on 28psi. Here you can see the early turbo set-up originally purchased in 2011. When NRE released its new symmetrical turbos later in the build, Steve bit the bullet and forked out for them, despite the significant additional cost – which included $6000-worth of new manifolds, on top of the huffers.
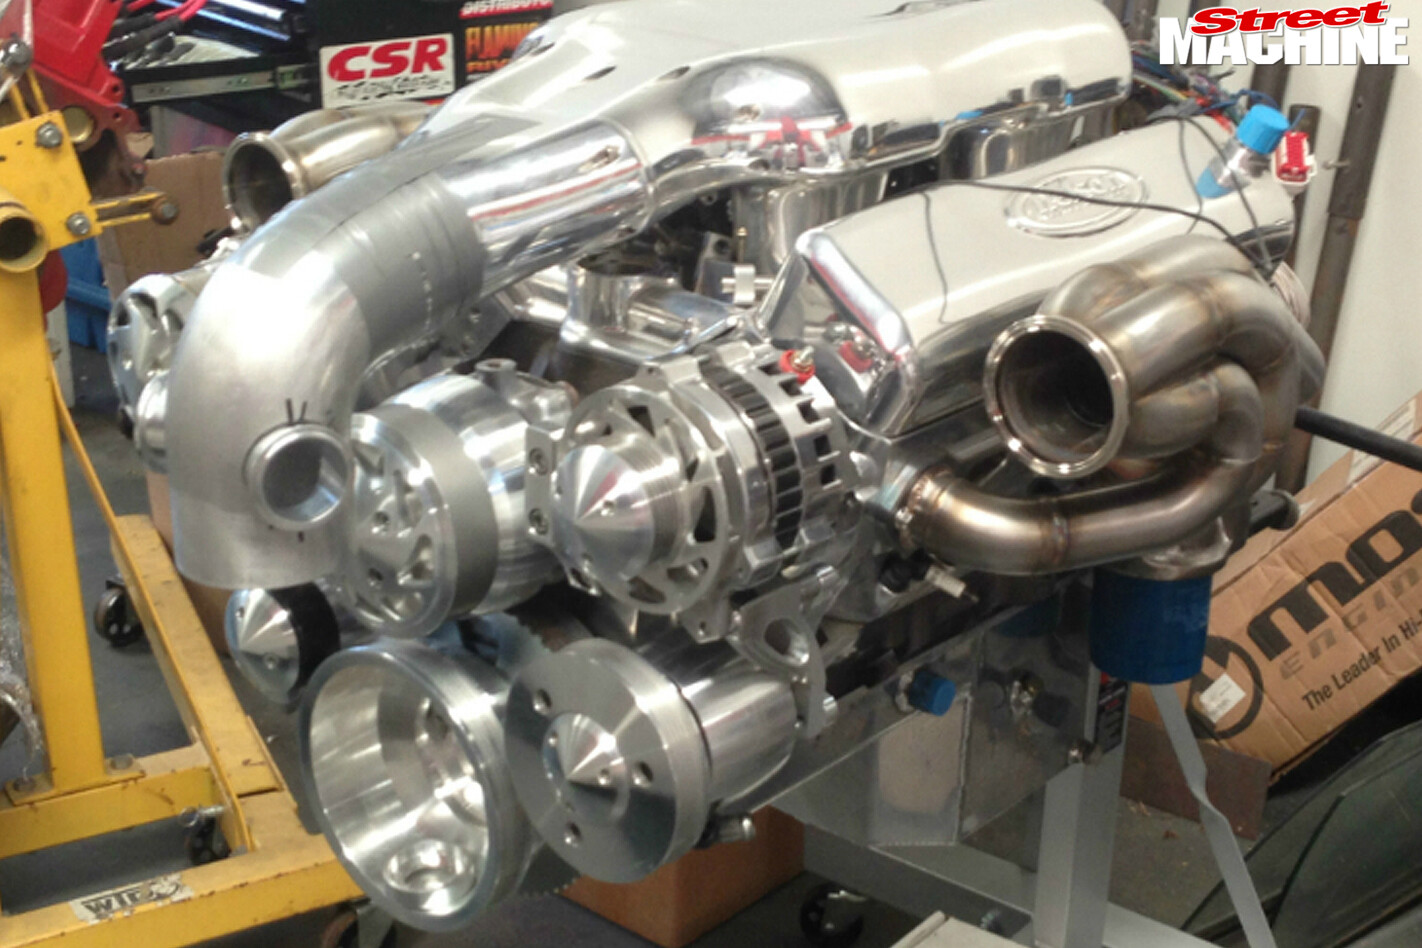 These are the new manifolds to suit the symmetrical NRE turbos – they’re noticeably nicer-looking than the originals. A Billet Specialities Tru Trac serpentine set-up provides smooth drive for the alternator, power steering pump and air-conditioning compressor.
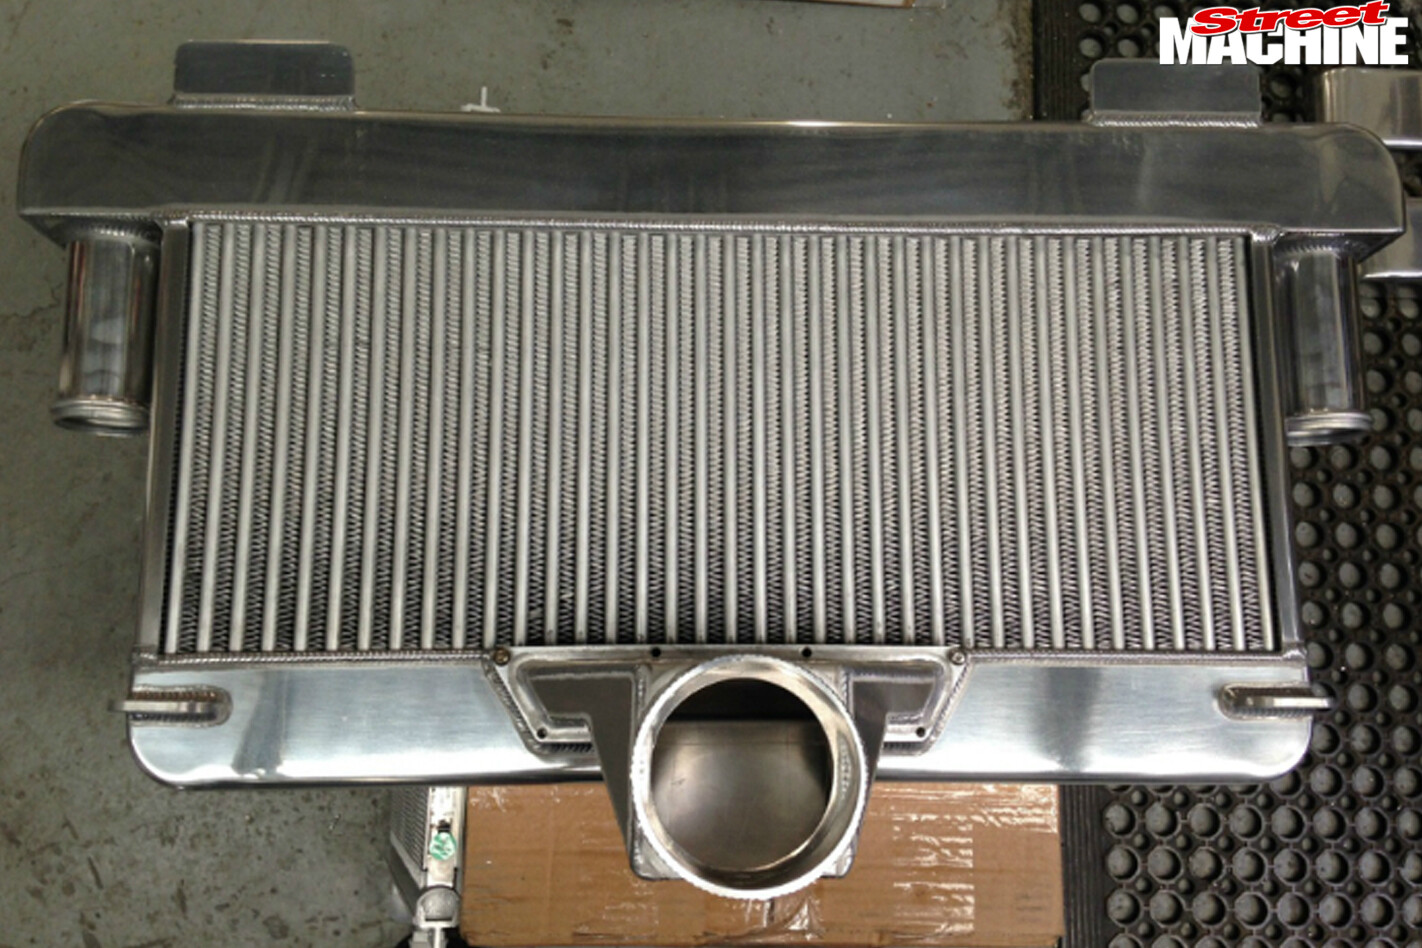 The massive dual-core air-to-air intercooler has an inlet from each turbo at the extremities, all merging into a single outlet. It (and the radiator) was fabricated by Shaun’s Custom Alloy from wooden templates, which included all the mounting brackets. Due to the lack of space, it had to be very precise fit – fortunately it pretty much bolted straight up.
 See what I mean about a packaging nightmare? Everything is a very snug fit, with the barest of room to spare. Getting it all to fit and be serviceable took a ton of planning. Check out those slick headers. As well as those two fans pulling air through, there’s another big one out in front pushing.
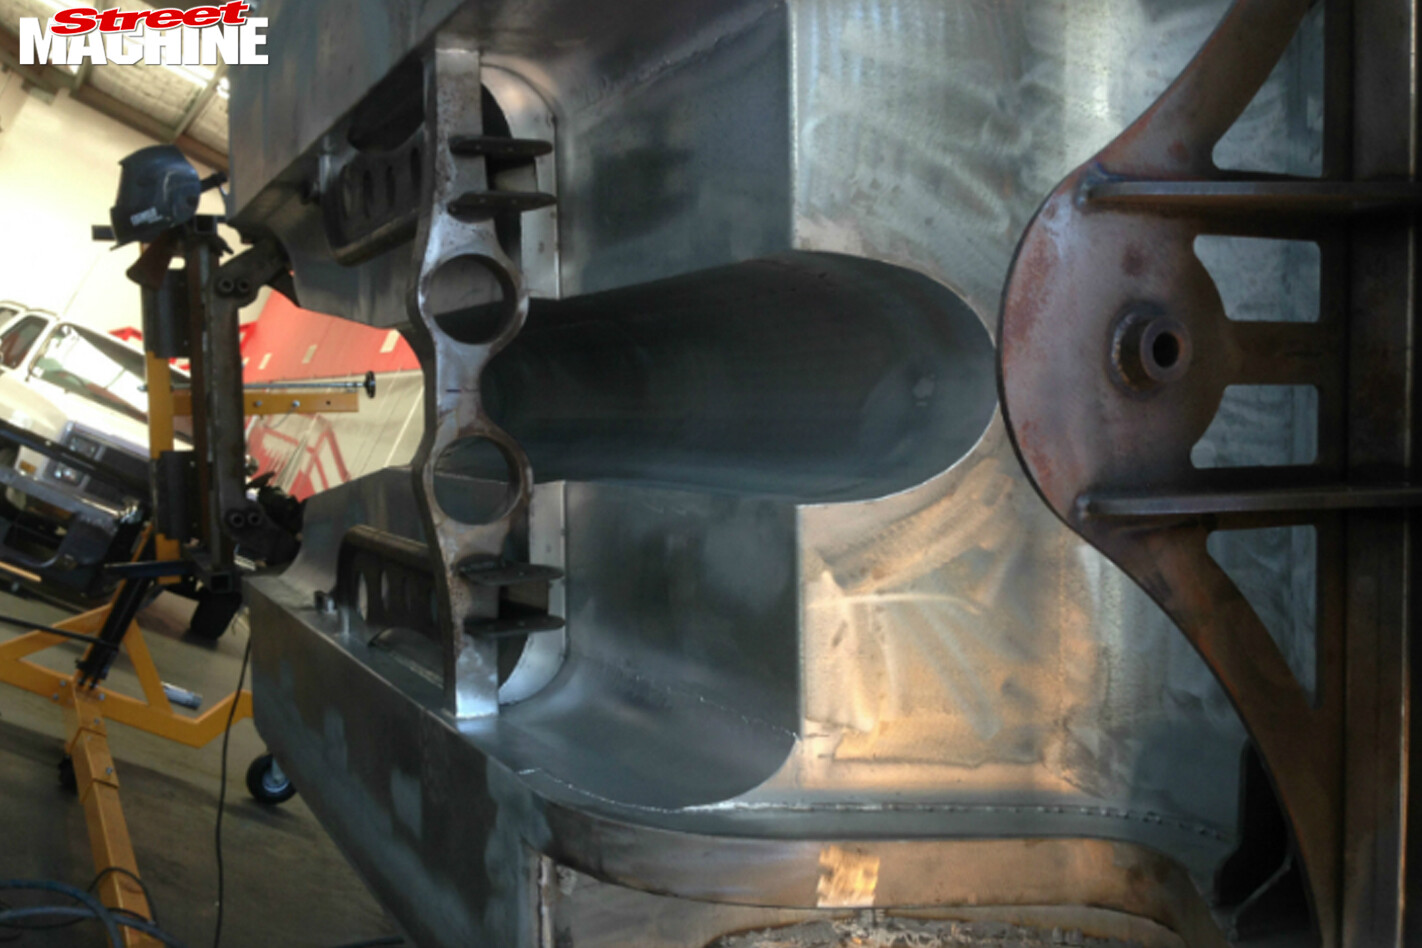
 This shot gives you a good look at the SRG ‘Monster Arm’ rear end. This resembles a NASCAR Sprint Cup-style set-up. There’s no additional upper links or torque tube; instead, these two bars are rigidly fixed to the diff housing. Their resistance to bending/bowing is what stops axle wind-up, while the Watt’s link prevents lateral movement. Note the symmetry of everything from front to back.
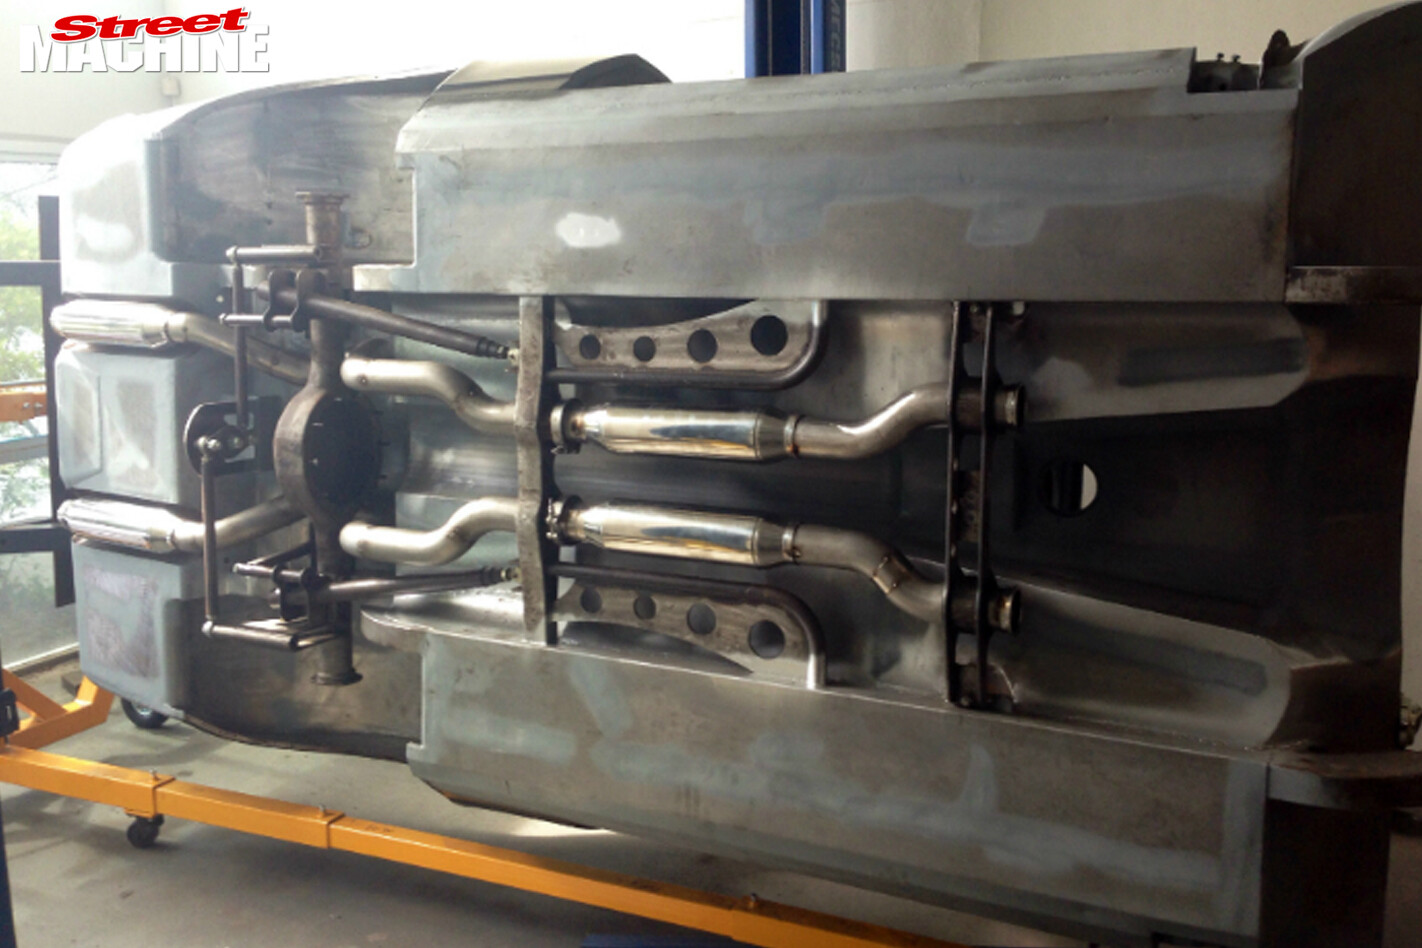
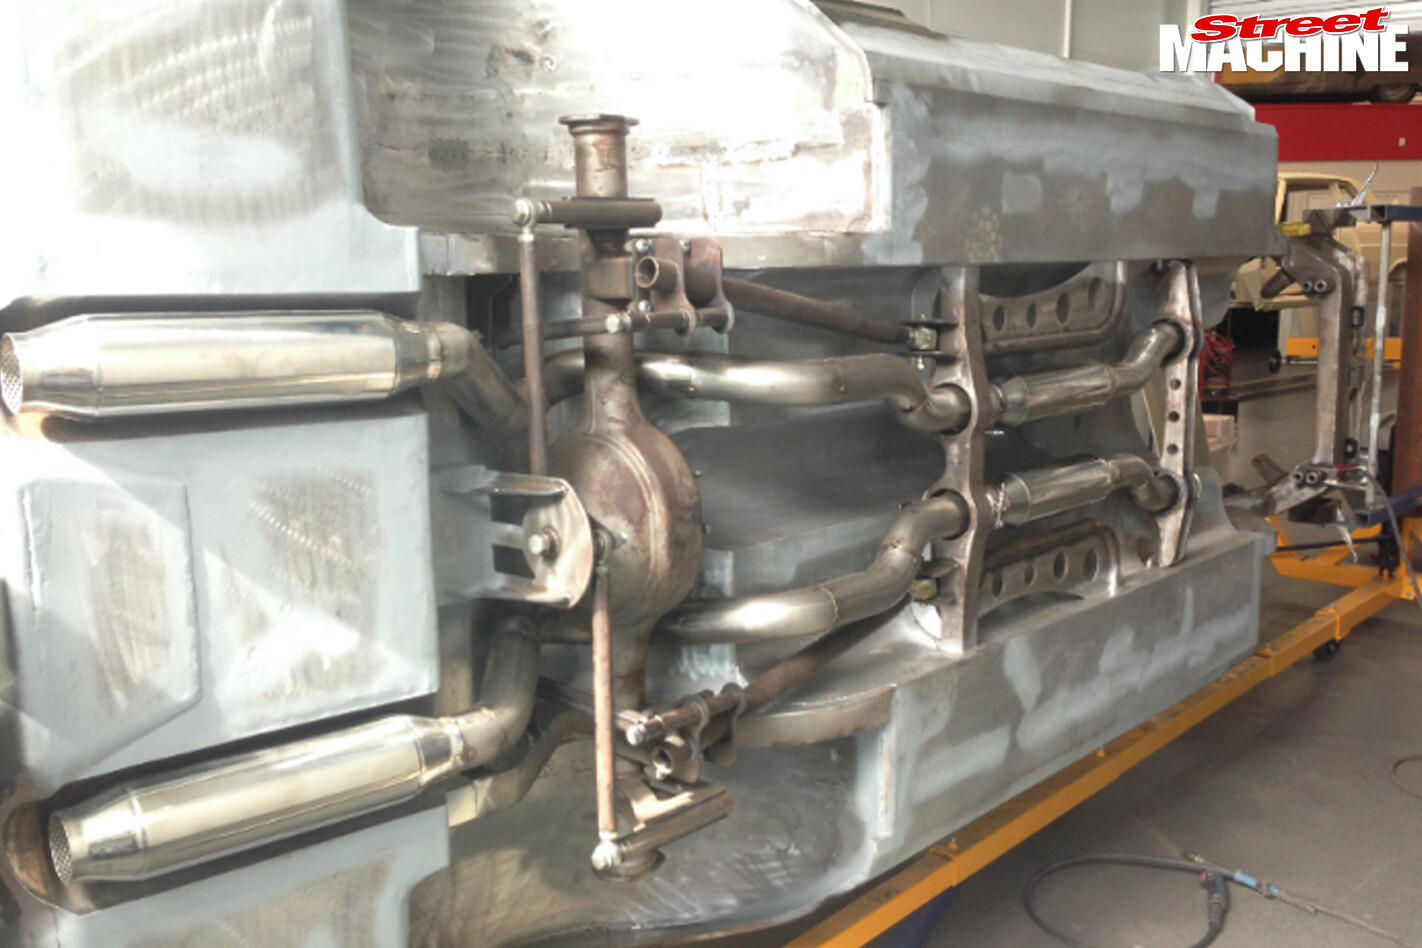 For the full three-inch exhaust, Steve started with a box of bends and tacked it all together, while the Camaro was on the rotisserie. It was then sent off to be professionally TIG-welded. Unfortunately once fully welded it had all moved and no longer fitted due to the tight tolerances. “I spent three weeks making them fit again,” Steve says. “There was lots of heat-shrinking and re-welding, along with quite a few swear words. I nearly threw the lot in the bin several times. And this was all going on with the underside painted and the stress of trying to get ready for MotorEx [Sydney 2015]!”
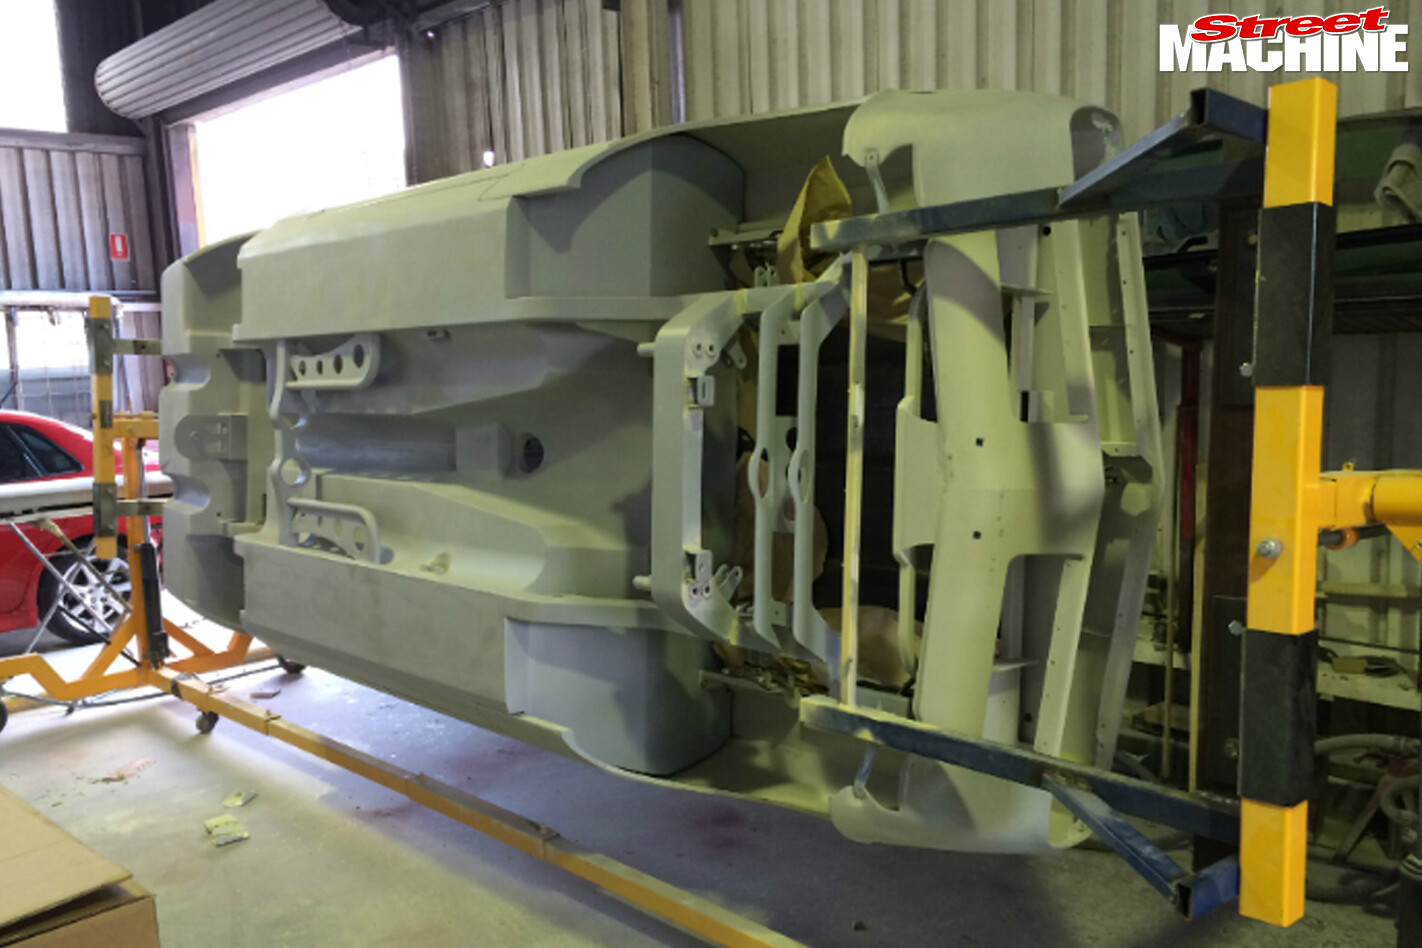 Note how the trailing edges of the guards have been moulded into the wraparound sills. The firewall has been extended as well, to hug the inside profile of the smoothed-off guards. You can also make out the integrated mounts for the removable gearbox crossmember, which you can see in the previous two images. The bulk of SINISTR’s five-year build went into the underside.
 That full-length console is a permanent welded fixture in the car. It not only serves a decorative purpose, but the main tunnel and fabricated console forms a dual-skin centre spine that dramatically stiffens the whole car – all the better for cornering. The wiring runs up through this cavity as well.
 Everything smoothed off, primered and ready for paint. The centre mount for the reverse Watt’s link was originally part of a chassis crossmember that hung down quite substantially (see image #5). This configuration left no room for the exhaust, forcing Steve to re-engineer and beef up this section of the floor and chassis to eliminate the crossmember.
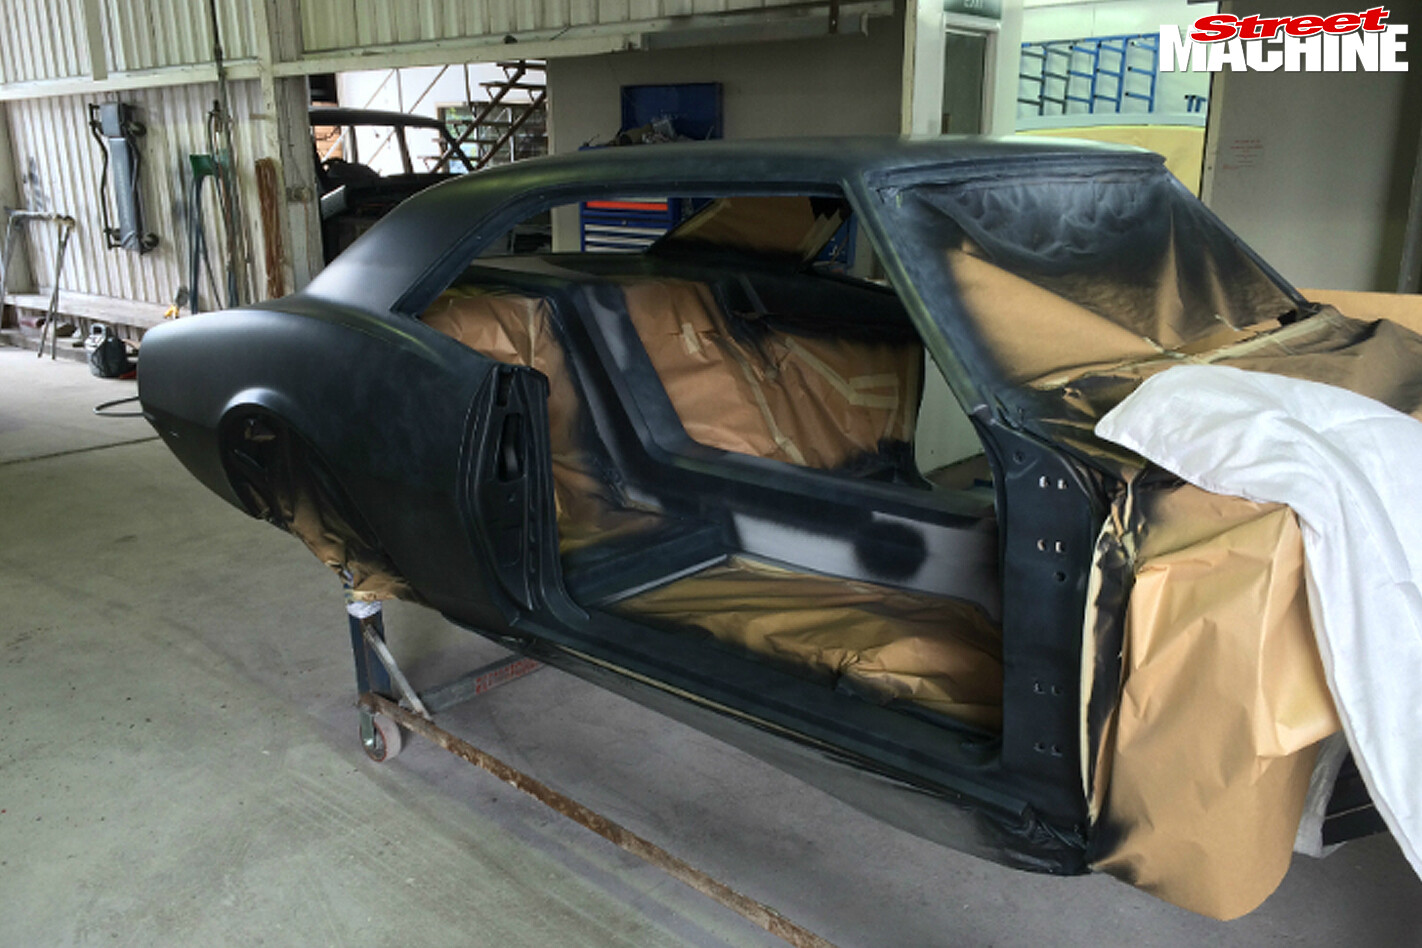
 Once back from the painters it was full steam ahead for MotorEx. “I was doing a lot of hours,” Steve says. “Over 70 hours a week at work and another 40, minimum, on the car. I had Little Steve helping me as well. If it wasn’t for him I think I’d still be going.” SINISTR looks black in most photos, however you can see where the light hits it, it’s actually brown.
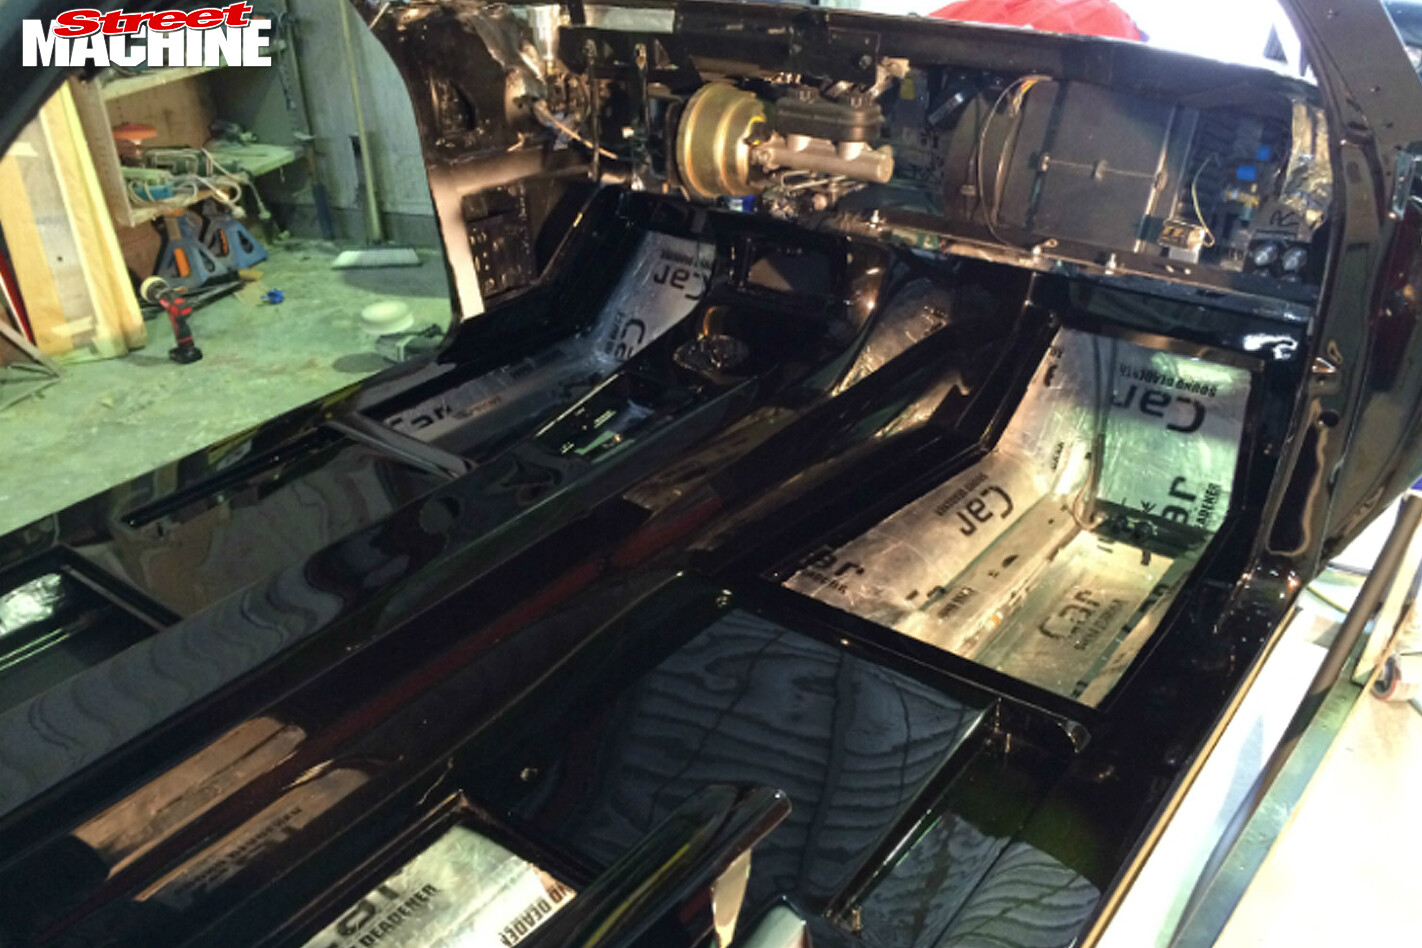 There’s a lot packed in behind SINISTR’s fibreglass dash, including the brake booster, master cylinder, clutch, wiper motor, Vintage Air a/c, coil packs and ECU. Being a driver, there’s full sound-deadening and you can just make out the tunnels under the floor, through which all the fluid lines have been routed. How about the gloss on those floors!? It’s this level of finish that scored SINISTR Top Street Machine at the Queensland Hot Rod Show and a Meguiar’s Super Six spot at MotorEx 2016.
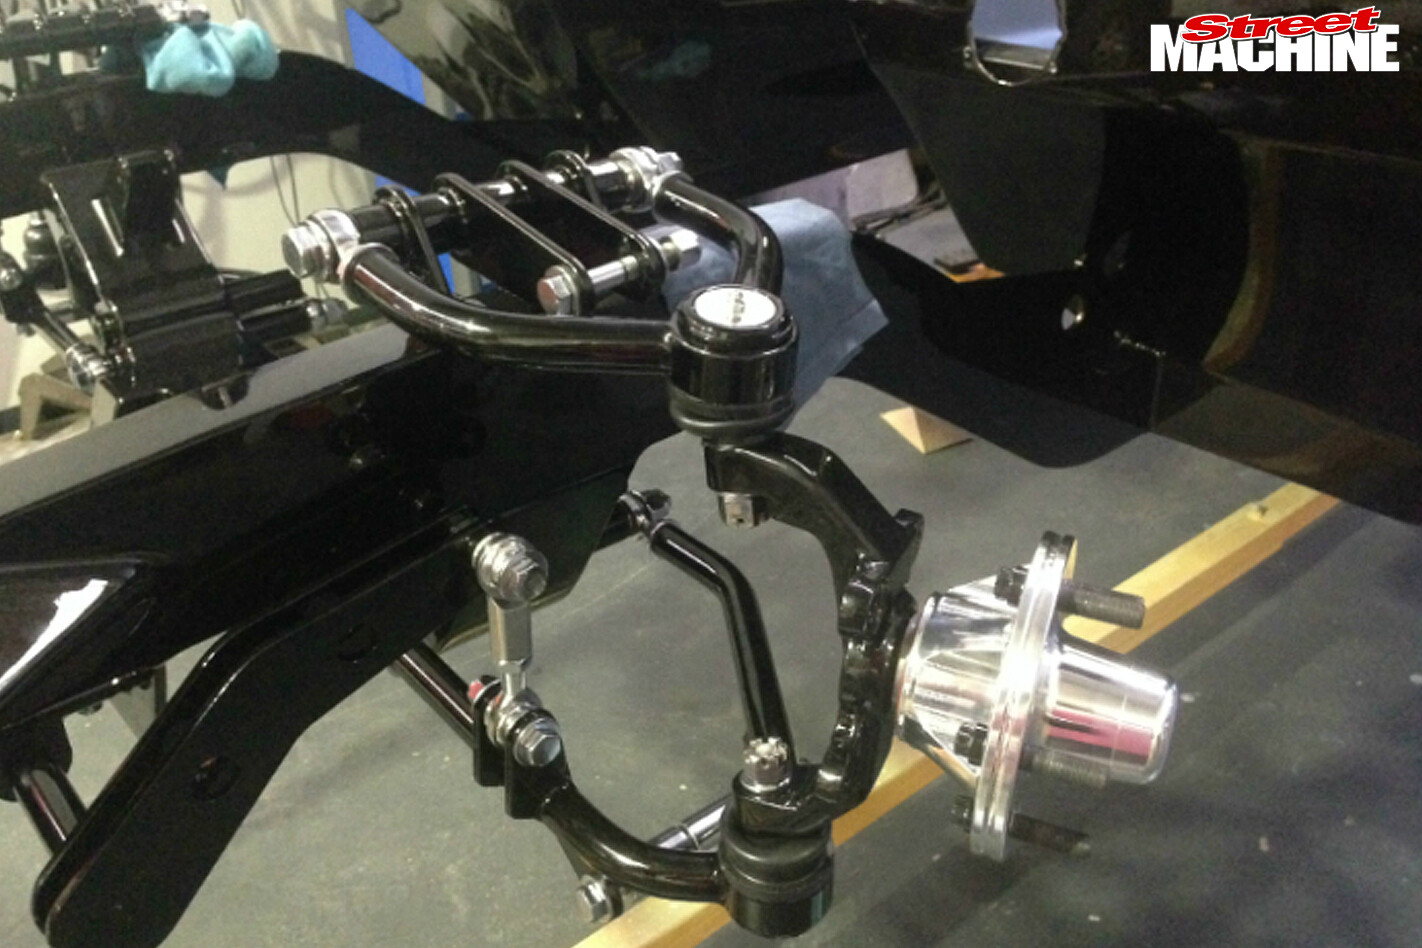 In addition to the tubular arms, Wilwood aluminium hubs, and direct-acting, adjustable splined sway-bar, the SRG chassis uses a beefy stub-axle to handle the increased loads that will be transferred through fat, wide, sticky tyres.
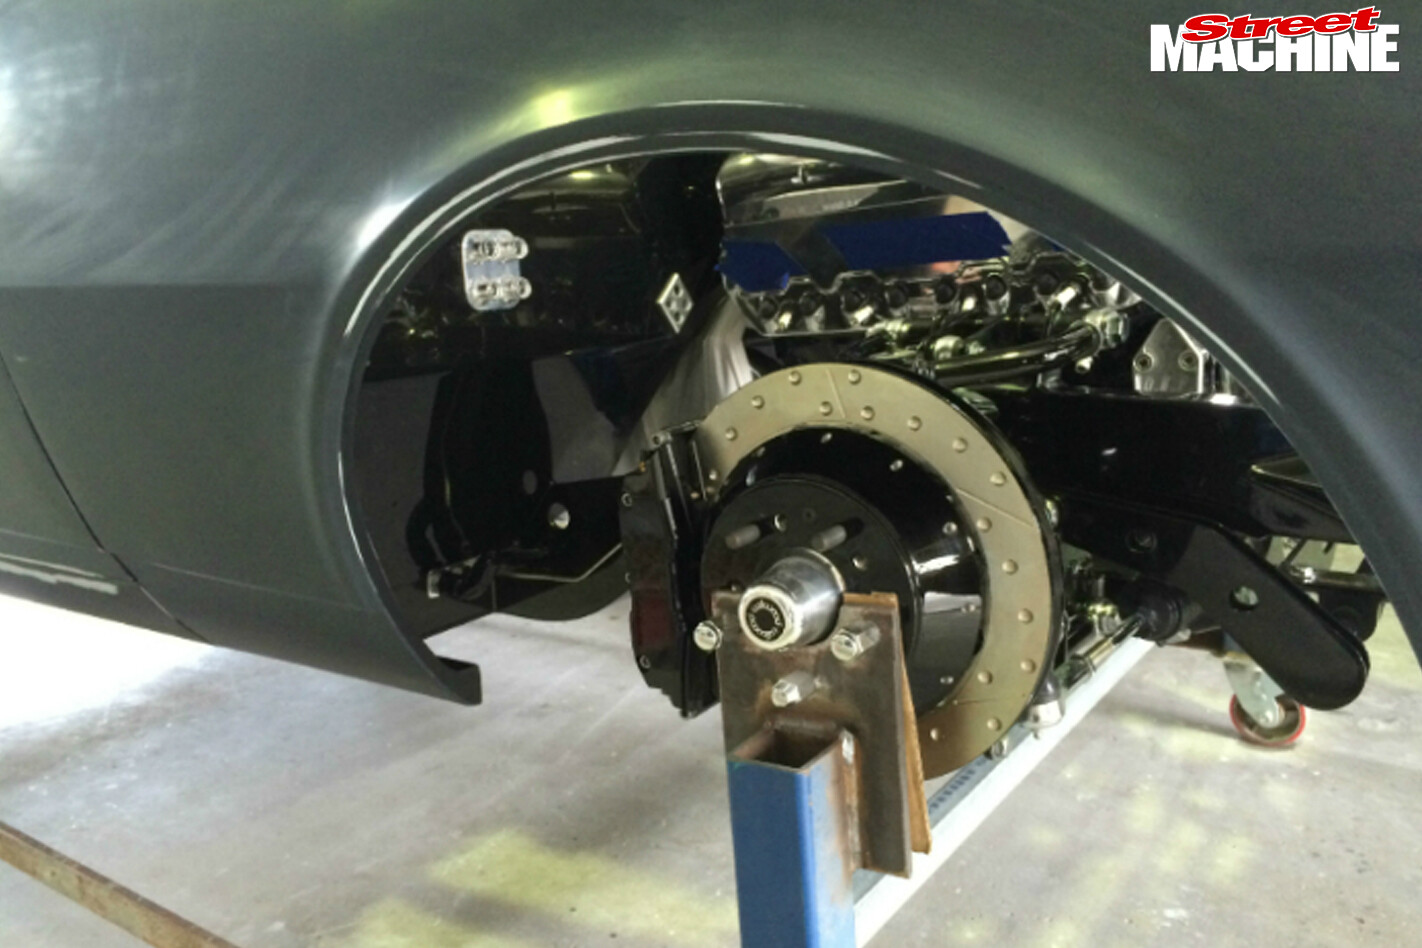 Wondering why you haven’t seen dimpled rotors like this before? That’s because Steve made them himself. He fabricated a jig and then set about drilling the dimples using his workshop drill press. The Wilwood calipers have been given the same smooth treatment as every other part of SINISTR. Dig the polished billet bulkhead fitting for the AC and heater hoses!
Comments