Want a four-speed auto for your older Ford? Fitting an AOD (Auto Over Drive) is an ideal solution
THERE’S something innately satisfying about cruising in an old-school streeter. But while they’ve certainly got style, they lack the dynamics and finesse of modern machinery. One area where you can close the gap is by upgrading your streeter’s antiquated three-speed auto for a slick-shifting four-speed overdrive unit.
Unlike Holden, which offered the hydraulically shifted TH700 when shifting from three to four speeds, Ford Australia jumped straight from three-speed hydraulic autos to electronically controlled four-speed overdrive units, which are a complete bugger to retrofit to older Fords. But don’t despair — there is a solution for the FoMoCo brigade, in the shape of the hydraulically operated AOD (Auto Over Drive) four-speed.
While dropping AODs into older Fords is quite common and well-documented in the US, it’s a relatively unusual swap here. This has much to do with the AOD receiving bad press for being hideously complicated, having a troublesome valvebody and not being very strong — the lock-up input shaft and overdrive band are notorious weaknesses. However, the proliferation of these gearboxes in Mustang drag racing, along with the rise in popularity of retro-fit installations, means there is now almost as much aftermarket gear and accumulated experience for the AOD as for the venerable C4.
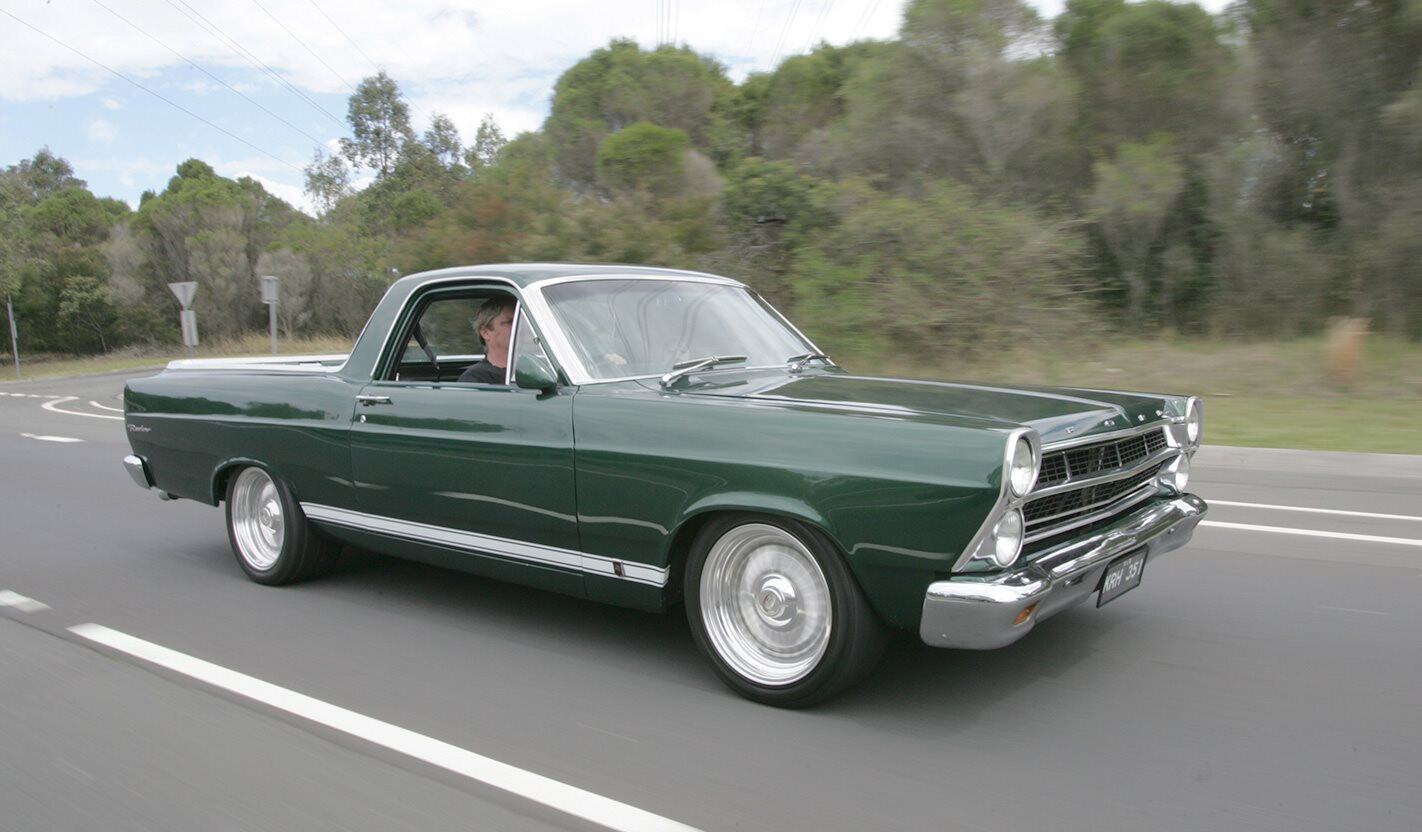
There are numerous advantages to stepping up to a four-speed auto; lower cruising revs, less engine wear, quieter cruising, increased fuel economy and potentially better off-the-line acceleration when combined with taller diff gears. Kris Hodges, of Kris Hodges Automotive (02 4297 6620), decided to savour the benefits of overdrive by slotting an AOD into his 1967 Ranchero ute. For those who don’t know, ’67 Rancheros are virtually identical under the body to XR-XC Falcons, so nearly all the salient details are the same for anybody looking to put an AOD into a pre-’88 Aussie Ford. We couldn’t resist taking a closer look.
THE GEARBOX
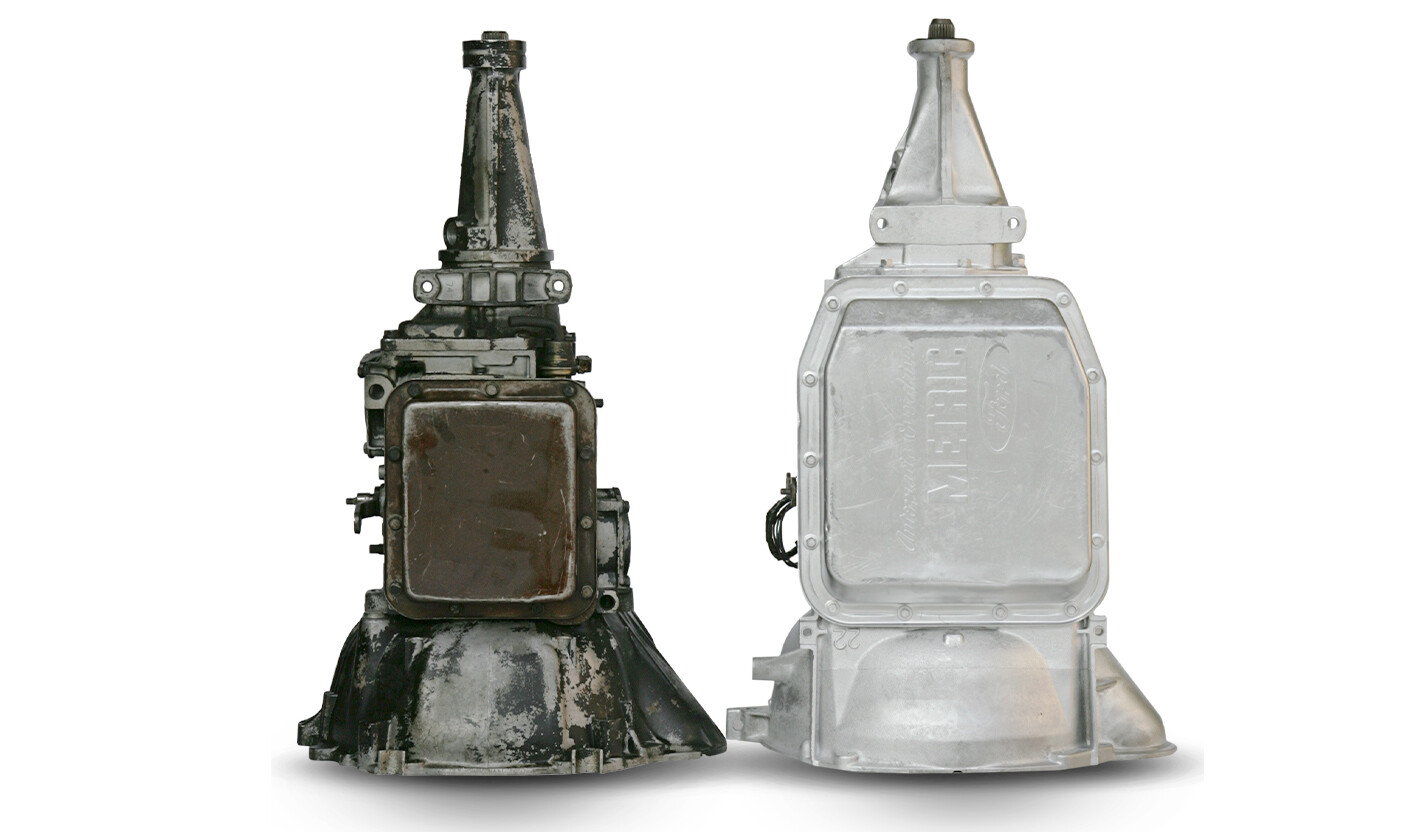
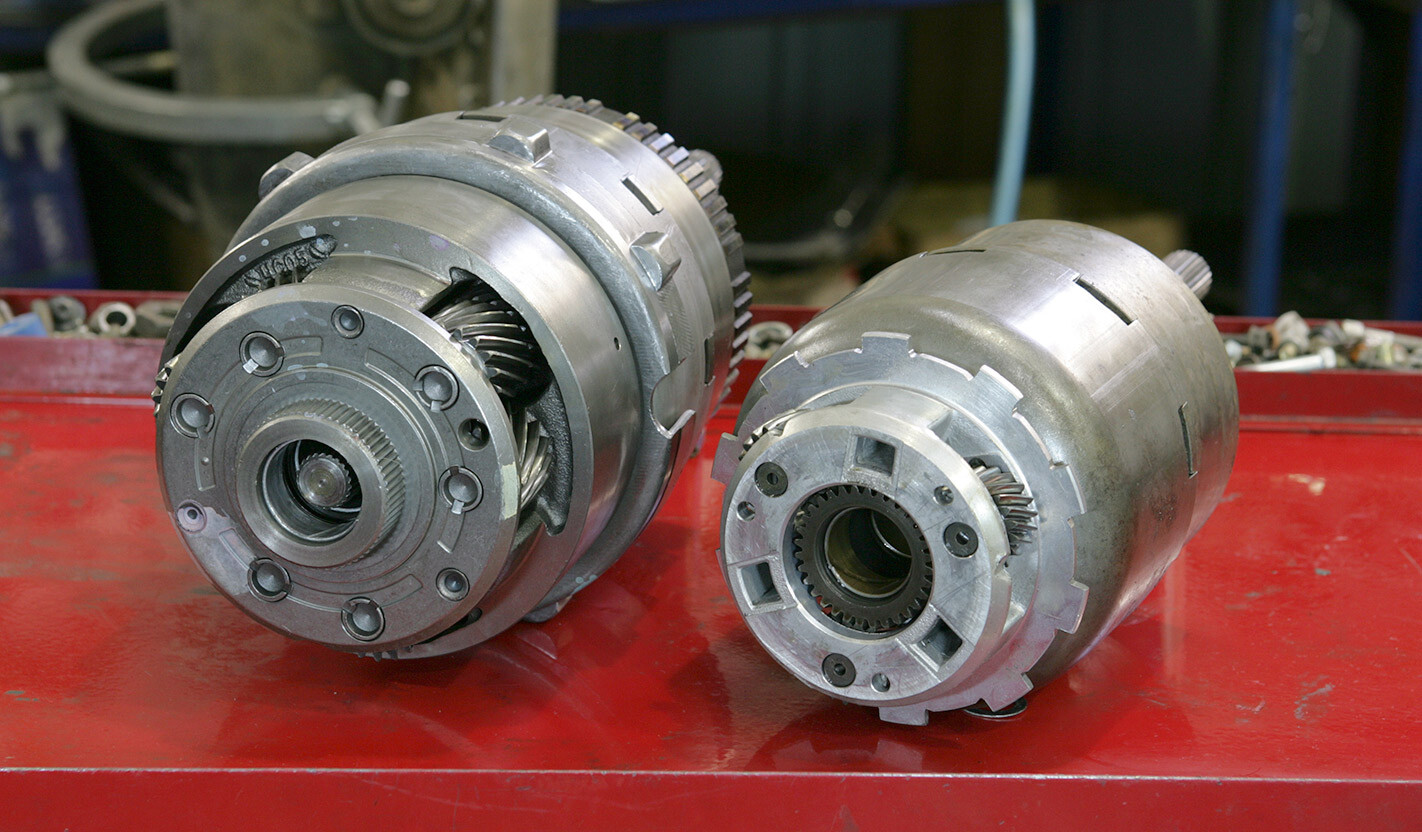
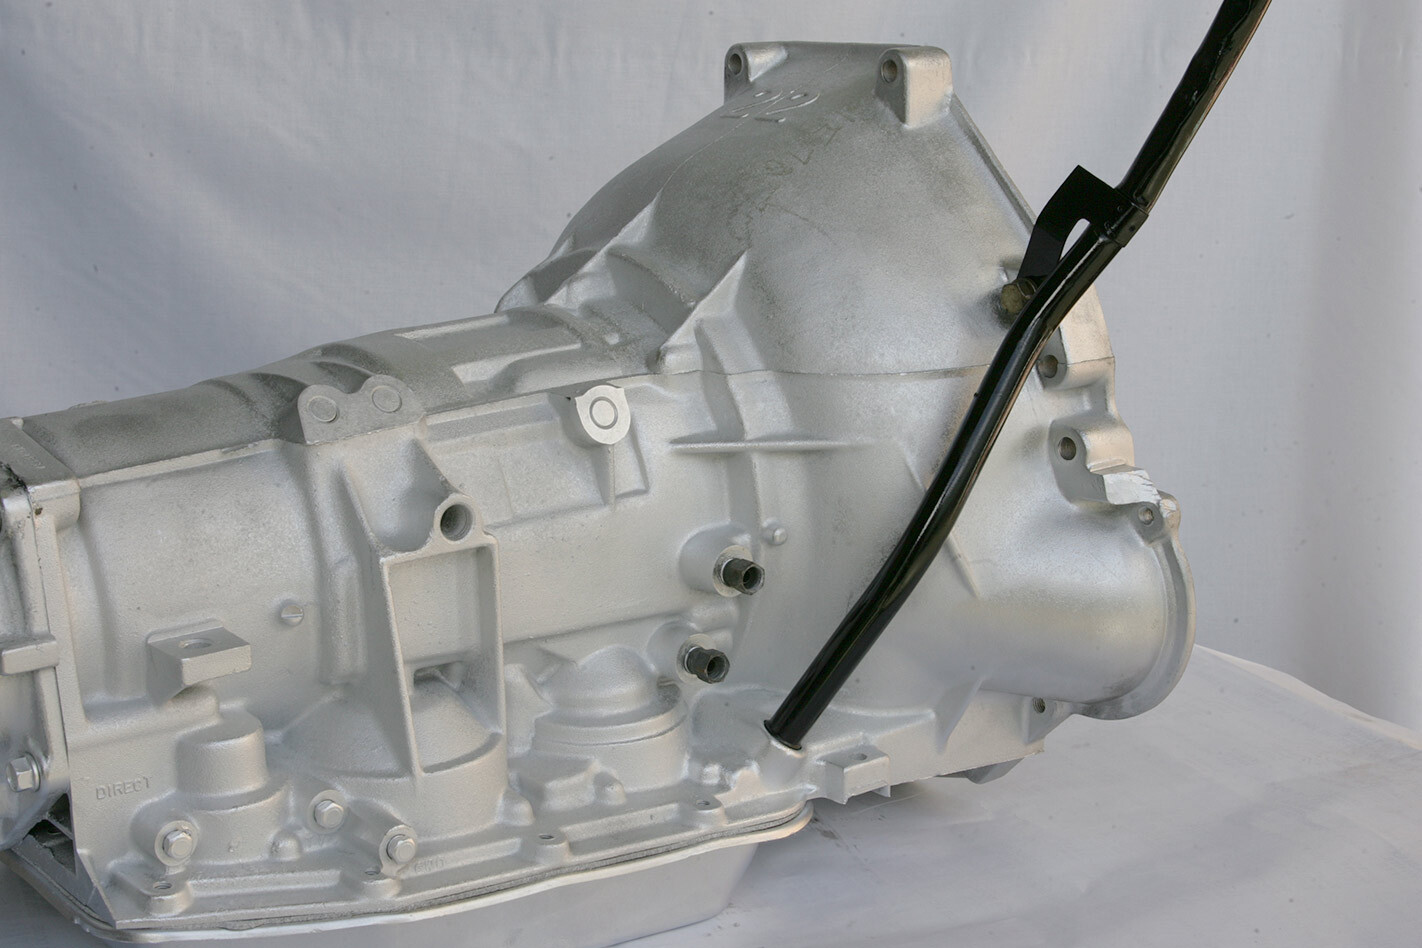
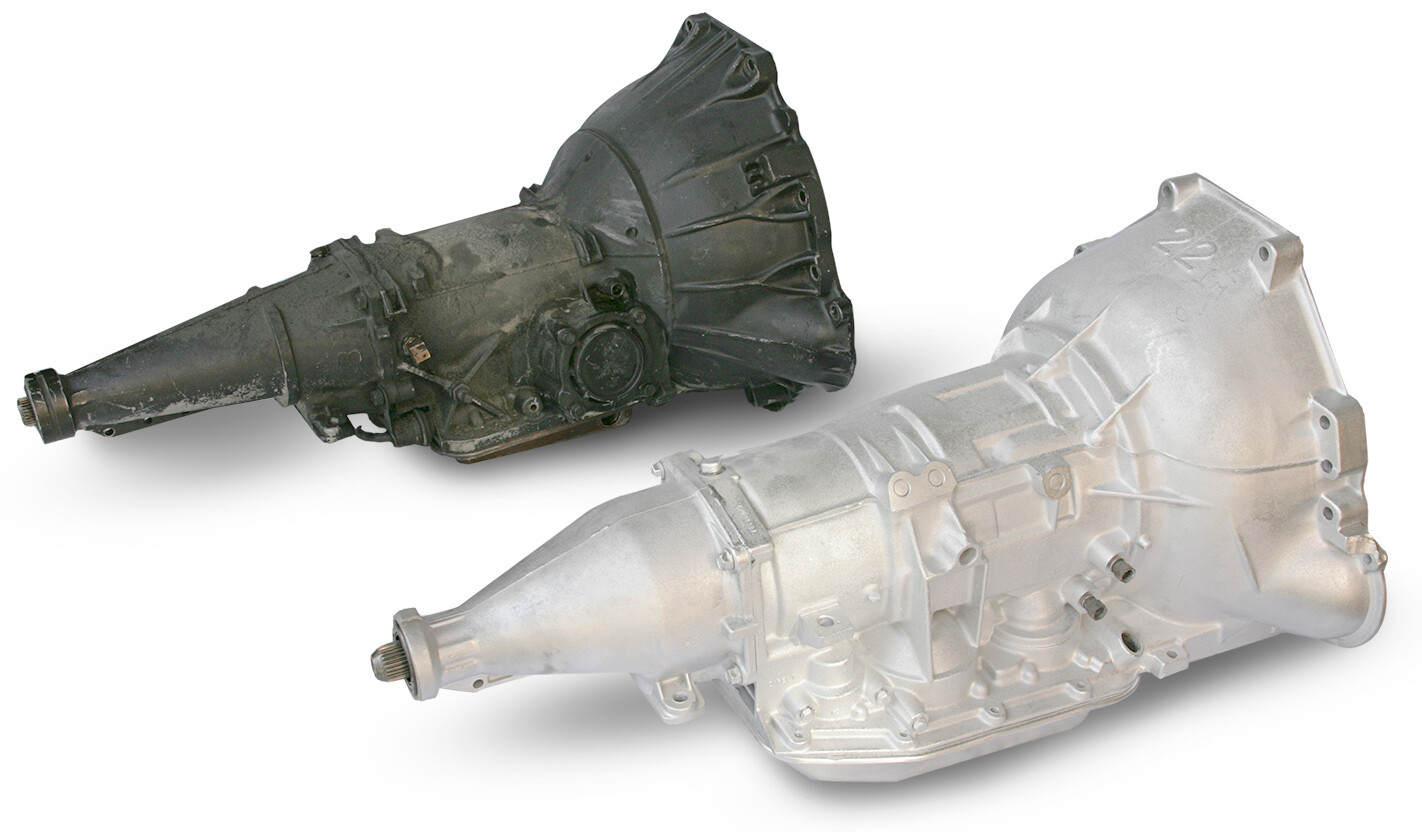 Bellhousing-wise the AOD is the same as every other Ford gearbox; it also uses the same 28-spline output shaft common to the C4 and BW35. And except for the AOD’s overdrive fourth, the ratios between the C4 and AOD are very similar (C4: 2.46, 1.46, 1.00; AOD: 2.40, 1.47, 1.00, 0.67). At 780mm, the two ’boxes are equal in length. That’s where the similarities end; the AOD is wider (356mm v 250mm), heavier (63kg v 45kg) and a lot broader in the main body. Internally, the AOD shares similar planetary architecture as the old FMX, so it’s strong by design — note the considerable difference between AOD and C4 internals (above right); a stocker can handle more than 400hp. With the range of aftermarket gear (from TransGo, B&M, TCI, LenTech Automatics and Baumann Engineering), they can be built to handle in excess of 800hp. There are 1200hp versions but these are radically different in operation.
Unlike its GM counterparts, the AOD doesn’t use a lock-up converter. Instead, it has a shaft within a shaft (see Step 03) that bypasses the converter to directly drive the gearbox when in overdrive and partially (60 per cent) in third. Bury the throttle hard enough in top and the ’box drops out of overdrive, bringing the converter back into play. This dual-shaft arrangement makes it easy to incorrectly install the converter, with catastrophic results (see Steps 03 and 06).
 If you’re shopping on the internet for an AOD, your best choice is one from an ’86 to ’93 5.0-litre Mustang. Steer clear of the later AOD-E and 4R70-W as these are computer-controlled versions. Also there is a rare, long-extension housing version — you’re after the one that measures around 260mm (10¼in).
 The AOD’s non-synchronous first-to-second and second-to-third shifts can yield superior shift quality over a C4, C6 or FMX but unfortunately the AOD’s soft valvebody calibration hides its performance potential — it almost feels like it’s slipping between changes. Before installation this particular ’box received a shift kit to speed up and stiffen the action.
TV (THROTTLE VALVE) CABLE ADJUSTMENT
 The trickiest part of the conversion is correctly adjusting the TV cable, as the AOD has an incredibly finicky TV. If not correctly adjusted, you’ll burn the ’box out simply driving it around the block.
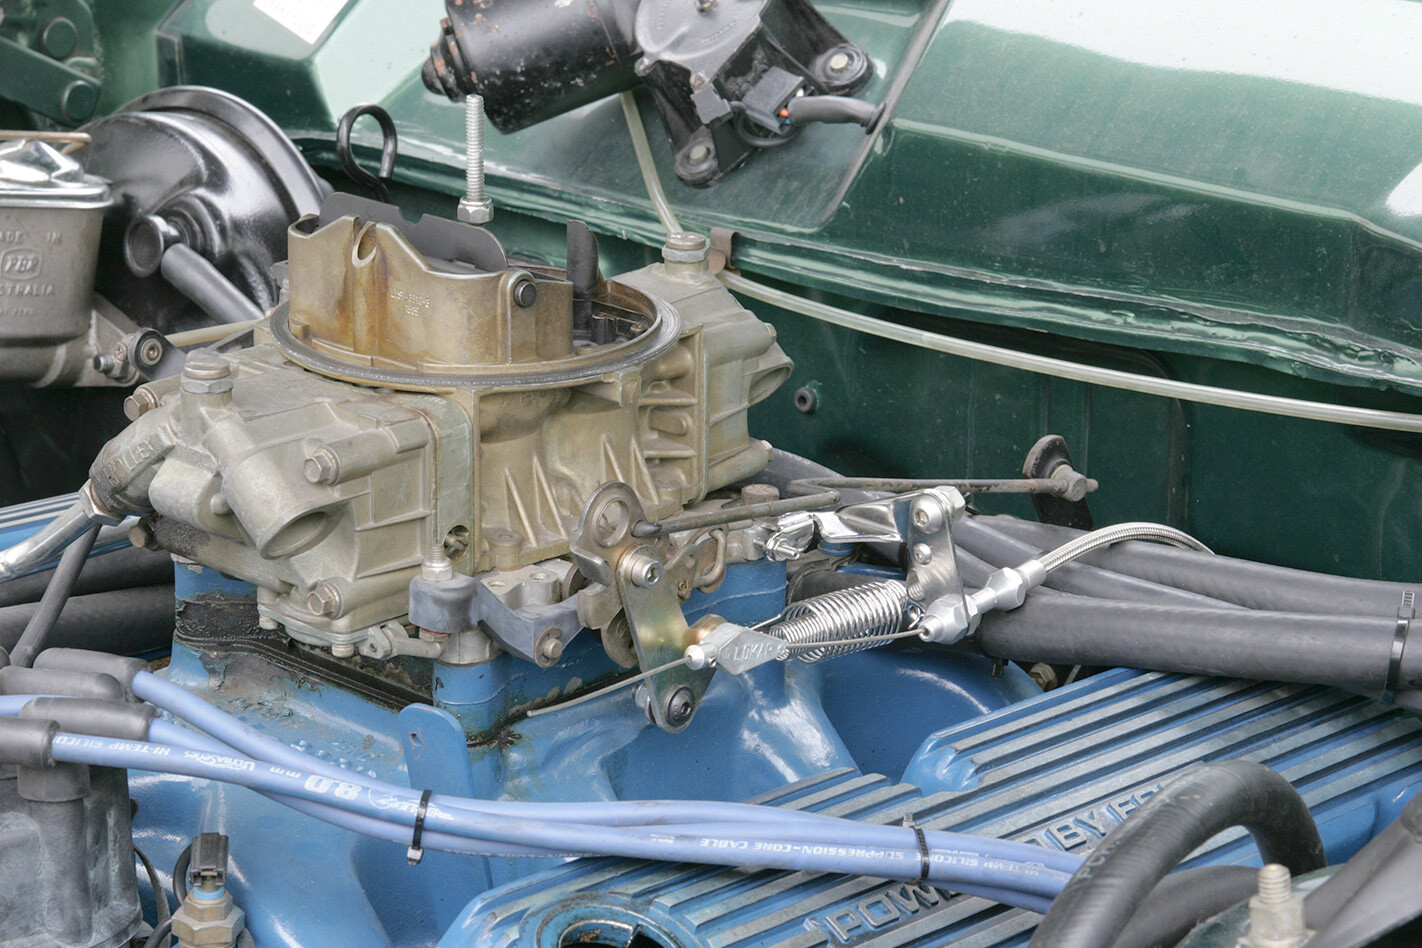
When installing an AOD into a carburetted vehicle, you’ll need to install an additional lever onto the carburettor to operate the TV cable. The arc and sweep of this lever are critical — so much so that it’s not worth contemplating fabricating your own as Lokar offers a very neat and relatively cheap kit (P/N: KD-2AODHT) that works exceptionally well.
 Depending on your specific vehicle and gearbox combination, the cable will come in from the rear (as shown in step 11, below) or from the front — there are instructions with the kit.
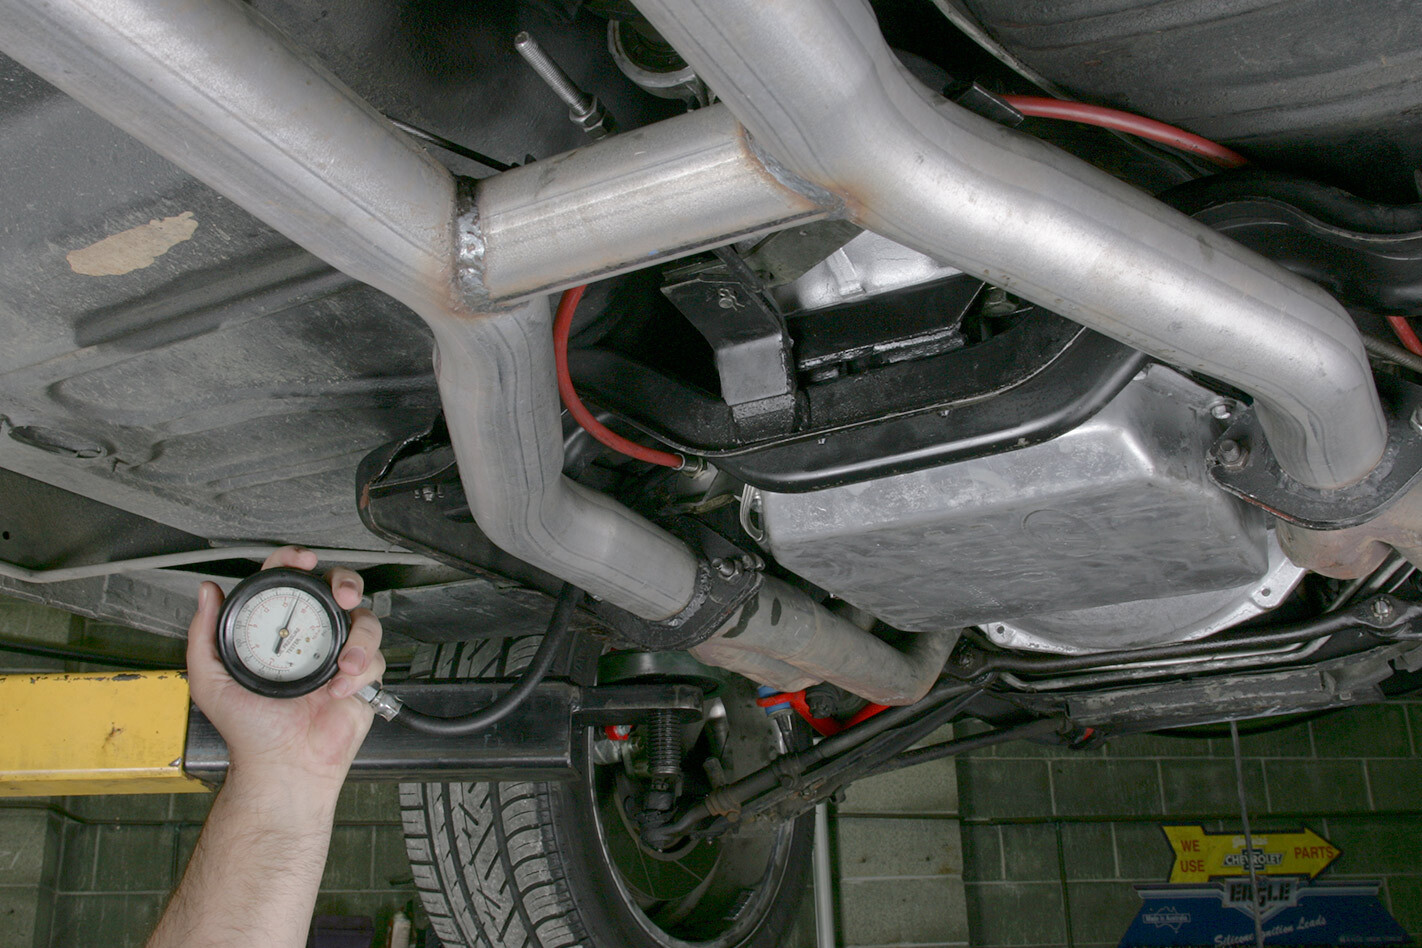
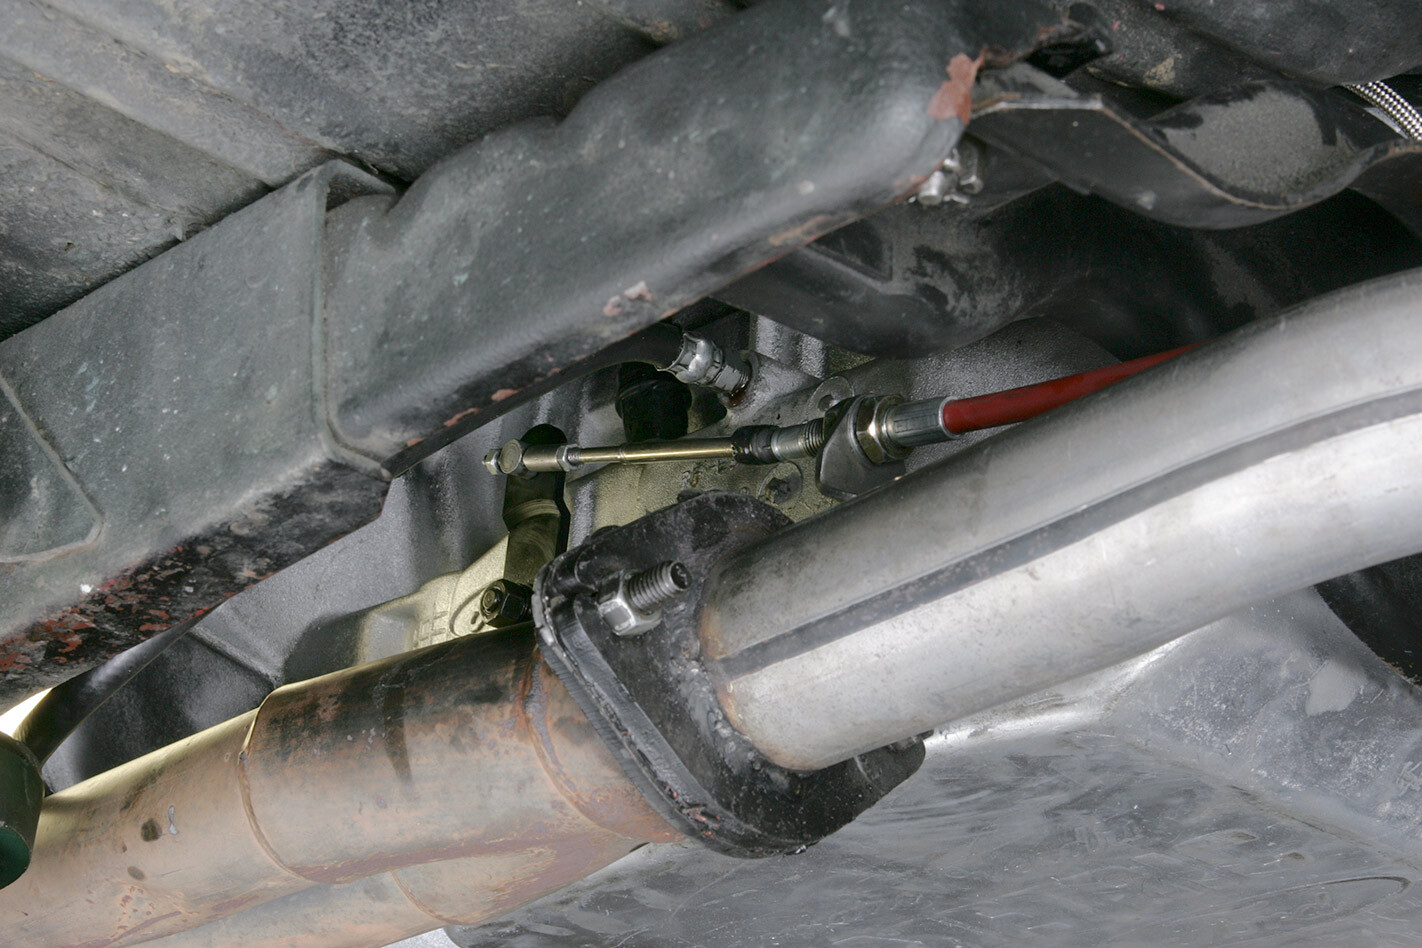
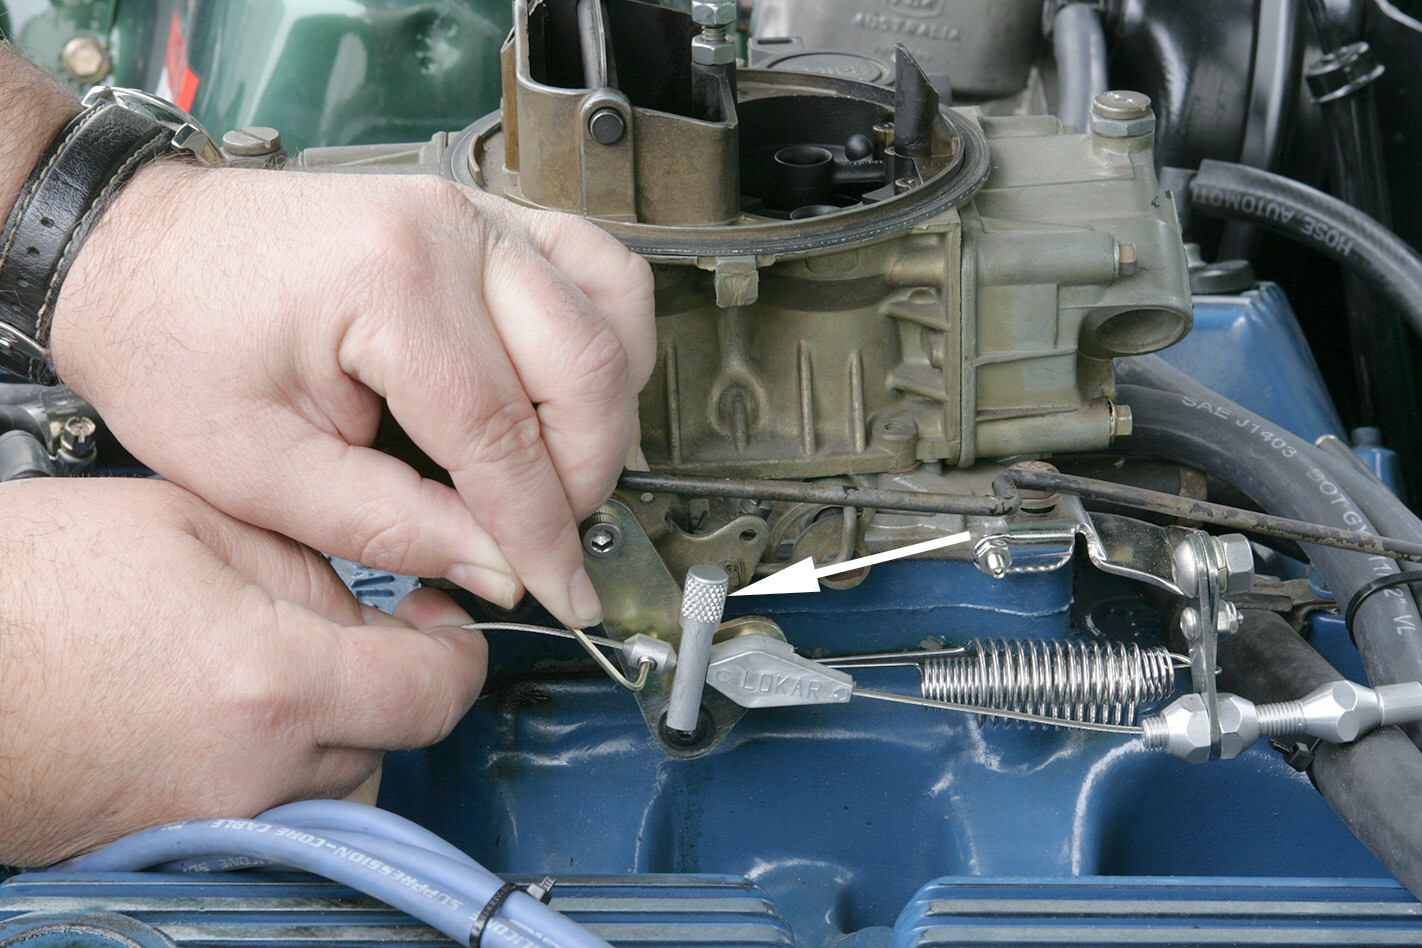 You need to carefully follow the TV adjustment instructions supplied with the Lokar kit. In short, you need to screw a pressure gauge into the TV pressure port, warm up the engine and gearbox (38–70C), then, while idling in Park and with the special Lokar gauge tool (arrow) in position, adjust the TV cable until the TV pressure is 35psi — pressure should drop to zero once the gauge tool is removed. If you’re in any doubt about this procedure, seek the help of an experienced transmission shop.
AOD INSTALLATION STEP-BY-STEP
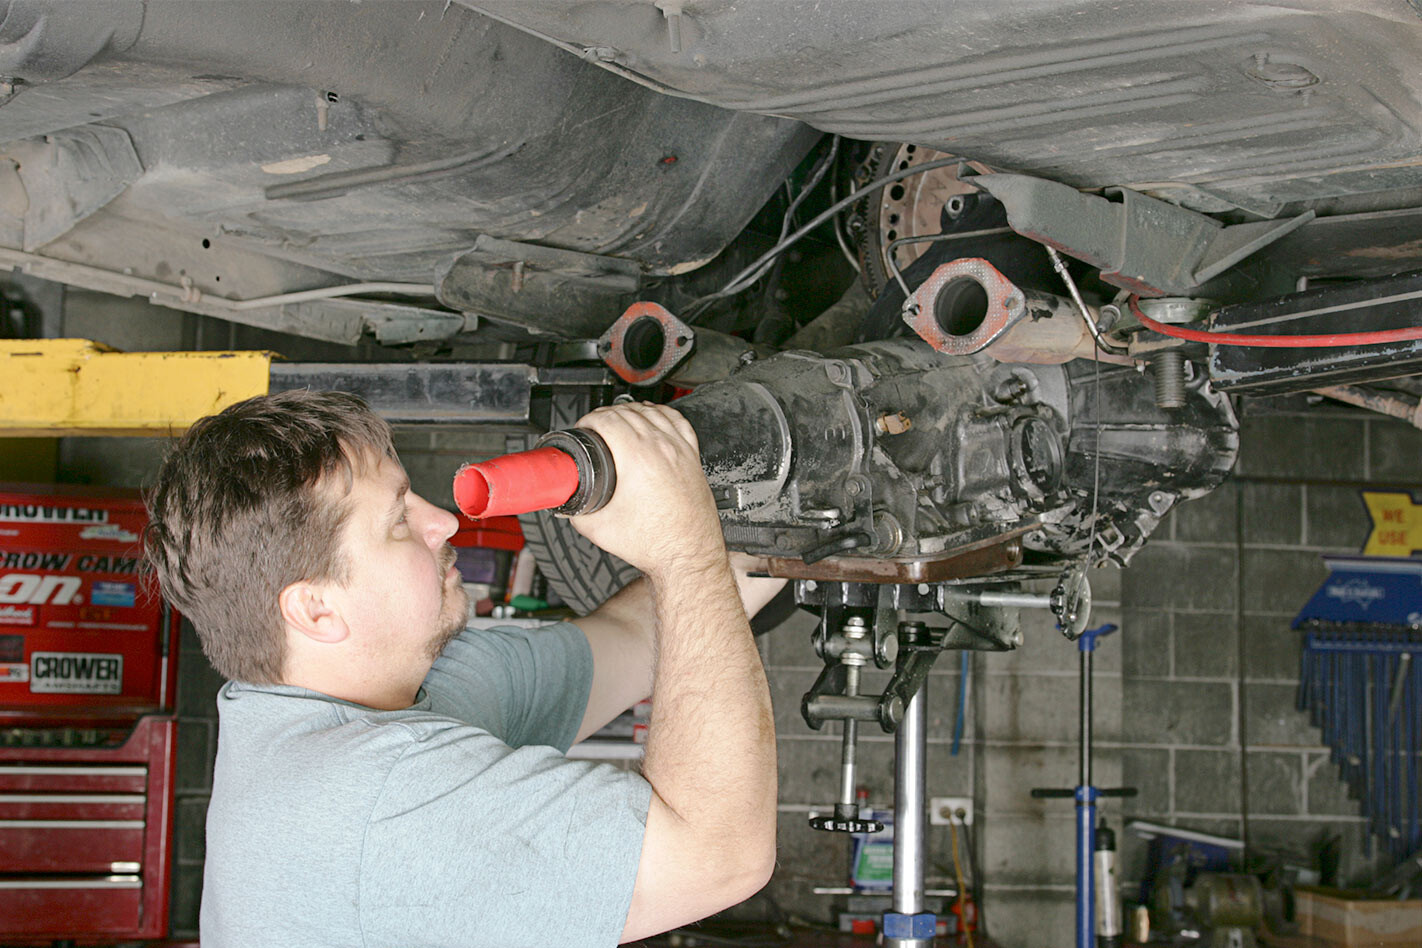 STEP 1. Disconnect the battery, drop the exhaust and tailshaft — stick a bung up its bum to prevent oil spillage. Then disconnect shift linkage, kick-down cable, vacuum modulator hose, starter neutral switch, speedo cable, starter motor and the bellhousing’s dust cover. Once you’ve removed all four converter bolts, disconnected the oil-cooler lines and the six bellhousing bolts, the old C4 can be dropped down out of the way.
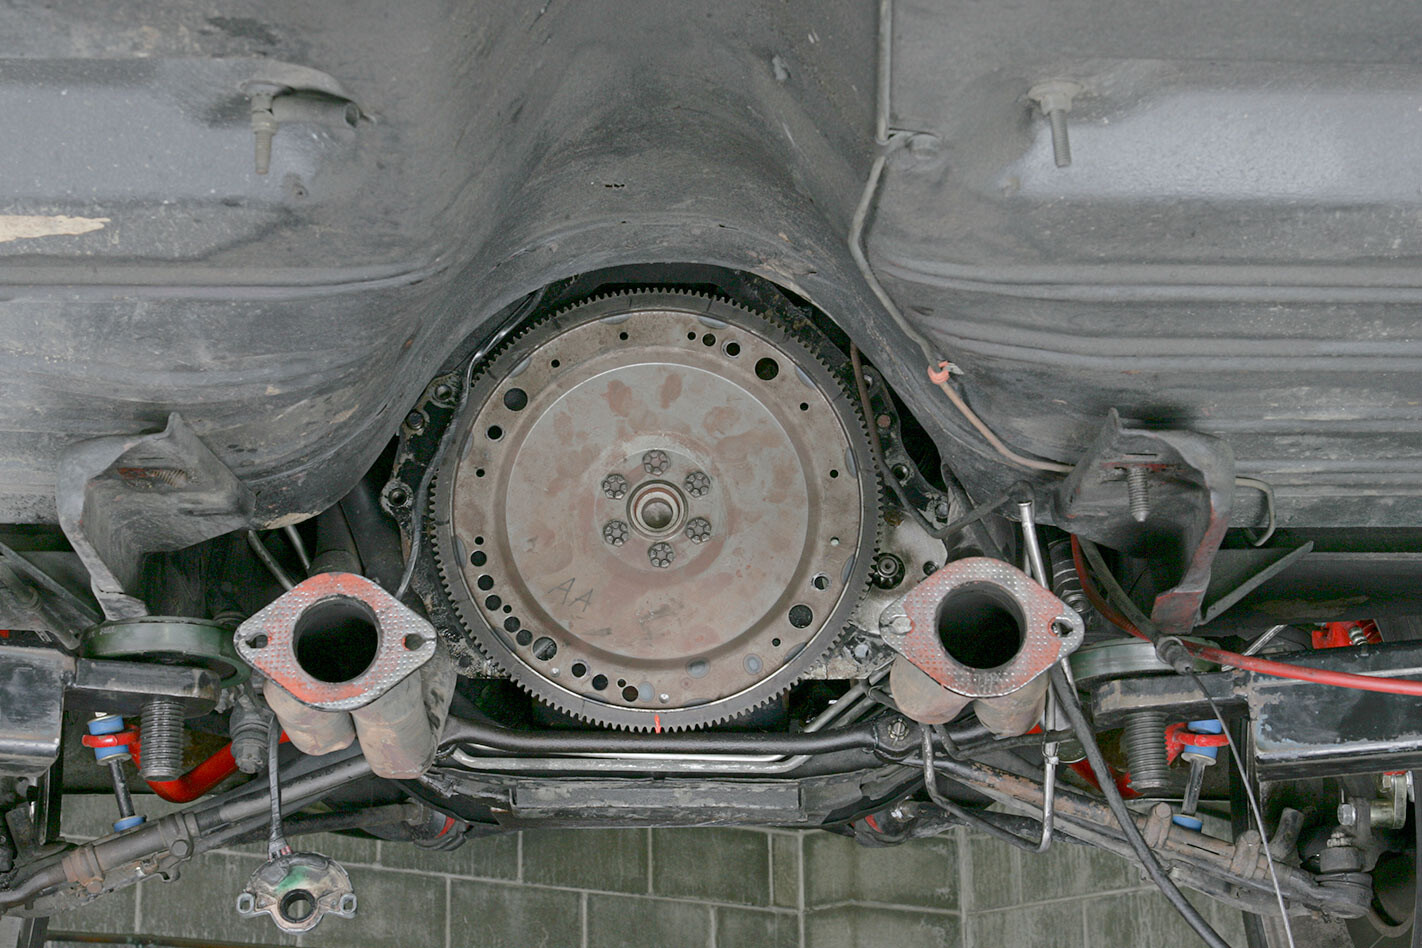 2. You’ll need a 164-tooth flex-plate (standard on all Clevelands and 351W) and correct block/sandwich plate. Early 289/302 Windsors used 157-tooth flywheels. Don’t use the later EFI Windsor’s 164-toother, as that has a greater (54oz v 28oz) imbalance factor. The Cleveland flex-plate is close and will be fine up to 5000rpm on Windsors. Otherwise modify the Clevo’s balance weights for high-rev applications.
 3. The AOD’s original 12-inch, 1500rpm converter will bolt straight up, so try to get it with the ’box. Kris opted for a 2000rpm stall converter from Swan Transmission Parts. Be wary of different flex-plate depths — mock it up prior to installation to ensure the converter snout has sufficient engagement.
 When installing the converter, you must feel it go through two steps or detents in order for it to be seated properly.
 4. One of the great things about Ford transmission swaps is that all the bellhousing bolt-patterns are the same. That said, you’ll need longer mounting bolts (around 21/4in, 57mm), due to the AOD’s thicker casing. With a bit of a bend and a tweak, the stock Mustang dipstick tube comes up at just the right location. It takes around 11-litres of Dextron-II (C4s used Type-F) to fill a dry AOD.
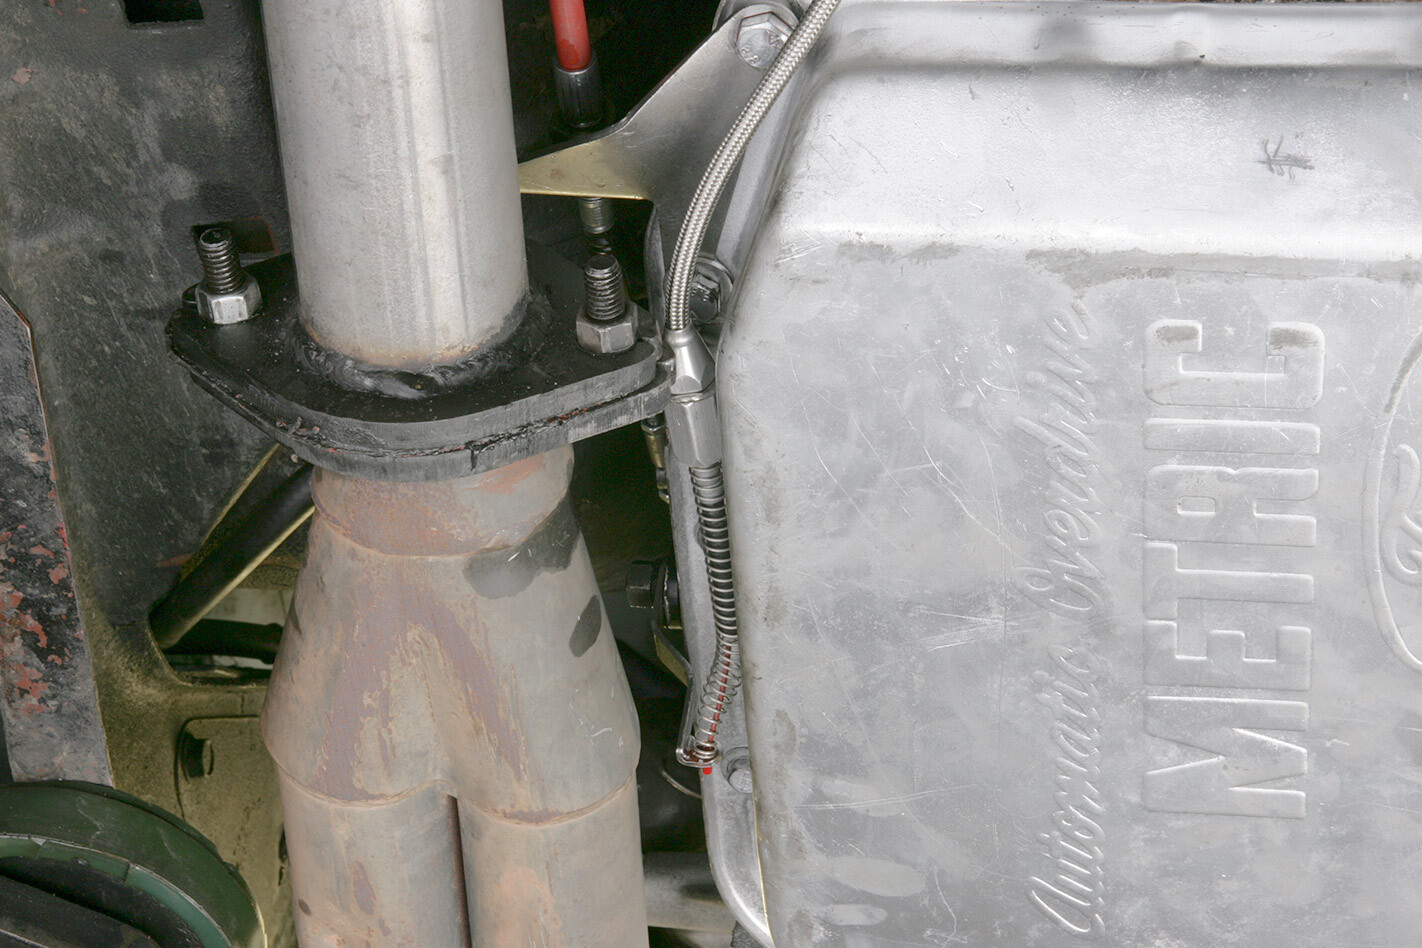
 5. The AOD’s rear mount is 65mm further back, so new mounting holes were cut further aft in the chassis horns, which necessitated a handbrake spacer. The AOD is simply too heavy for even two people to manhandle safely, especially considering it takes time to make all the connections. That means you’ll definitely need some kind of jack (preferably a gearbox jack) to lift it up and hold it.
 6. The AOD is similar in size to the big-block C6, so there’s plenty of clearance up in the tunnel.
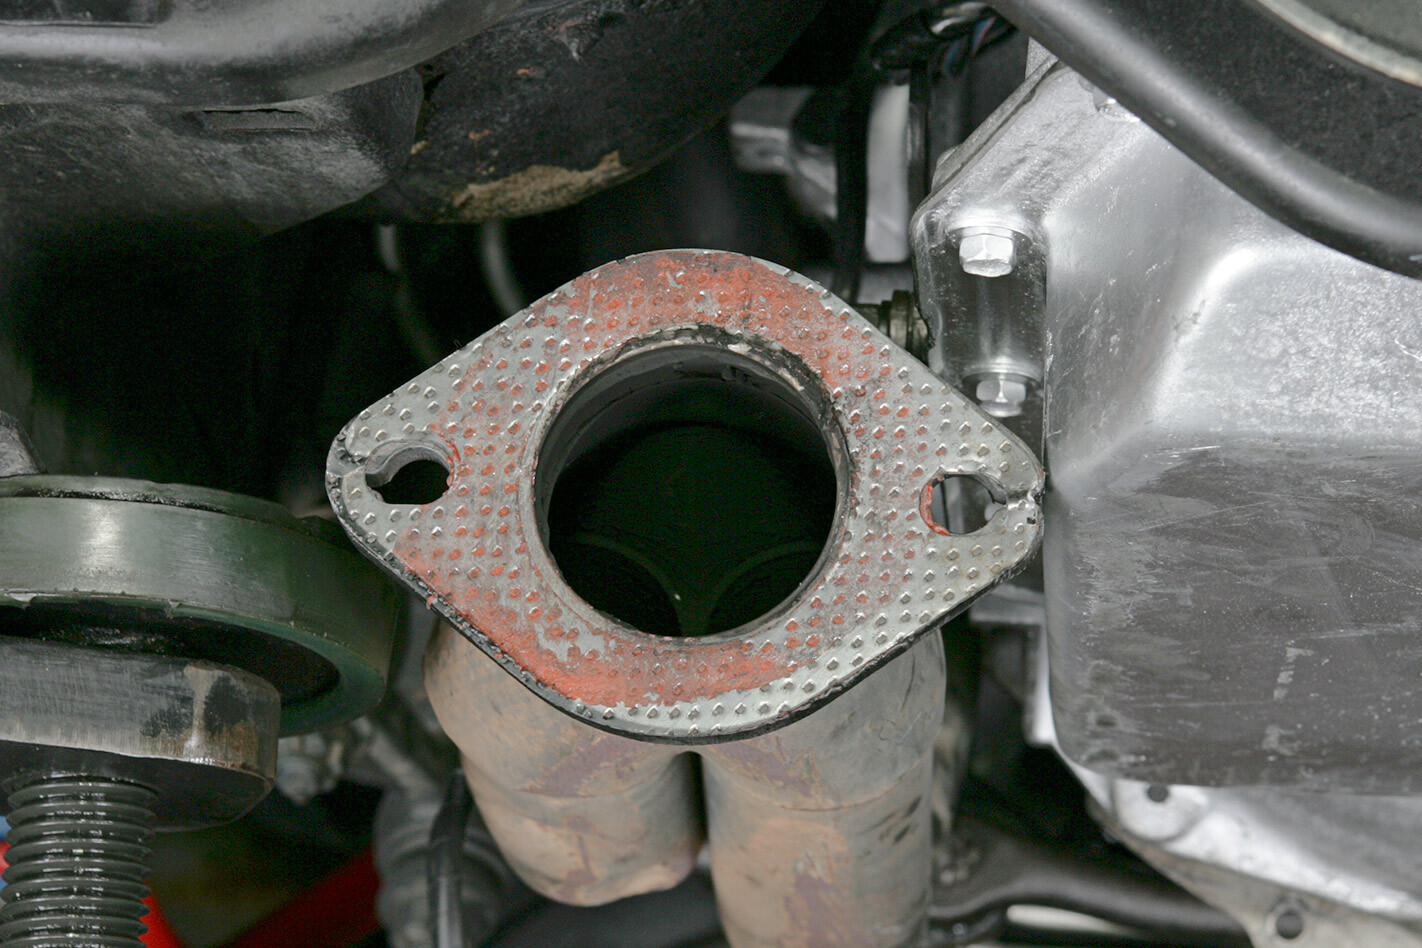 However, the AOD’s pan is 105mm wider than a C4’s, so be prepared for exhaust work. Here, a bottle-jack was used to spread the headers to gain sufficient clearance. With the ’box bolted up, you should be able to move the converter back and forth a small amount. If not, the converter is incorrectly installed.
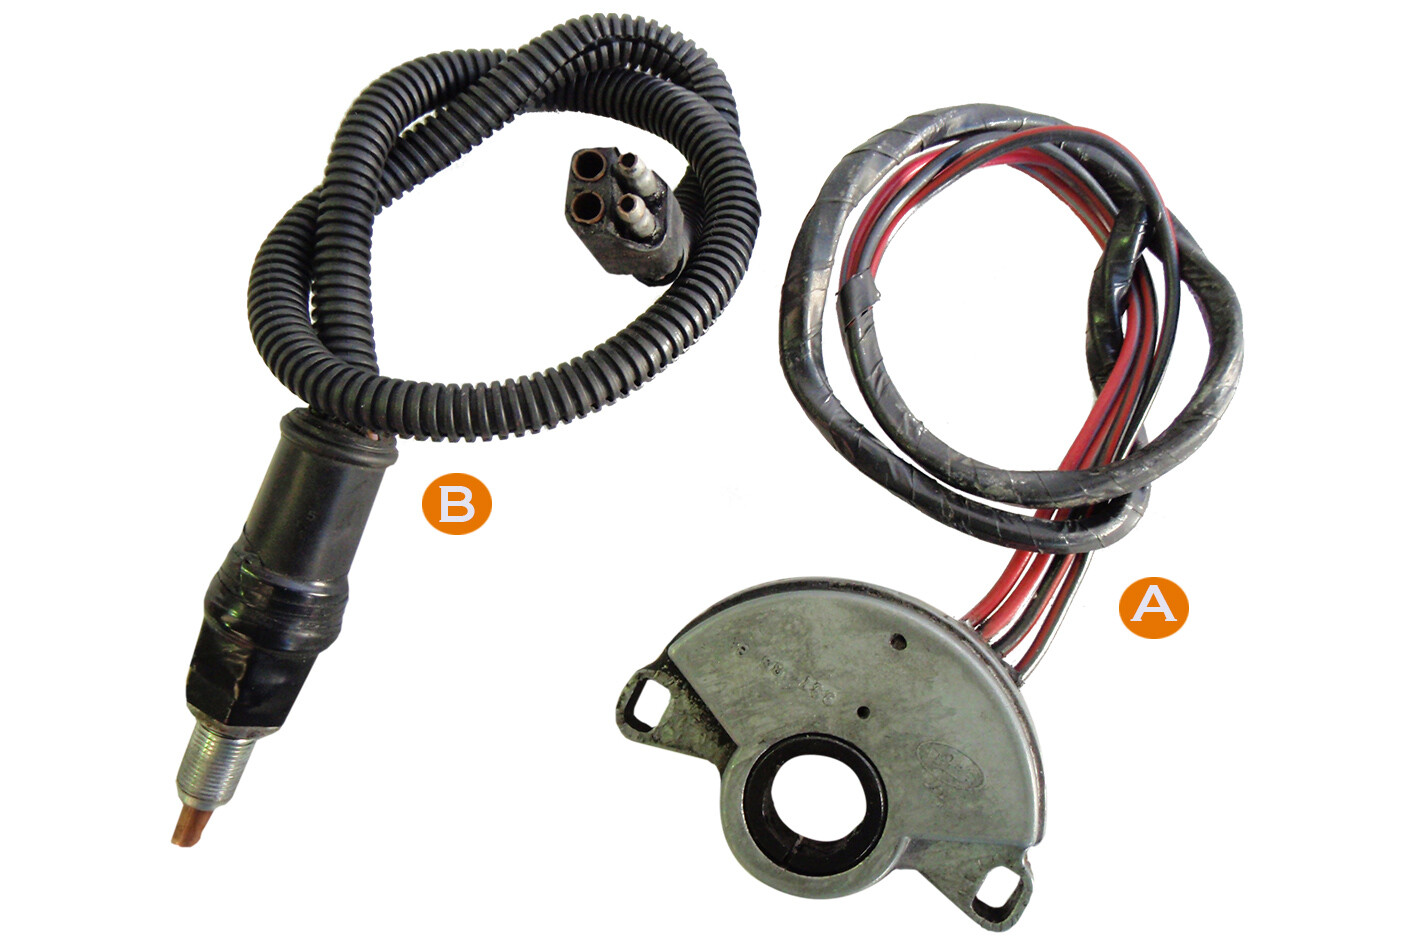 7. While the C4 (A) and AOD (B) starter/neutral switches are radically different in appearance and fitment, they work in exactly the same way. There are four wires; two for the starter circuit (start in neutral or park) while the other two are for the reverse-light switch. The AOD’s switch is quite a bit better, as it goes off the transmission’s gear position and not the assumption that the shift linkages are correctly adjusted.
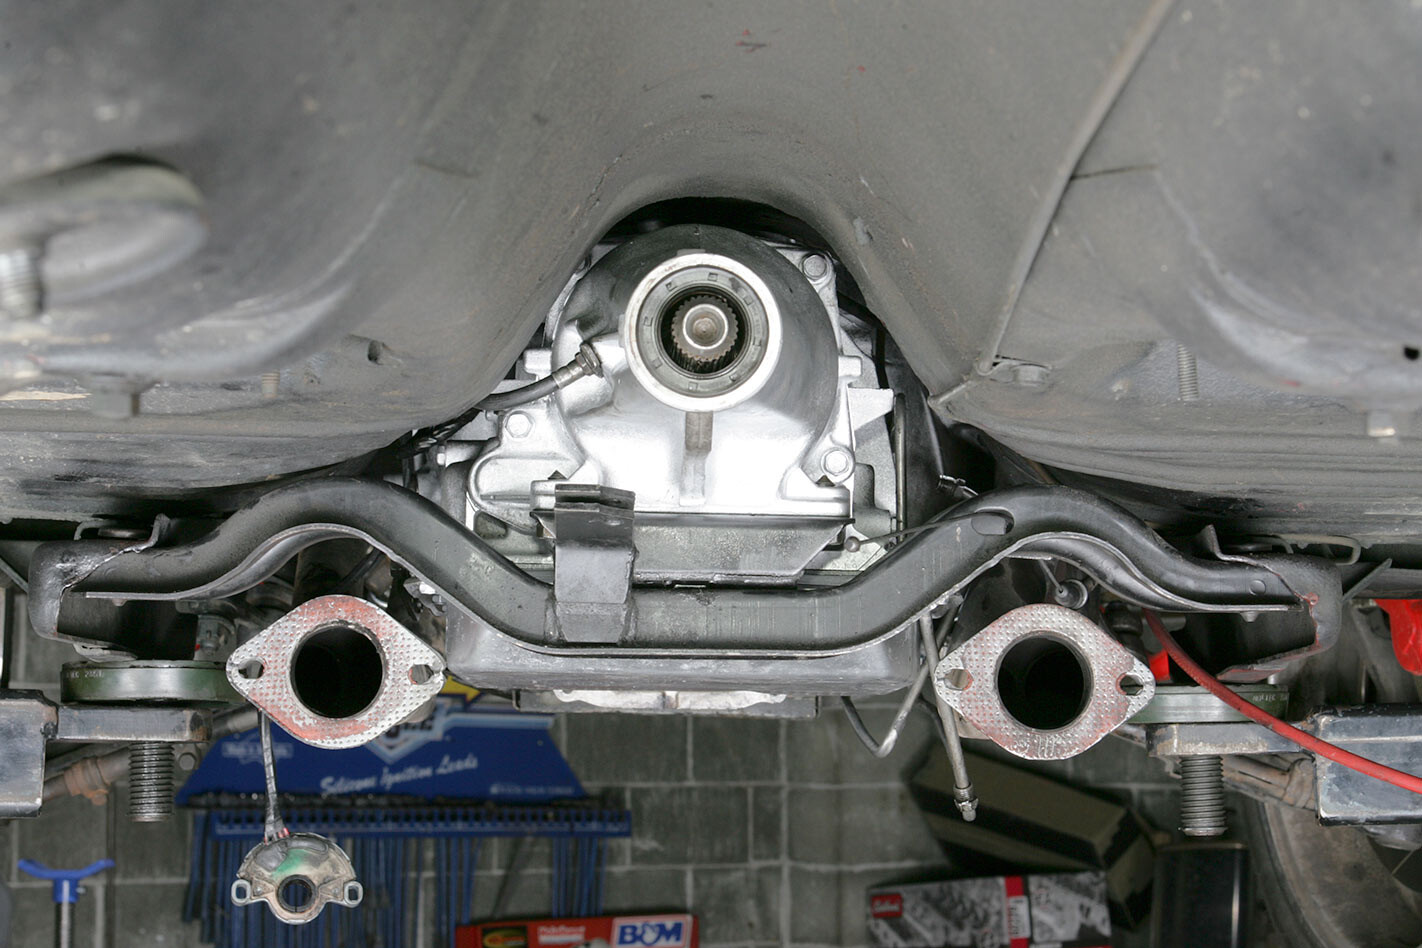
 8. Your existing speedo cable and retaining clip slips straight into the AOD. If you’re changing diff ratios, head down to your local Ford-knowledgeable parts supplier and order a drive-gear from a Ford with a similar diff ratio and tyre height. Although AOD and C4 housings are the same length, the AOD’s output shaft protrudes around 20mm, requiring the tailshaft to be shortened a similar amount.
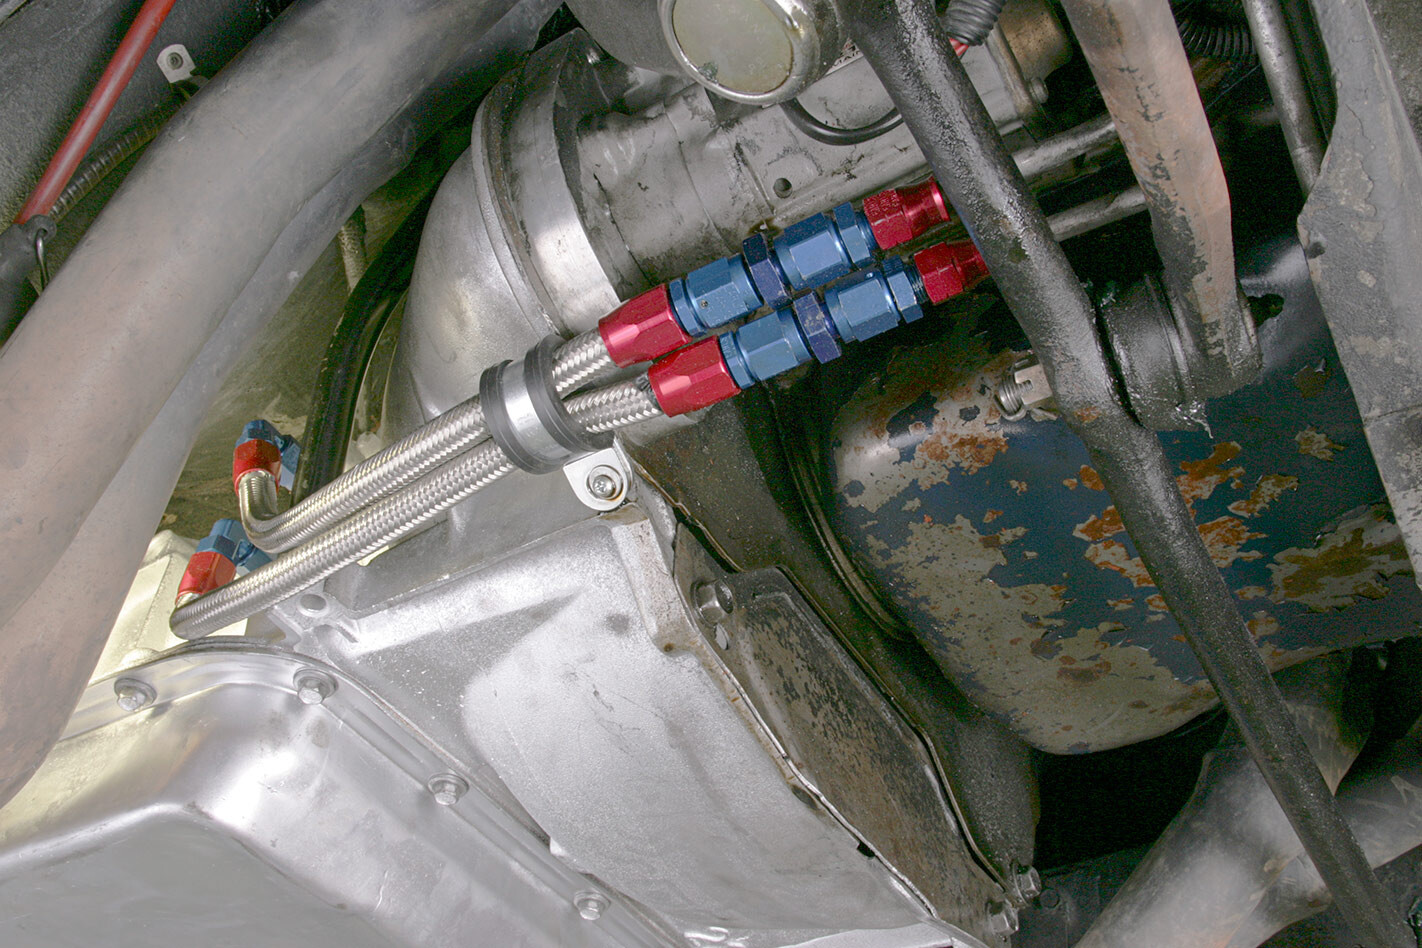 9. The AOD’s cooler lines are in a different location. You can either fabricate new lines or cut down and re-bend the factory ones — you’ll need metric flare-nuts or metric-to-imperial adaptors. For this job, some Earls fittings (they attach to the hardline via an olive fitting) and braided hose did the trick. It’s probably not a bad idea to add an external oil cooler.
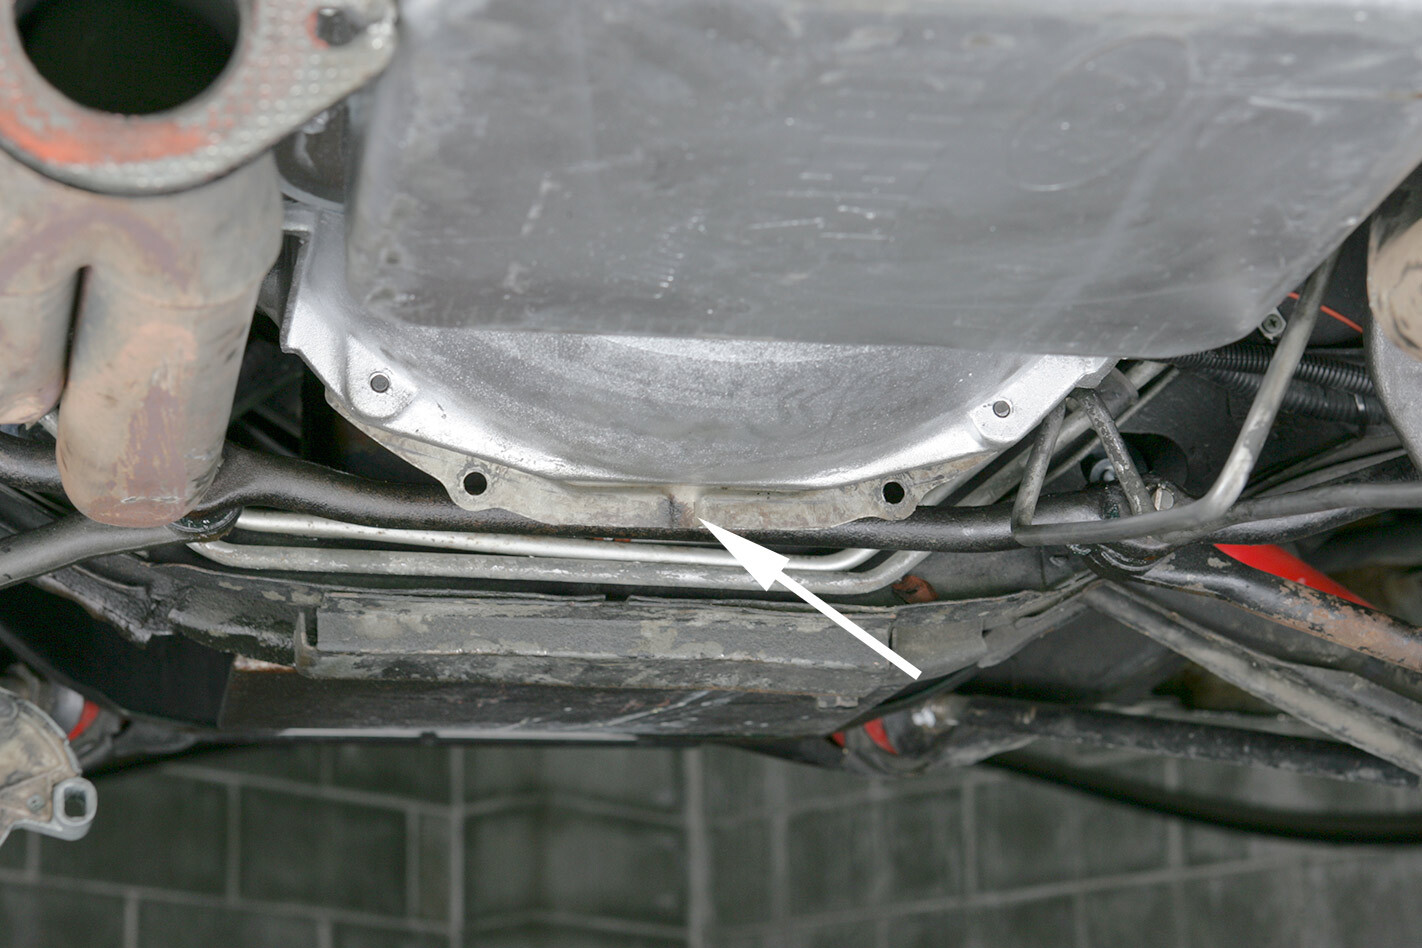 The C4 dust cover can be used but needs a trim (arrow).
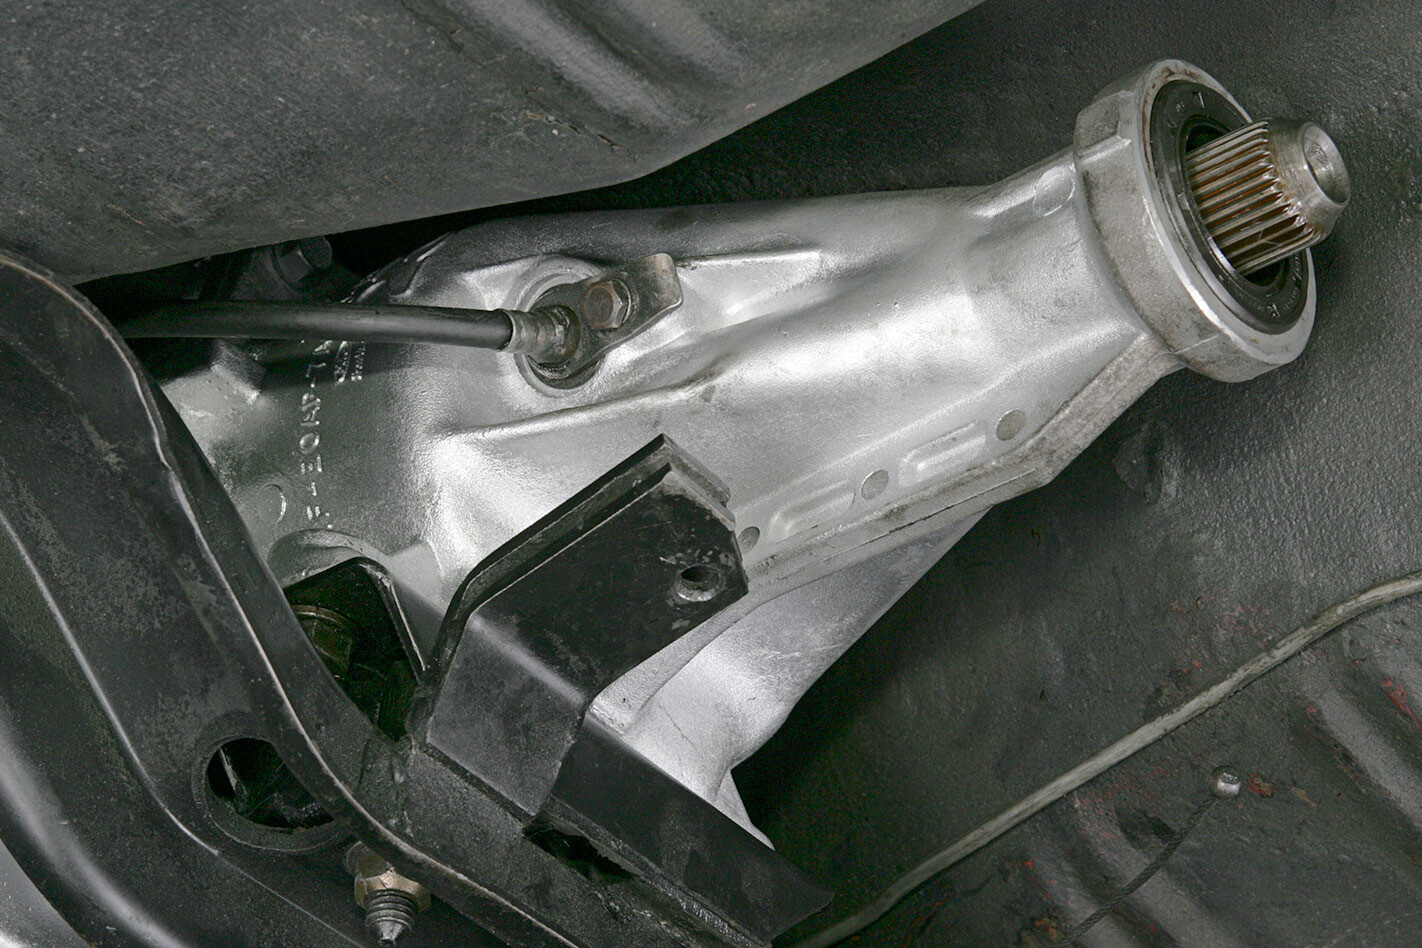
 10. The shifter bellcrank points upwards on column-shift AODs and downwards on floor-shift models. Flipping over the bell-crank requires dropping the pan. The Ranchero’s column-shift uses a B&M-style shift cable, which fitted straight up with only a simple spacer but your shift linkages may have to be modified. The four-speed AOD has no detent for second, so it works fine with factory three-speed shifters.
 11. The AOD doesn’t use a kick-down or vacuum modulator to sense load so disconnect and plug the vacuum line. It uses a throttle valve (TV) to control up and downshifts as well as overdrive engagement. When routing this cable (and the shift cable), use flowing arcs and cable-tie them well out of harm’s way. Sheath them in some heat-resistant sleeving if they’re anywhere close to the exhaust.
WRAP UP
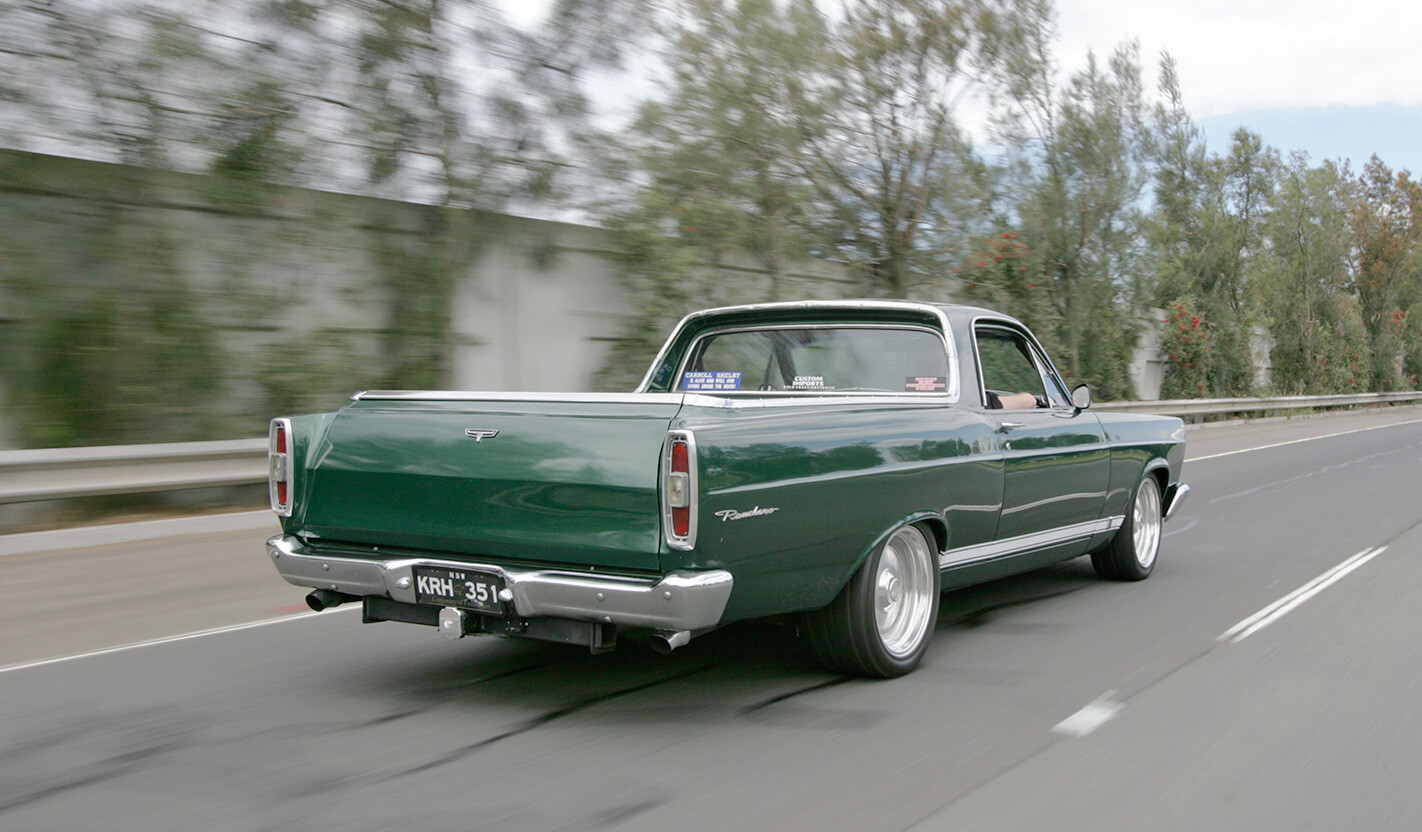 After sorting through a few niggly problems, which included the installation of a new clutch pack, it was time to road-test the ’box. At 110km/h, the AOD-equipped Ranchero is far more civilised and ambles along at a leisurely 1600rpm — that’s in conjunction with 3.55:1 diff gears and 652mm-tall rear tyres. Better still, it’s yielded a 10 to 15 per cent improvement in fuel economy around town and a 40-odd per cent increase out on the highway!
While factory EFI engines can get away with 3.00:1 diff gears behind the AOD’s 0.67:1 overdrive, 3.55:1 is about the minimum for a carburetted engine. Besides, in overdrive, a 4.11:1 set will act like 3.00:1s! Opt for something like the 4:11s and you’ll get a huge improvement in the off-the-line acceleration with no engine-rev or fuel economy penalty out on the highway. Those benefits alone are worth the price of admission.
It’s an extremely worthwhile swap and one of the single best things you can do to improve an older Henry’s overall driveability. However, we can’t stress enough how finicky the AOD gearbox is. Only attempt this conversion with the help of someone who is very familiar with this ’box.
Comments