THIS article on how to install a plate Nitrous system was originally published in the January 2008 issue of Street Machine magazine.
WITH a healthy normally aspirated 565ci big-block under the bonnet, Craig Hewitt’s brawny VL Walkinshaw ran a best of 9.35sec. He wanted to go faster without building a new engine so he for a nitrous oxide system.
Just about any V8 engine can handle a 100–150hp shot of nitrous, provided the engine is in good condition. Power levels of 200hp or more require dedicated components, however. Craig’s big-block runs a forged crank, forged pistons and quality H-beam rods, plus premium Felpro O-ring head gaskets and ARP studs from top to bottom — pretty much standard equipment for any big-power nitrous engine.
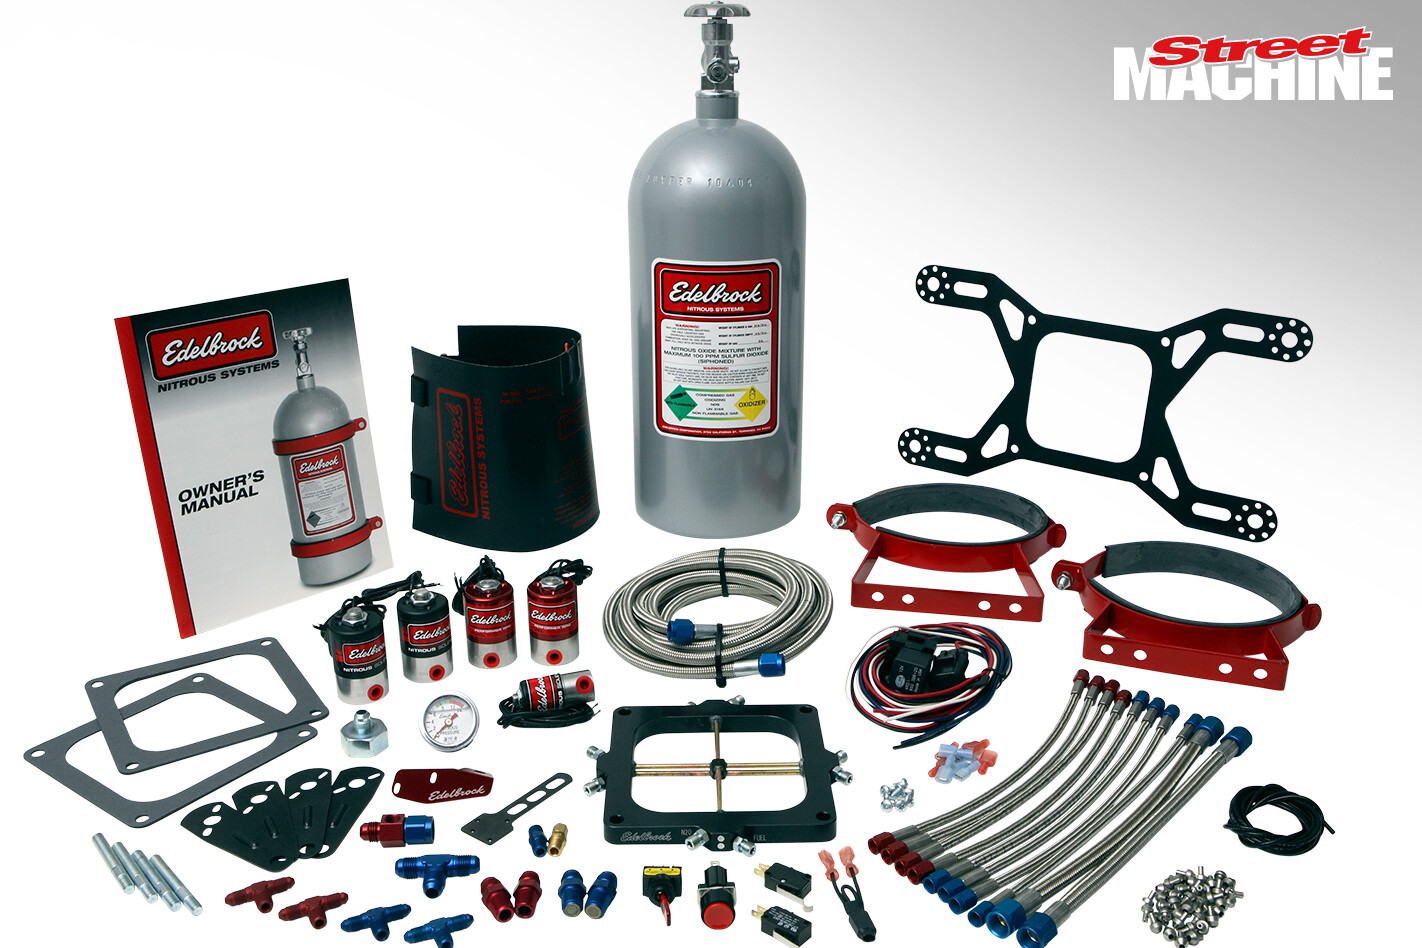
Modern plate systems have come a long way, with increases of up to 400hp easily achievable. They can be added to virtually all carburetted engines and many EFI-equipped cars and the whole installation can be completed in less than a day!
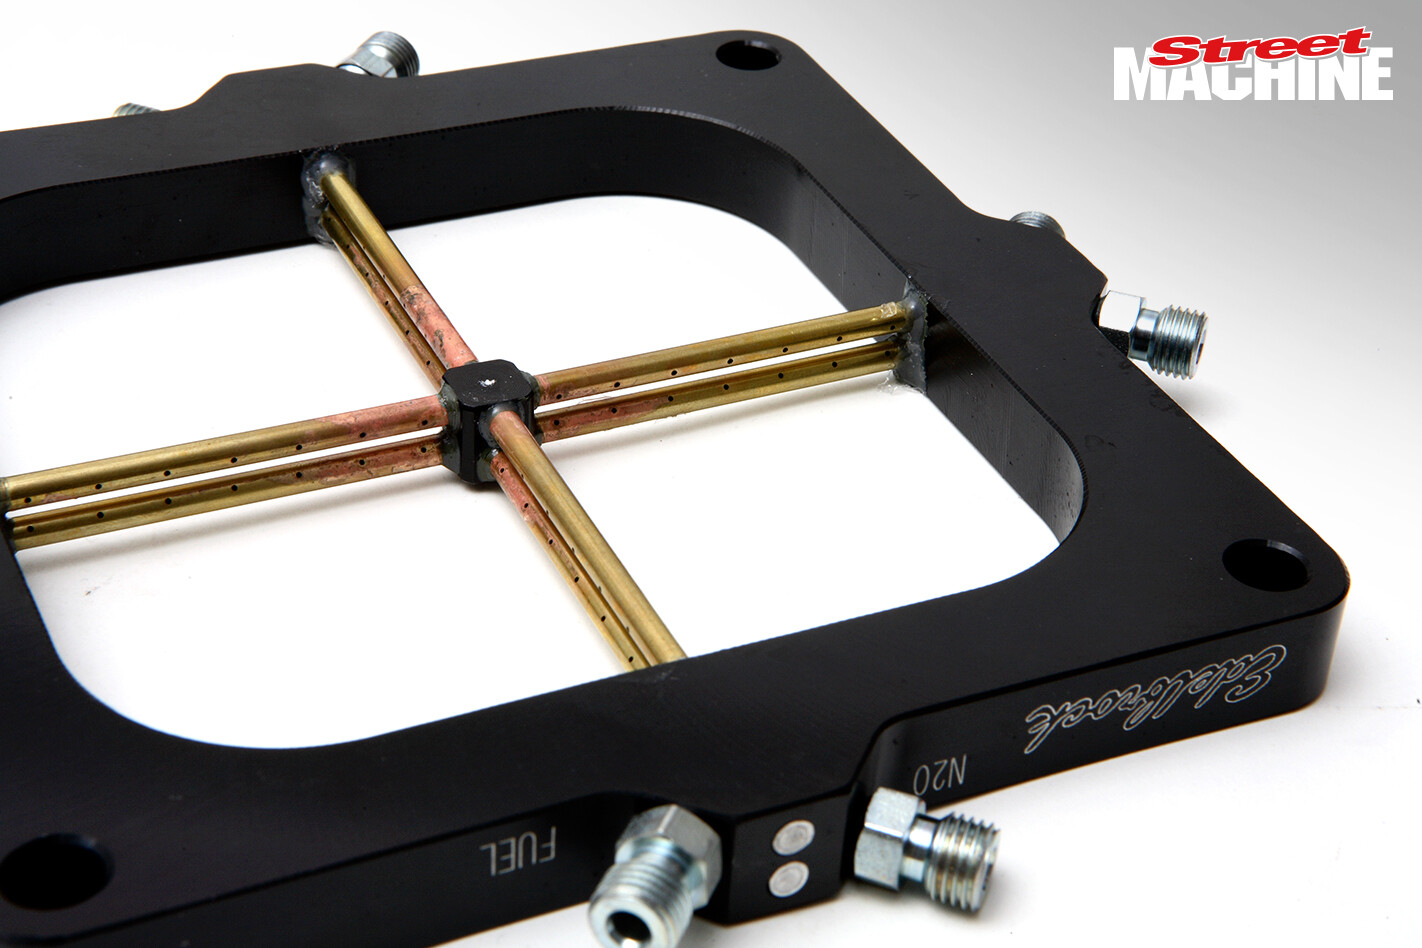 STEP 1: Nitrous is sprayed and atomised from the minute holes in the intersecting top bars, while fuel exits the parallel bottom bars. This creates a fog of fuel and nitrous. The size of the plate’s inlet jets (inset) controls the amount of nitrous and fuel injected. When experimenting with a new system, avoid the temptation to use the biggest jets straight away; always start with the lowest hp jets.
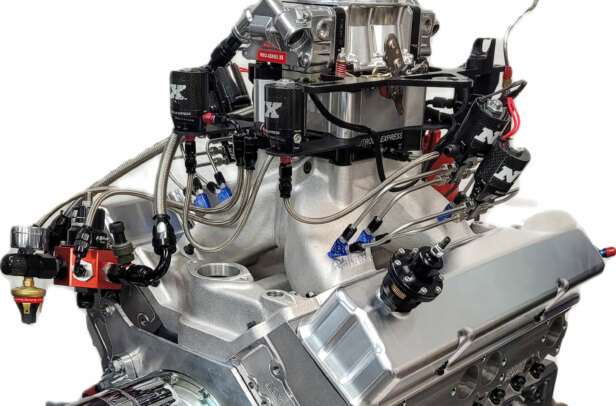
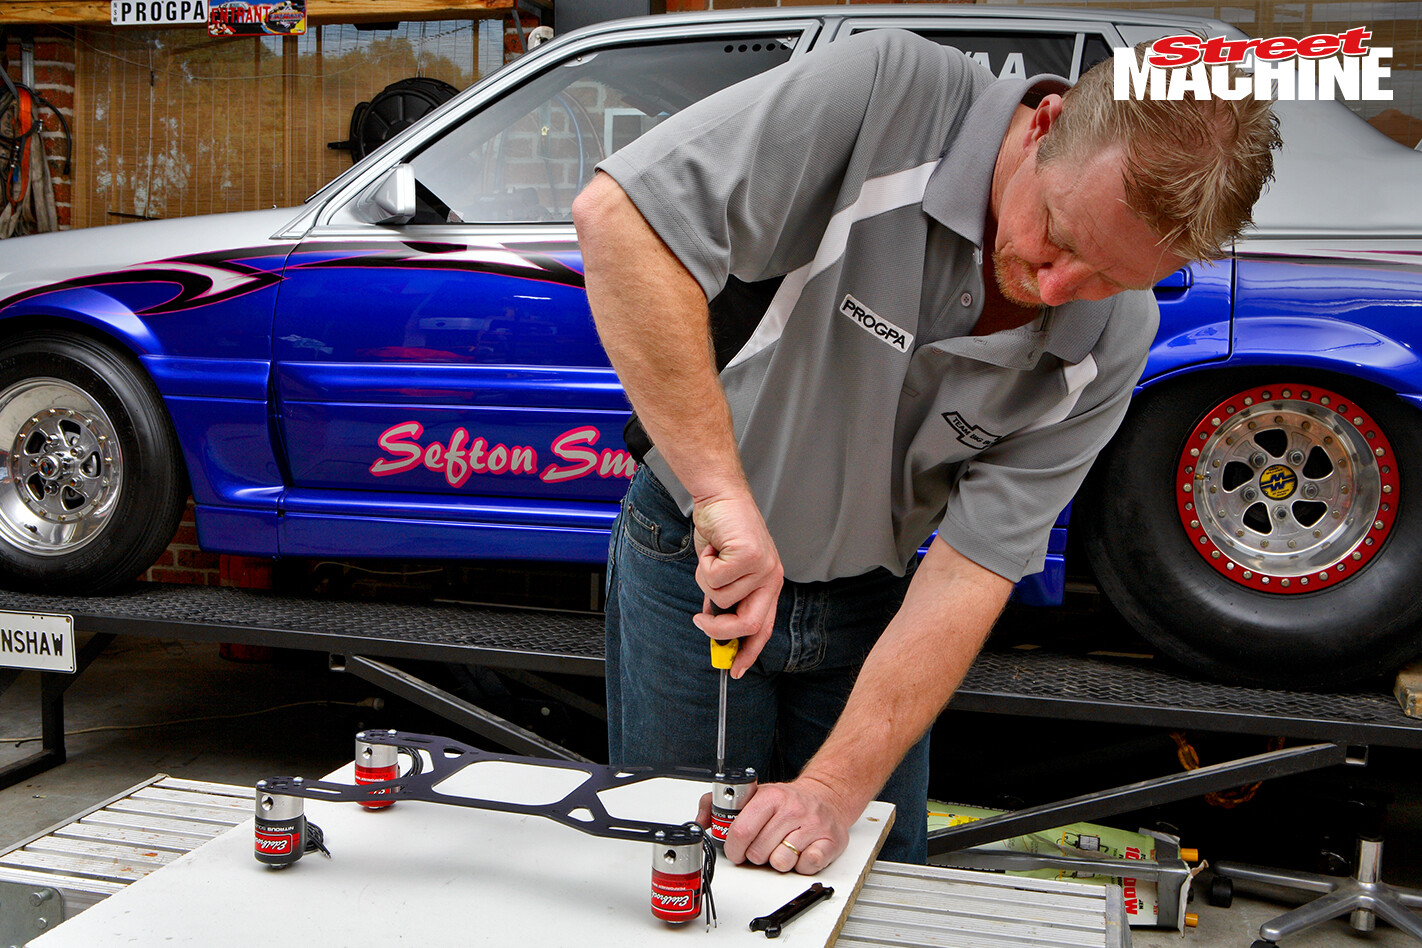 STEP 2: This high-power kit uses two fuel solenoids (black) and two nitrous solenoids (red). Once they’re screwed to the mounting plate, neatly lay out the wiring, (earth and power for each solenoid), as per the supplied diagram. Quality electrical connections are very important. Wiring should be neatly cable-tied to the mounting plate and all connections soldered to prevent open circuits later on down the track.
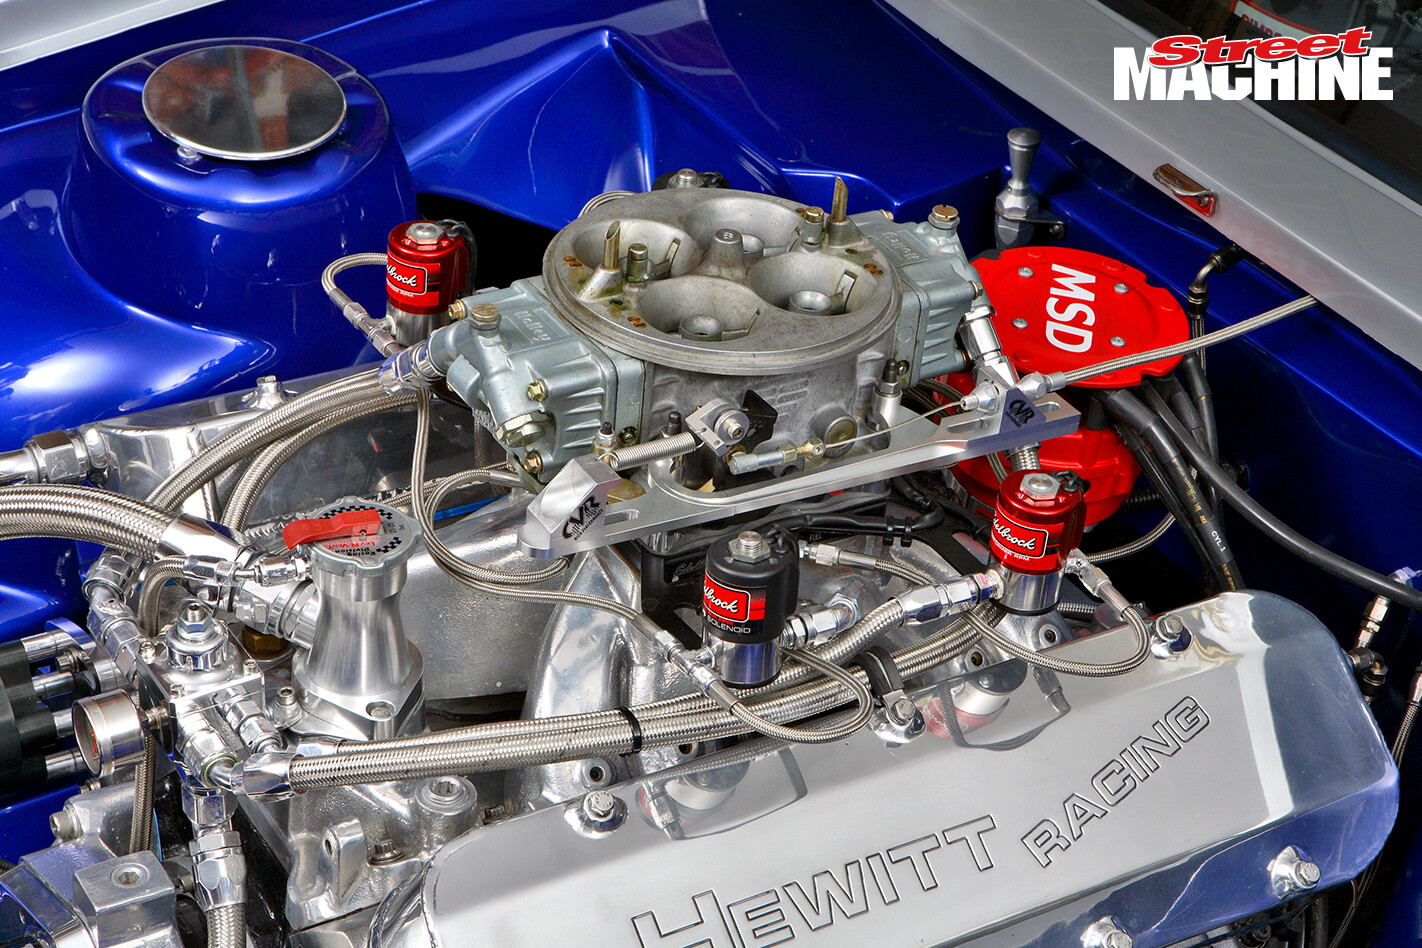
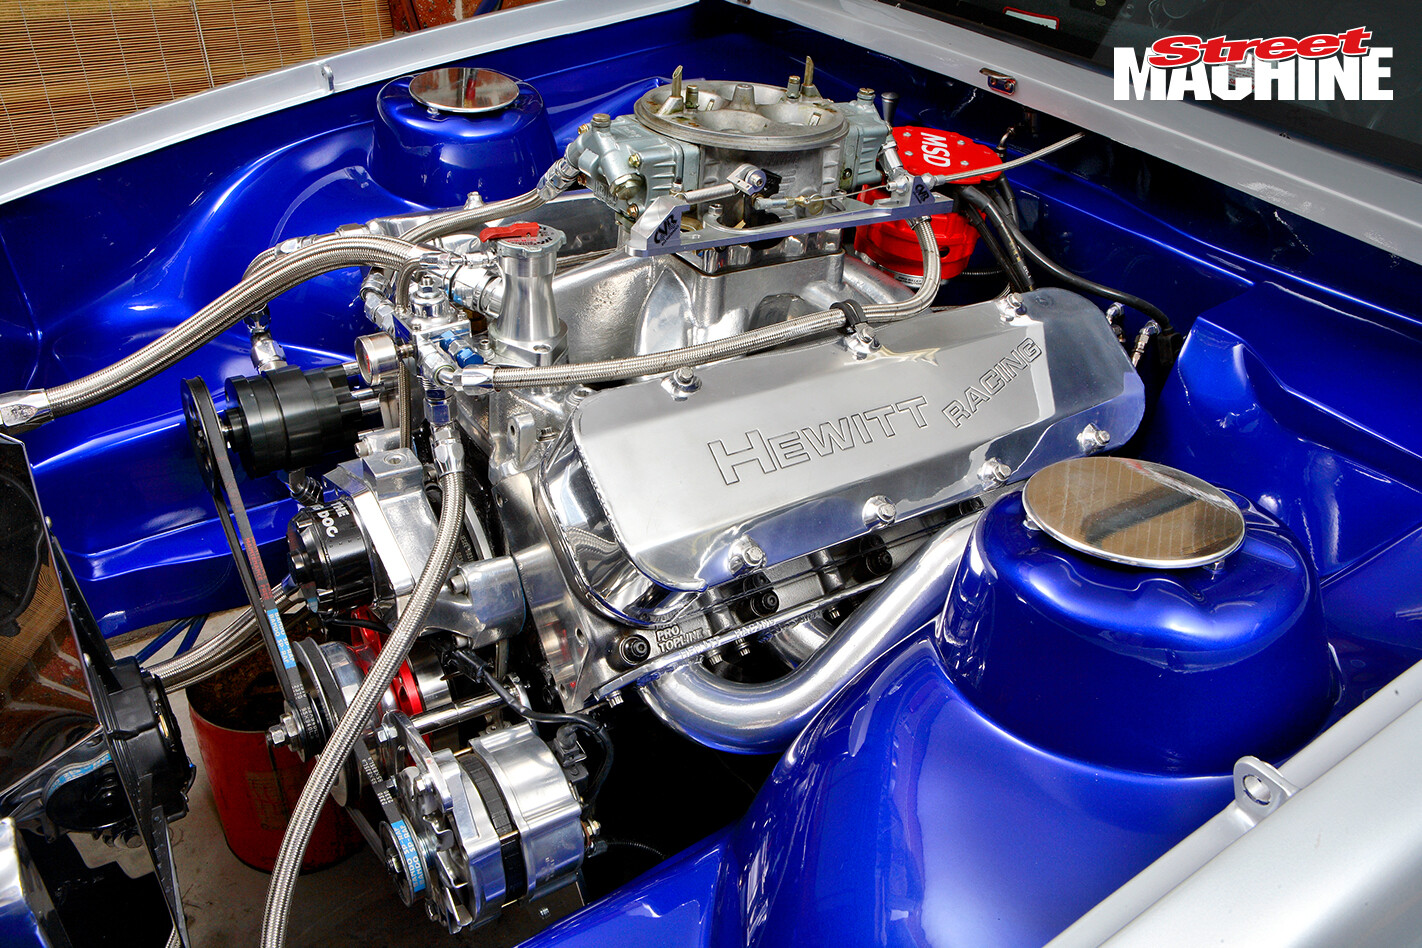 STEP 3: The 565-cube behemoth runs a suitably sized 1250cfm Holley Dominator, so the kit was ordered with the appropriate solenoid mounting plate (they’re available to suit two and four solenoids, both in 4150 and 4500-style base-plate configurations). With the fuel lines disconnected (use a rag to catch any fuel spills) and the carburettor removed, carefully install the longer carby studs.
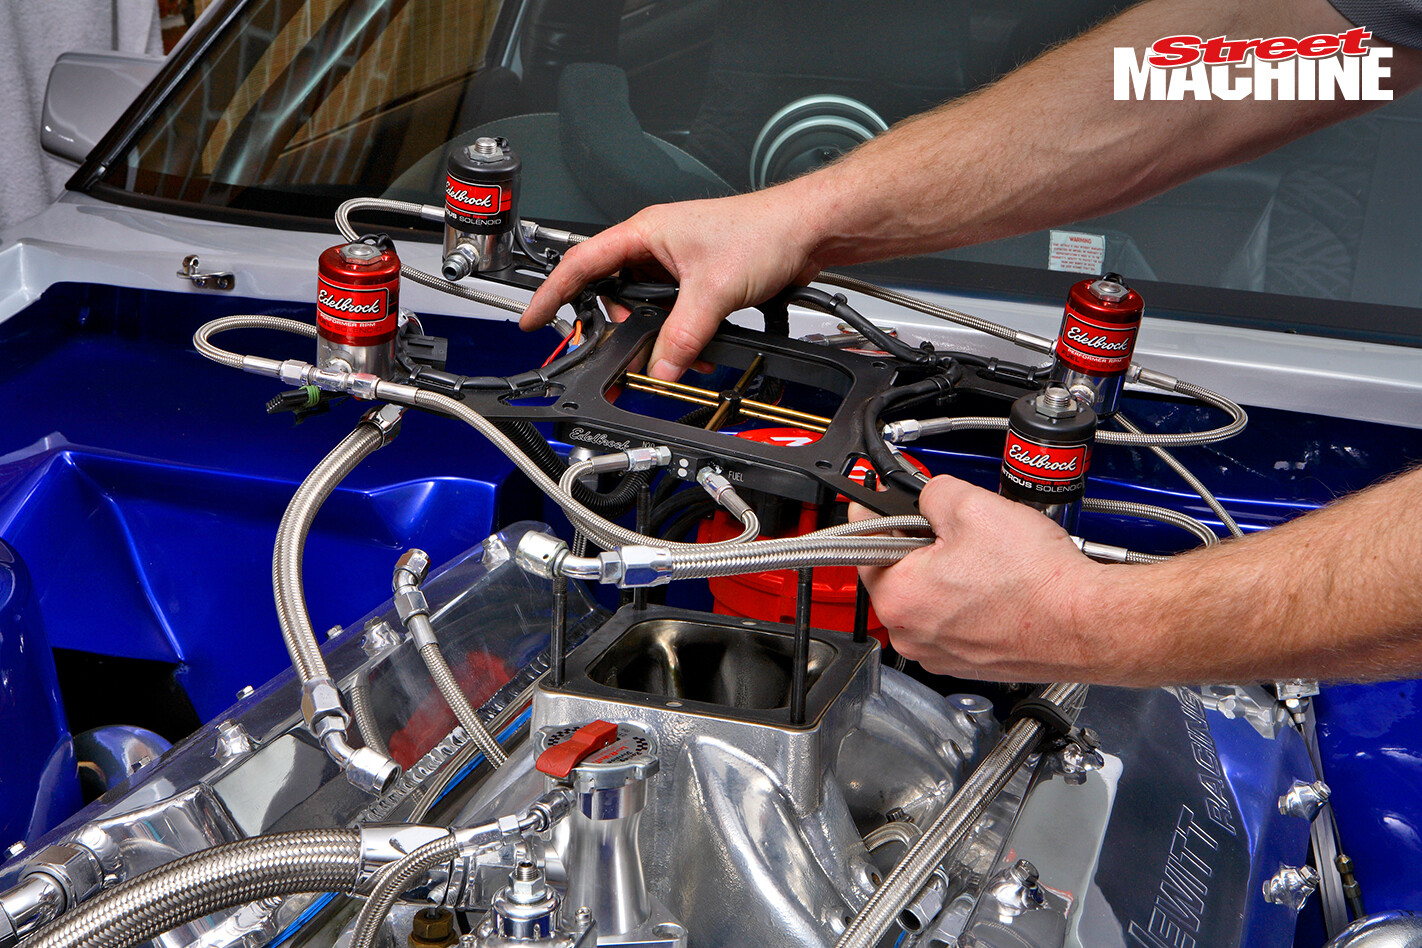 STEP 4: Install the solenoid mounting plate onto the engine and be sure to use the supplied new gaskets. Check to ensure there’s adequate clearance between the four solenoids and the inlet manifold, rocker covers and anything else in that vicinity. Then connect the nitrous and fuel lines from the solenoids to the plate. Being a 400hp system, we started with the 200hp jets (the smallest units supplied).
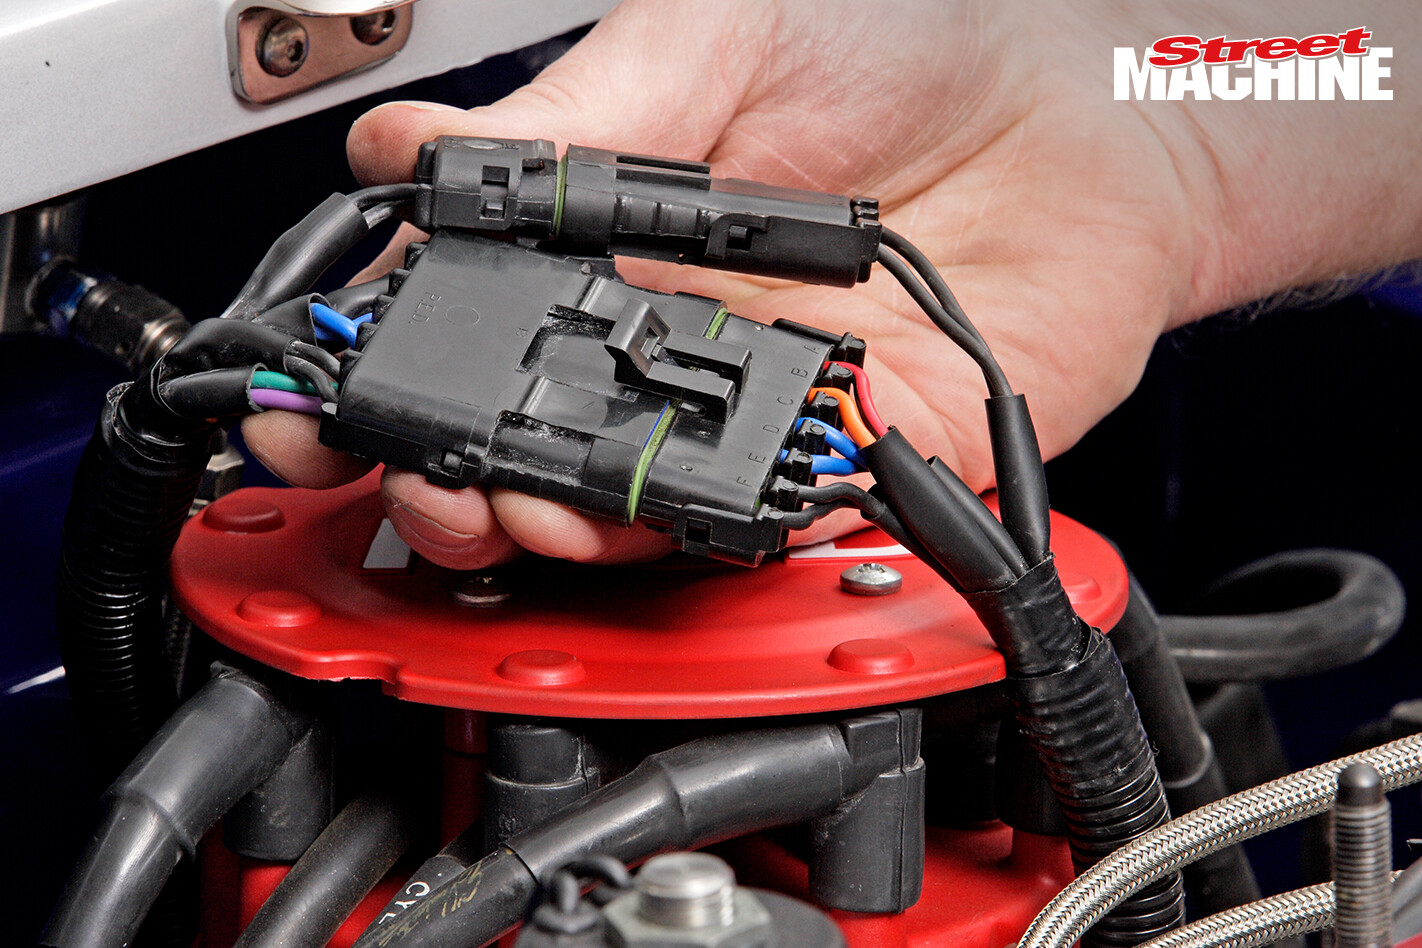 STEP 5: For ease of removal and system serviceability, it’s a good idea to incorporate a multi-pin plug (preferably weatherproof) into the nitrous harness. Fuses and relays should always be used on a good installation. It’s better to blow a fuse and have a slow run than to short out half of your nitrous system, melt a piston or blow a head gasket. Make sure you have good, clean, solid earth connections.
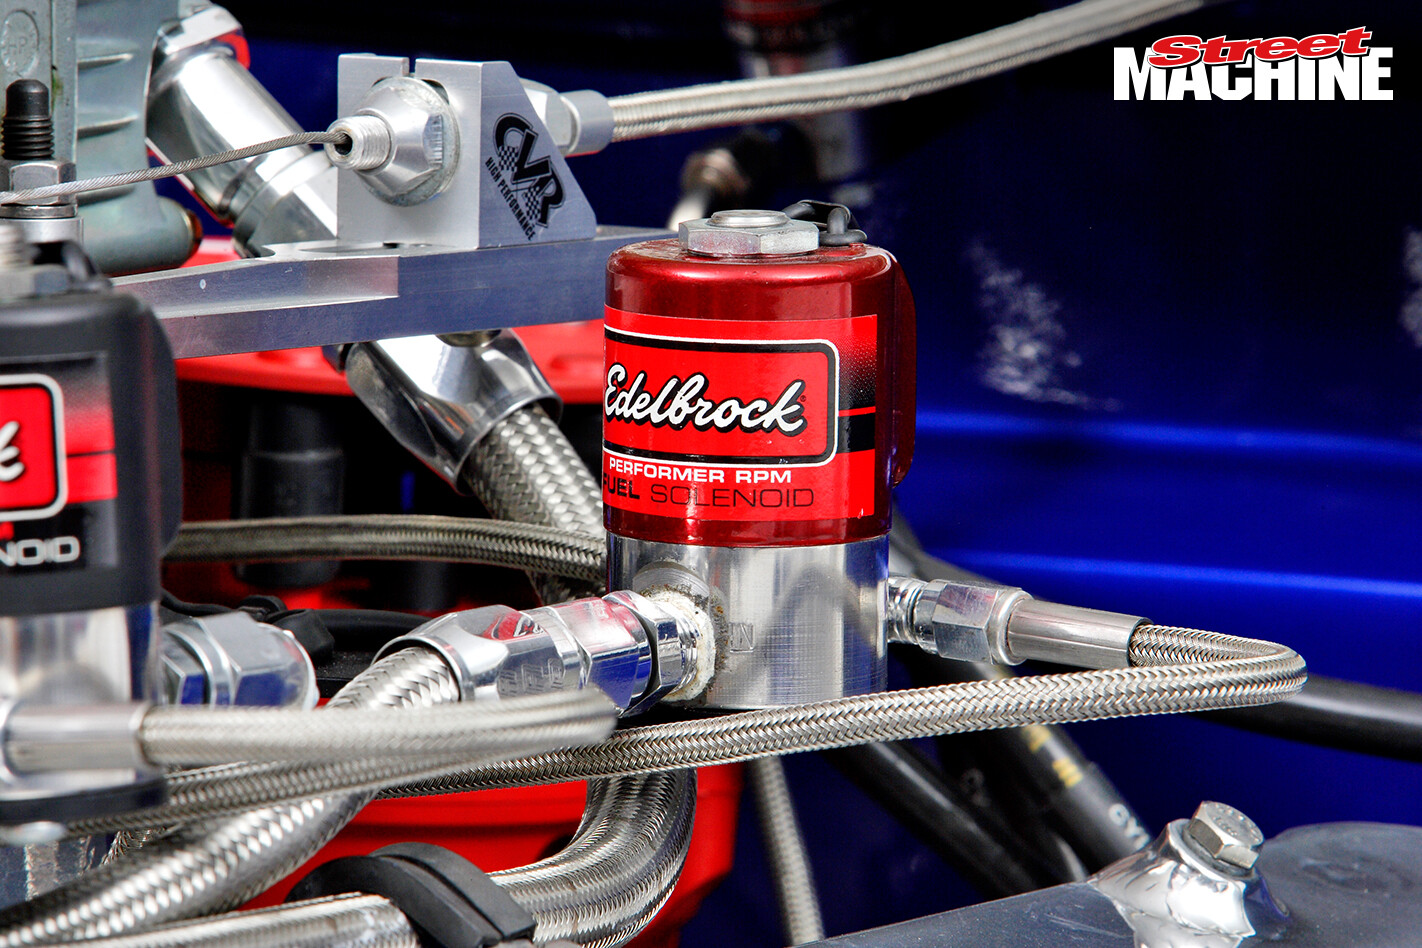
 STEP 6: Lay out the fuel lines from your regulator to your fuel solenoids. Avoid right-angle bends and be sure the lines are a sufficient size. This kit needs adequate flow to support up to 400hp extra, so a dash-10 line runs to the regulator, then dash-6 lines to each solenoid. Use the correct AN spanners to avoid scratching up your fittings when tightening. Alloy fittings should be firm but not overly tight.
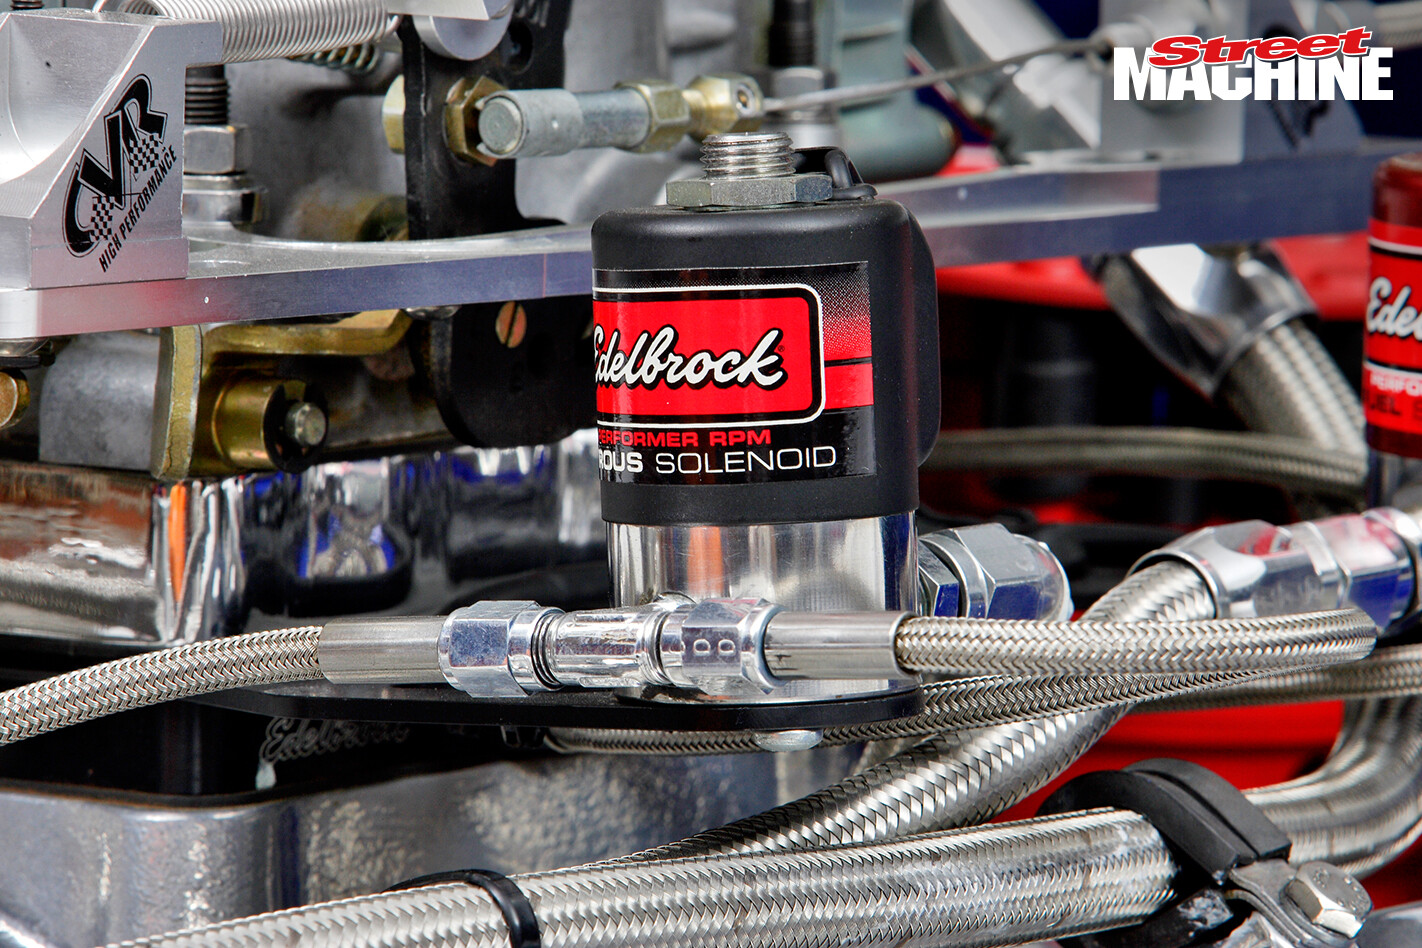 STEP 7: The inlet to each nitrous solenoid is fitted with a filter (see inset) to prevent debris from entering the solenoids, which could damage their plungers or cause them to stick open, allowing nitrous to leak into the engine and cause a dangerous induction explosion. Each fuel and each nitrous solenoid feeds a pair of jets (four solenoids feed eight jets, see Step No.1), hence the T-piece fitting on the outlet port.
 STEP 8: Only use white Teflon paste for sealing the tapered-thread fittings — bevelled-seat AN-type fittings do not need sealant. Thread tape can break away and clog filters and jets, which is bad. Once all lines are installed, open the nitrous bottle half a turn and carefully and methodically check for leaks at every joint, connection or fitting. Crack open the throttle and check nitrous is not leaking into the engine.
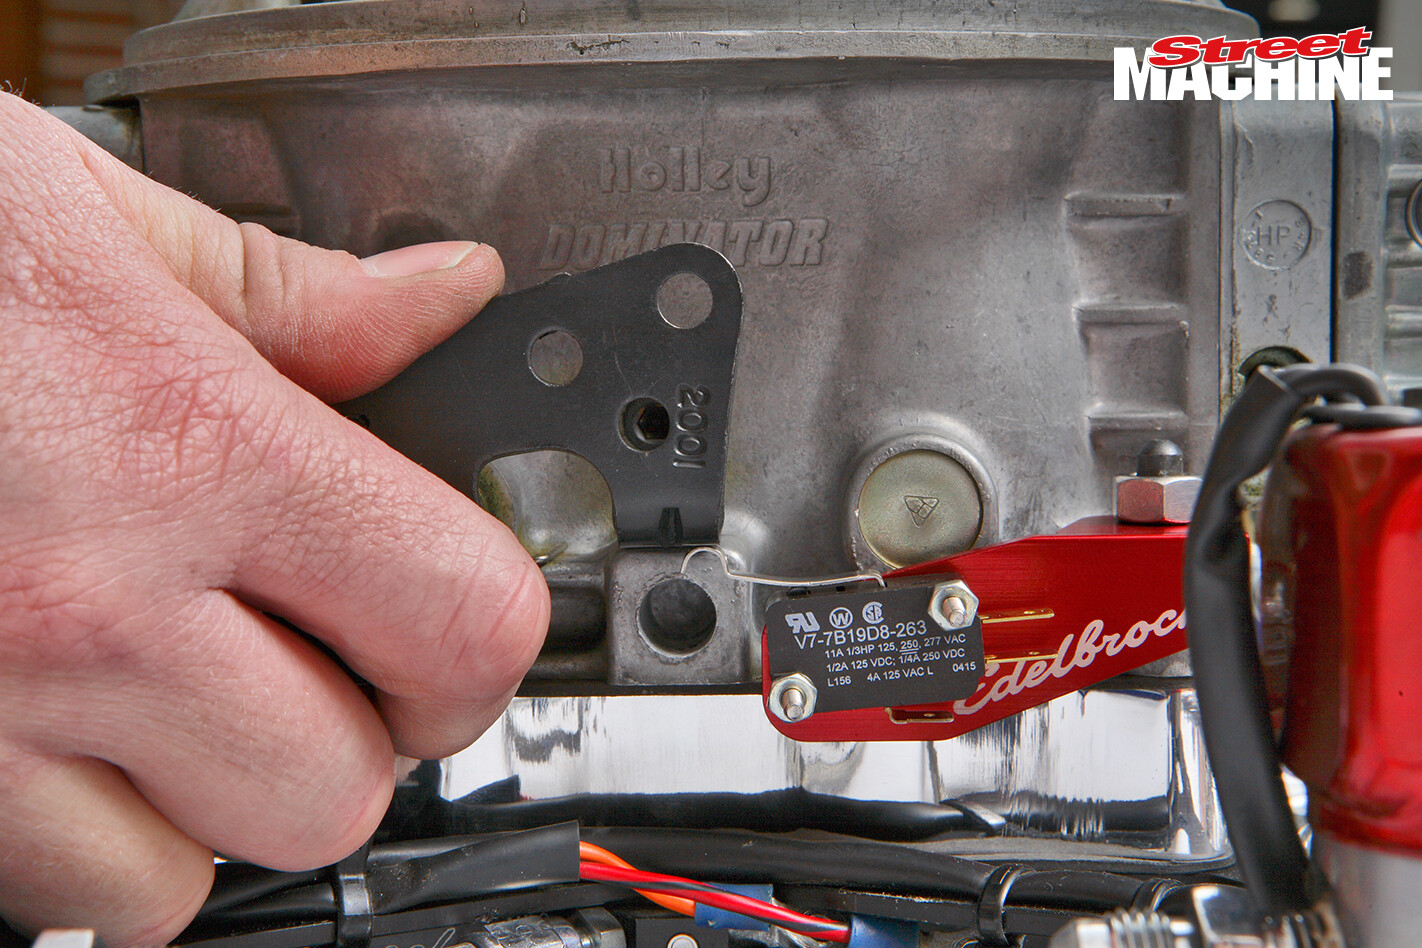 STEP 9: After checking the reinstalled throttle linkage operates the carby to wide open without binding or fouling on any part of the nitrous system, adjust the micro-switch so that the nitrous is only engaged at full throttle. Most kits come with a universal bracket but a range of optional billet throttle-switch brackets are available, which add a neat, finished look to the installation.
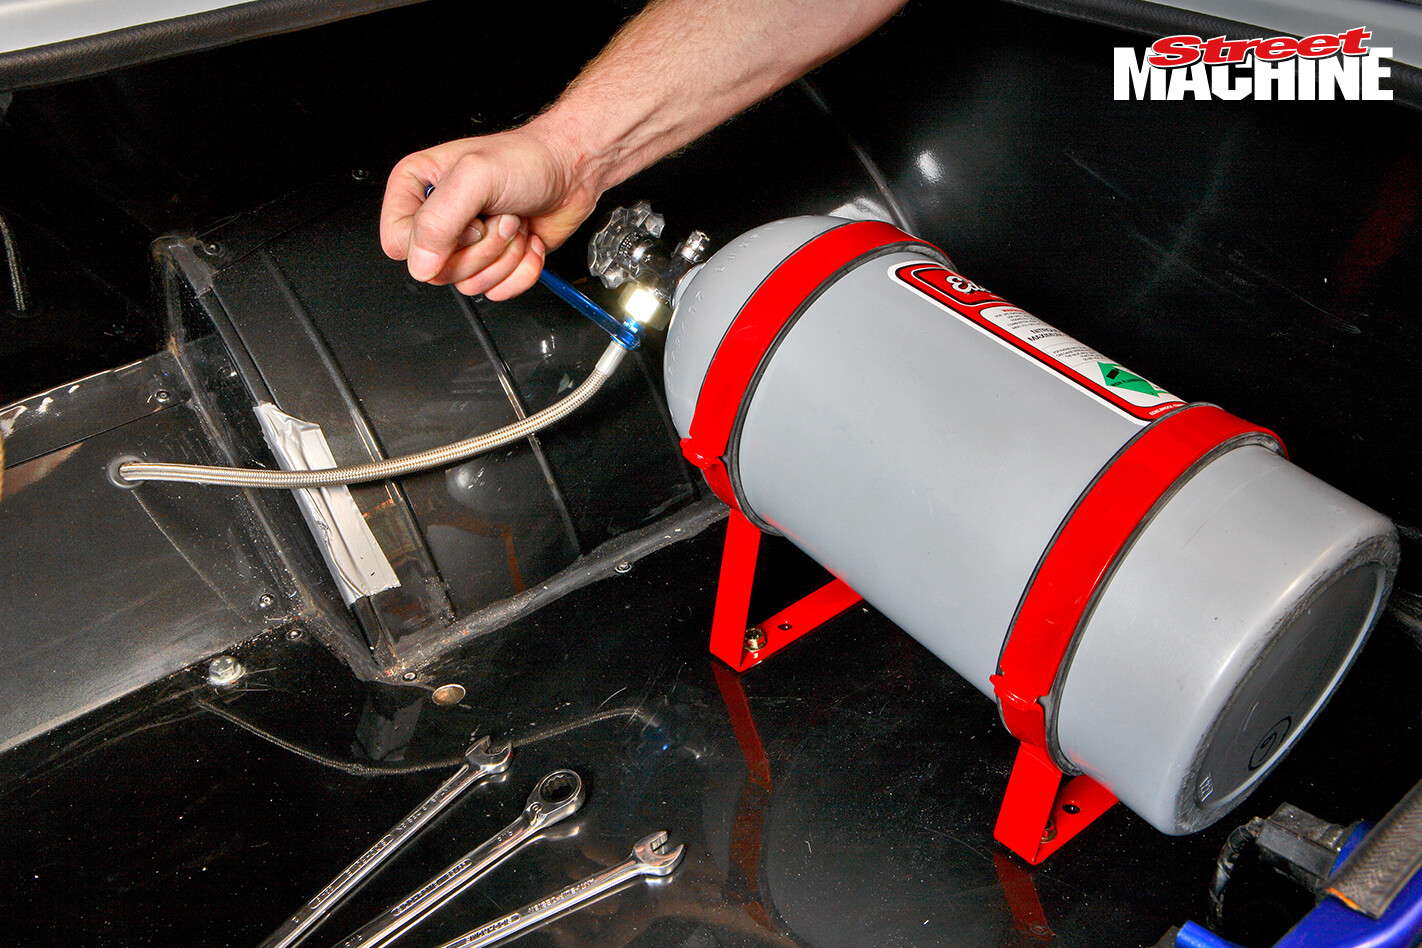 STEP 10: A 10lb bottle weighs 25lb when full, so don’t use self-tappers to secure it to the floor or it’ll turn into a deadly missile in the event of an accident. Use high tensile bolts with washers so they don’t pull through. When drilling the bracket mounting holes, don’t drill through your fuel tank! For consistent nitrous performance, fit an electric bottle warmer to maintain bottle pressure between 900 and 950psi.
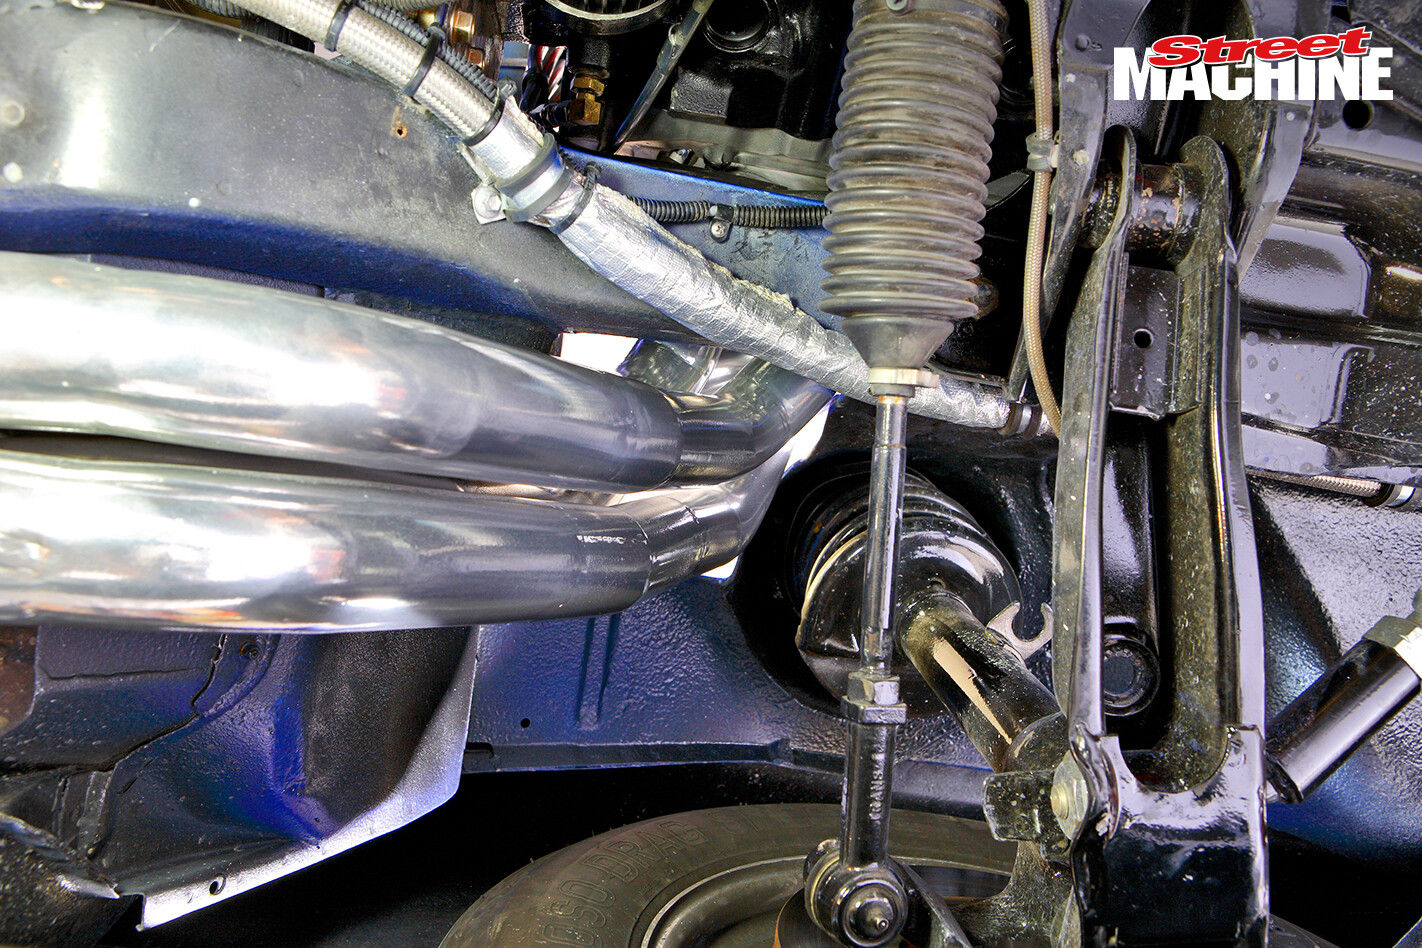 STEP 11: A melted, worn-through or damaged fuel line can spell disaster, so be very thorough when routing and securing it. It must be run out of harm’s way, outside the cabin, and mechanically secured about every 200mm. Use heatproof sheathing if it runs near hot items such as the exhaust. If you’re upgrading the fuel pump, increase the size of the fuel lines too.
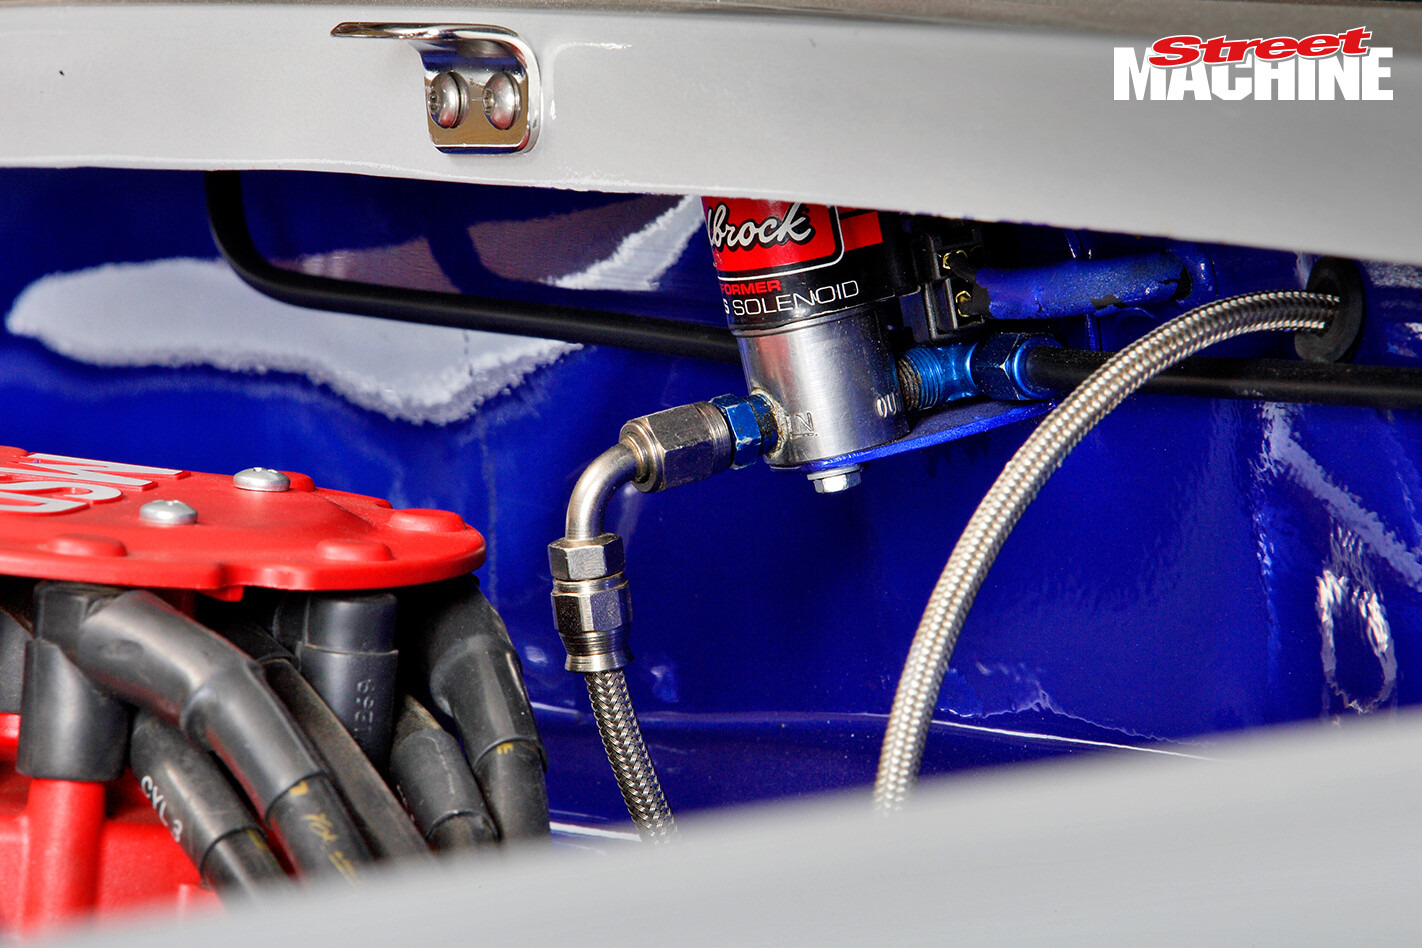 STEP 12: Gaseous nitrous in the lines will cause erratic performance. The purge solenoid releases any trapped gas just prior to launching. This ensures there’s only liquid nitrous at the solenoids and the system is ready to go. Craig’s car uses twin purge vents mounted at the base of the windscreen. However, you can be as creative as you like and purge through your bonnet scoop or even the grille.
FUEL SYSTEM
WHEN it comes to nitrous, there’s no such thing as a fuel system that’s too big — especially on an engine like this, which is making close to 1200 flywheel horsepower with the nitrous. Ideally you’d run a large, high quality pump from Magna Fuel or Barry Grant, along with a large four-port regulator, a combo that’s proven to work well.
 If you’re adding a big nitrous set-up but you’ve already set up your fuel system, it’s not a bad idea to install a dedicated fuel pump and fuel regulator just for the nitrous system. Many systems simply employ the car’s existing fuel tank but a popular option is to mount a secondary tank up the front. A fuel pressure gauge, plumbed in as close to the fuel solenoids as possible and in easy view of the driver, will help you verify there’s adequate fuel pressure before arming the system.
IGNITION SYSTEM
MOST factory electronic ignition systems can cope with a 100hp system but for bigger shots you should consider purpose-designed ignition systems, such as those offered by MSD. From its entry level 6AL right through to the big-banger MSD 10, these units are ideal — one of MSD’s Digital-7 programmable units was chosen for this installation.
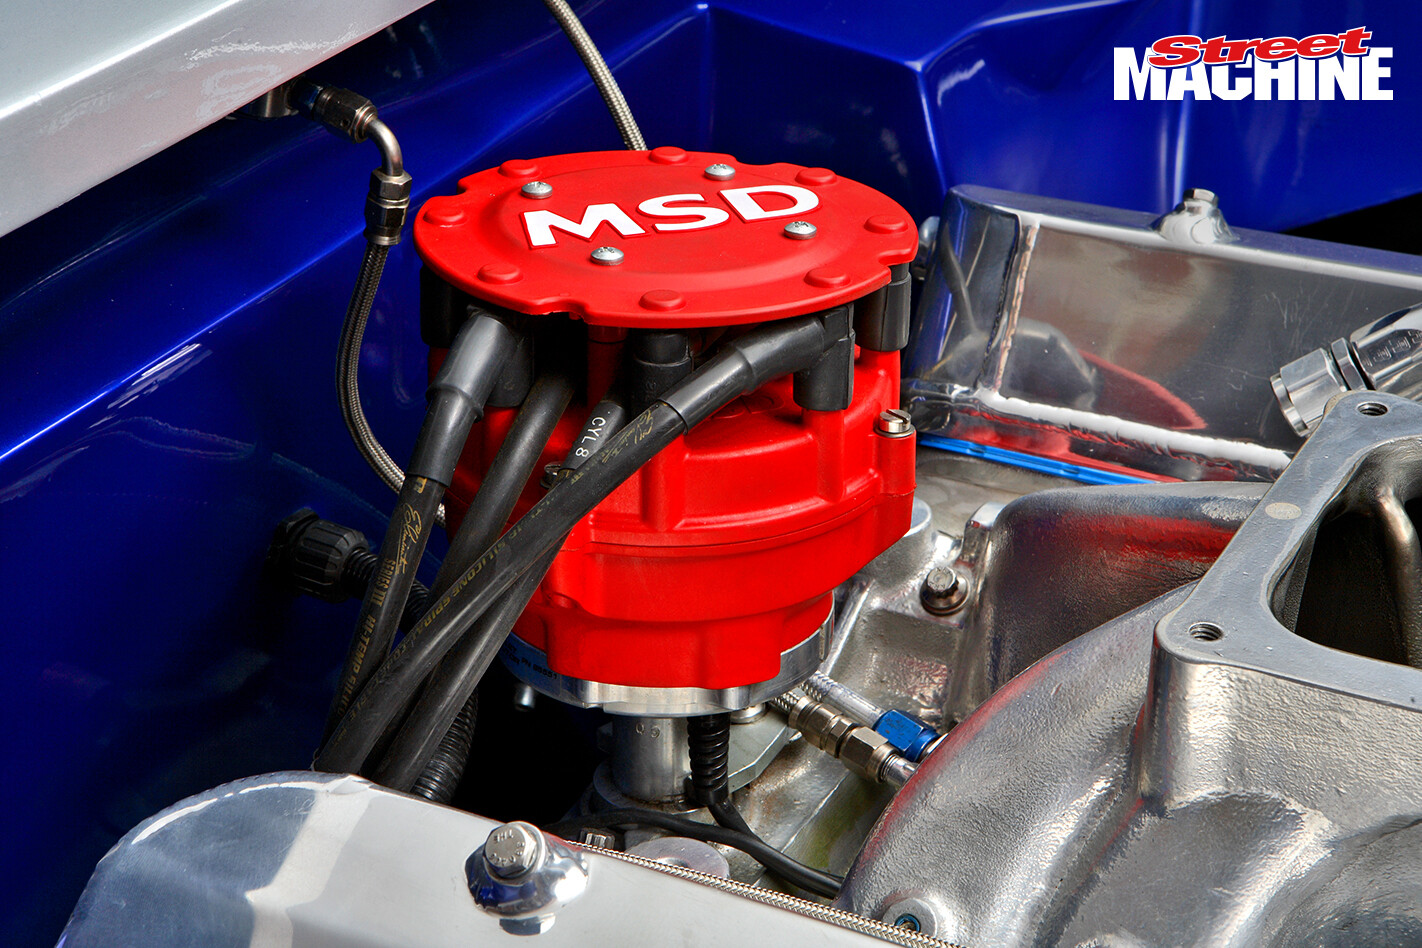 With three retards, rev limiter and rpm-activation, it’s particularly well-suited to single or multiple-stage nitrous systems. The Digital-7 series also incorporates a launch retard, allowing you to control ignition timing at the start-line. Craig’s VL also has an Edelbrock nitrous controller, which is one of the best on the market. Controllers are exceptionally useful on small-tyre cars, or cars with large, single-stage systems, as they allow you to set a 300hp system to say 30 per cent (90hp), then ramp it up over three seconds or so, to minimise wheelspin.
TOPPING UP
LIKE any fuel tank, you’ll need to get your nitrous bottle filled regularly. Have a chat to racers in your area to find out where the local filling station is. As we stated earlier, start with the small shot and work your way up. Just run a half-pass or a launch to get a feel for the system. If the car starts to misfire or doesn’t feel right, back off and check everything again. Follow the manufacturer’s instructions for fuel pressure, nitrous pressure, ignition retard and sparkplug heat range — they really do know their stuff.
 What difference did the Rocket Industries supplied plate system make to Craig’s Commodore? With the 200hp jets fitted (kit includes 200s, 300s and 400s), the Walky dropped from a best of 9.35@144mph straight into the 8.5s. Jets were then stepped up to the 300s, and it ran an [email protected] after some fine tuning. That’s a 1.2 sec and 24mph improvement — not bad for an upgrade that took less than day. Soon it will be fitted with the 400hp jets, which should put the car in the sevens!


Comments