
First published in the November 2002 issue of Street Machine
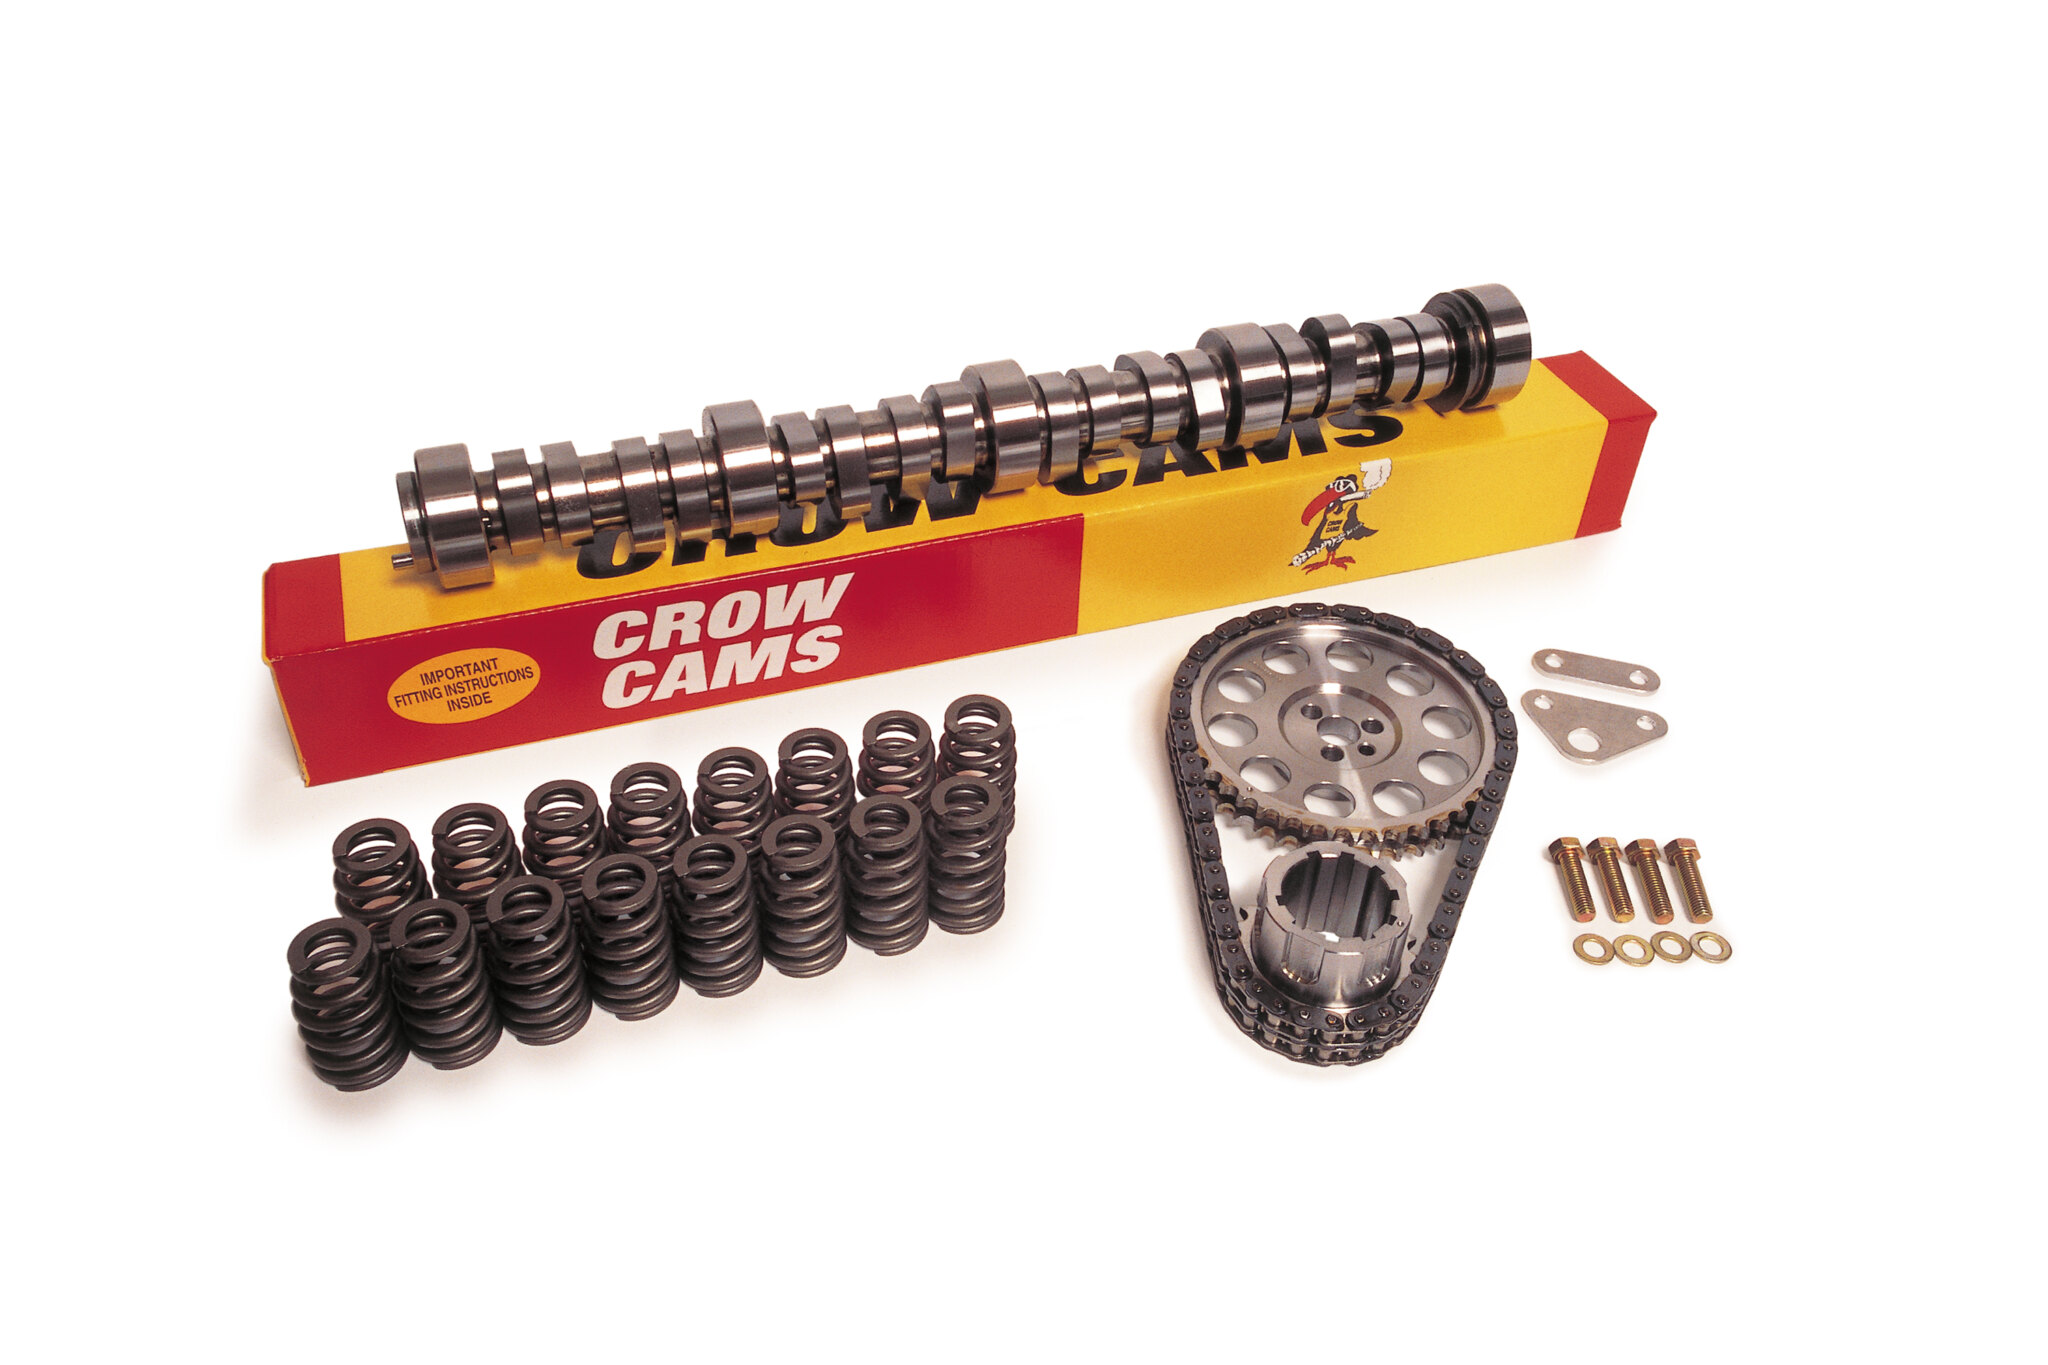
Now with a simple exhaust upgrade, VU FOR U has gained a meaty bark and a lot of extra bite. After such a good start, we were keen to see what other power gains could be made with the Gen III through some other relatively simple mods. We spoke to Crow Cams who’ve been burning the midnight oil developing a new billet roller camshaft, a tougher set of conical valve springs, a true-roller timing chain and computer software package that would work a treat with our exhaust upgrade. So we asked them to ship us a kit and so we could give it a burl.
While the Gen III is quite a different animal to a traditional V8, slipping in a new cam is still essentially the same as it has been for the last 50-odd years – with a couple of idiosyncrasies thrown in. Considering the kit includes comprehensive fitting instructions, we’ll concentrate on those quirky Gen III differences rather than each and every step.
Changing the camshaft in a computer-controlled engine requires reprogramming (mapping) the ECU (computer). Unfortunately gone are the days when this process was nothing more than plugging in a new E-Prom, rather the Gen III’s ECU needs to be ‘flashed’ or reprogrammed. With the integration of the vehicle identification and anti-theft systems into the Commodore’s ECU, you need to keep car and computer as a pair – making a change-over situation impractical. To get around the problem, Crow supplies a perfectly-sized pre-paid Post-Pac so you can mail them your ECU for reprogramming. This process is a two-day turn around, so figure on having your car off the road for this period.
STEP-BY-STEP

1. Before touching the engine, unbolt the computer, drop it into the pre-paid Post-Pac, scribble your return address on the back and shoot it in the nearest mailbox. Do it now and it will be on its way back by the time you’ve finished the rest of the installation.

2. To remove the balancer, you’re going to need a long high-quality breaker bar, as the retaining bolt is extremely tight. You’ll also need a professional-quality three jaw puller, as the crankshaft/harmonic balancer interference fit is extra, extra snug.

3. Removing the timing case cover reveals this weird-looking oil pump. It must be removed to get access to the timing chain’s crankshaft sprocket. Like numerous other parts in the Gen III, the timing case cover, pump and camshaft sprocket are all secured by 10mm bolts.

4. Trickiest part of the job is undoing the bolt that secures the oil pick-up to the bottom-edge of the oil pump. To get at it, drop the sump to create a gap just wide enough to slip a 10mm ring spanner through and onto the bolt head. Be extra careful! Drop the bolt into the sump you’ll either have to yank the engine or fish it out with a strong magnet.

5. Once again you’ll need a three-jaw puller to get the lower sprocket off. The new double-row timing chain is marginally wider than stock, which requires the oil pump to be spaced forward when reinstalled. Crow includes the spacers to do this (they’re the two small aluminium plates shown above and at the far right in the main photo at the top of this page).

6. To change the camshaft, the lifters need to be clear of the cam lobes and bearing journals. Normally you just remove the inlet manifold and pop them out. Not so in a Gen III (they’re covered by the heads). One way of holding up the lifters without pulling the heads is to use threaded rods with powerful magnets glued to their ends.

7. Before sliding the threaded rods down the pushrod holes, make doubly sure there’s absolutely no metal fillings on the magnets or the treads. A smooth rod doesn’t work as they don’t have the serrations to catch an edge and hold the lifter up out of the way.

8. There’s no choice but to remove the radiator to make enough room to slide out the camshaft. However, with the air-conditioning condenser you can simply undo all the securing brackets along with the associated hoses and pipes and there’s enough slack in the fittings to move it up out of the way.

9. If a lifter falls into camshaft tunnel, you’ll have to pull the inlet manifold and the heads to retrieve it, so have the new cam lightly-coated in engine oil ready to slot straight in. You can re-use the Gen III’s old roller lifters as long as they are re-installed in the same location. Bolt up the cam retaining/thrust plate to make sure the cam doesn’t pop back out.

10. Timing chain installation is the usual deal: engine at top-dead-centre, line up the dots and slip it on – the crankshaft sprocket will need to be tapped into place using a round piece of pipe and a hammer. The new chain is thicker, therefore Crow supplies two aluminium spacers and longer bolts to space the oil pump slightly forward. Add a smear of sealant to both sides of the spacers when re-installing the pump.

11. Chevrolet saw fit not to include a crankshaft keyway for the harmonic balancer, therefore the crankshaft/balancer interference fit is extra tight. Use a longer centre bolt (with the same thread) to press it back on. Once halfway on, swap for the longer bolt for the original centre bolt and do it up until the balancer bottoms out.

12. Crow supplies a tougher set of conicle valve springs, as the Gen III’s originals have proven to be a weak link. To change springs with the heads still bolted on, you’ll need to stop the valves from falling in. Make a simple device like this, which screws into the spark plug hole and allows you to fill the cylinder with compressed air.

13. Although it’s possible to remove the valve collets by rigging up a lever arrangement using a bolt in the rocker boss, a professional valve-spring compressor like the one shown here is relatively inexpensive and makes the job a whole lot easier.

14. While it’s spring pressure that holds the tapered valve collets in place, you’ll still need a strong magnet to pull them out of the seats in the retainers once the pressure is taken off of them by compressing the spring.

15. With around a 100psi in the cylinder the valve should stay put. However, if the valve drops in, it’s a heads-off proposition, so don’t muck around. To reinstall the new springs, simply compress them, drop in the two collets and slowly let the tension off.
UNDER DRIVEN

It takes power to turn all those accessories bolted to the front of your engine, and the faster you try to spin them the more power they absorb. Power Bond’s all-steel replacement harmonic balancer/pulley assembly is a smaller, 10 percent under-driven unit which reduces the rotating speed of all the accessories freeing up wasted power.

Additionally the inertia ring is secured by a high-strength, pressure-bonded rubber dampener, as the original can rotate and/or fail in high performance applications. The Power Bond unit is spin tested to 10,000rpm, includes a keyway for use with aftermarket crankshafts and is the same unit fitted to the new GTP Monaro.
CONCLUSION

With the neoprene O-ring-like seals on all of the Gen III’s metal gaskets, everything buttons back up pretty easily – just make sure the timing case cover goes back on in exactly the same pozzie. That done, it was onto the street to evaluate the new combo and, man, what a difference! Let’s go GTS hunting! You’ve gotta love modern technology. Look at that nice healthy power curve which was achieved without sacrificing driveability or fuel economy. That’s as long as you don’t get aggressive with the right foot – after all, it does take fuel to make power. As for power, that 210kW at the wheels translates to around 300kW at the flywheel, or 400 tyre-shredding horsepower in old-speak. While there’s lots more power to be gained if you want to get serious, the car is already a barrel of fun and traction is damned near non-existent so we decided to leave proceedings there. The cam, valvespring and remapping kit will set you back $2475, while the double-row timing chain works out at $195 and $310 for the under-drive harmonic balancer. (Prices as at Nov, 22)
Comments