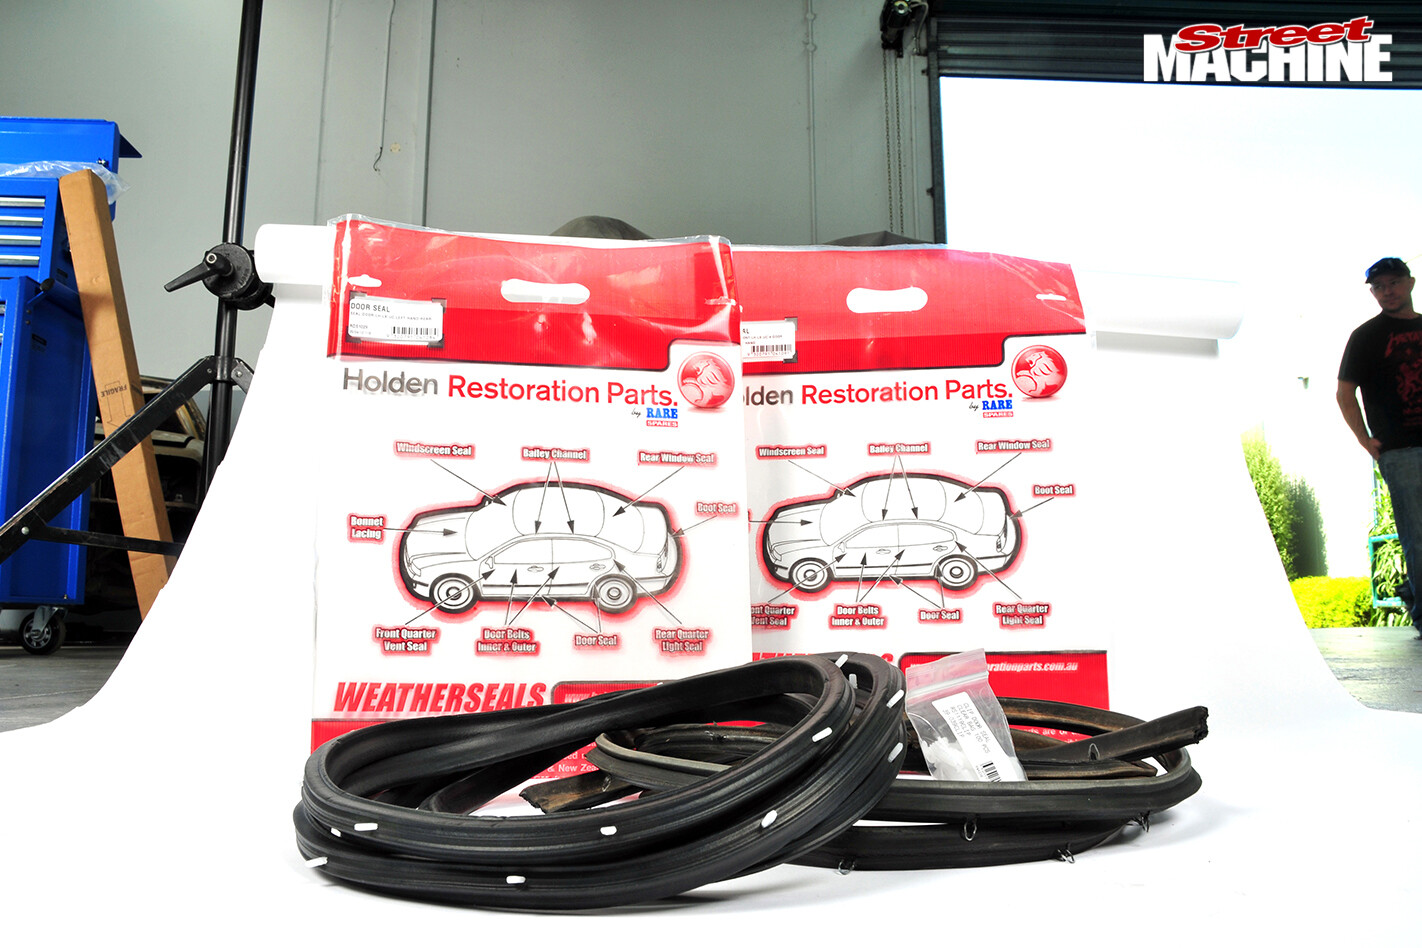
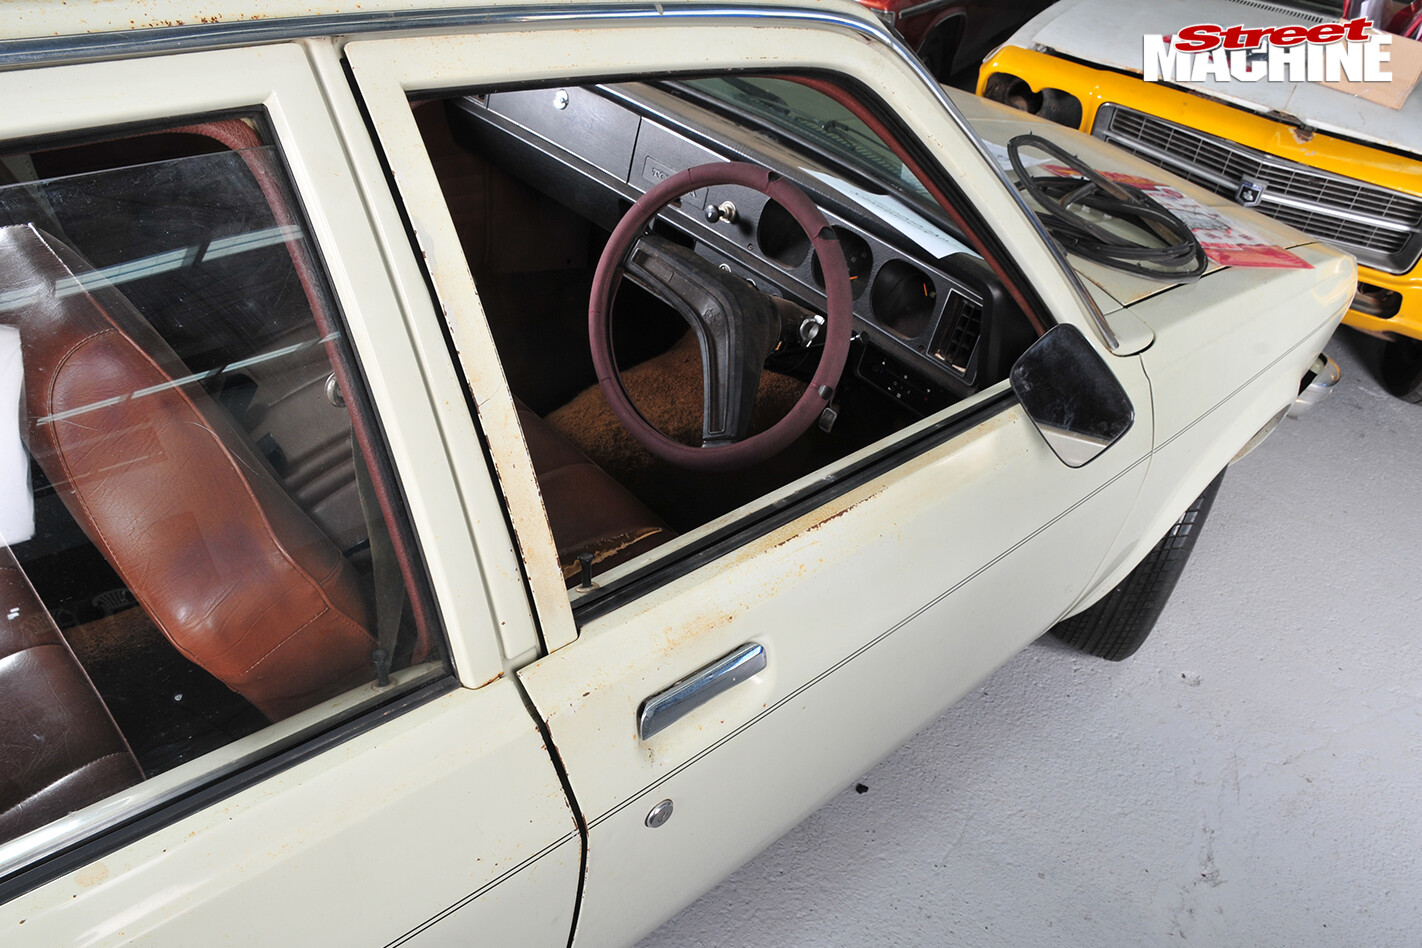
RARE Spares is well known for its comprehensive range of aftermarket parts for classic Aussie machinery. The company is dedicated to making things fit properly and opened a research centre in 2012 solely dedicated to the process, where we photographed this story.
Replacement door rubbers are one of its specialties and are available for many models. These reproduction seals are actually better than the originals because of the modern materials used in their construction; they’re softer and remain pliant for longer.
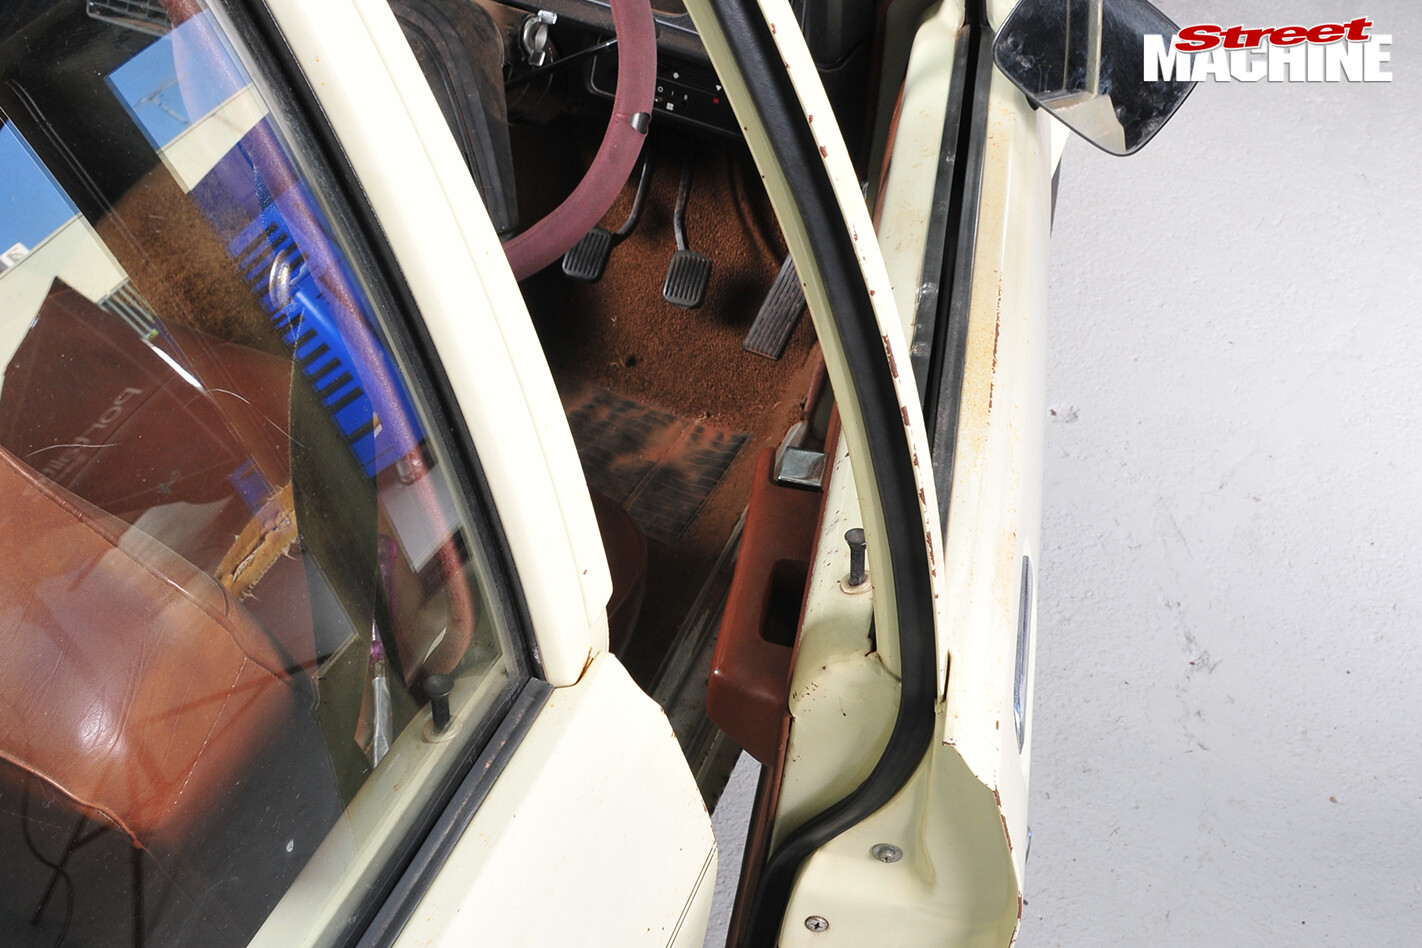
The two basic types of seal available are clip-on and glue-in. The seals fit and work well — so long as the installation procedure is followed and the seals are fitted in the correct orientation.
 RSP deputy general manager Lance Corby demonstrated the correct method for both types of seal for us and says that most complaints they receive about seals not fitting are traceable to installation issues.
Lance advises to note how the originals are fitted and fit the replacement the same way, and to do them one at a time. People often rip all the old seals off and are left wondering how they were fitted. It’s not just amateurs who do this; he’s seen high-dollar show cars with incorrectly fitted seals.
Correct orientation is covered in the instructions that come with each seal but people seem resistant to reading instructions. Perhaps the following photographs of door seal installations in an LH Torana and an FJ Holden will help.
STEP-BY-STEP
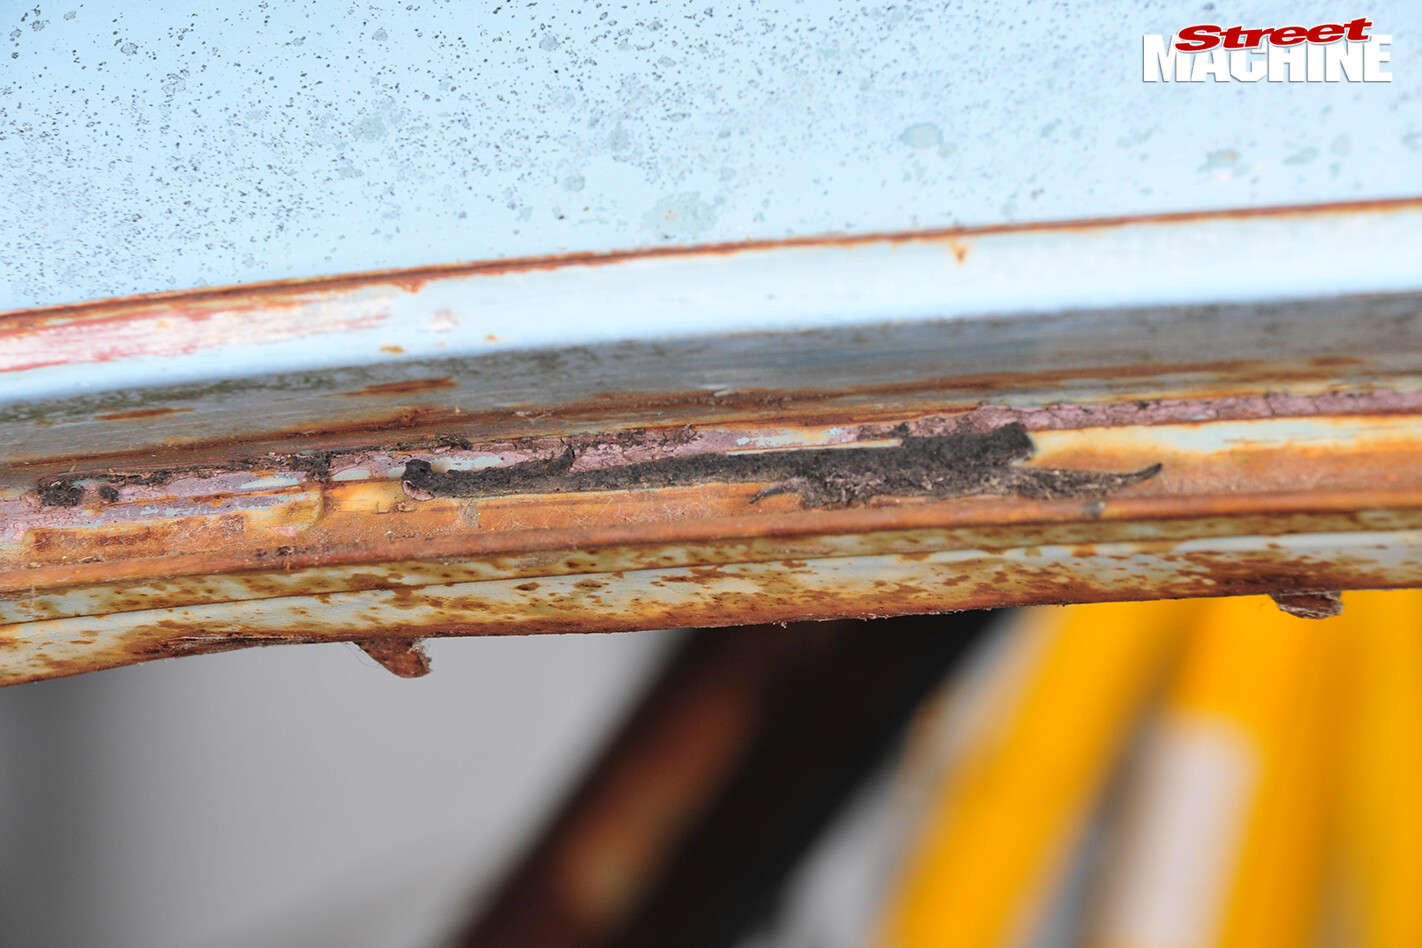
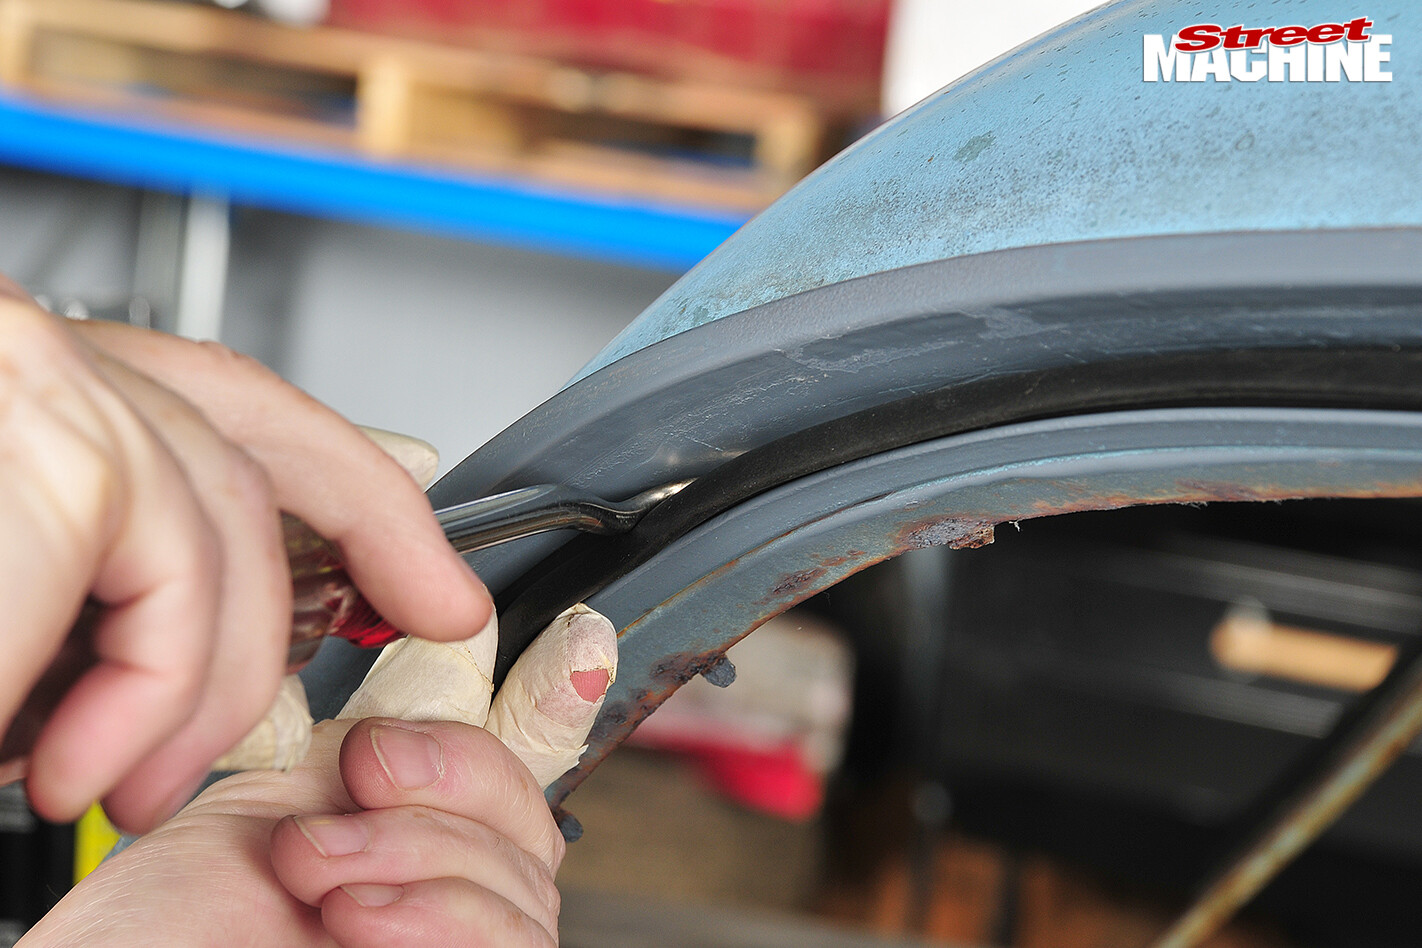
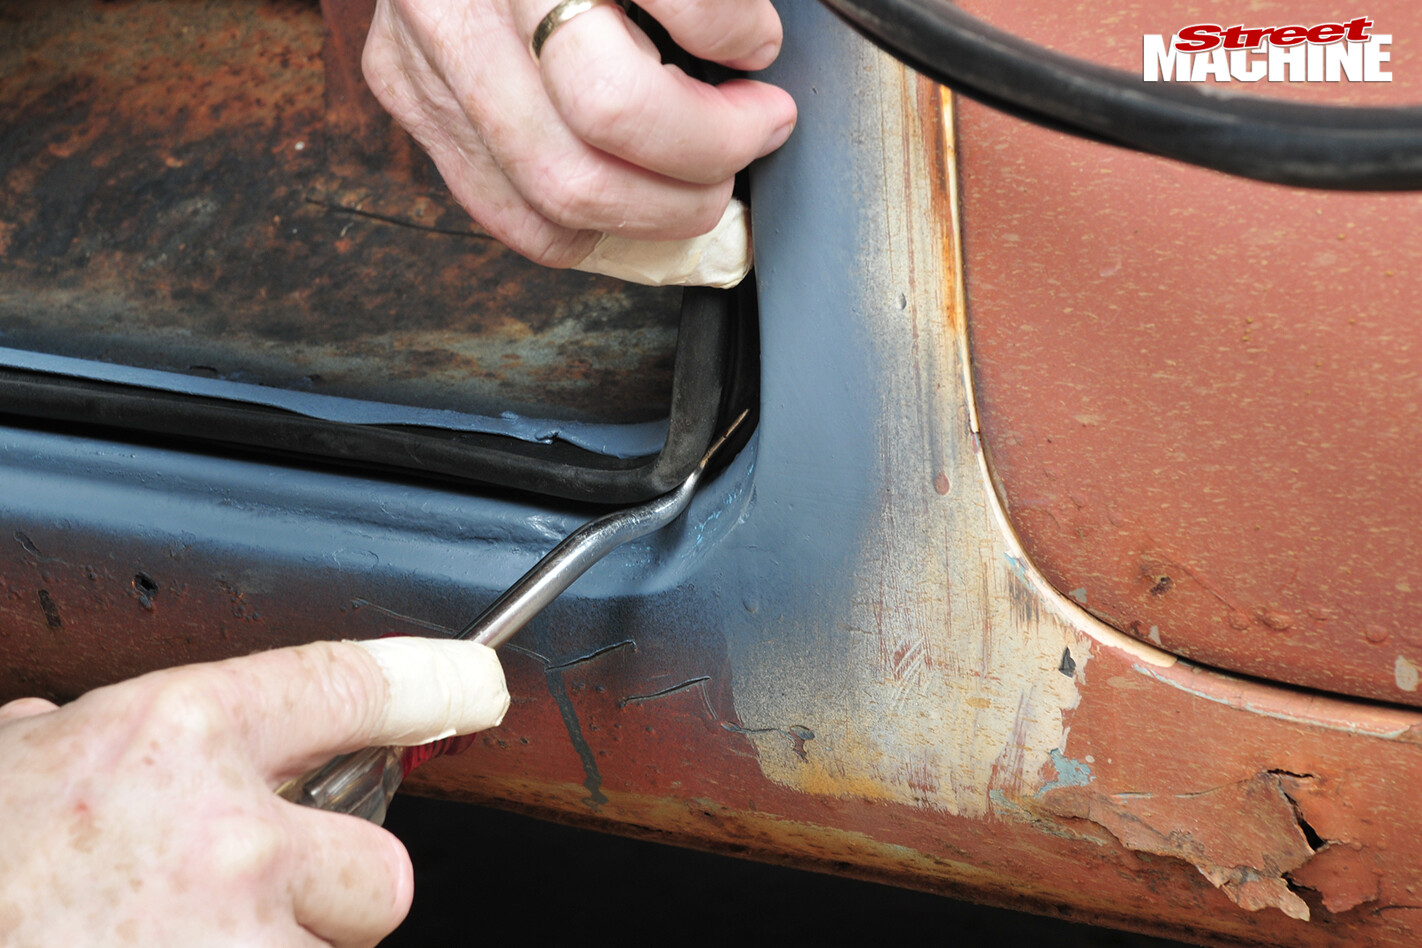
 1 Remove the old seal. The clips can be levered out using a fabricated tool; a trim clip removing tool also works. Note the tape to protect the paint. The seal may stick and it will likely be cracked and brittle, causing parts of it to break off but all remains must be removed. Don’t remove all the seals at once — replace them one at a time. That way, if anything goes wrong you’ll still have three seals fitted
 2 Once a couple of clips have been removed you’ll be able to get a grip on the seal and you should be able to pull the remaining clips free of the holes by hand. At the top of the door, the holes are simply drilled in the door’s metal frame.
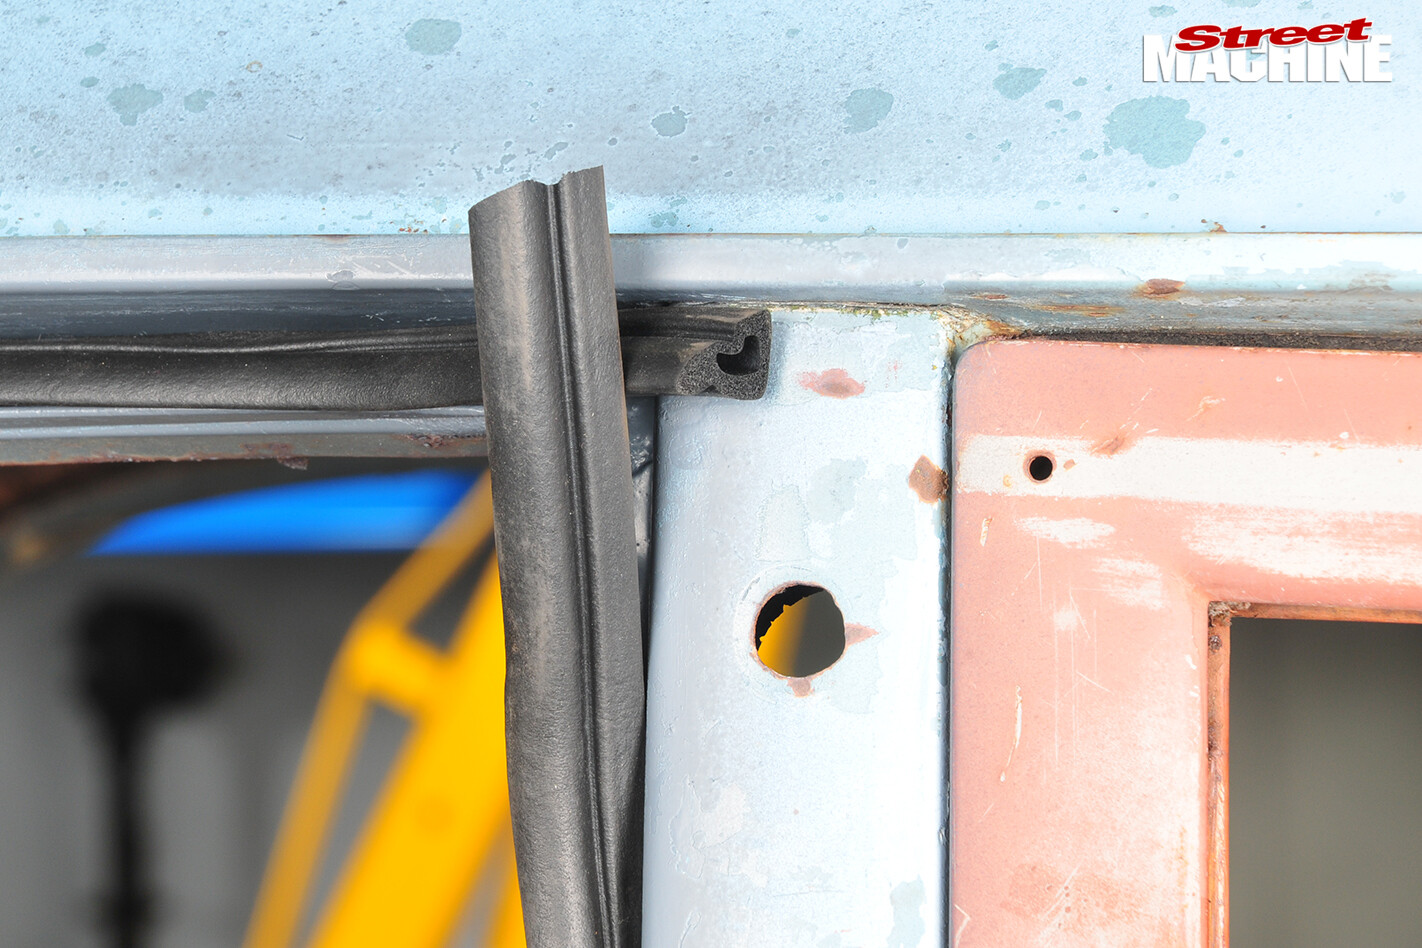
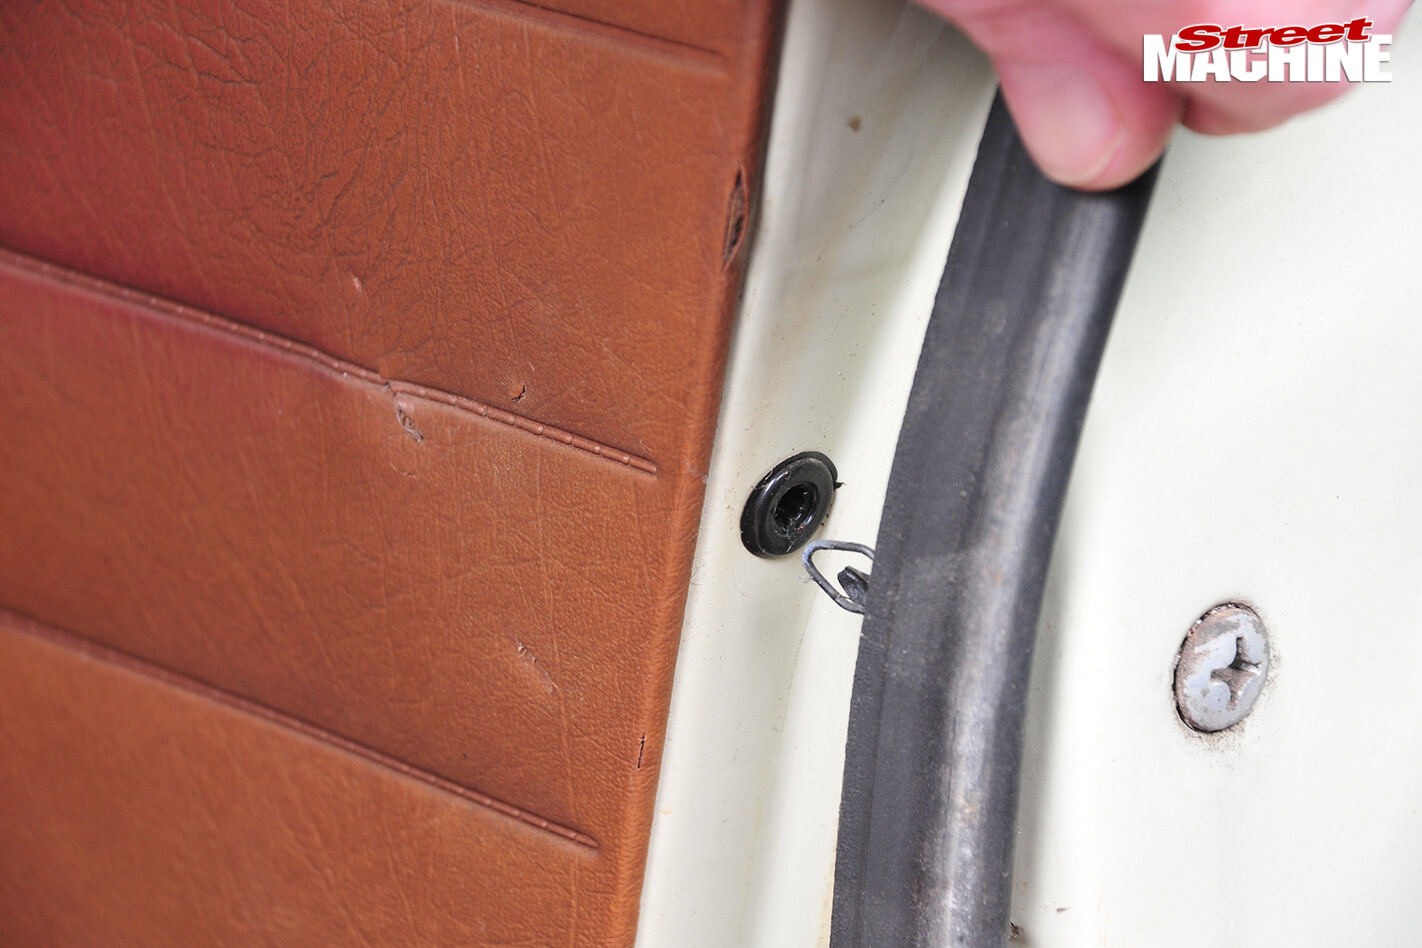 About halfway down the Torana doors, the holes have plastic inserts. Badly corroded clips can break off and remain in the hole. Make sure this hasn’t happened
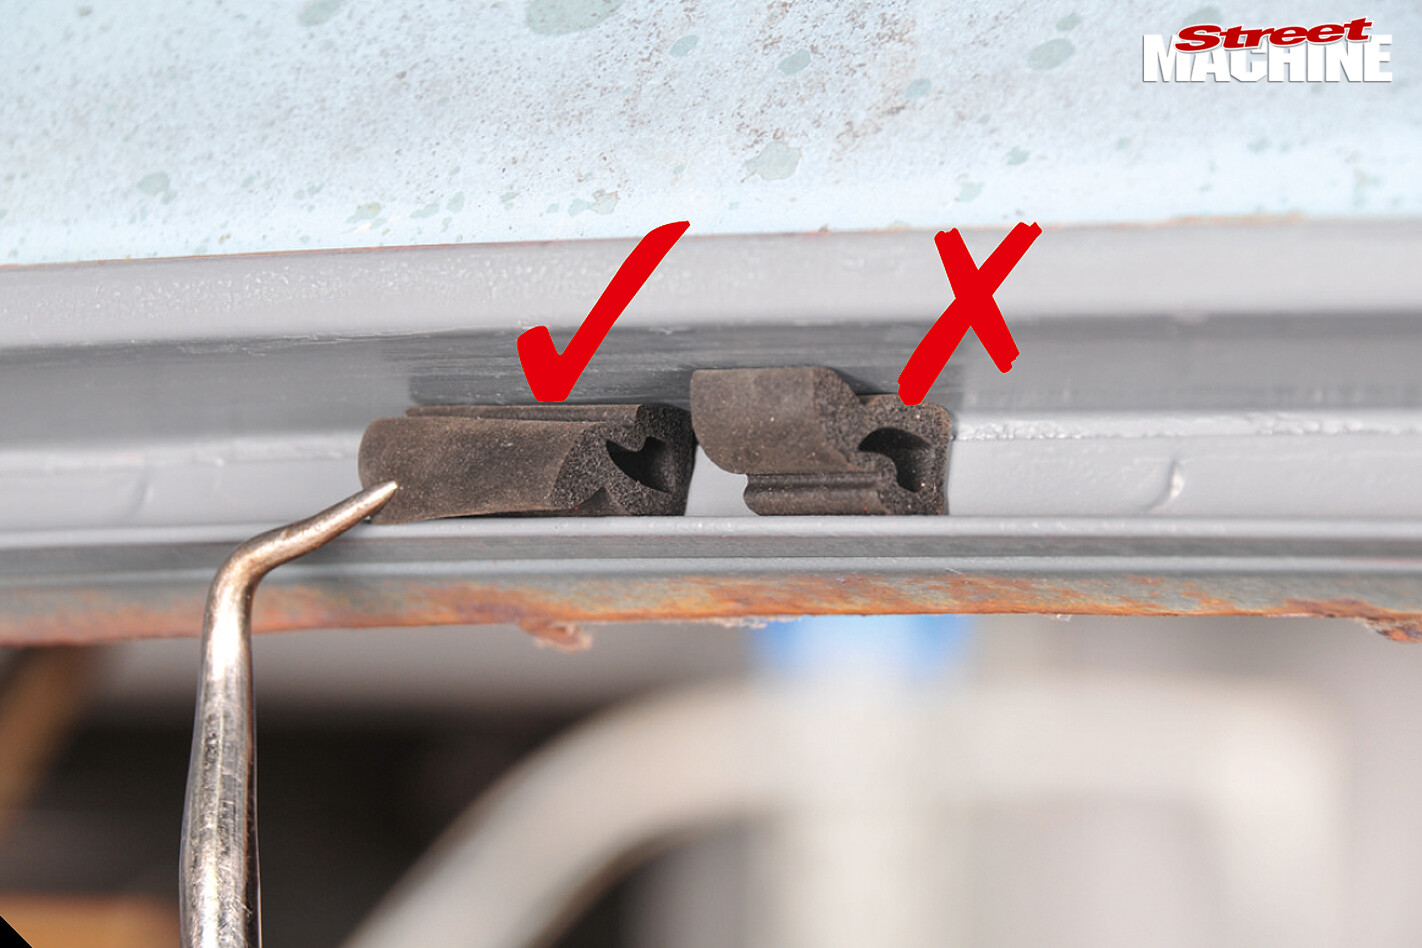
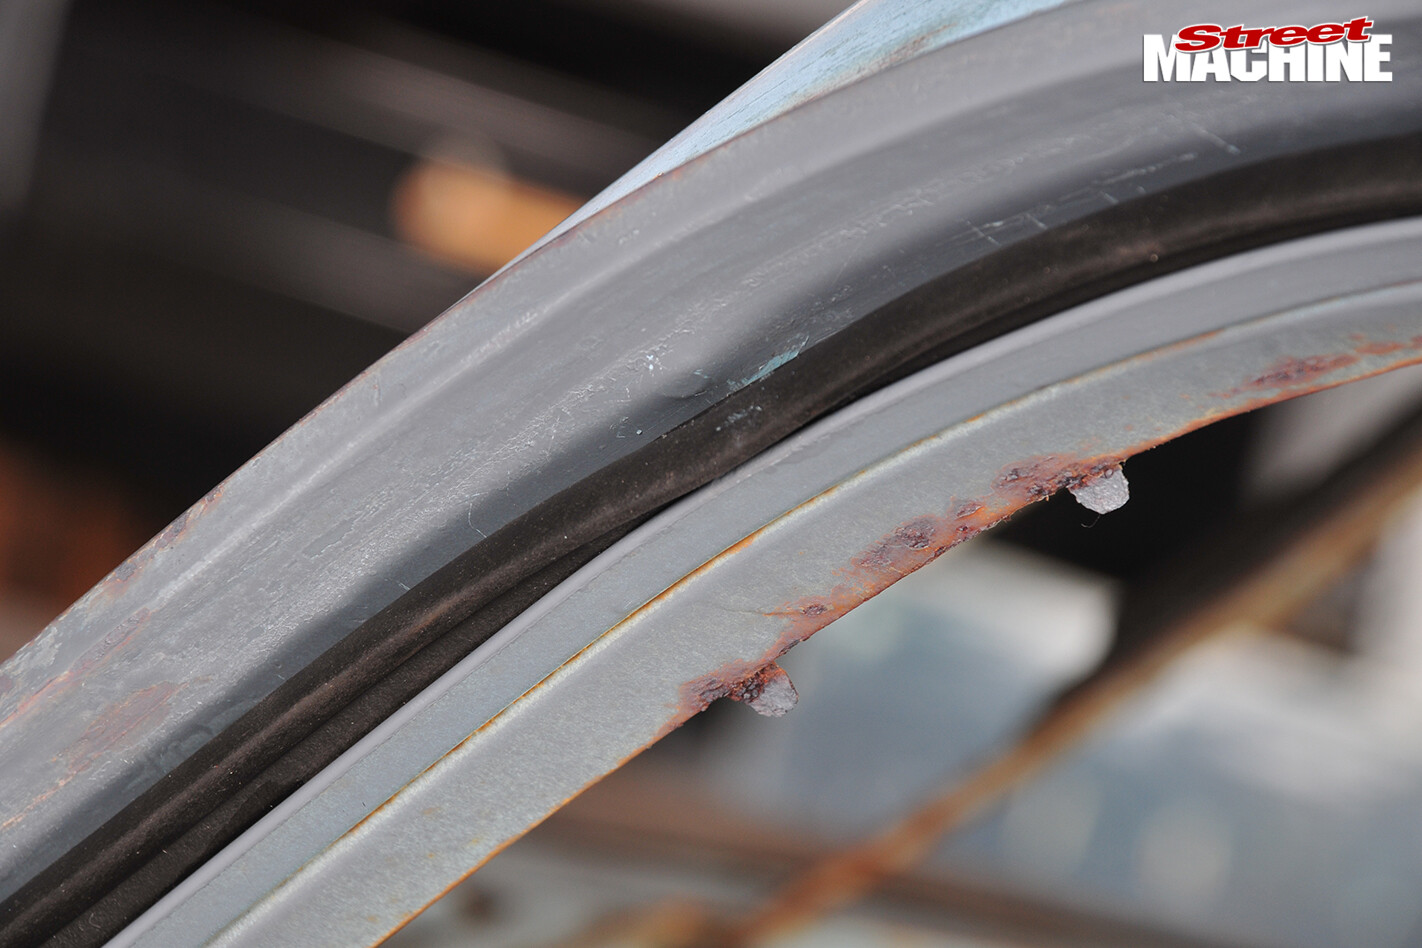
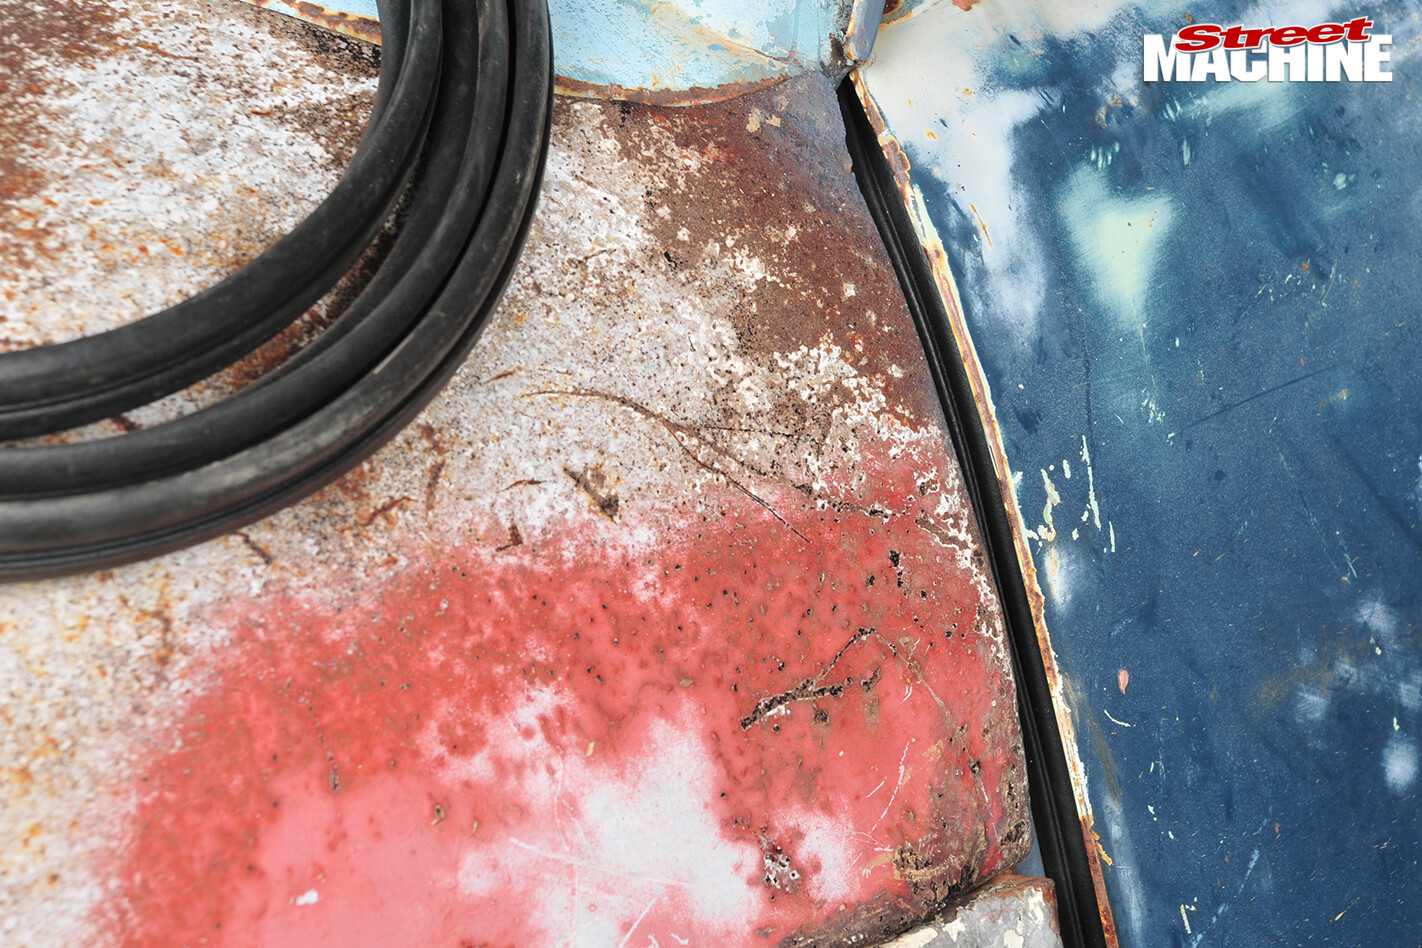
 3 One of the most common installation errors is fitting the seals with the wrong side facing out. When installed correctly, shutting the door compresses the rubber against the body and water is directed outside.
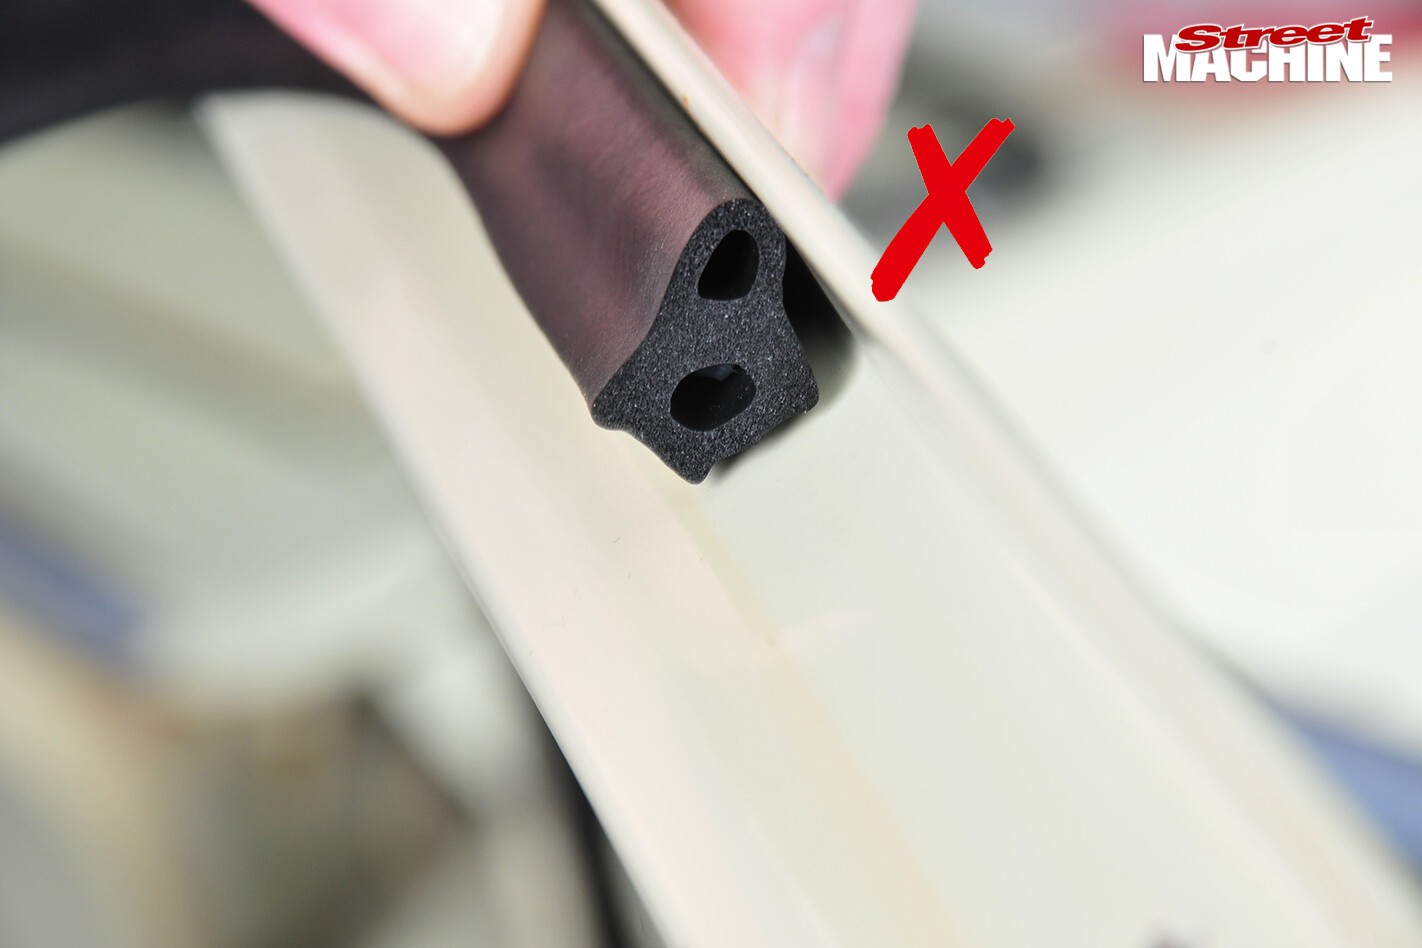 See here on the incorrectly oriented seal how water would be directed into the car. People do this and then blame the seal for leaking when it’s really the fitting method that’s at fault
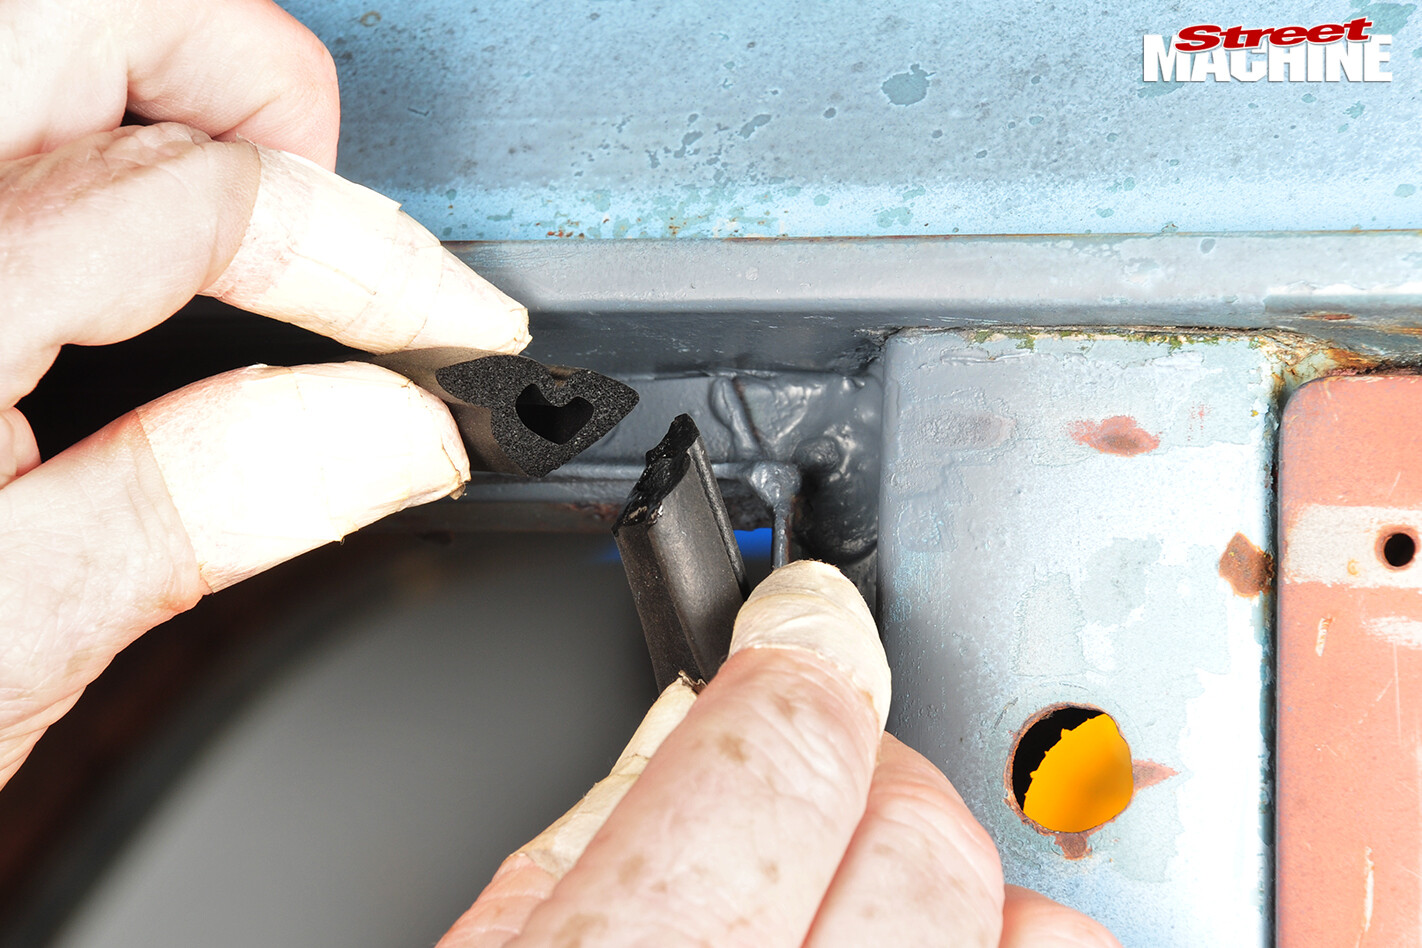
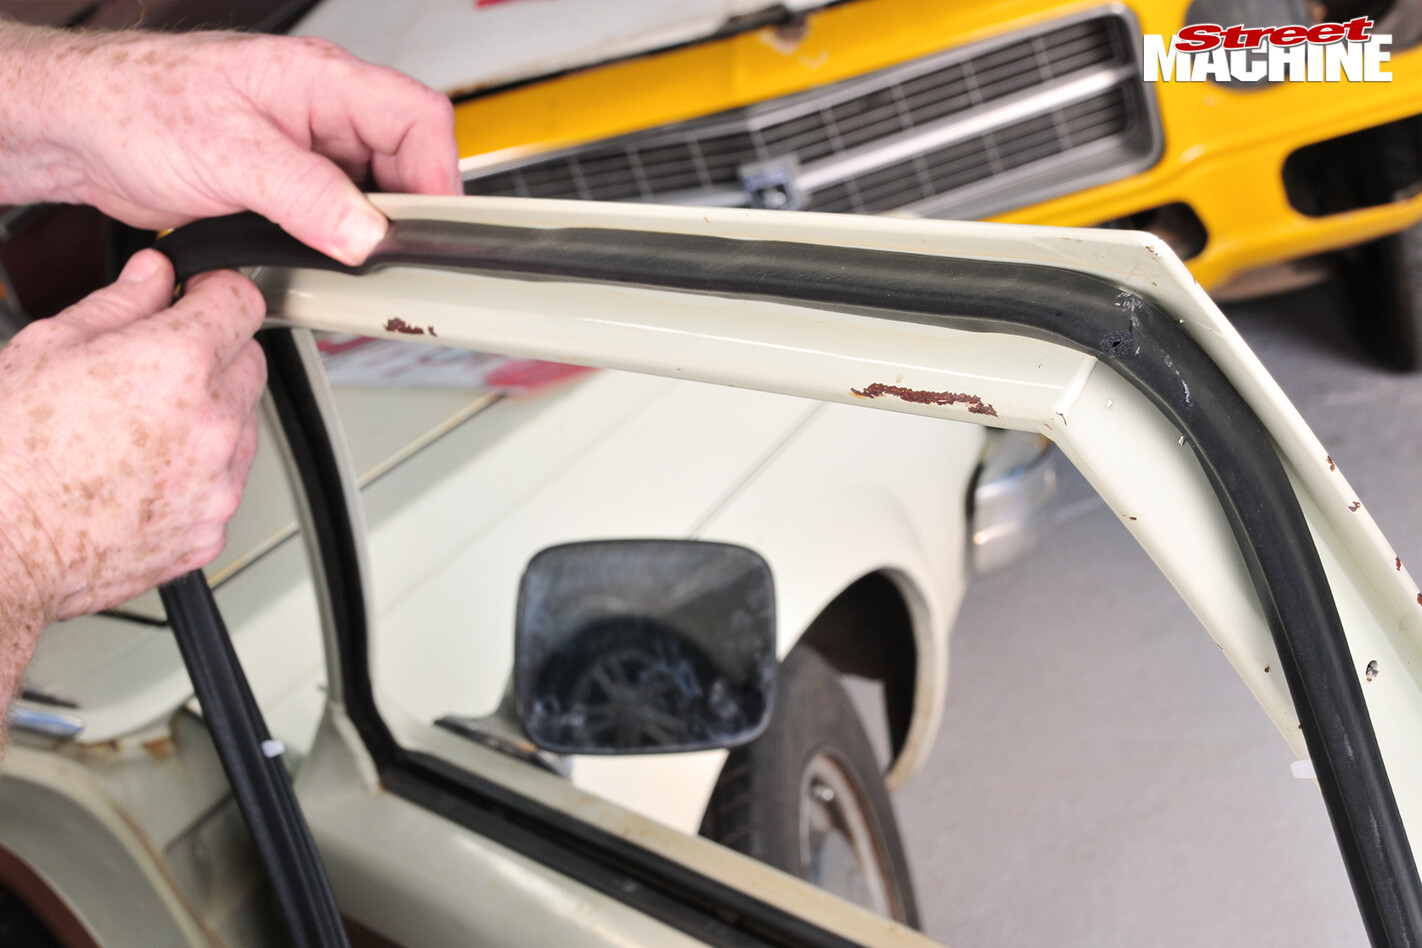 4 Start at the top rear corner, where the join in the rubber forms the easily identifiable 90-degree kink. The seals come with the push-in nylon clips already fitted but they’re single-use only, so they’ll need to be replaced if you trial-fit the rubbers when gapping the body and checking alignment while doing the bodywork. New clips are available separately in bulk packs and are quite cheap
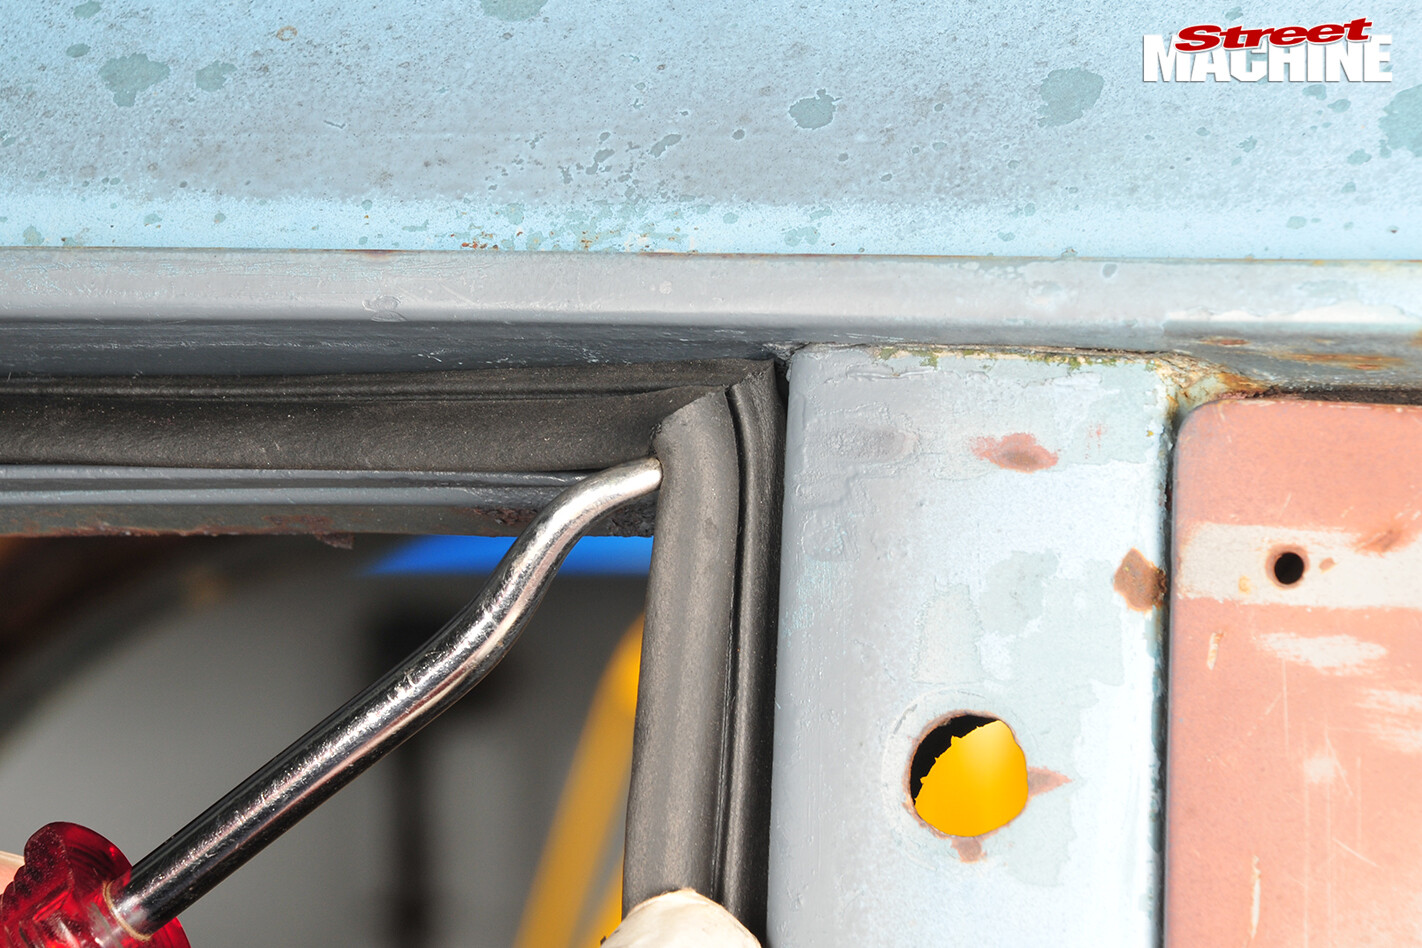
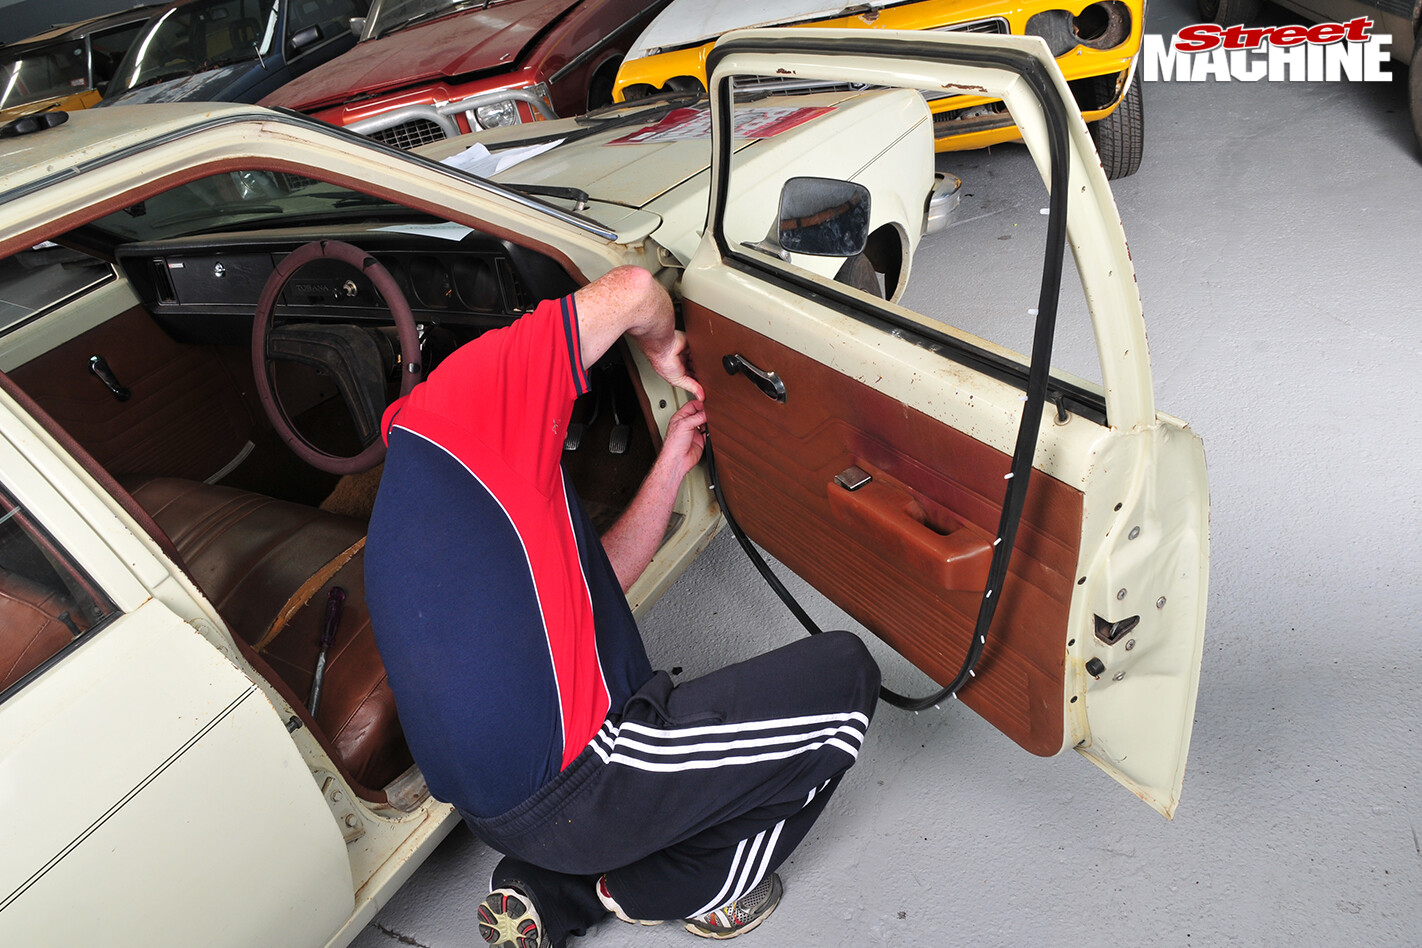 5 Installing new door rubbers is not a very difficult job and with a bit of care and attention it’s a task anyone can achieve. Progressively work your way around the door and make sure that you press down directly on each clip to ensure each one is fully seated in its hole.
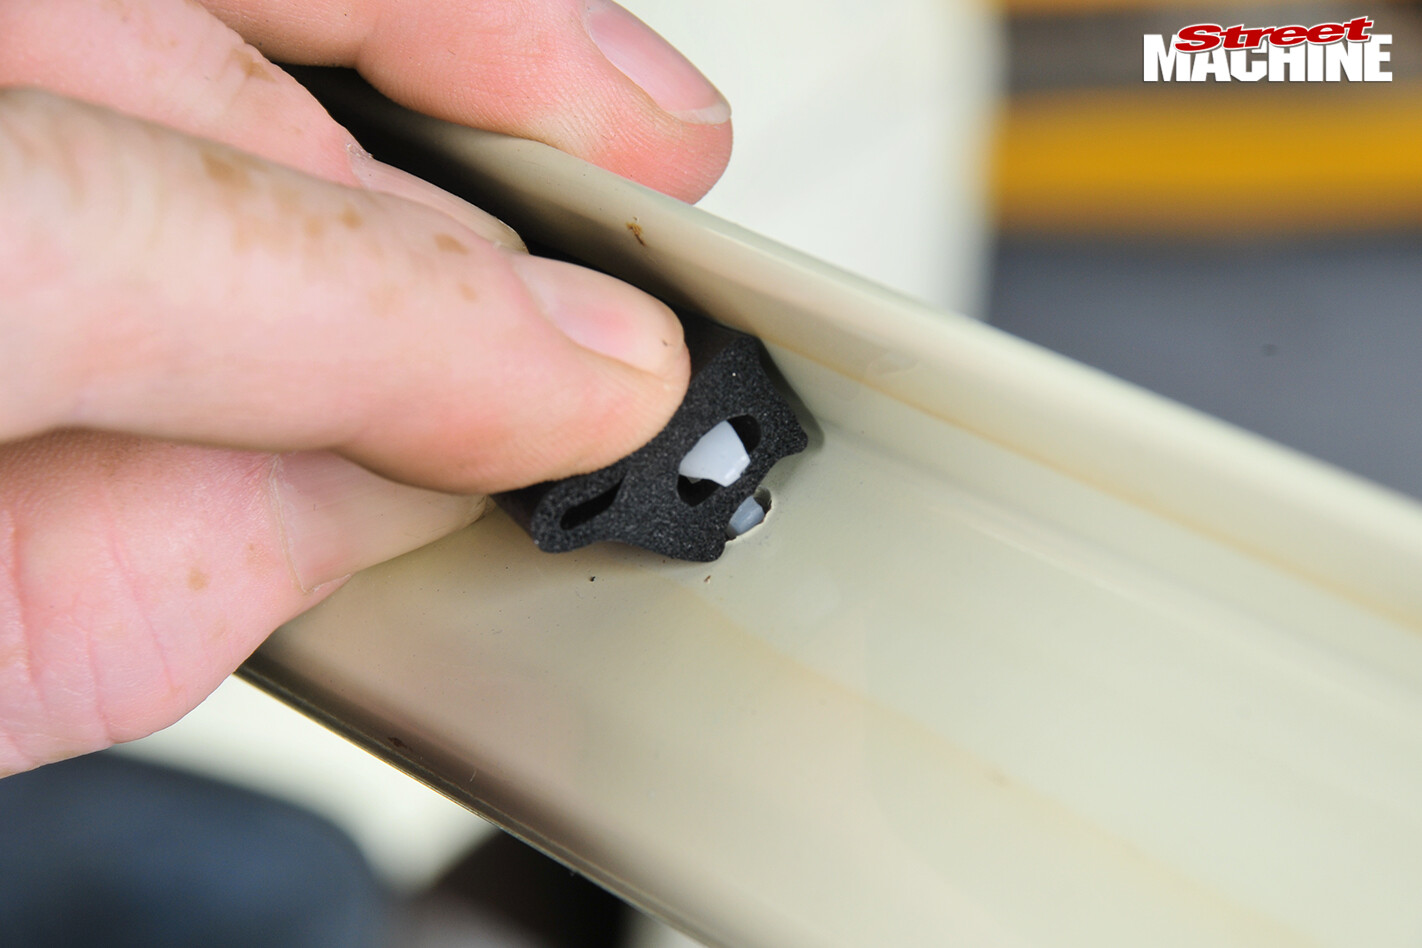 We’ve cut this seal so that you can see how the clips should be oriented — longways, along the length of the seal as shown here
 6 All EH to WB Holdens used the same extrusion, with the same clips and clip spacing. The only difference was the joining points, the length of the seal and therefore the number of clips.
 While clip spacing is generally uniform, many models have a section with two clips closer together than the others. This is generally the starting point. Other than that, installation is the same for all these Holdens
 7 It’s advisable to pre-fit the door seals before painting, though they’ll need removing before rolling the car into the spray booth. Freeing the new rubbers from the clips without tearing the new seal requires a deft touch. The trick is to stretch the rubber at each clip to slightly elongate the hole, push the rubber to one side and slip it off that end of the clip, then slide it the other way to fully release it
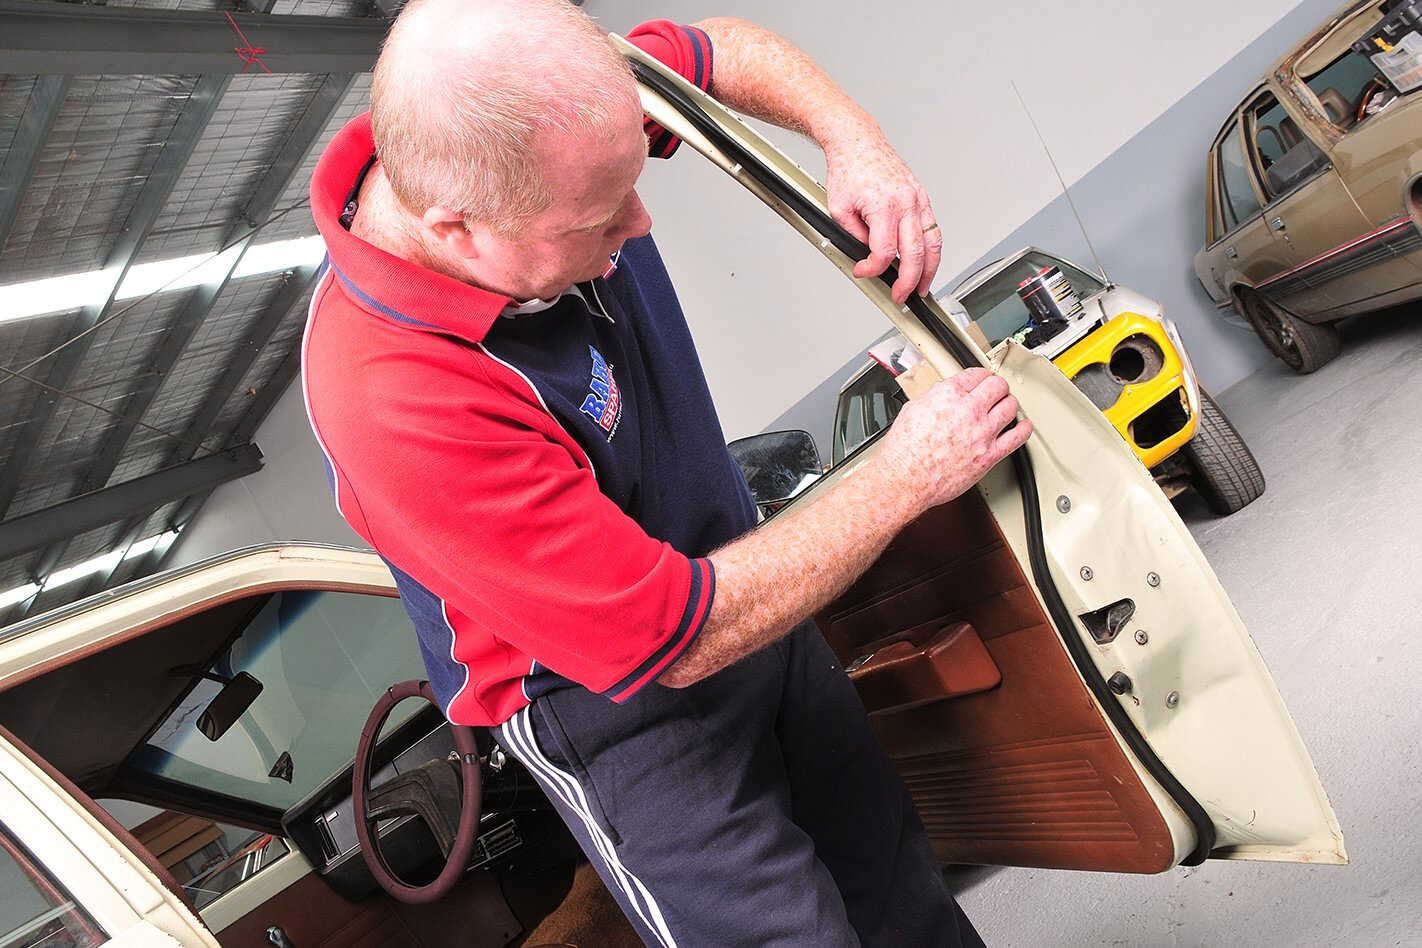
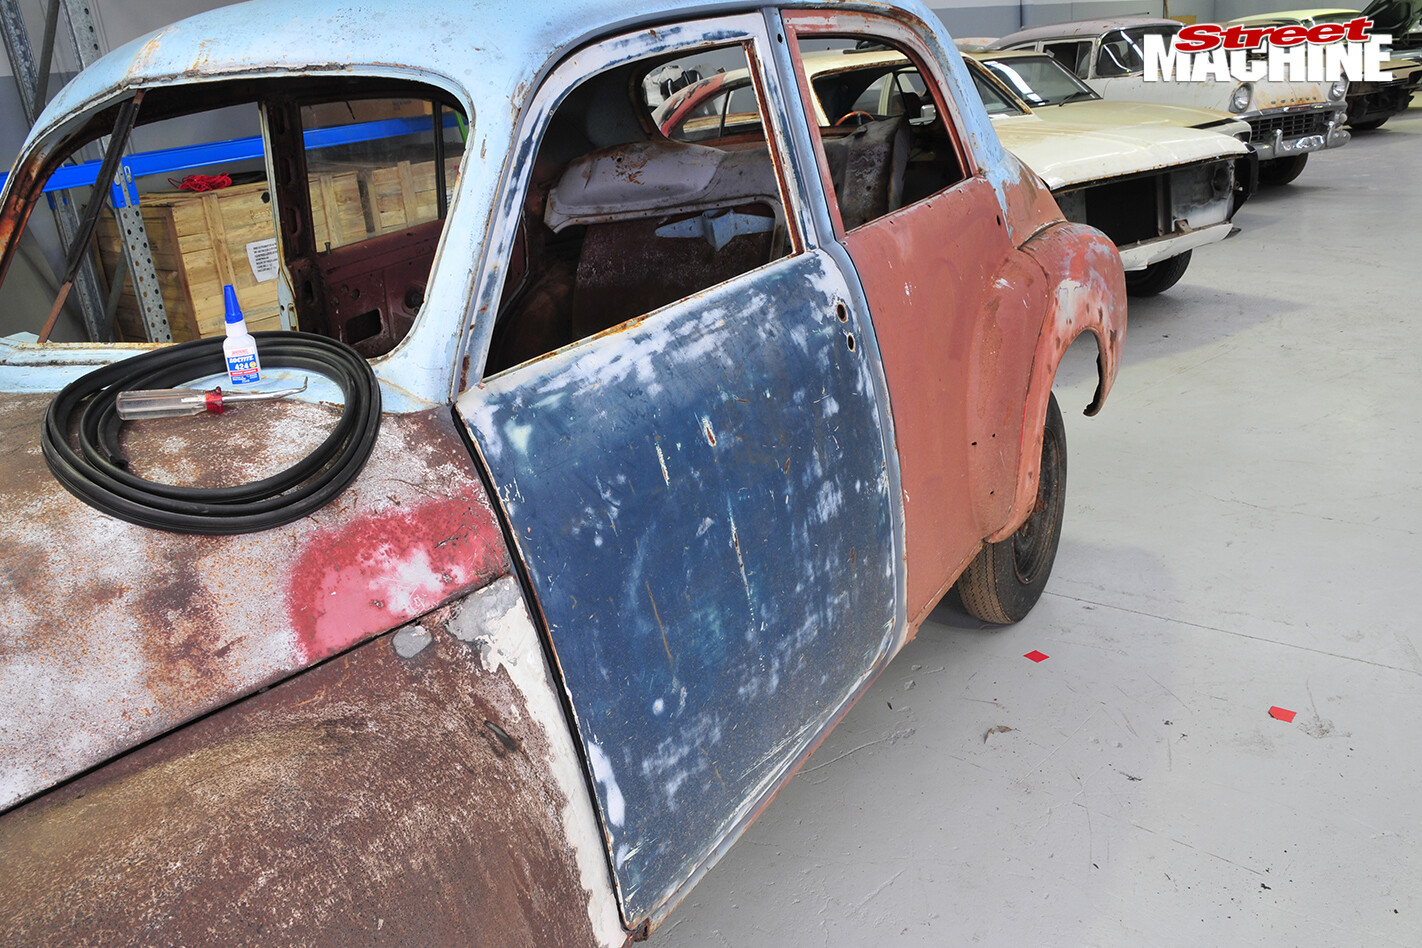
 8 Another common type of door seal is the glue-in type. Normally you wouldn’t fit new seals to a car in this state; we’re just using this one to demonstrate the process.
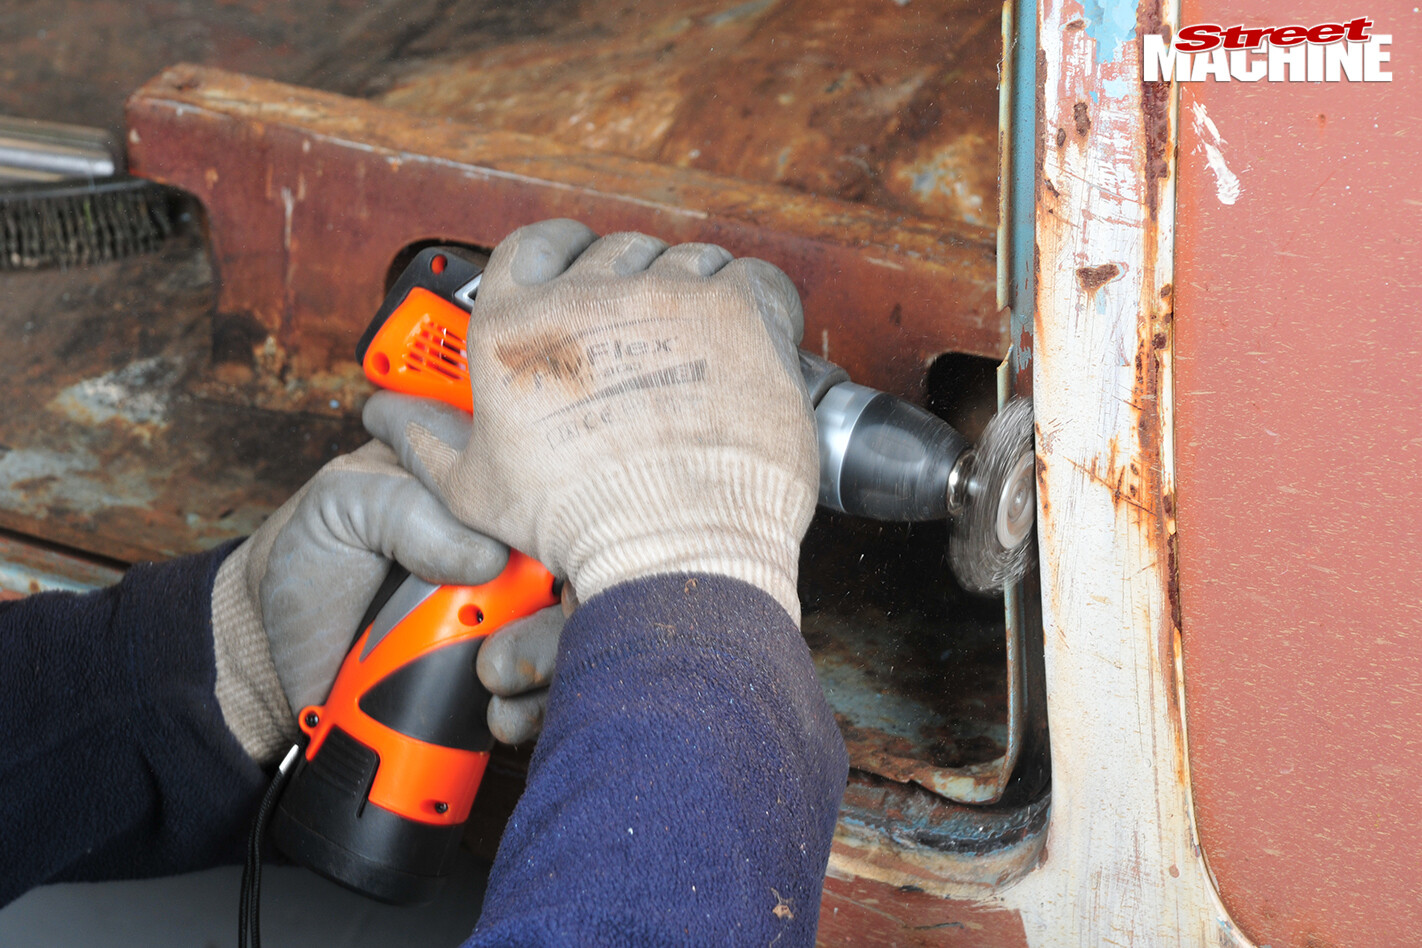 Regardless of condition, the channel must be absolutely clean for the glue and seal to take, so Lance cleaned it out and blew in some primer. Amazingly, he told us that he’s seen cars that have been resprayed over seal residue like that shown
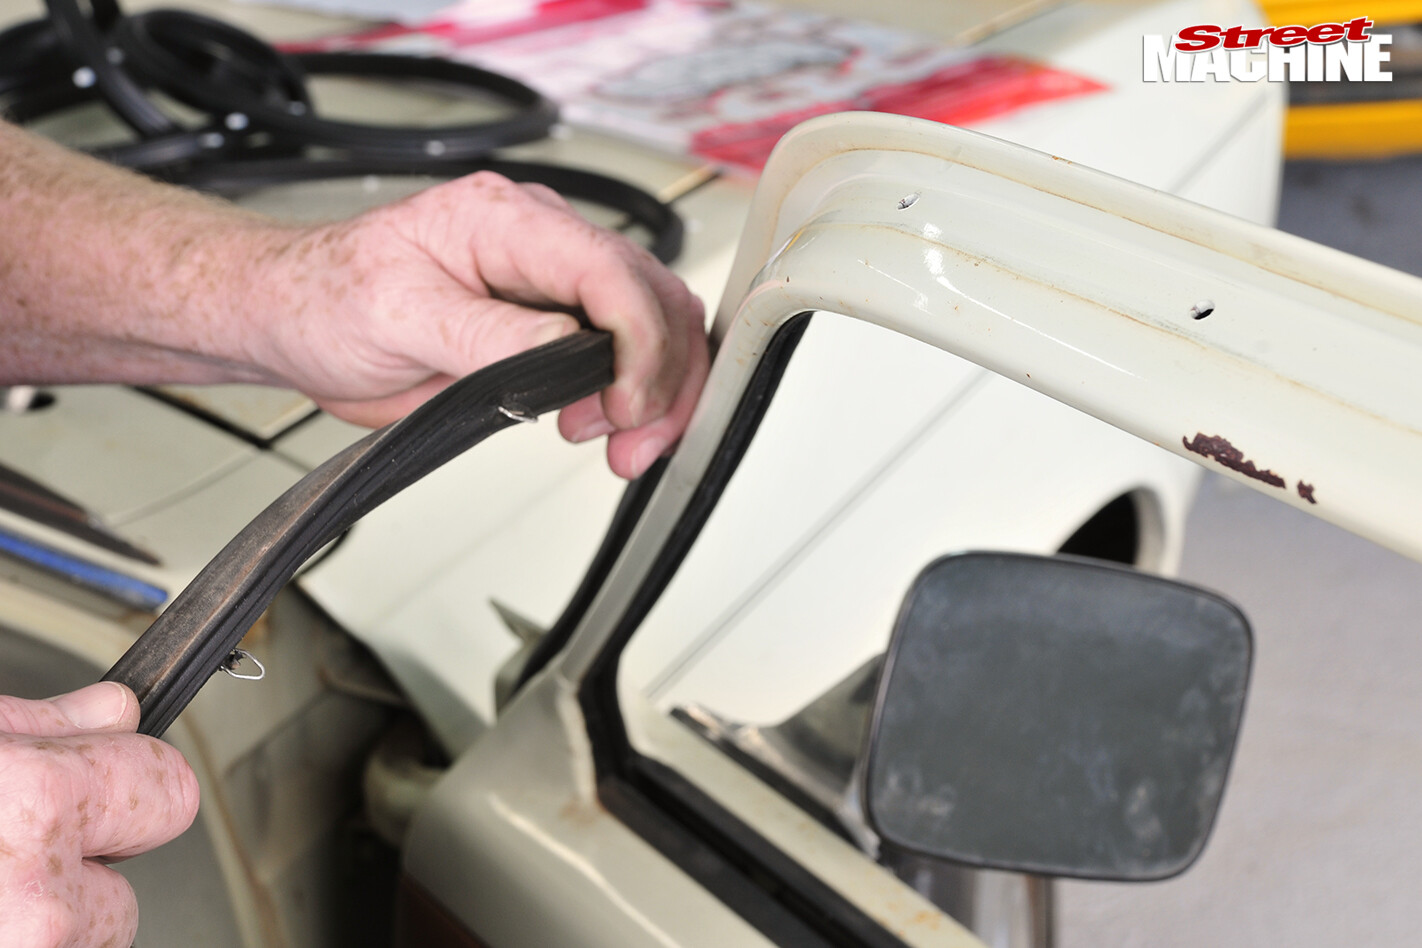
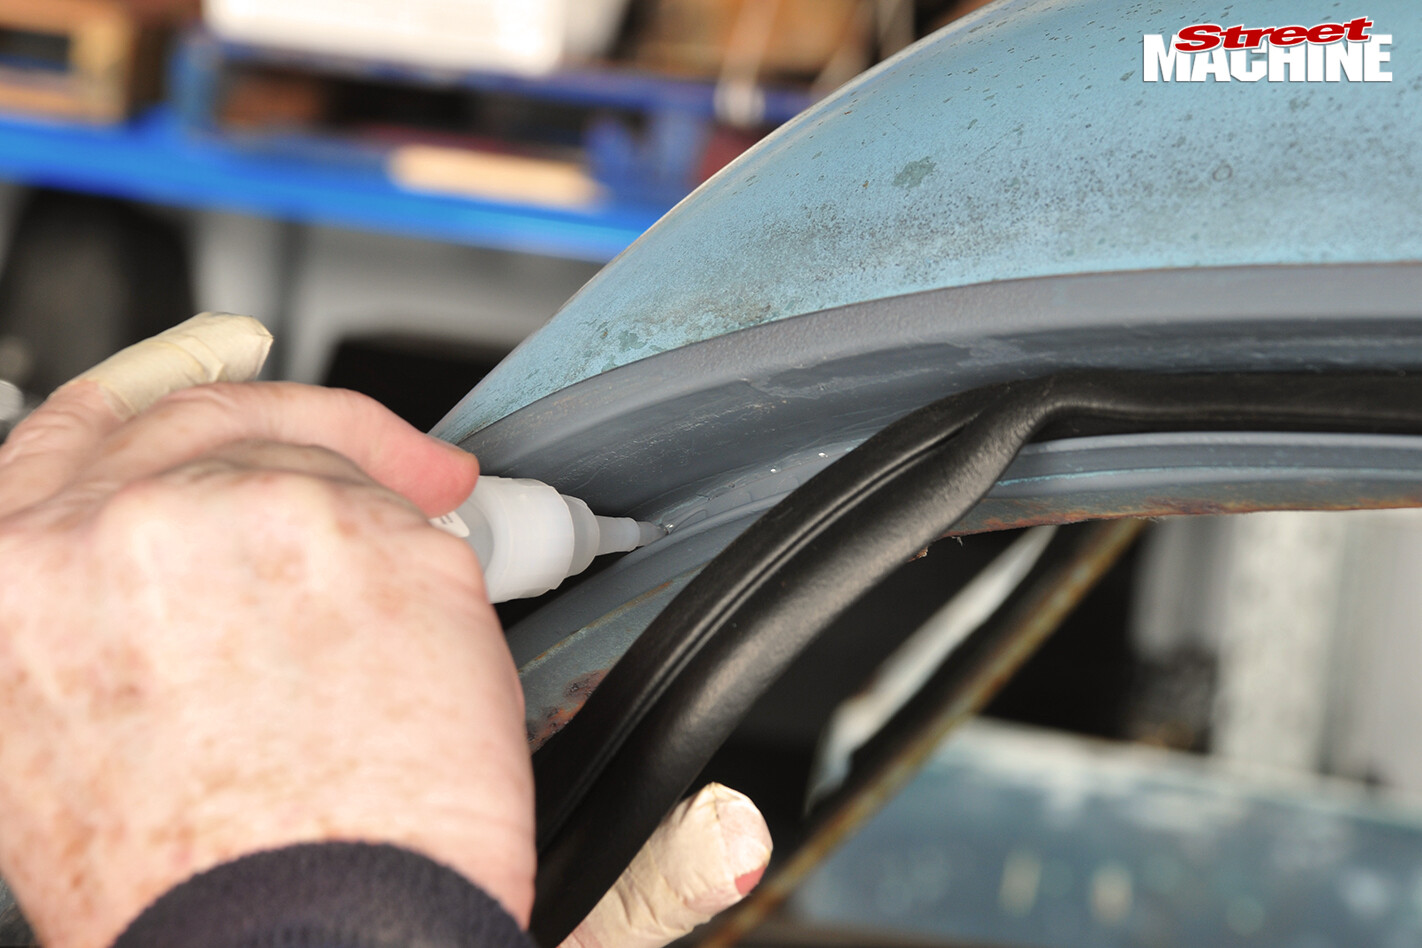
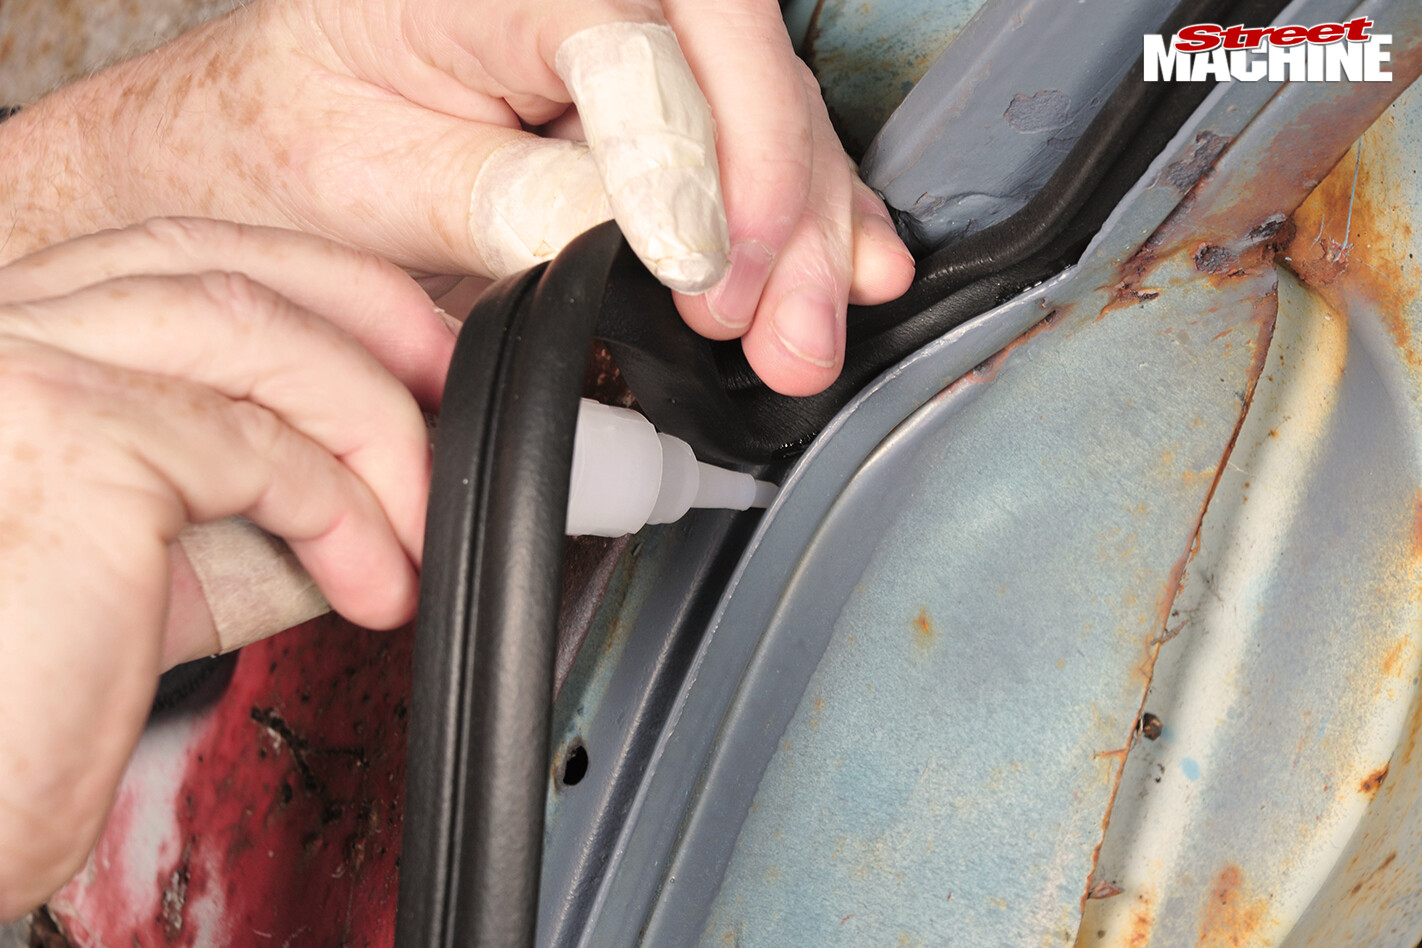
 9 As with the clip-in seals, the direction in which glue-in seals are installed is vital. Lance is pointing at the correct orientation, which will compress when the door is shut against it. Again, take note of the orientation of the original seal prior to removal — take photos if it’s likely to be a while before you get around to refitting them. Lance says he’s seen the most experienced builders get the seal direction wrong
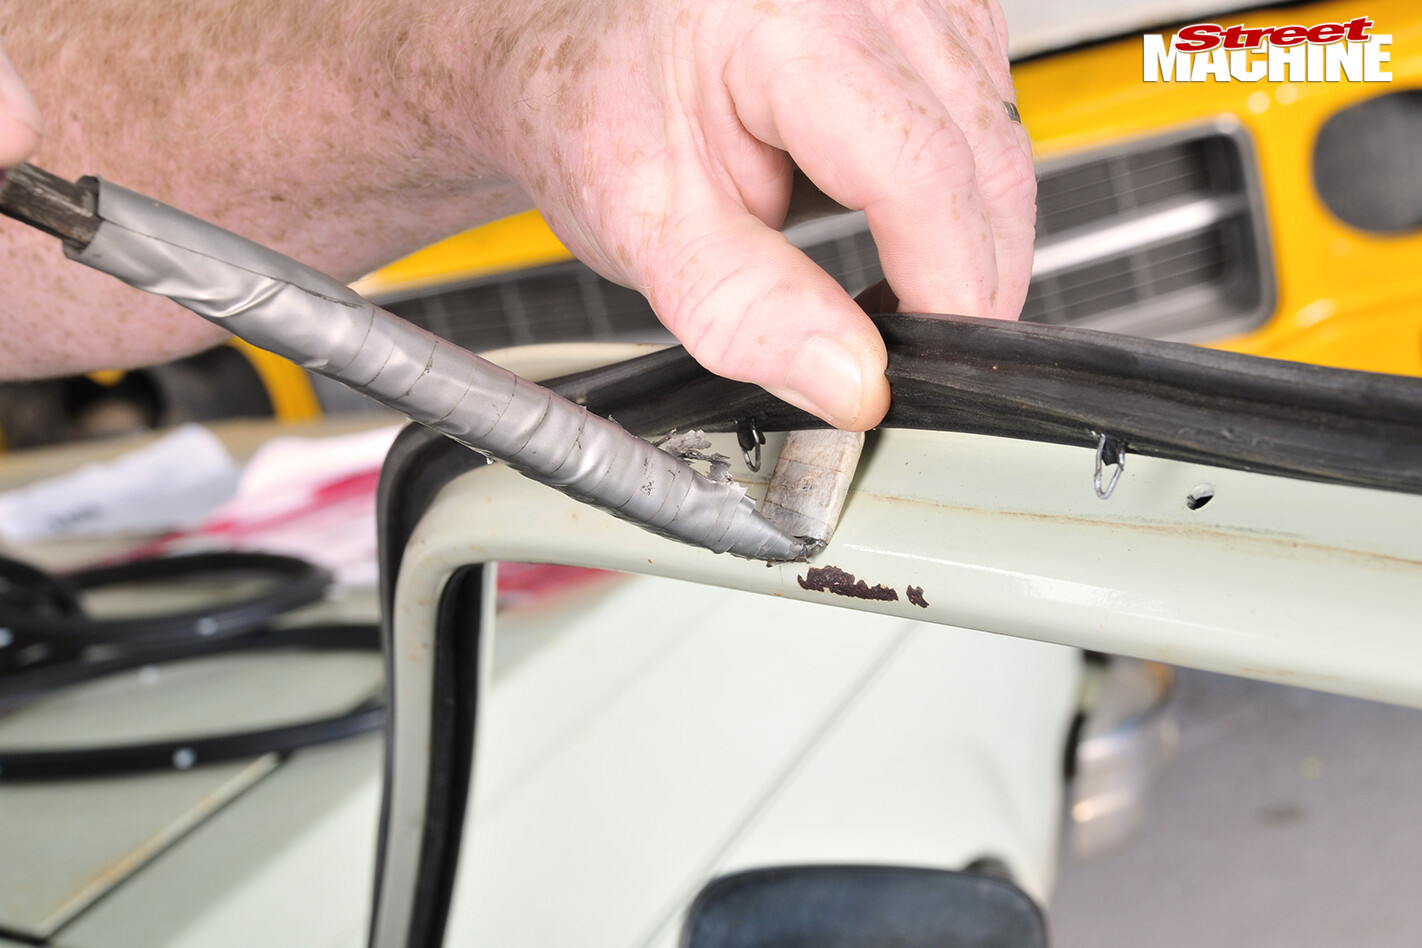
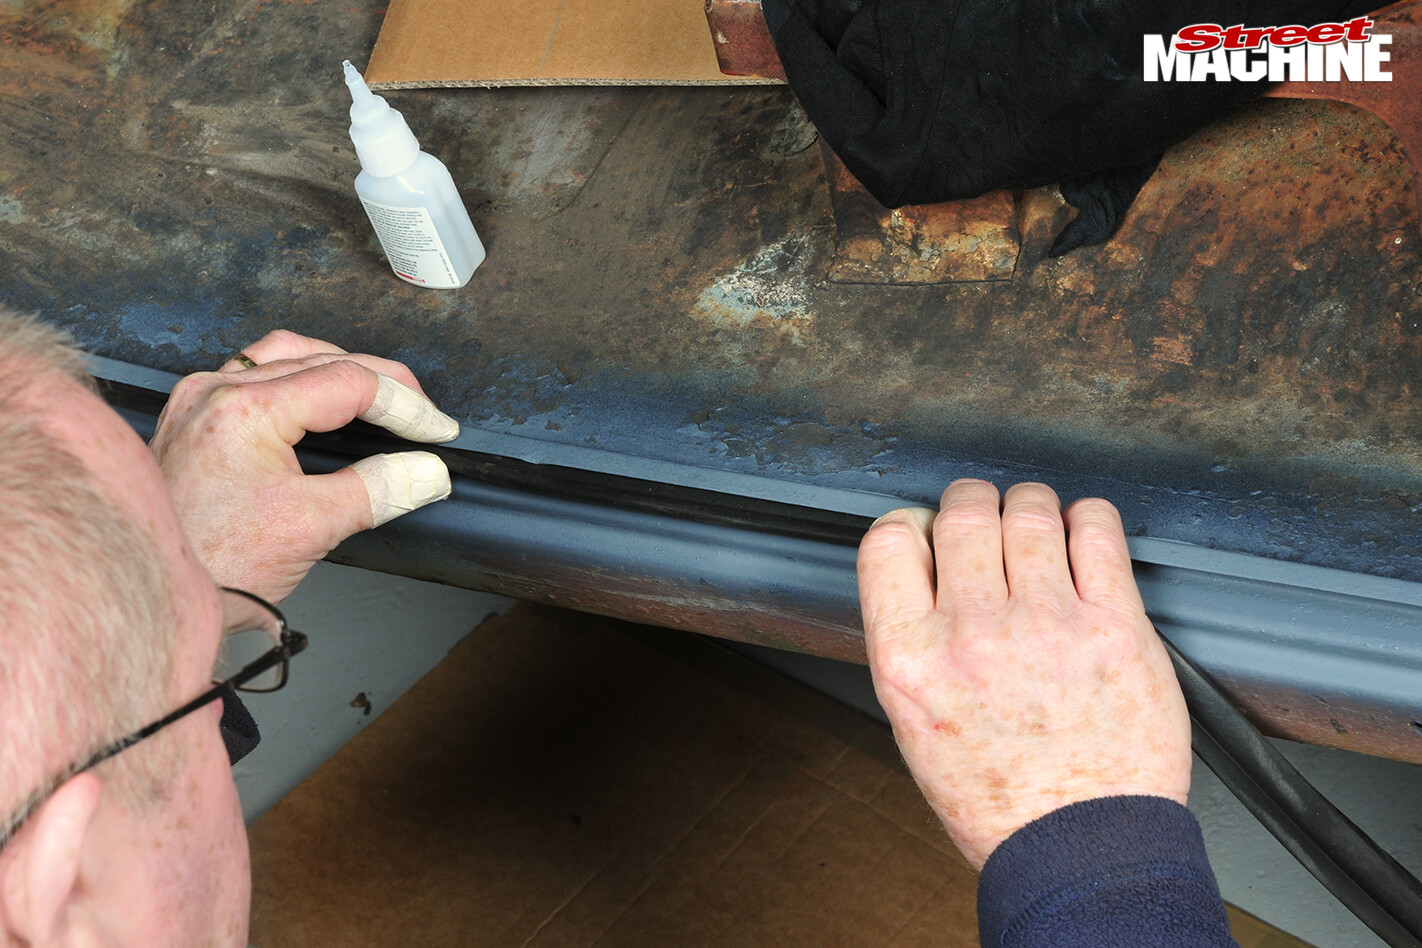
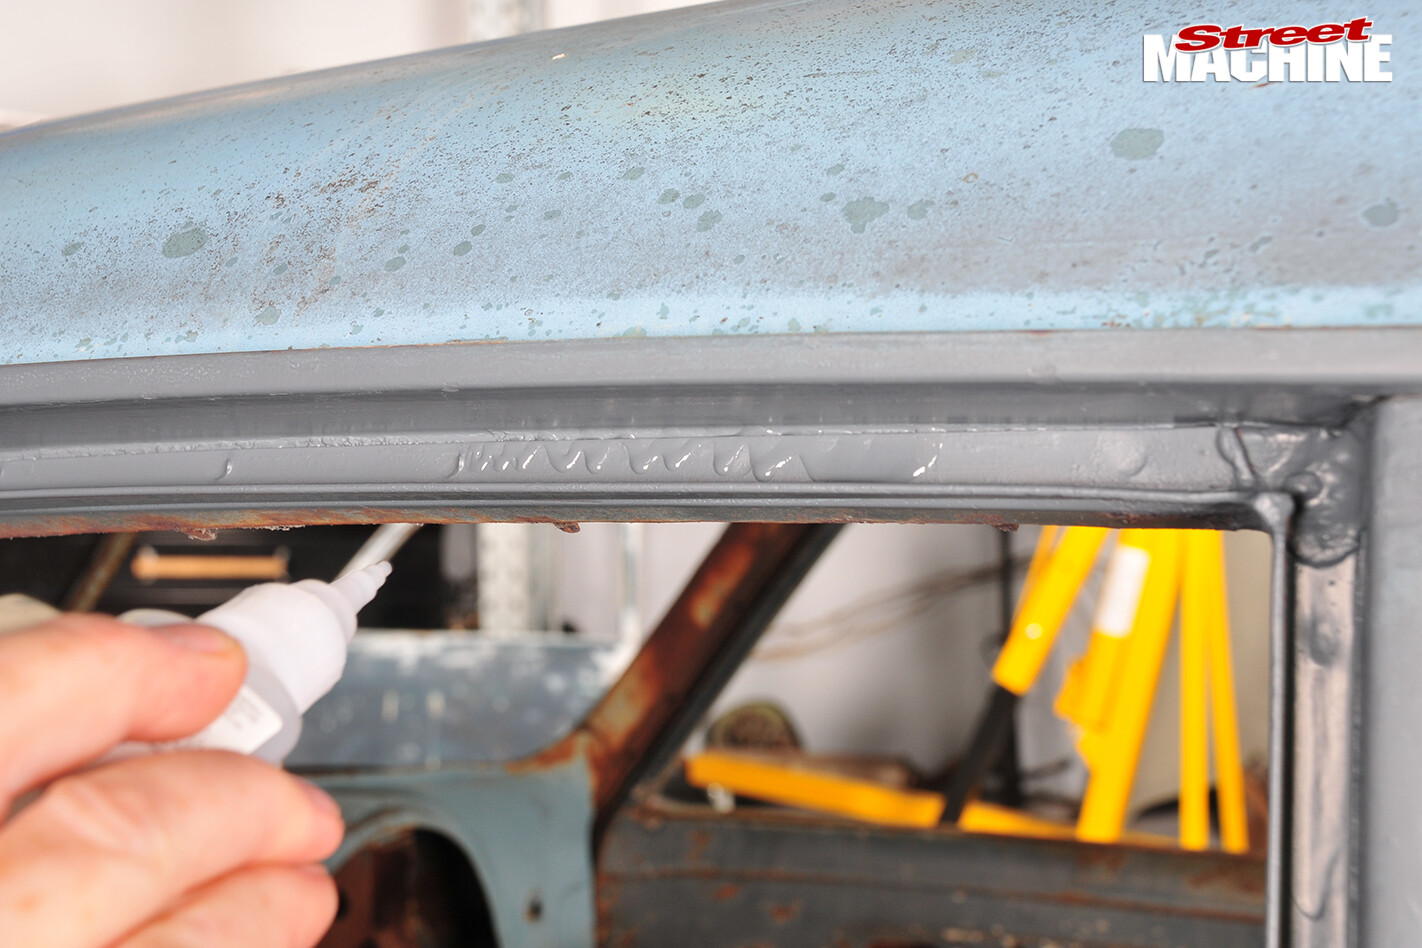 10 Loctite 424 has proven best for holding glue-in seals in place. There are cheaper glues available but you get what you pay for so it’s best to use the more expensive recognised product. The glue needs to be applied in a zig-zag pattern bead along the base of the groove. Beginning about two or three inches in from the corner will make it easier to finish off the corner nicely later on (See Step 16)
 11 Reasonably quick work is essential as the glue sets quite rapidly, so it’s best to work on short sections (three to four inches) at a time. When each section of the seal has been set in the groove, apply a little pressure and hold it in place until the glue sets. The glue is extremely runny and can end up everywhere if you’re not extra careful. It can be wiped off but again, you need to act quickly
 12 Here, glue has ended up on the side of the groove and the rubber has stuck to it and become distorted. This not only looks unsightly but it can also allow water to get in.
 The seal had to be quickly pulled away and pushed into the correct position. The windscreen fitter’s tool, with its pointy hardened end, is perfect for this. It’s extremely handy but be careful not to scratch the paint or tear the rubber
 13 In more complex areas it’s better to work in slightly shorter sections, as this allows greater control. Note that Lance has wrapped the tips of his fingers with masking tape so they don’t become caked with glue, which is very difficult to remove — as many of us know. To ensure there’s no mould-release agent or other contaminates left on the rubber, thoroughly clean it with Prepsol before installation
 14 The seals fit snugly into the channels for which they were designed. On straight sections, stretching them a bit during installation temporarily makes them slimmer and allows them to be placed into the groove more easily for a neater installation. Over the length shown here you might stretch the seal about an inch.
 Of course, you can’t stretch it around corners so you’re back to poking it into place with the windscreen tool
 15 When the seal has been fully installed, the ends should overlap like this. This allows them to be trimmed to form a neat mitre join — using a pair of sharp scissors works well. Slight tension is needed in the seal, so each end is cut short of where the centre of the mitre join will be. This should be no more than about 5mm as cutting it too short will stretch it too far and cause it to pop back out of the groove in service
 16 Care and patience are needed for the final step, as getting it wrong can wreck all of your good work thus far. Sneak up on the final cut in small stages — constantly check the angles to ensure they form a neat 45-degree match.
 Then apply glue to the ends, carefully bring them together and hold them in place until the glue sets. Finally, apply glue into the channel and push the last section of the seal into place
 WRAP UP
When test-fitting glue-in rubbers for gapping and bodywork, don’t use a full bead of glue; a few spots mean that careful removal will allow a seal to be reused. Regardless of type, correctly installed seals should allow you to shut the doors without having to lean on them.
 The factory ‘thunk’ that can be achieved with new rubbers is one of the important finishing touches to a project. To make this happen, it’s important the doors themselves fit nicely — if they pinch or excessively crush the rubbers, the doors will be hard to shut as the pressures become enormous. Lubricating the seals with Rare Spares Rubber Magic or other rubber conditioner (beware silicone-based sprays as they can discolour your paint) and letting them set with the doors shut for a few days (do this several times) will help loosen the seals and bed them in.
For more info and a full list of available seals, log on to: www.rarespares.net.au


Comments