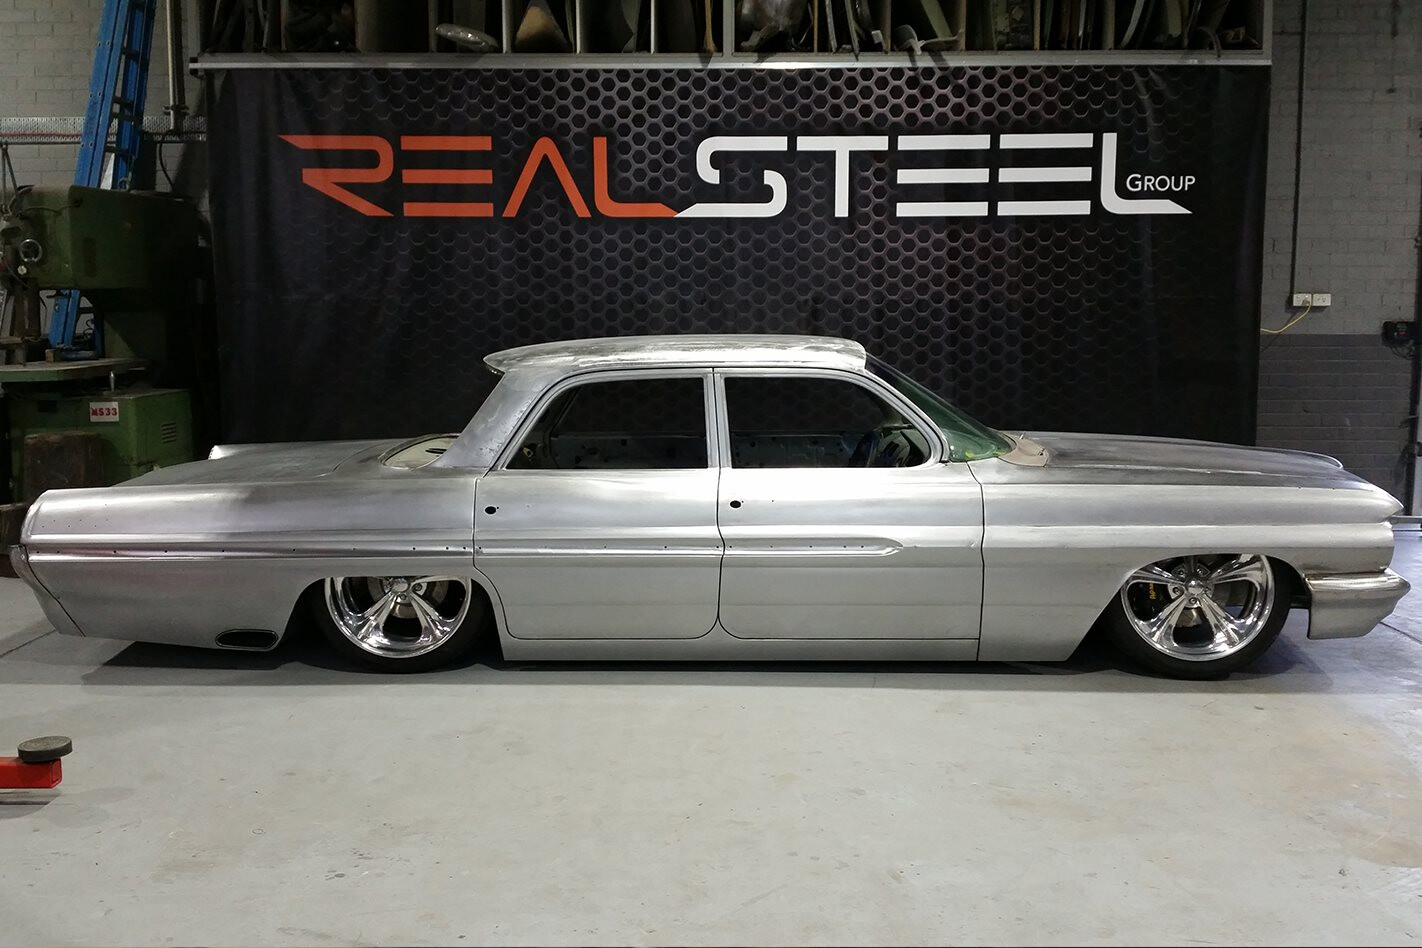
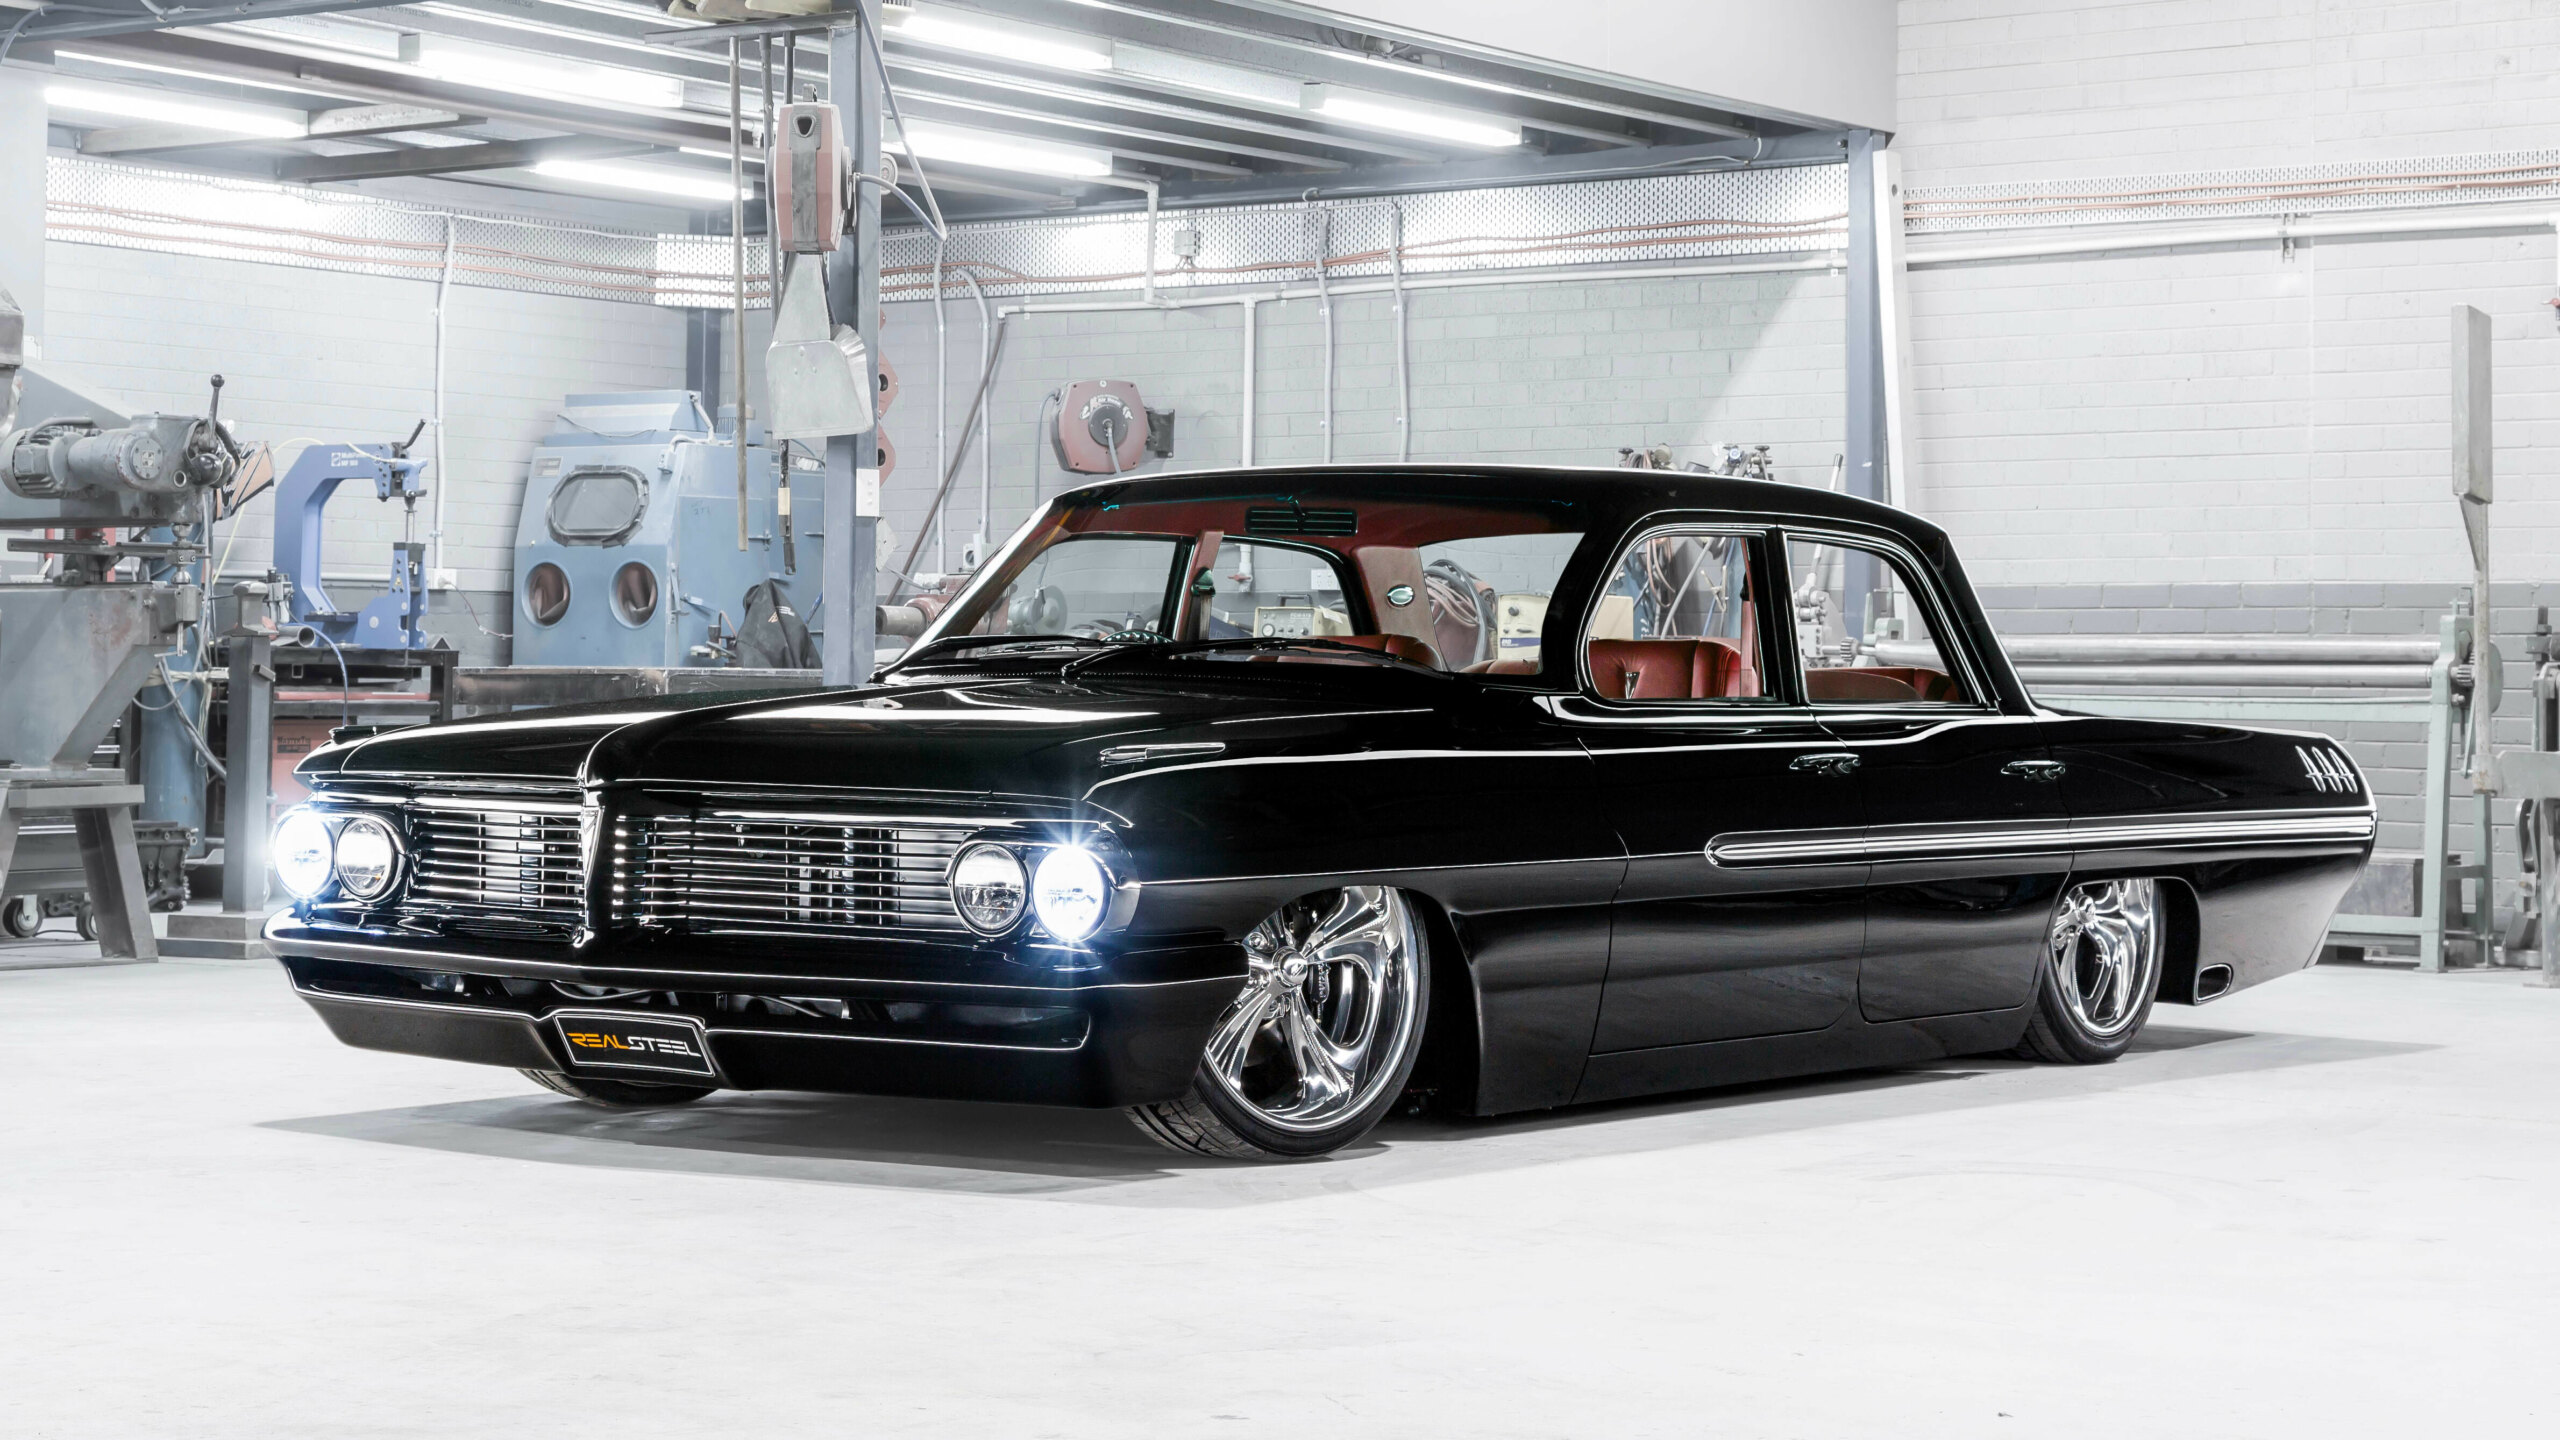
DENNIS Deane and his son Luke initially wanted to get their 1962 Pontiac Laurentian tidied up a bit so it could tow their race boat. But as we outlined in Part One of our build story, this Laurentian was destined for grander things, thanks to the incredible work of Queanbeyan workshop Real Steel. An Elite Top 10 spot and a Top Exhibition award at Summernats 29 were just rewards for Real Steel’s painstaking craftsmanship. Just how painstaking? Read on.
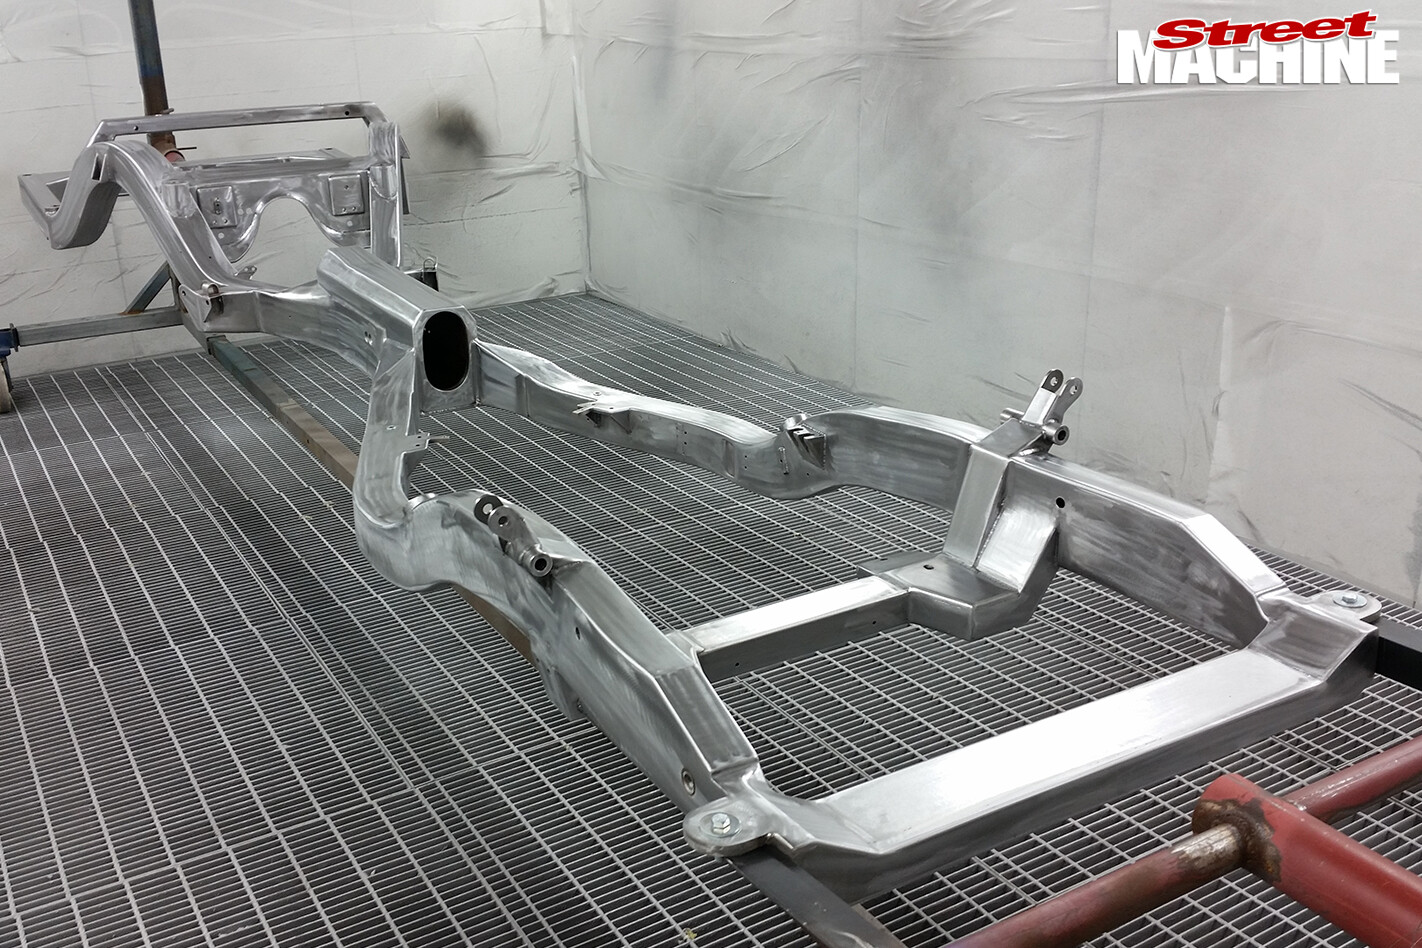 There’s not too much of this X-frame that hasn’t been modified or tweaked. It features additional bracing, a mounting bar across the back for the airbag struts and a big kick-up in the rear to allow the car to sit a lot lower. There’s also a beefy new front crossmember for the double A-arm front suspension, and the central tunnel has been raised to clear the tailshaft at full dump.
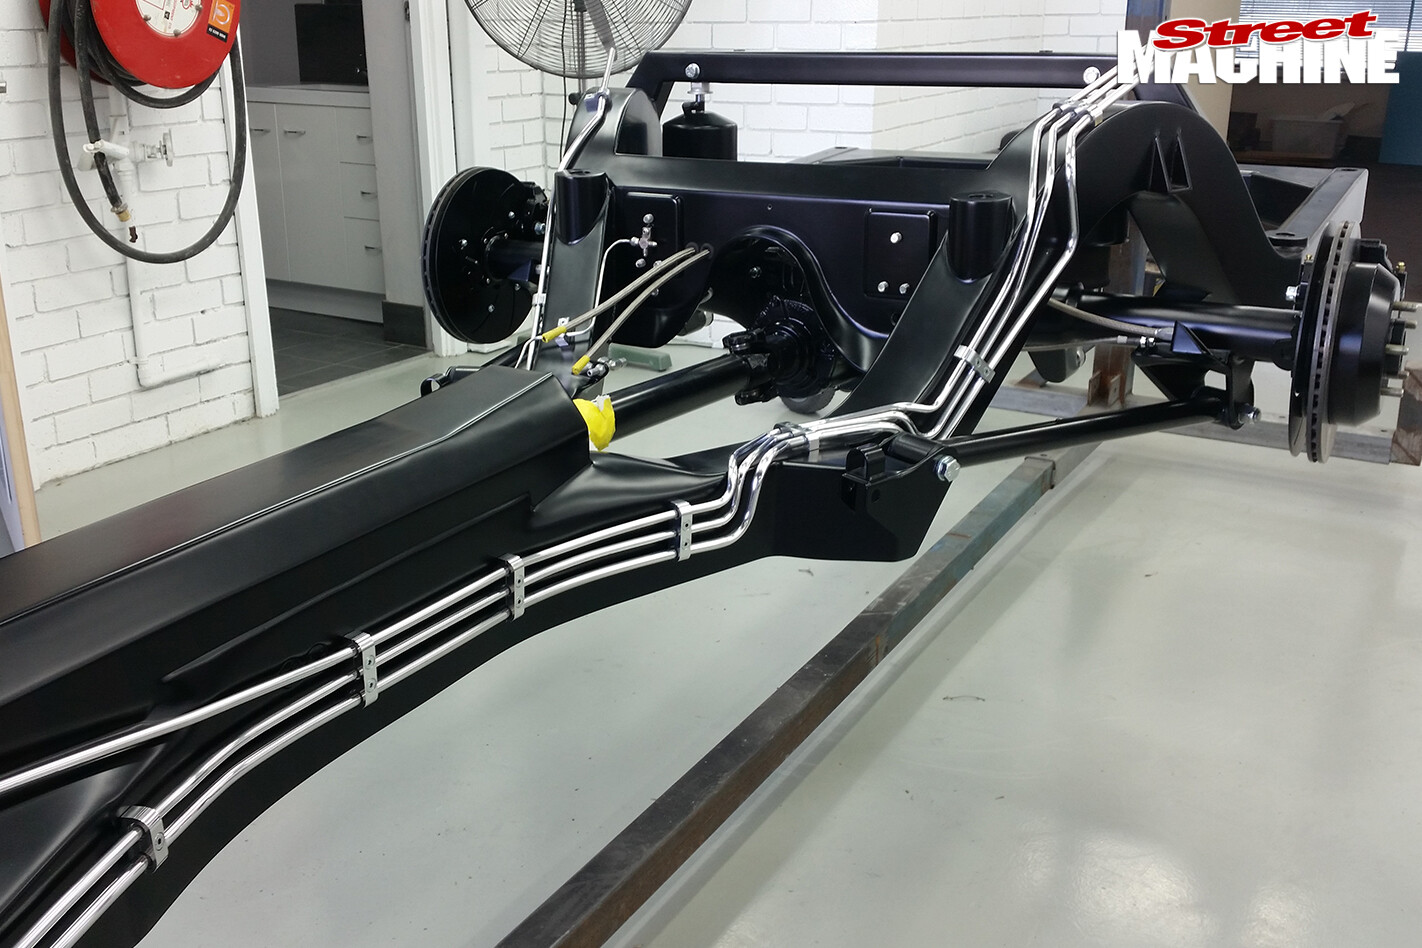 The elegant routing of the fuel, air and brake lines is another example of Real Steel’s fastidious attention to detail of components and fittings that will never be seen – the body completely hides all of this. The polished billet aluminium saddles anchoring the tubing are custom CNC-machined.
 The shape of the X-frame determined the unusual pick-up points for the triangulated four-bar rear suspension. Look inside the wheels and you’ll note the satin-black powdercoated backing plates covering the unsightly handbrake assembly – there’s even a braided stainless-steel outer sheath for the handbrake cables.
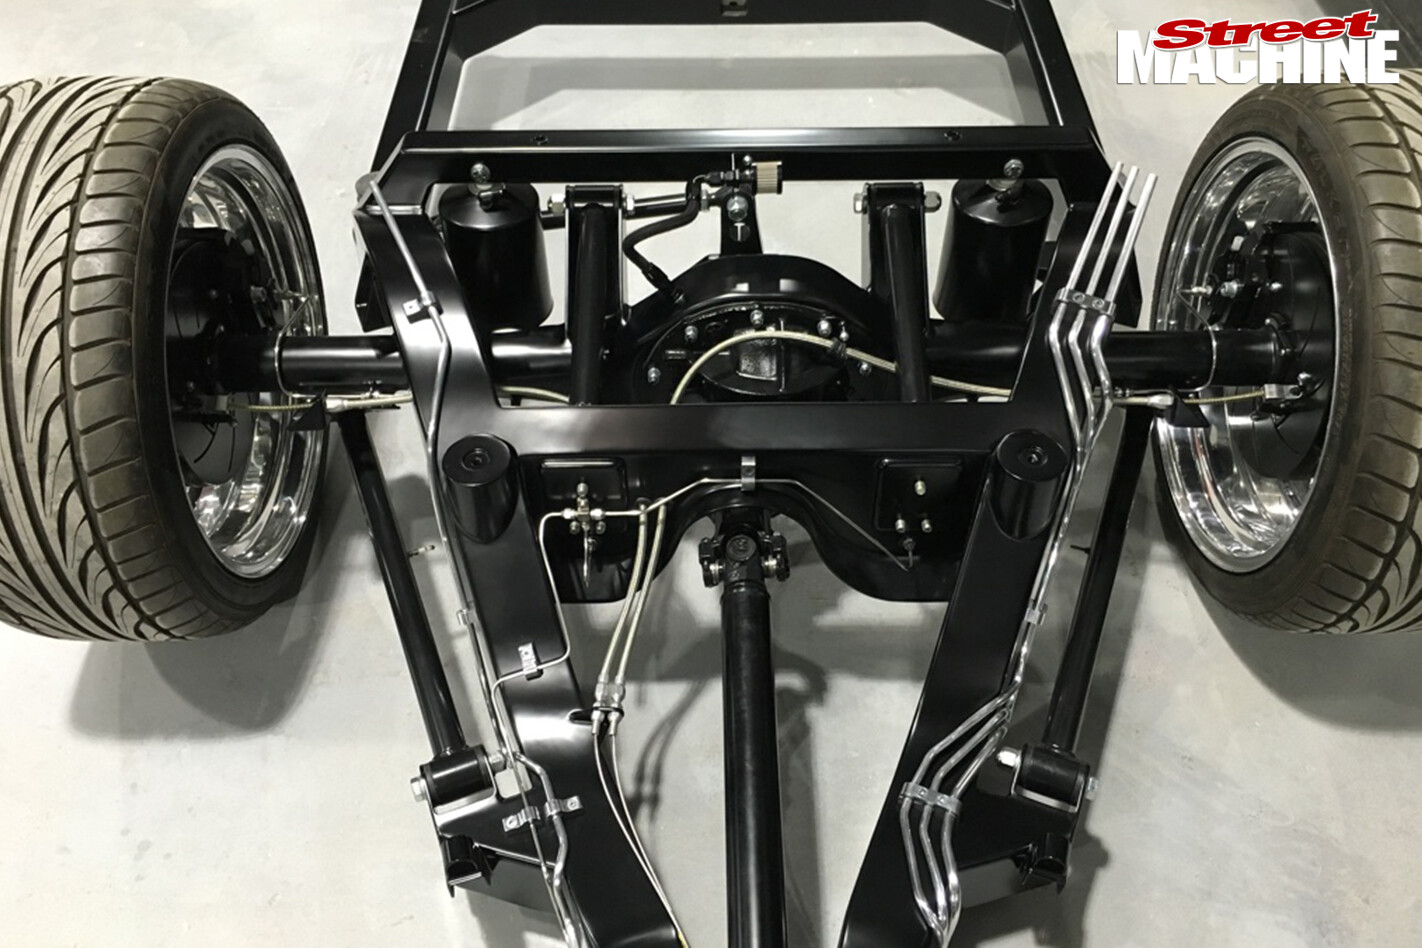
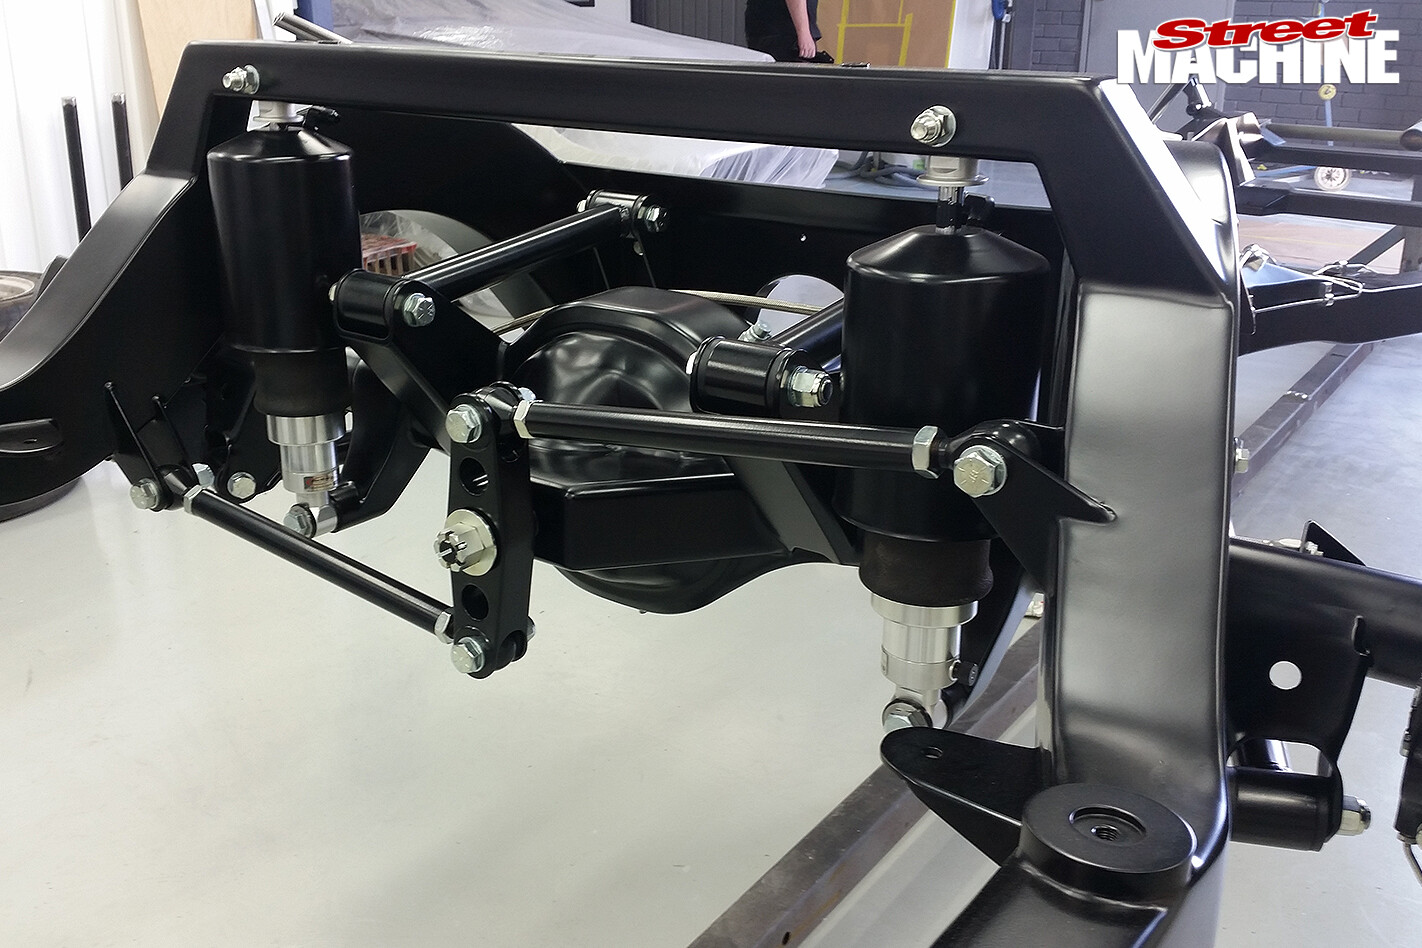 Despite using a triangulated four-link, Real Steel also added a Watt’s link set-up to guarantee minimal lateral (side-to-side) movement of the differential. This was necessary due to the extremely close (10mm) body-to-tyre clearance – all movements had to be super-accurate. The airbags shown here are an early design, which were upgraded later in the build. As the Laurentian was to be a bona fide street-driven vehicle, zinc-plated bolts were used rather than stainless steel. However Real Steel did go to the trouble of matching the plating finish on every bolt used in the car.
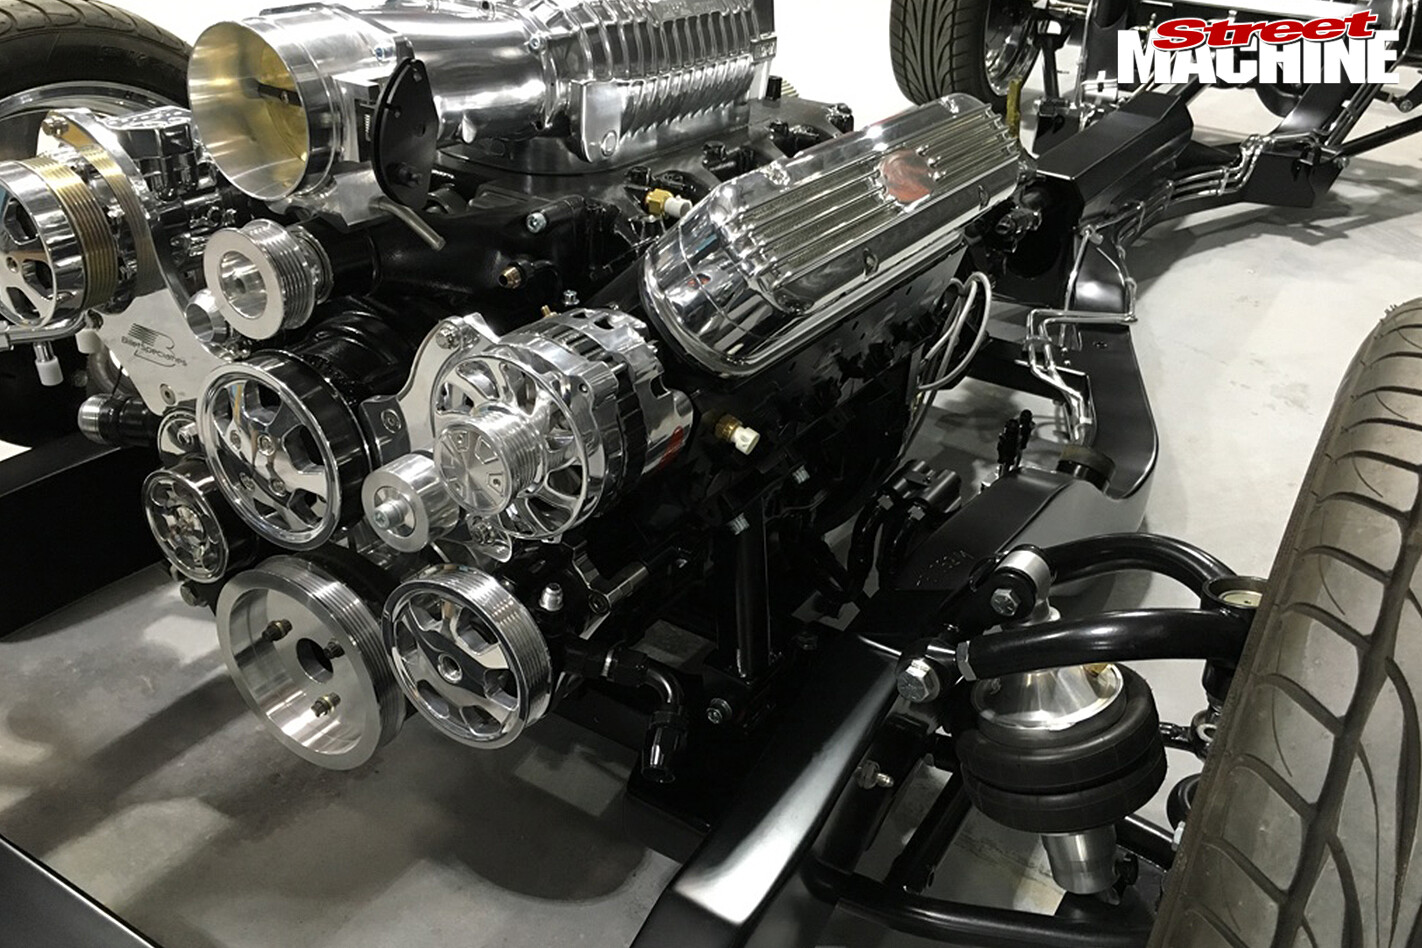 The Harrop-blown GM Performance 376 LSX crate motor and T56 six-speed were bolted into place with the body dropped over them. The more observant of you will notice how the Billet Specialities Tru Trac serpentine drive incorporates the blower drive – surprisingly this set-up is not offered by Billet Specialties. Real Steel took an off-the-shelf kit, added extra idler pulleys and re-routed the belt, to drive everything with a single belt. Hidden from view is the Real Steel billet crank support (which you’ll see in a few images time).
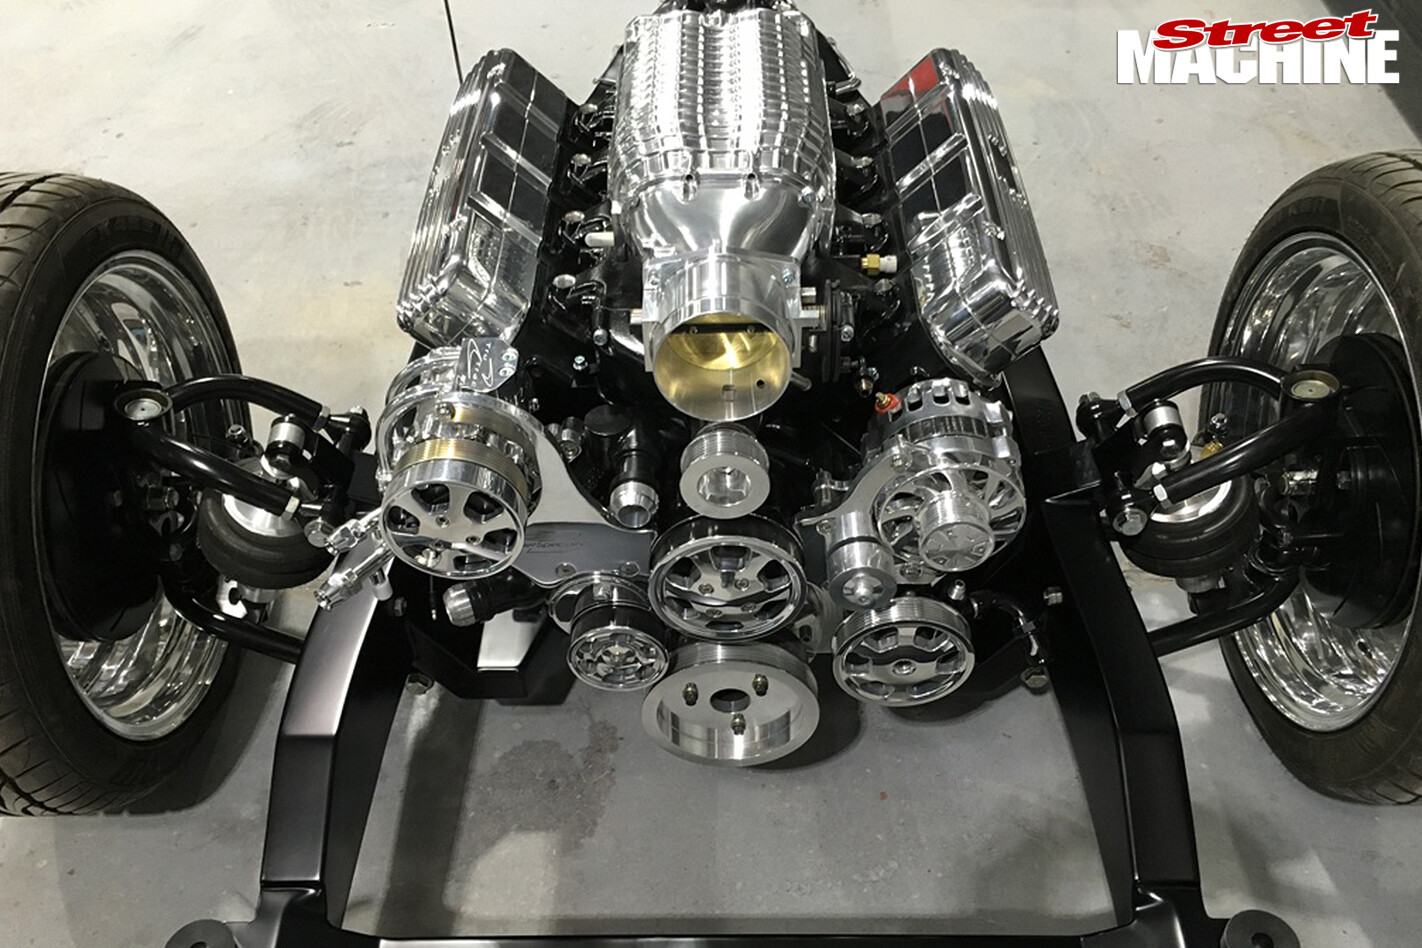 By switching to custom-made upper and lower control arms, the front end doesn’t suffer any of the typical crazy camber issues when the suspension is at full bump. Their beefy construction is also more up to coping with the Laurentian’s portly 2130kg kerb weight. This image also nicely accentuates the symmetry of everything. As Steve from Real Steel commented: “For a car that runs full accessories including air, steer and a blower, it looks pretty posh.” The two outriggers at the very front are body mounts, the total number of which were increased from eight to 12 to better tie everything together.
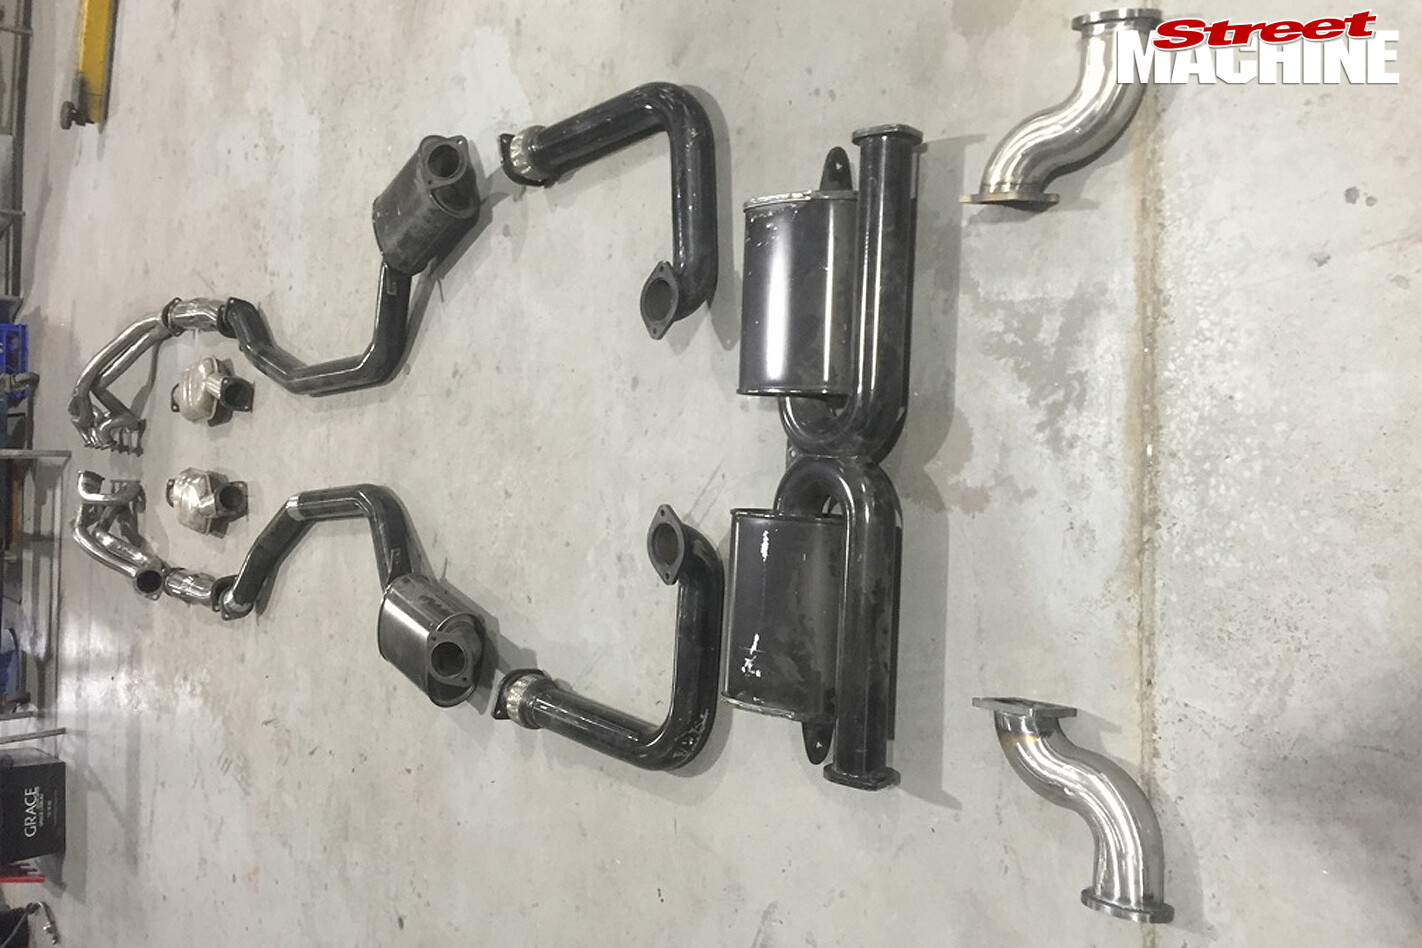 The exhaust jigsaw prior to being coated in high-temp, satin-black ceramic. It was constructed from so many pieces for serviceability, and can be removed without having to pull the car apart.
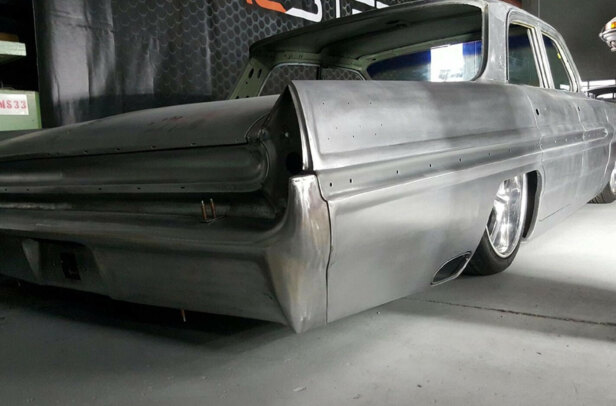
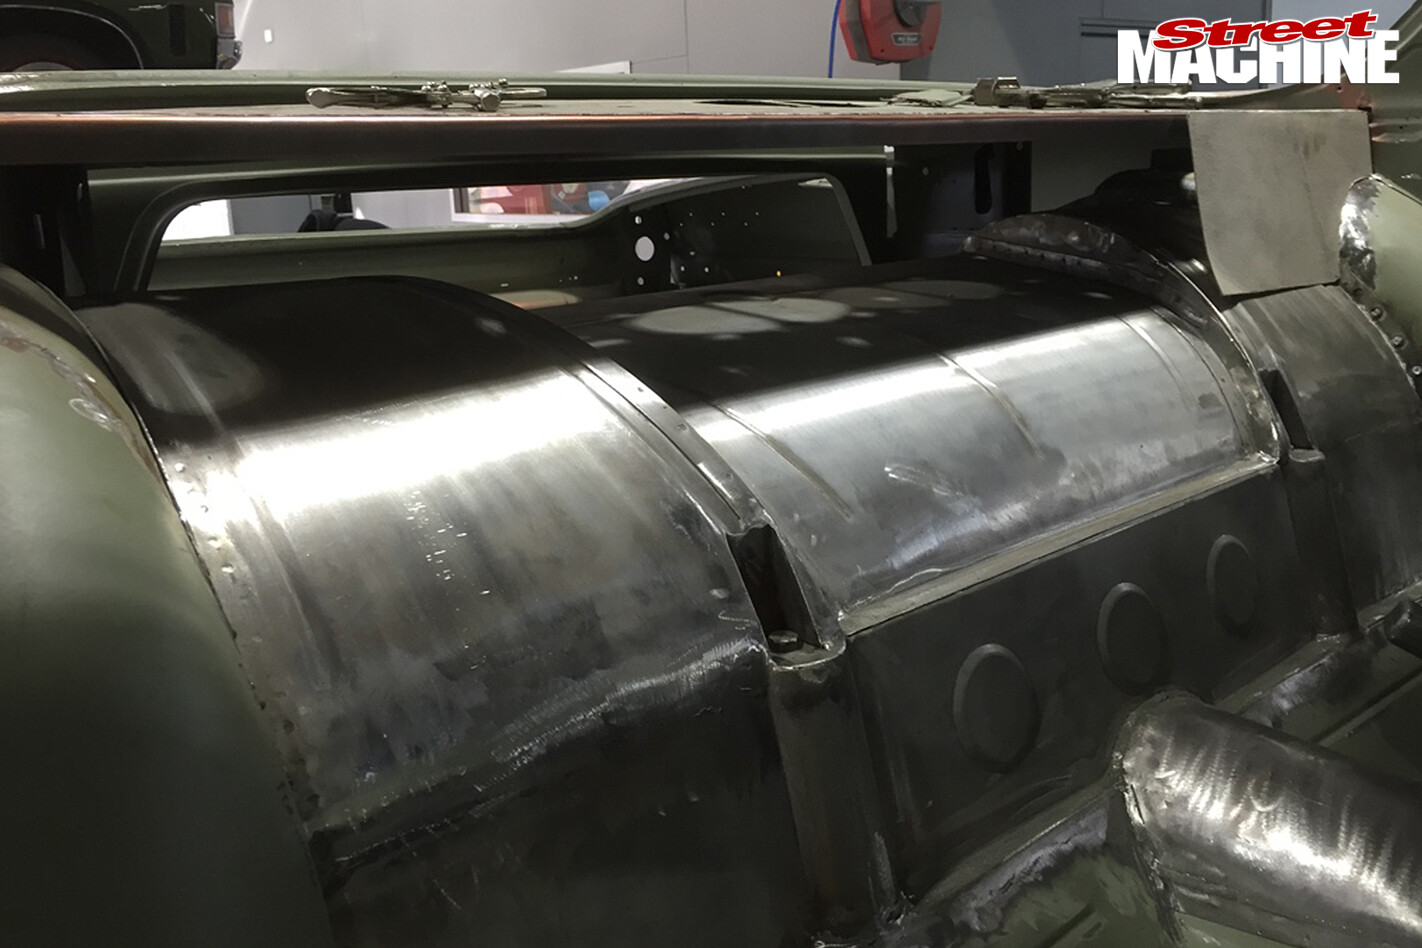 The rear tubs needed to be this high to clear the tyres at full drop; they come within about 10mm of the top of the tub. The two exposed bolt heads in the foreground are body-to-chassis fasteners.
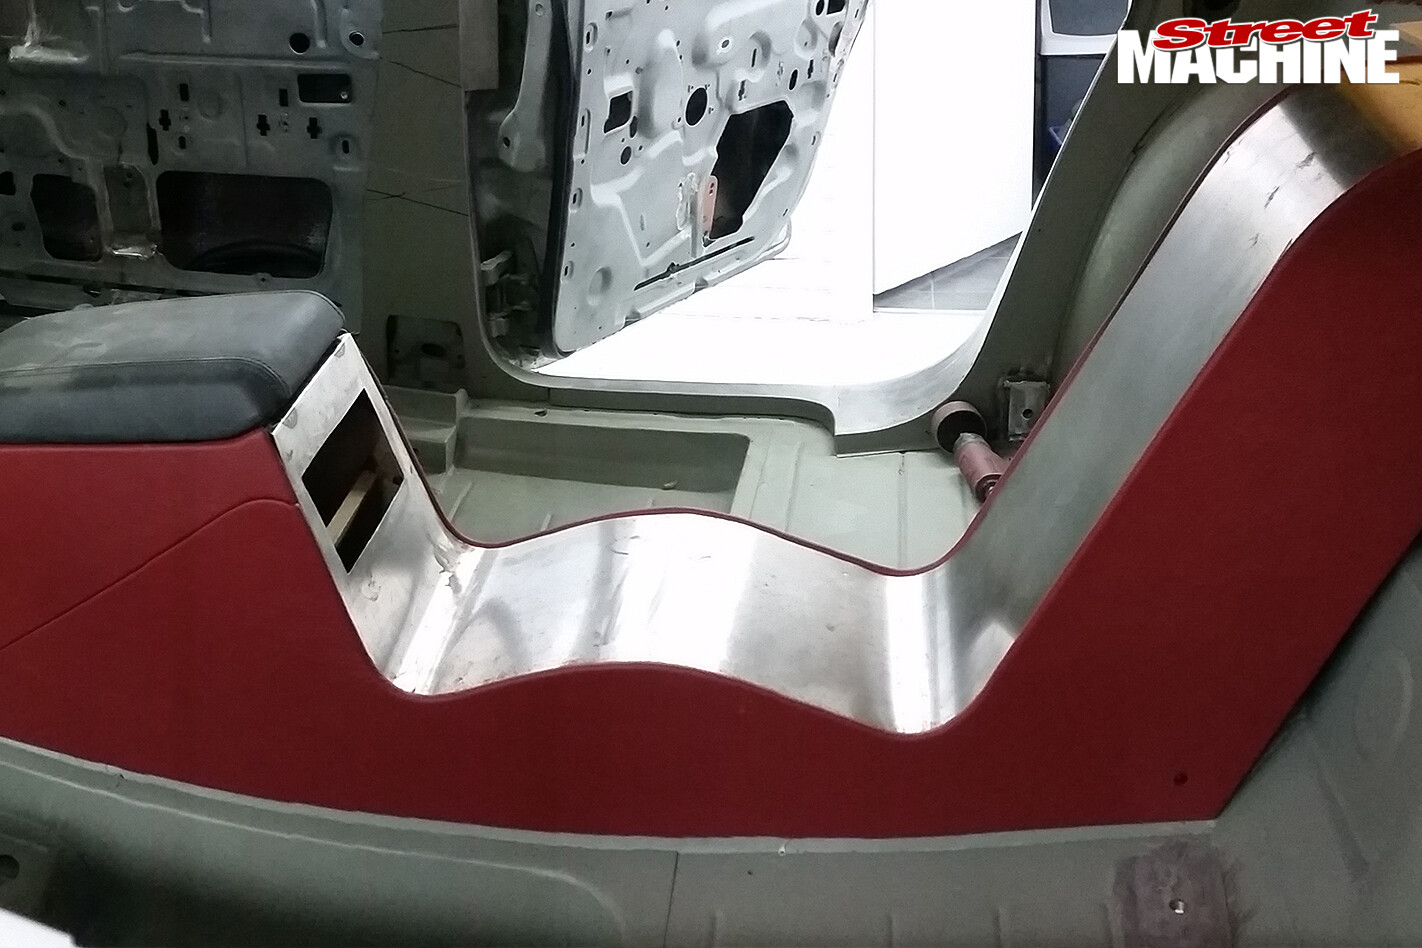
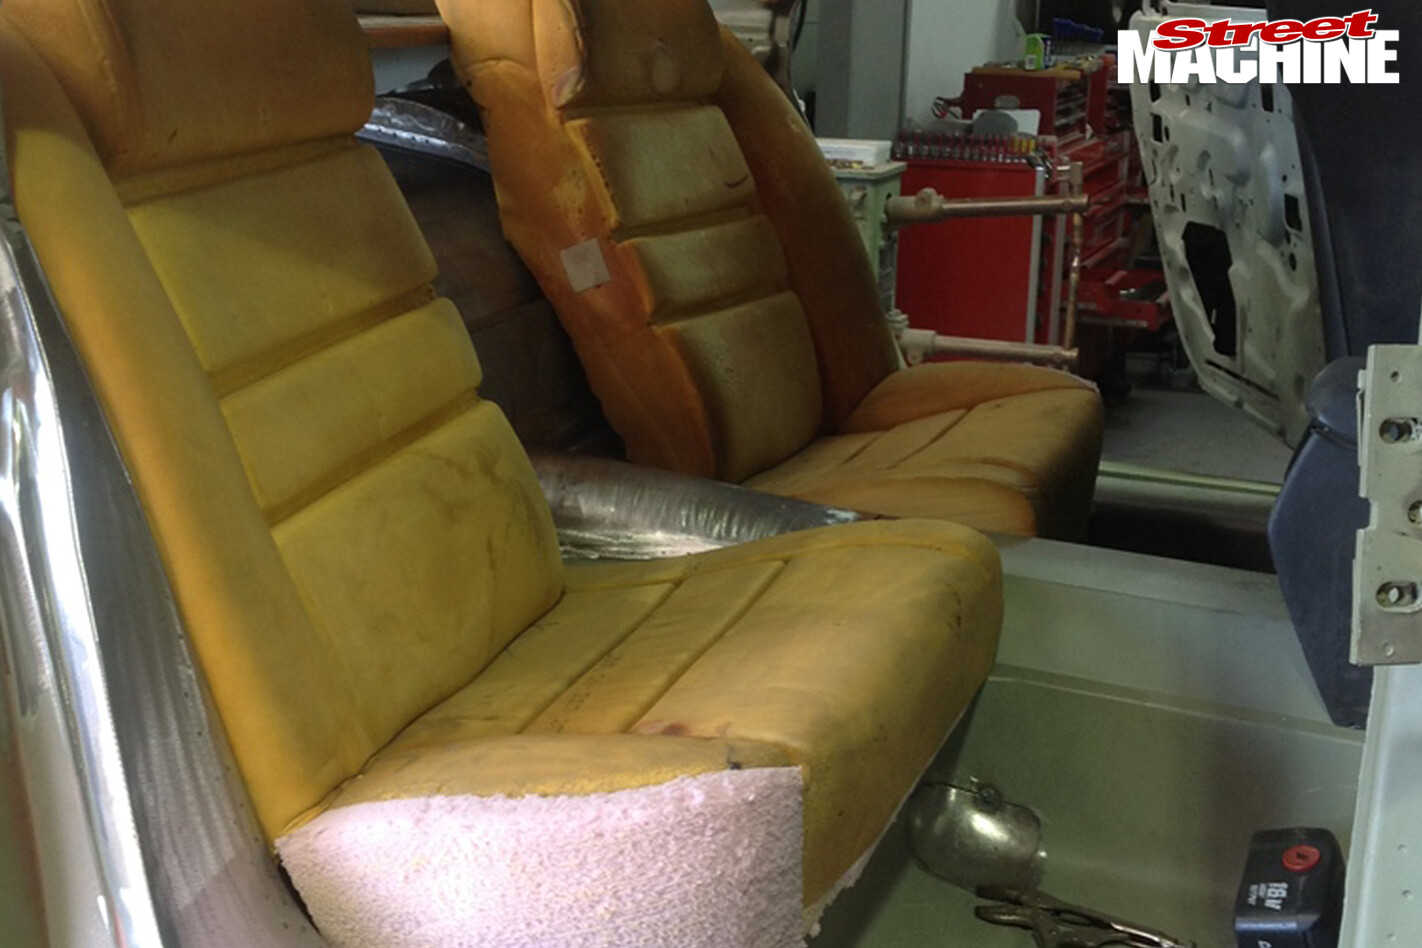 There’s a mountain of detail work here besides the sculpted seat squabs – which eventually morphed into something completely different. The door jamb area is custom, and you can also see the quality of the fabricated floors and raised tunnel running down the centre. The seats’ hidden mounting bolts have already been integrated at this stage.
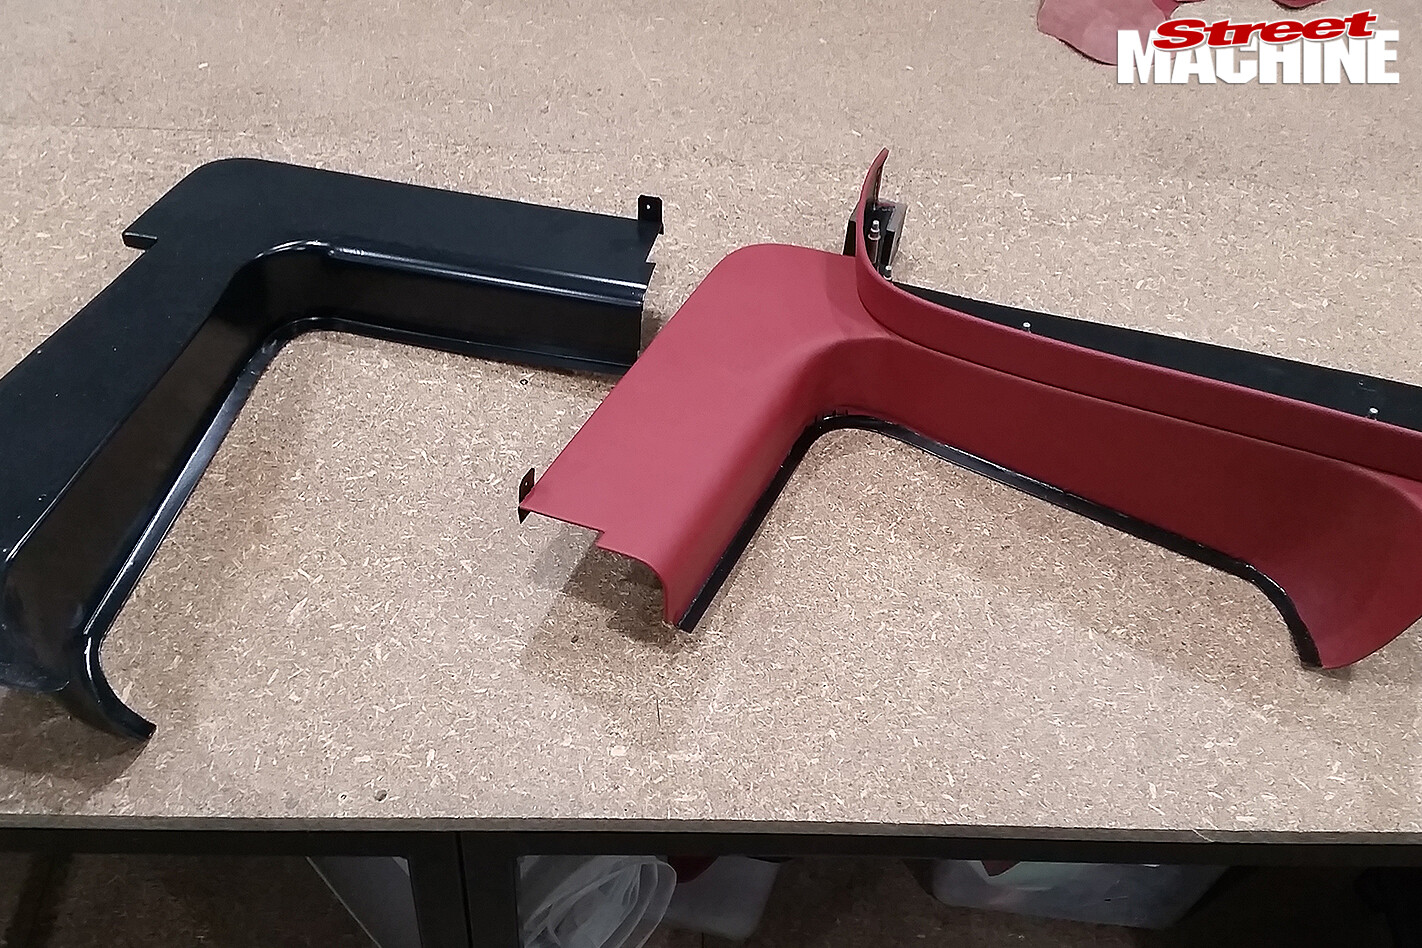 With a full custom interior, every trim piece has to be made from scratch. They’re all made in steel and wrapped in leather. These two pieces go around the base of the rear seats.
 The beginnings of the rear console – understandably dubbed the ‘Ski Jump’ – which ties the whole interior together.
 Now that’s how you blend a Commodore console into a custom 60s Pontiac – and make it all work. Mind you, the frame on which the OEM section sits was made from scratch. The cut-out is for a TV monitor.
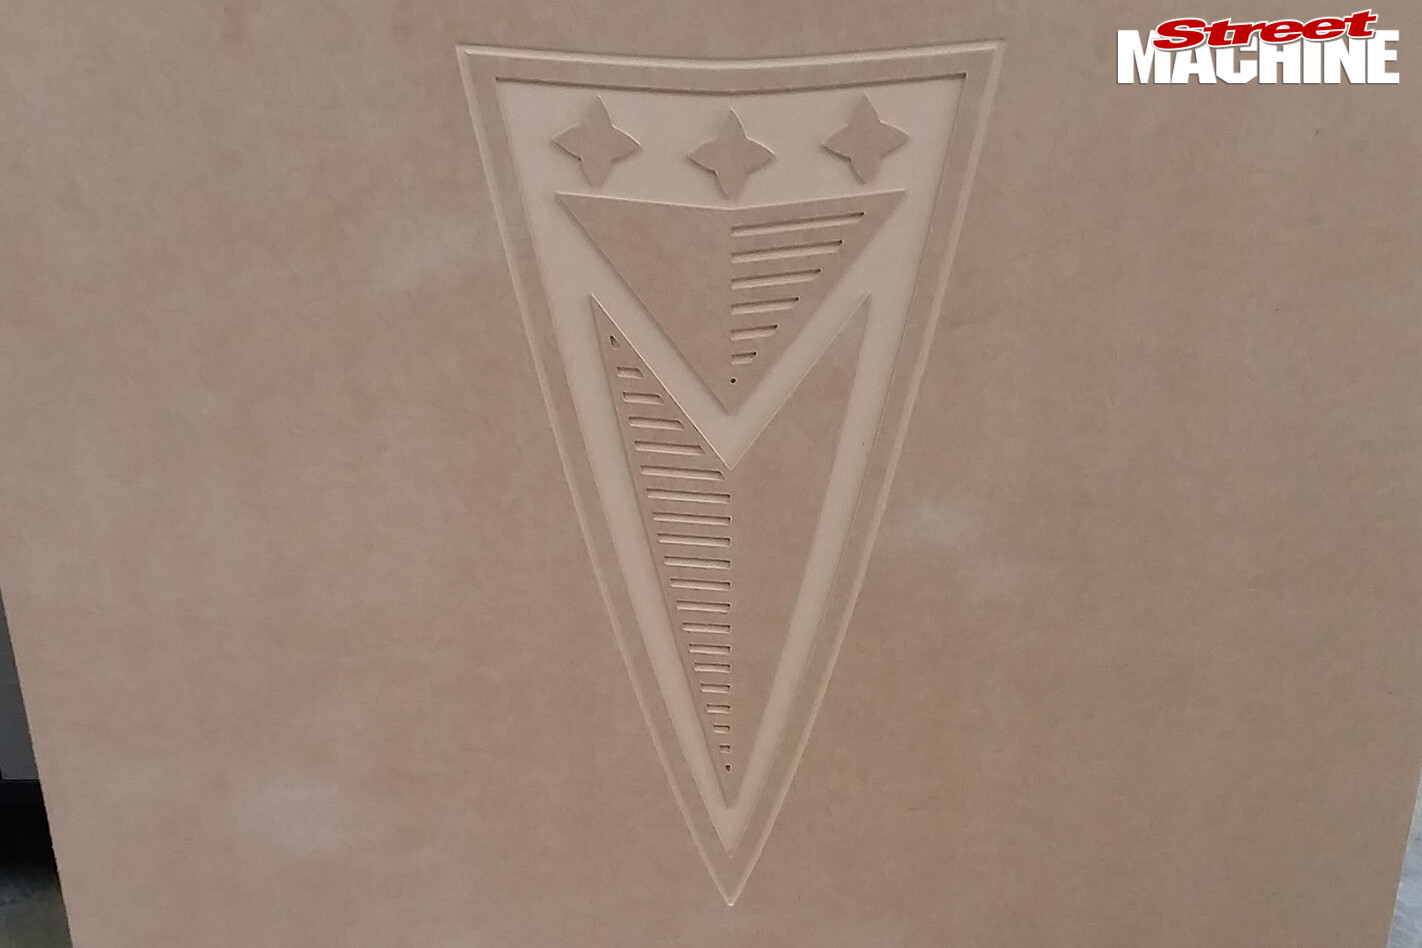 Real Steel CNC-routed the Pontiac emblem into the boot floor panel. High-quality contact adhesive, in combination with deft application of heat and steam, was used to work the leather down into all the fine-detail areas.
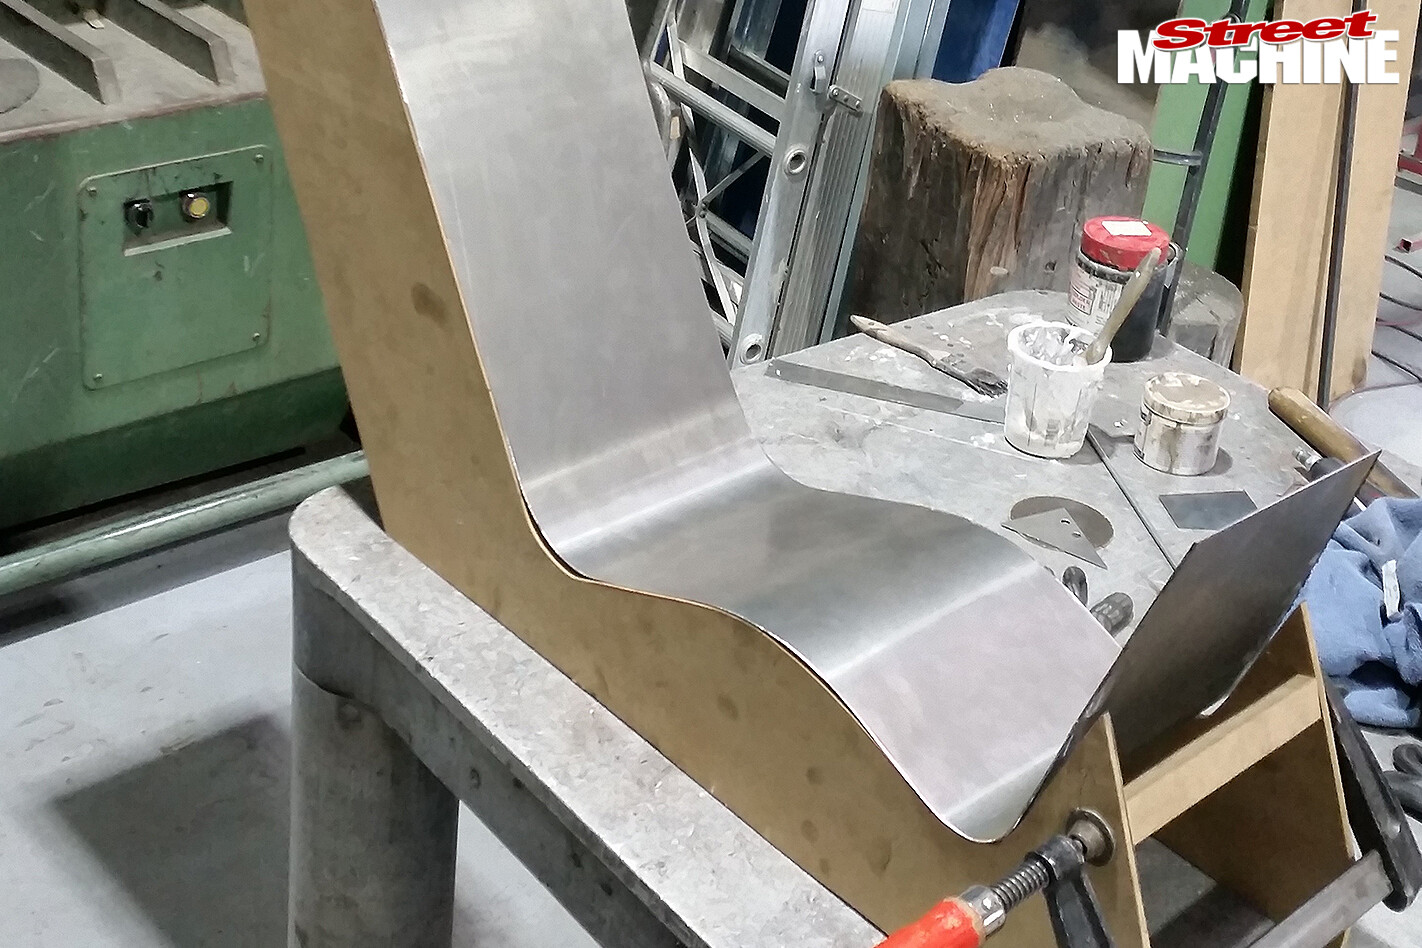
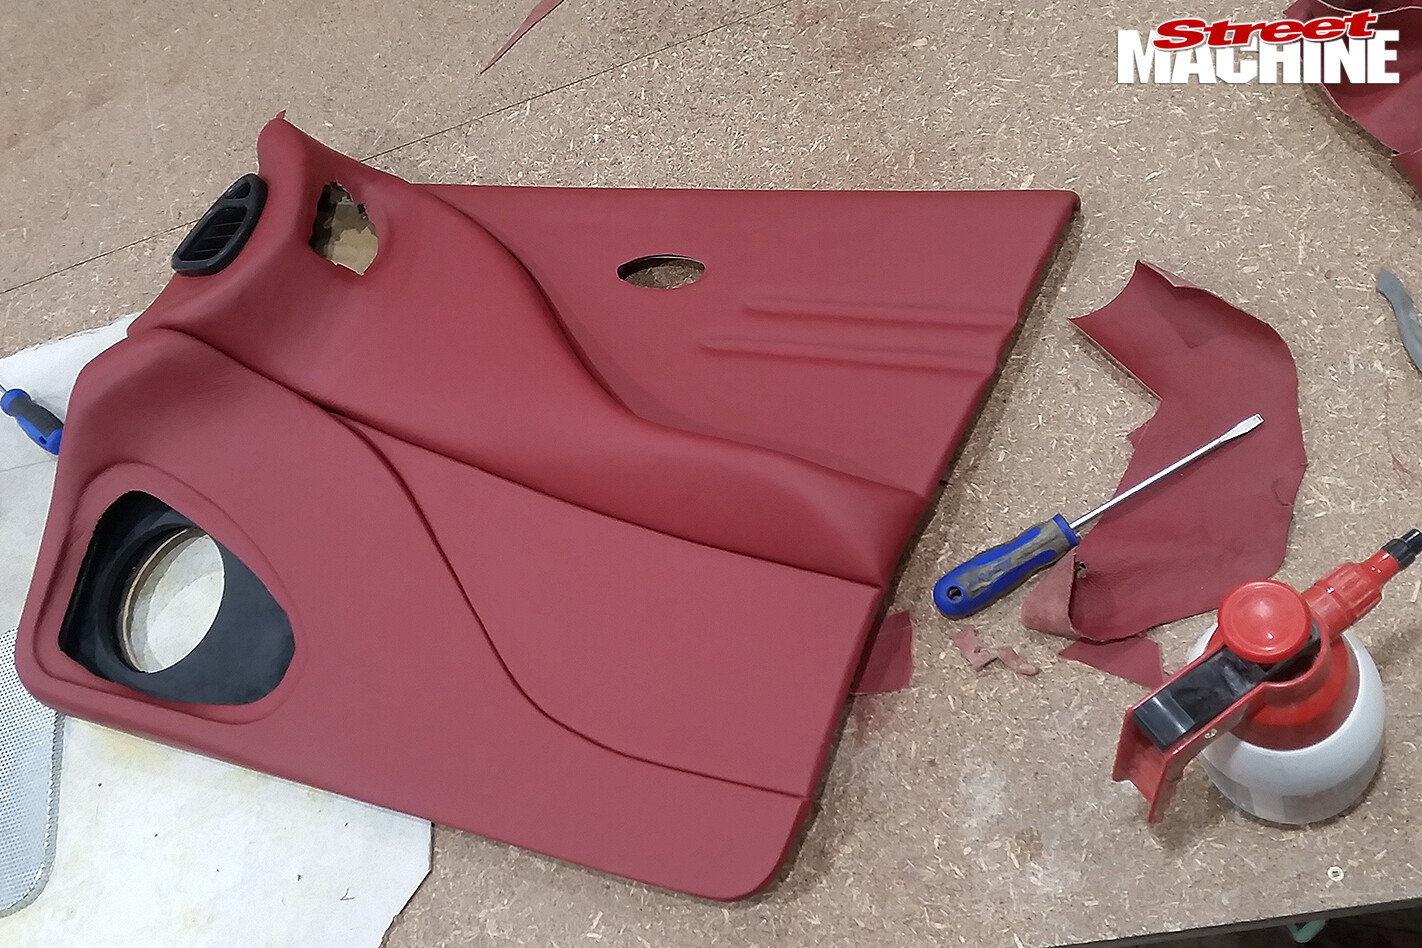 Although evocative of a Commodore door trim, it started out as flat sheet of MDF, which was built up with fibreglass and high-density foam.
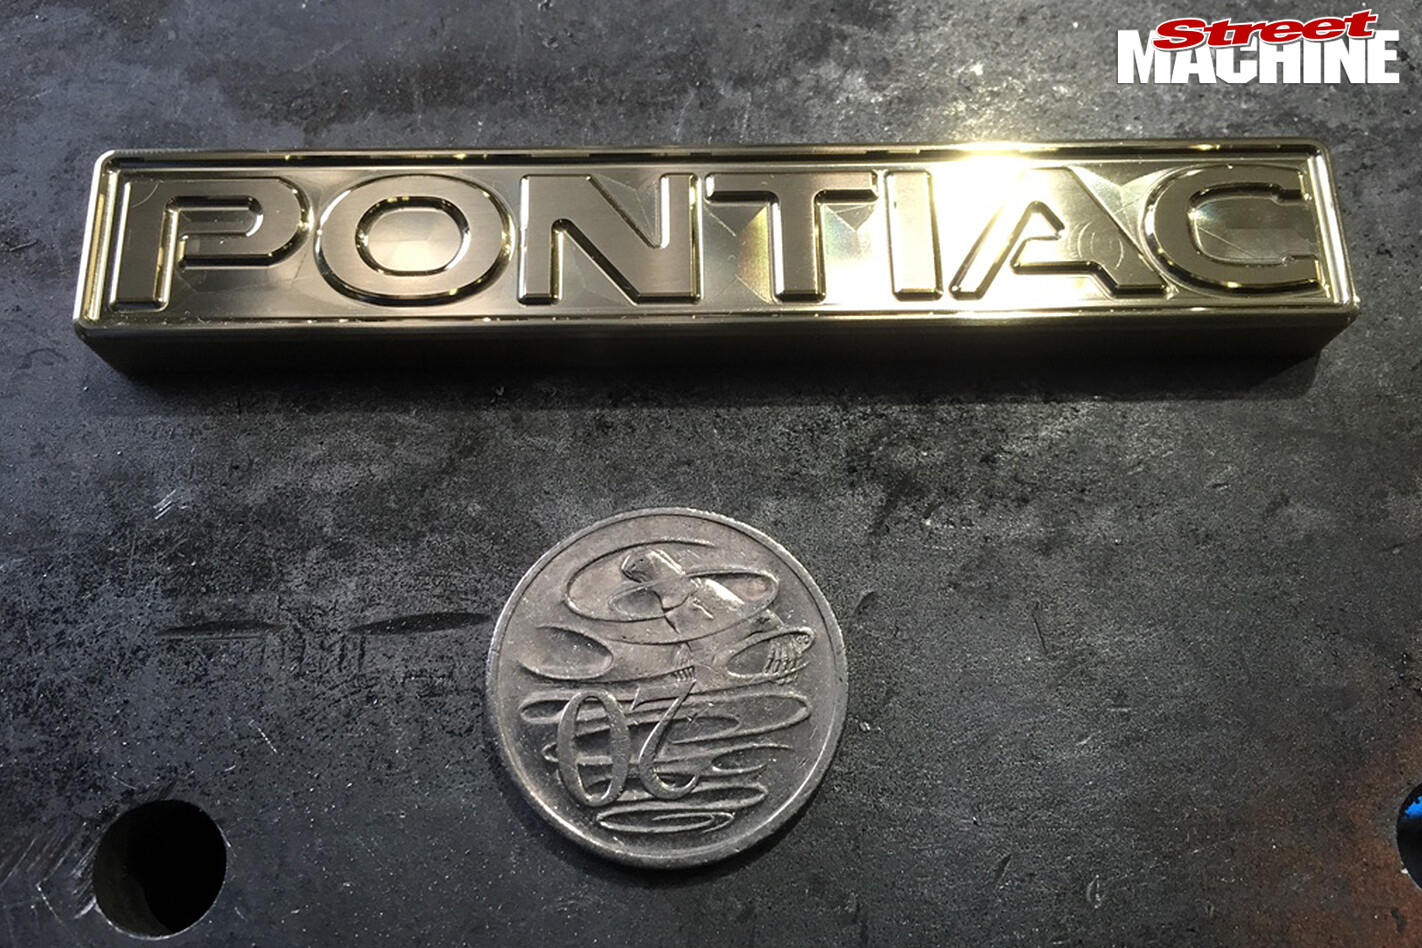
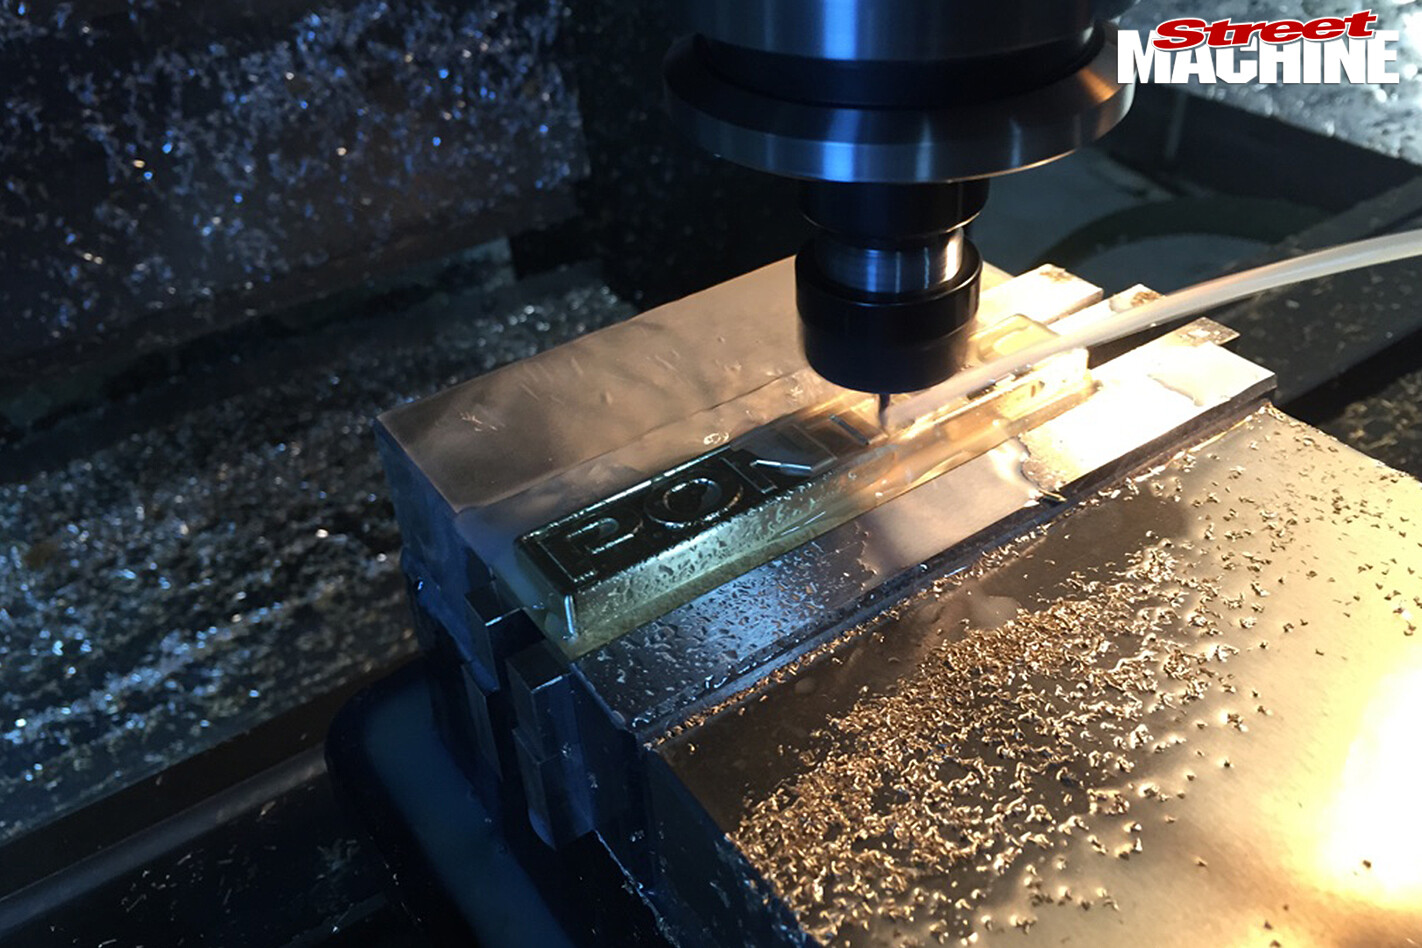 Thanks to Real Steel’s in-house CNC capability, one-off pieces like this Pontiac badge for the rear moulding feature prominently throughout the car.
 There’s no polishing here – this is straight out of the CNC. It takes a lot of time and a lot of passes to produce a finish as smooth as this, with almost no tool marks. All of the brass and billet aluminium badges and mouldings were chrome-plated for consistency.
![]() The CNC-machined lower badge for the rear moulding.
The CNC-machined lower badge for the rear moulding.
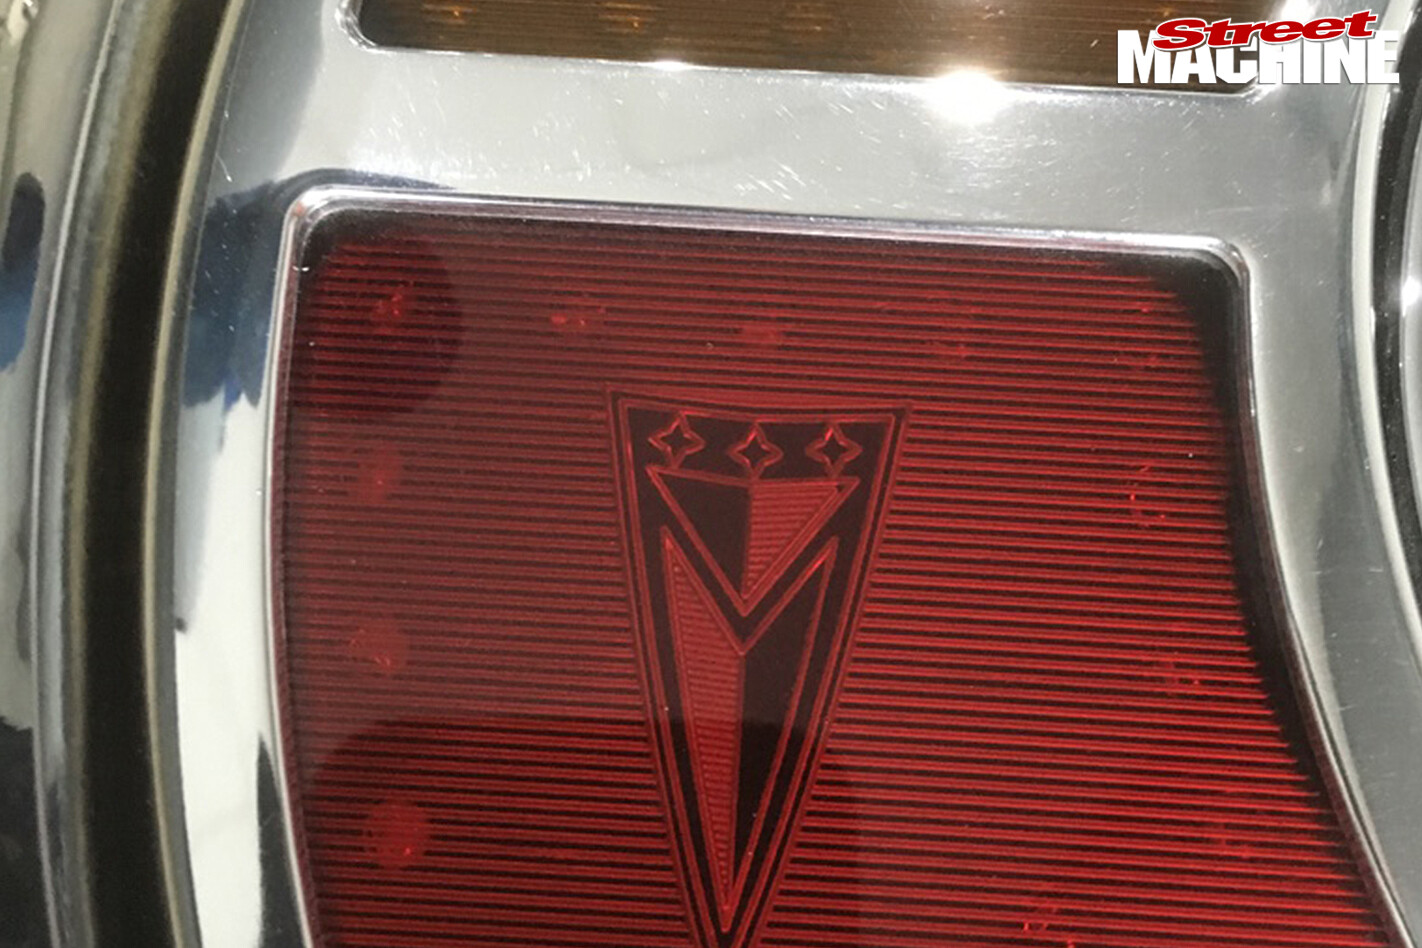 Real Steel even CNCed custom tail-light surrounds and acrylic lenses. Carving the Pontiac logo into the inside face of the lens is very trick. Look closely and you’ll notice the long-life LEDs behind.
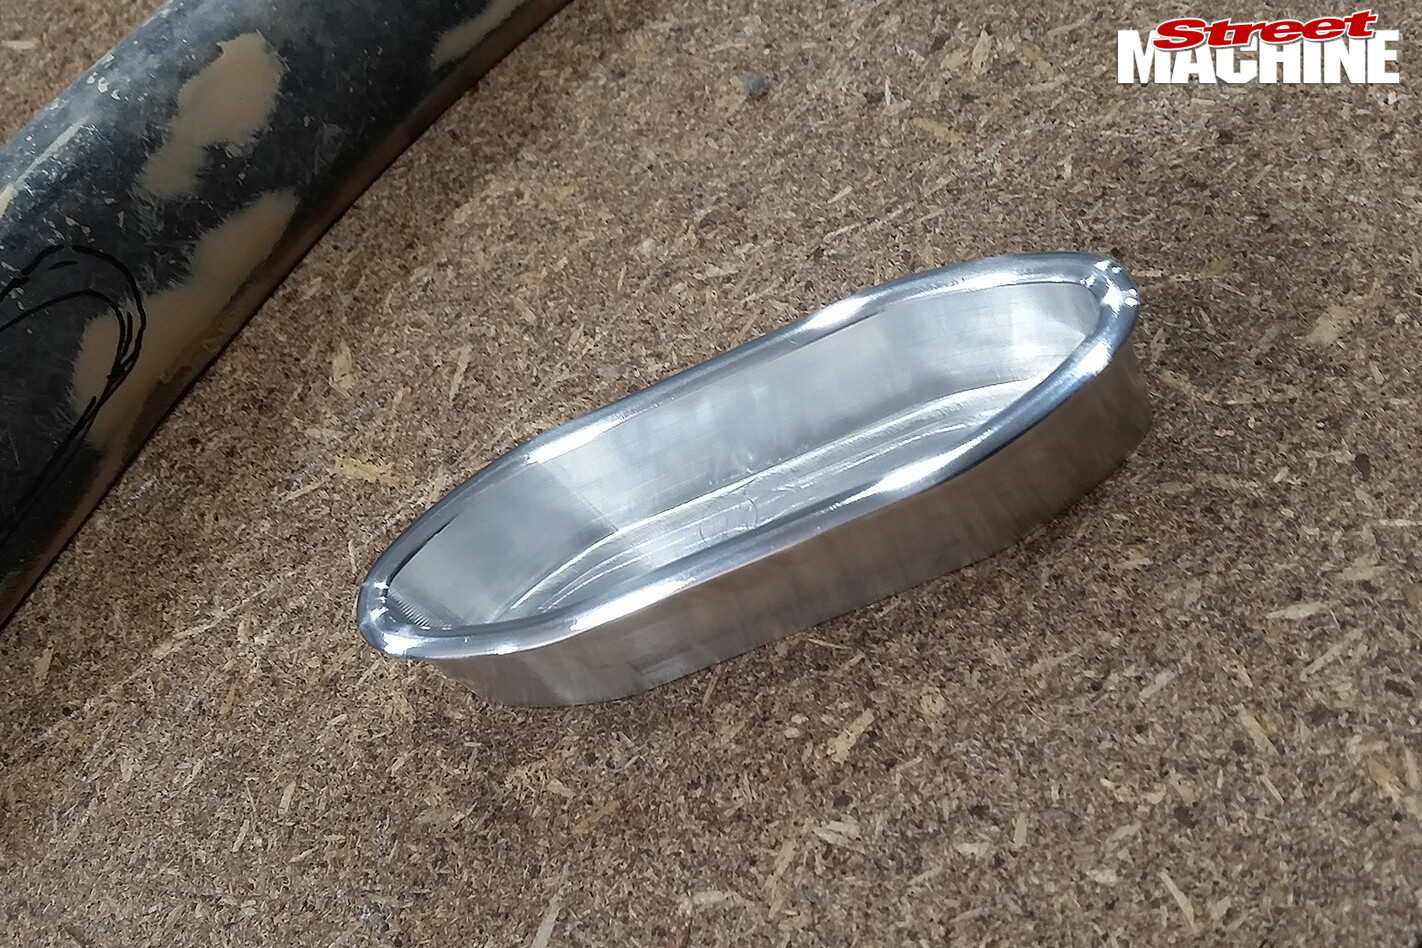 Given all the other one-off pieces used throughout the car, Real Steel wasn’t about to use off-the-shelf door pulls; instead the team designed and machined their own.
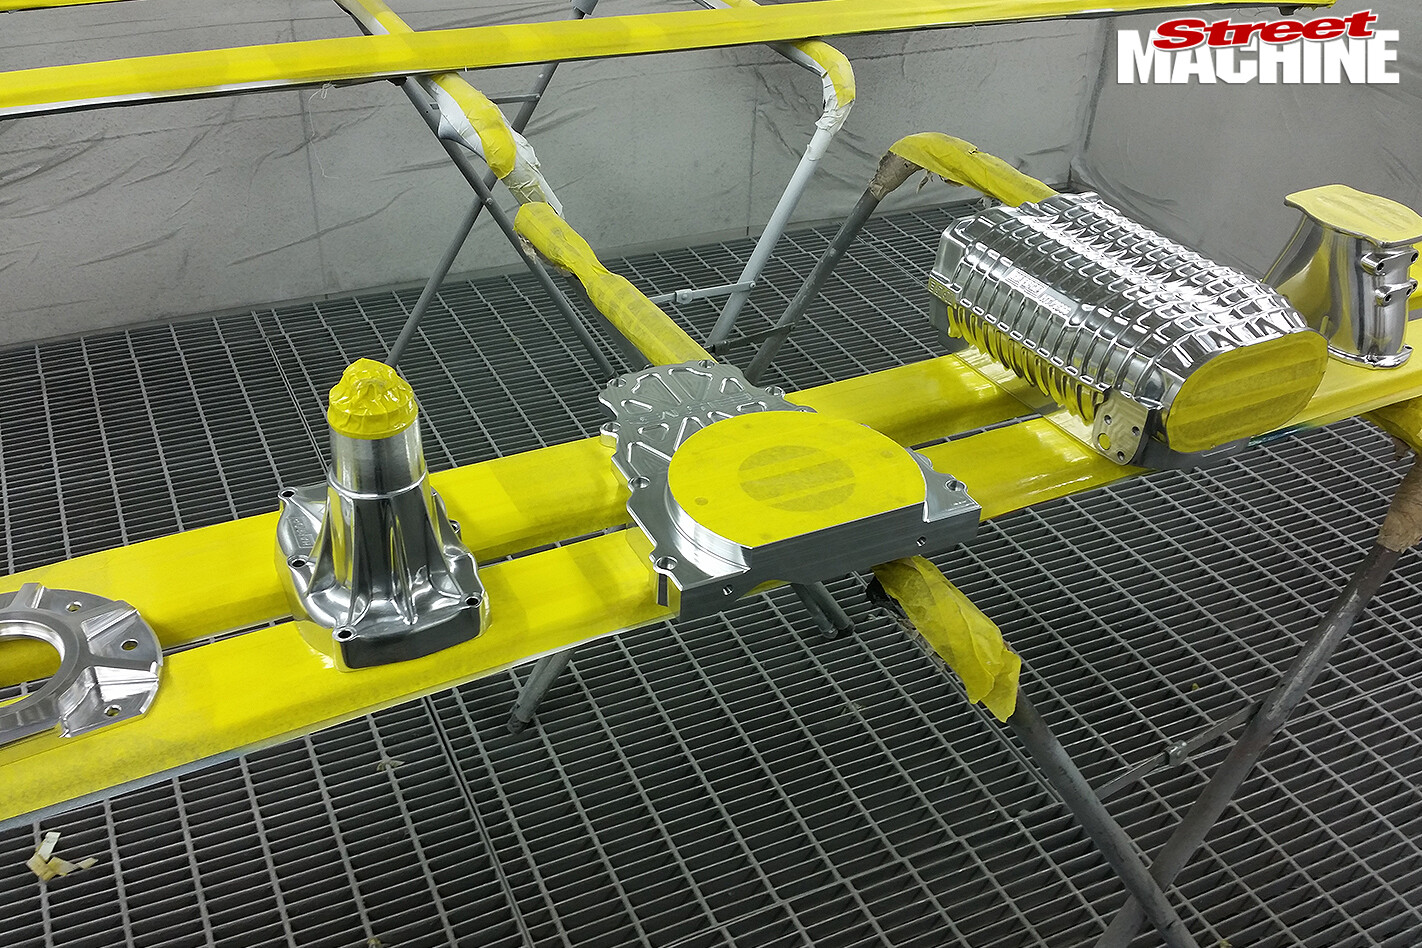 For ease of cleaning and to maintain the lustrous finish, all the highly polished alloy pieces were sealed with Ultimate Clear Coat. The bearing housing (far left) and timing case cover (centre) are the two halves of Real Steel’s LSX crank support system, specially designed for use with belt-driven blowers.
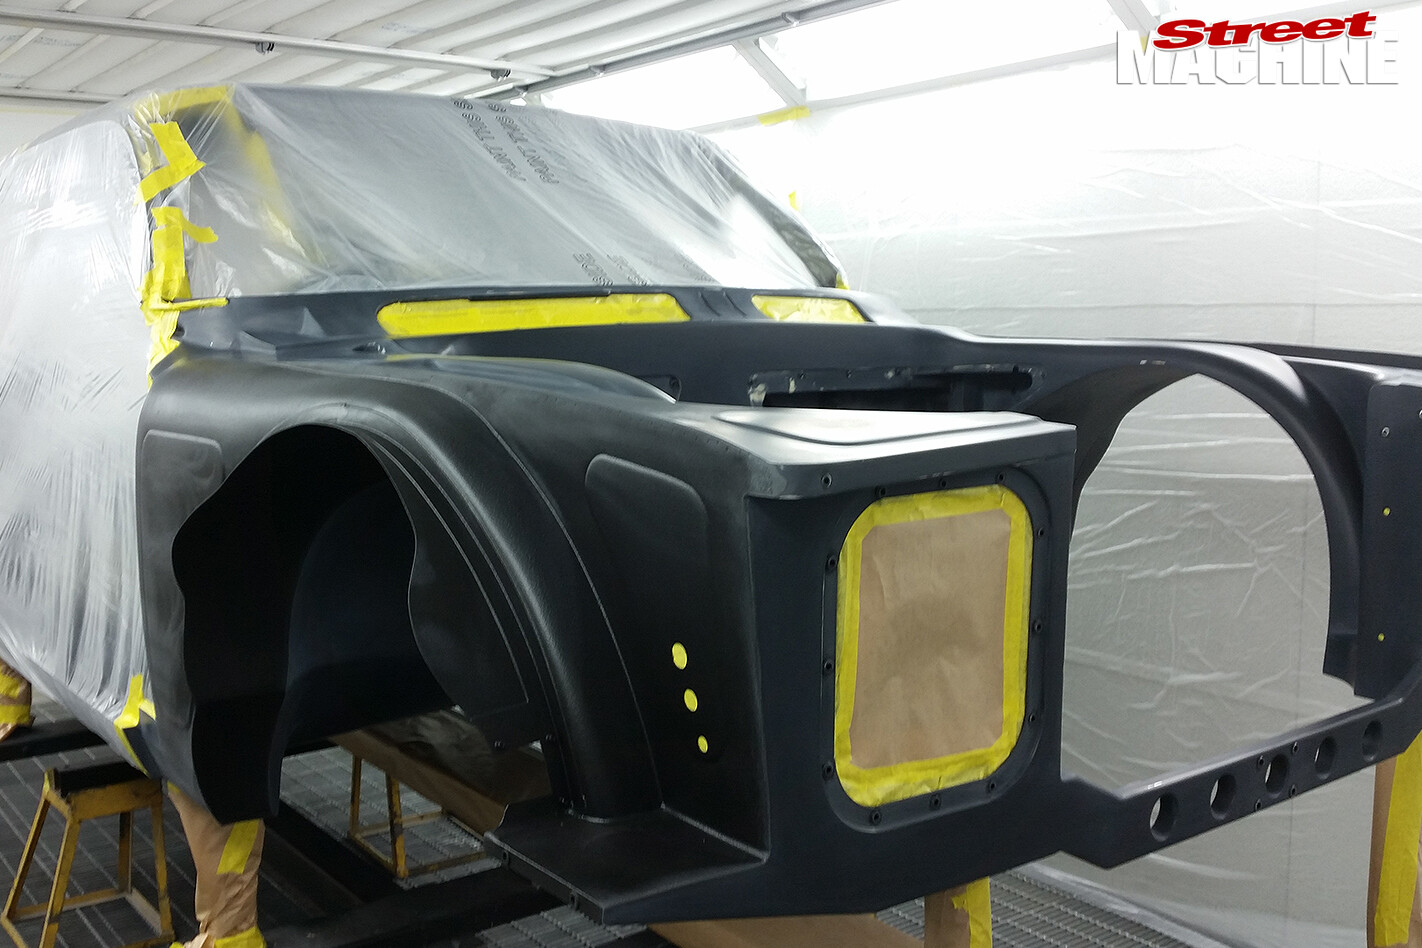 Black-tinted primer was used to provide a good dark base for the black top coat. It results in better coverage and a deeper black.
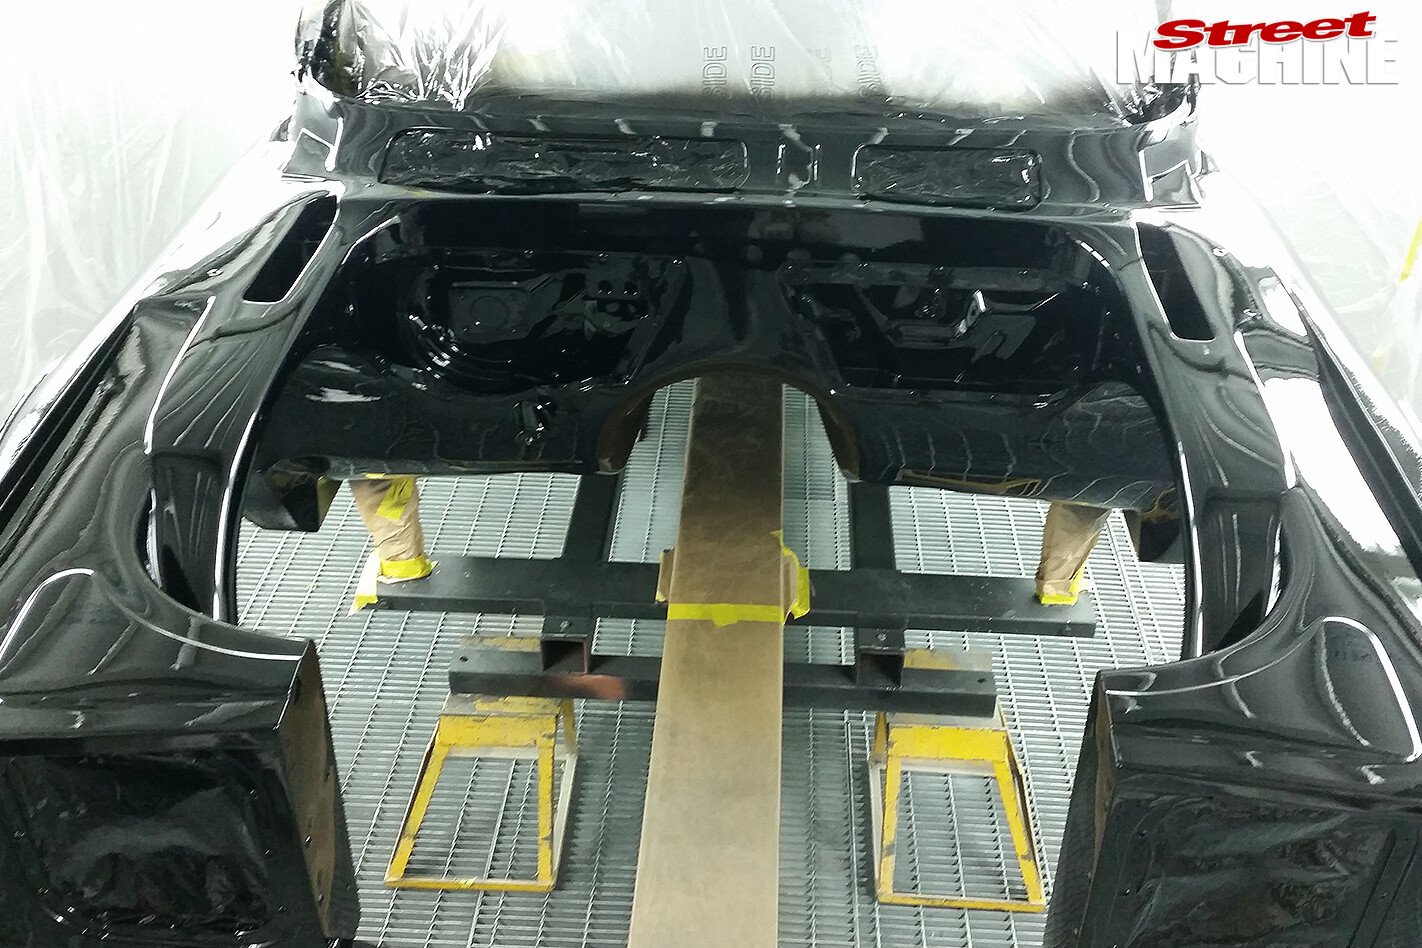 Although that’s pretty good gloss straight off the gun, every surface you see here was painstakingly colour-sanded with successively finer grades (ending in 4000 grit) before being buffed – there’s a ton of polishing in this car.
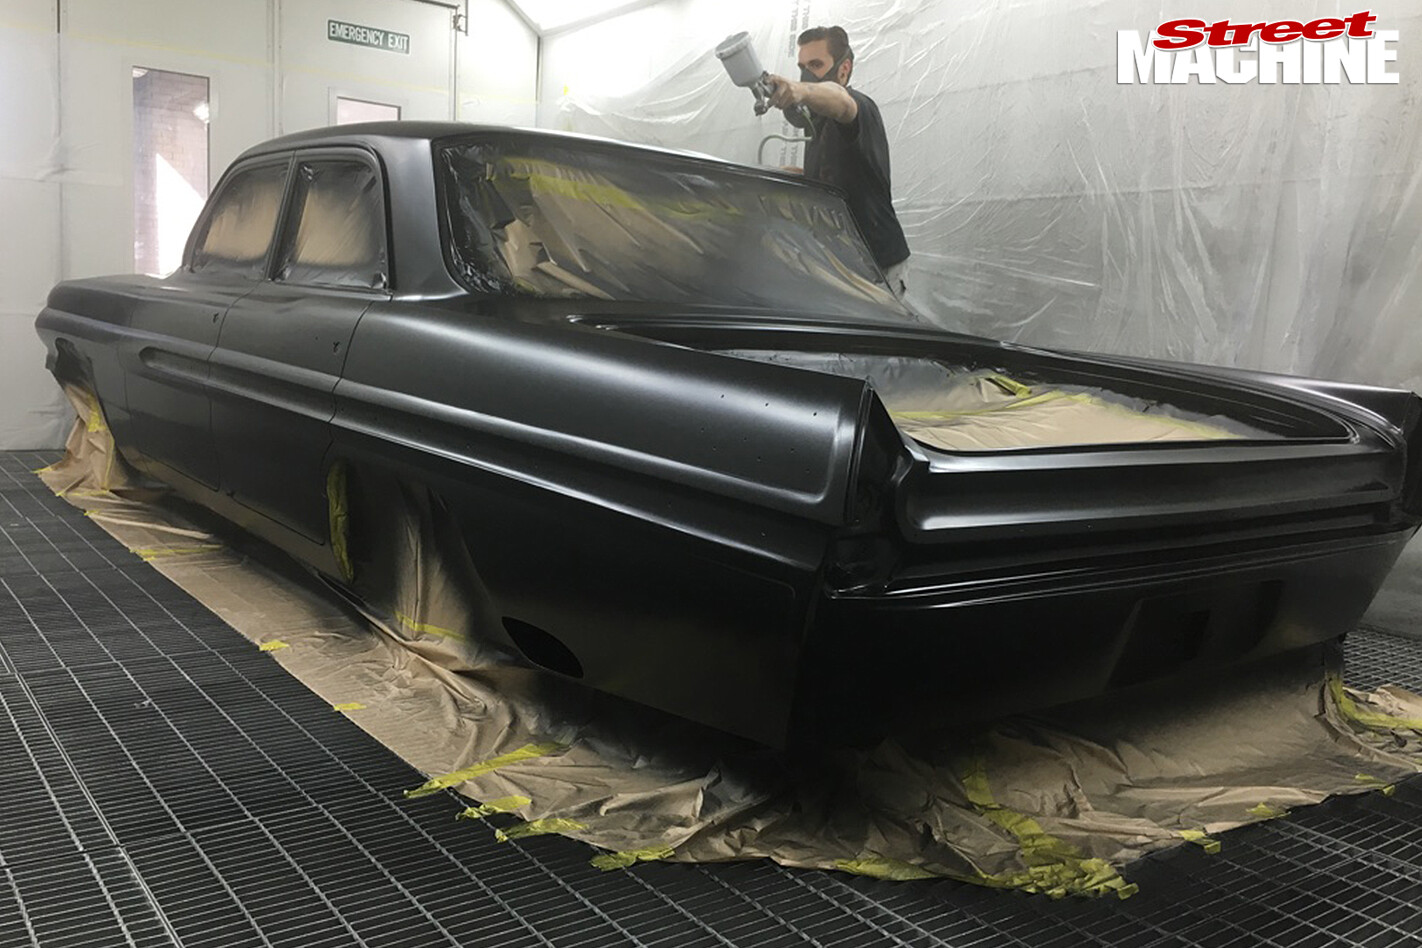 She’s a big ol’ beast. The sheer size and physical surface area of the car sure doesn’t make the task of painting easy. Not only is it hard to walk the length of the car, but due to its width it’s also difficult to be accurate and consistent down the centre – which of course you have to be when spraying unforgiving black. This photo was taken on 24 December 2015 – just two weeks prior to the car’s unveiling at Summernats.
 Putting this car together is like assembling a Swiss watch; there is a very strict sequence. There’s lots of little engineering things in this image; note the bulkhead fittings for the heater and a/c hoses instead of the traditional through-panel and rubber grommet arrangement. With the cover panels removed you can see the radiator cap (far right) and the overflow bottle (silver disc). Every flexible hose in the car uses proper aircraft fittings and braided hose – including the radiator hoses. The rubber seal in the OTR ensures all the air entering the throttlebody is drawn through the long, thin panel filter (the bit all taped up).
Comments